編輯:關於Android編程
一、問題描述
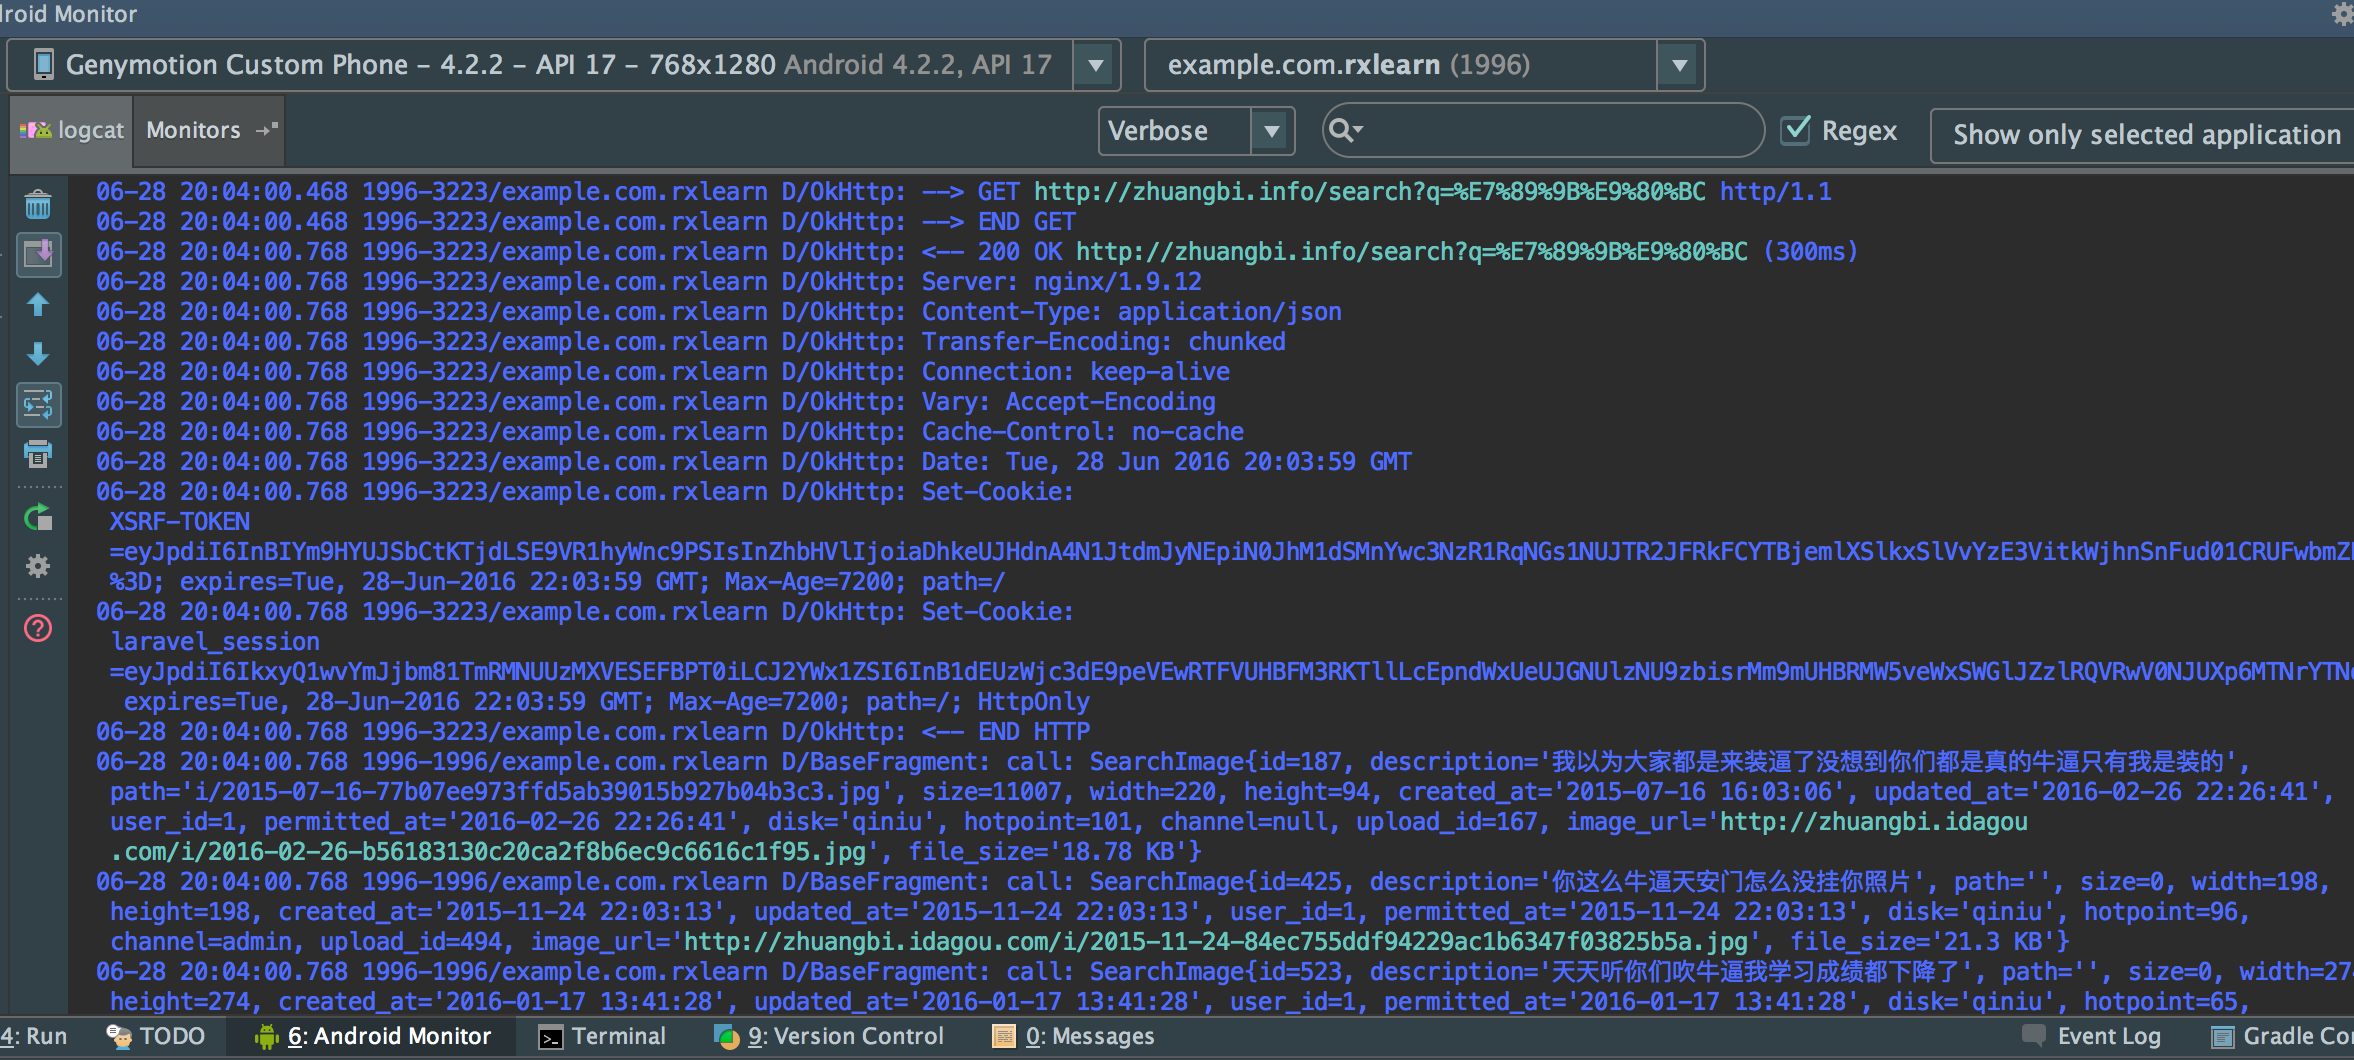
Android應用中經常涉及從網絡中加載大量圖片,為提升加載速度和效率,減少網絡流量都會采用二級緩存和異步加載機制,所謂二級緩存就是通過先從內存中獲取、再從文件中獲取,最後才會訪問網絡。內存緩存(一級)本質上是Map集合以key-value對的方式存儲圖片的url和Bitmap信息,由於內存緩存會造成堆內存洩露, 管理相對復雜一些,可采用第三方組件,對於有經驗的可自己編寫組件,而文件緩存比較簡單通常自己封裝一下即可。下面就通過案例看如何實現網絡圖片加載的優化。
二、案例介紹
案例新聞的列表圖片
三、主要核心組件
下面先看看實現一級緩存(內存)、二級緩存(磁盤文件)所編寫的組件
1、MemoryCache
在內存中存儲圖片(一級緩存), 采用了1個map來緩存圖片代碼如下:
public class MemoryCache {
  // 最大的緩存數
  private static final int MAX_CACHE_CAPACITY = 30;
  //用Map軟引用的Bitmap對象, 保證內存空間足夠情況下不會被垃圾回收
    private HashMap<String, SoftReference<Bitmap>> mCacheMap =
      new LinkedHashMap<String, SoftReference<Bitmap>>() {
      private static final long serialVersionUID = 1L;
//當緩存數量超過規定大小(返回true)會清除最早放入緩存的
      protected boolean removeEldestEntry(
Map.Entry<String,SoftReference<Bitmap>> eldest){
        return size() > MAX_CACHE_CAPACITY;};
  };
  /**
   * 從緩存裡取出圖片
   * @param id
   * @return 如果緩存有,並且該圖片沒被釋放,則返回該圖片,否則返回null
   */
  public Bitmap get(String id){
    if(!mCacheMap.containsKey(id)) return null;
    SoftReference<Bitmap> ref = mCacheMap.get(id);
    return ref.get();
  }
  /**
   * 將圖片加入緩存
   * @param id
   * @param bitmap
   */
  public void put(String id, Bitmap bitmap){
    mCacheMap.put(id, new SoftReference<Bitmap>(bitmap));
  }
  /**
   * 清除所有緩存
   */
  public void clear() {
  try {
      for(Map.Entry<String,SoftReference<Bitmap>>entry :mCacheMap.entrySet())
{  SoftReference<Bitmap> sr = entry.getValue();
      if(null != sr) {
        Bitmap bmp = sr.get();
        if(null != bmp) bmp.recycle();
      }
    }
    mCacheMap.clear();
  } catch (Exception e) {
      e.printStackTrace();}
  }
}
2、FileCache
在磁盤中緩存圖片(二級緩存),代碼如下
public class FileCache {
  //緩存文件目錄
  private File mCacheDir;
  /**
   * 創建緩存文件目錄,如果有SD卡,則使用SD,如果沒有則使用系統自帶緩存目錄
   * @param context
   * @param cacheDir 圖片緩存的一級目錄
   */
public FileCache(Context context, File cacheDir, String dir){
if(android.os.Environment.getExternalStorageState().equals、(android.os.Environment.MEDIA_MOUNTED))
      mCacheDir = new File(cacheDir, dir);
   else
    mCacheDir = context.getCacheDir();// 如何獲取系統內置的緩存存儲路徑
   if(!mCacheDir.exists()) mCacheDir.mkdirs();
  }
  public File getFile(String url){
    File f=null;
    try {
//對url進行編輯,解決中文路徑問題
      String filename = URLEncoder.encode(url,"utf-8");
      f = new File(mCacheDir, filename);
    } catch (UnsupportedEncodingException e) {
      e.printStackTrace();
    }
    return f;
  }
  public void clear(){//清除緩存文件
    File[] files = mCacheDir.listFiles();
    for(File f:files)f.delete();
}
}
3、編寫異步加載組件AsyncImageLoader
android中采用單線程模型即應用運行在UI主線程中,且Android又是實時操作系統要求及時響應否則出現ANR錯誤,因此對於耗時操作要求不能阻塞UI主線程,需要開啟一個線程處理(如本應用中的圖片加載)並將線程放入隊列中,當運行完成後再通知UI主線程進行更改,同時移除任務——這就是異步任務,在android中實現異步可通過本系列一中所用到的AsyncTask或者使用thread+handler機制,在這裡是完全是通過代碼編寫實現的,這樣我們可以更清晰的看到異步通信的實現的本質,代碼如下
public class AsyncImageLoader{
  private MemoryCache mMemoryCache;//內存緩存
  private FileCache mFileCache;//文件緩存
  private ExecutorService mExecutorService;//線程池
//記錄已經加載圖片的ImageView
  private Map<ImageView, String> mImageViews = Collections
      .synchronizedMap(new WeakHashMap<ImageView, String>());
//保存正在加載圖片的url
  private List<LoadPhotoTask> mTaskQueue = new ArrayList<LoadPhotoTask>();
  /**
   * 默認采用一個大小為5的線程池
   * @param context
   * @param memoryCache 所采用的高速緩存
   * @param fileCache 所采用的文件緩存
   */
  public AsyncImageLoader(Context context, MemoryCache memoryCache, FileCache fileCache) {
    mMemoryCache = memoryCache;
    mFileCache = fileCache;
    mExecutorService = Executors.newFixedThreadPool(5);//建立一個容量為5的固定尺寸的線程池(最大正在運行的線程數量)
  }
  /**
   * 根據url加載相應的圖片
   * @param url
   * @return 先從一級緩存中取圖片有則直接返回,如果沒有則異步從文件(二級緩存)中取,如果沒有再從網絡端獲取
   */
  public Bitmap loadBitmap(ImageView imageView, String url) {
    //先將ImageView記錄到Map中,表示該ui已經執行過圖片加載了
    mImageViews.put(imageView, url);
    Bitmap bitmap = mMemoryCache.get(url);//先從一級緩存中獲取圖片
    if(bitmap == null) {
      enquequeLoadPhoto(url, imageView);//再從二級緩存和網絡中獲取
    }
    return bitmap;
  }
  /**
   * 加入圖片下載隊列
   * @param url
   */
  private void enquequeLoadPhoto(String url, ImageView imageView) {
    //如果任務已經存在,則不重新添加
    if(isTaskExisted(url))
      return;
    LoadPhotoTask task = new LoadPhotoTask(url, imageView);
    synchronized (mTaskQueue) {
      mTaskQueue.add(task);//將任務添加到隊列中
    }
    mExecutorService.execute(task);//向線程池中提交任務,如果沒有達到上限(5),則運行否則被阻塞
  }
  /**
   * 判斷下載隊列中是否已經存在該任務
   * @param url
   * @return
   */
  private boolean isTaskExisted(String url) {
    if(url == null)
      return false;
    synchronized (mTaskQueue) {
      int size = mTaskQueue.size();
      for(int i=0; i<size; i++) {
        LoadPhotoTask task = mTaskQueue.get(i);
        if(task != null && task.getUrl().equals(url))
          return true;
      }
    }
    return false;
  }
  /**
   * 從緩存文件或者網絡端獲取圖片
   * @param url
   */
  private Bitmap getBitmapByUrl(String url) {
    File f = mFileCache.getFile(url);//獲得緩存圖片路徑
    Bitmap b = ImageUtil.decodeFile(f);//獲得文件的Bitmap信息
    if (b != null)//不為空表示獲得了緩存的文件
      return b;
    return ImageUtil.loadBitmapFromWeb(url, f);//同網絡獲得圖片
  }
  /**
   * 判斷該ImageView是否已經加載過圖片了(可用於判斷是否需要進行加載圖片)
   * @param imageView
   * @param url
   * @return
   */
  private boolean imageViewReused(ImageView imageView, String url) {
    String tag = mImageViews.get(imageView);
    if (tag == null || !tag.equals(url))
      return true;
    return false;
  }
  private void removeTask(LoadPhotoTask task) {
    synchronized (mTaskQueue) {
      mTaskQueue.remove(task);
    }
  }
  class LoadPhotoTask implements Runnable {
    private String url;
    private ImageView imageView;
    LoadPhotoTask(String url, ImageView imageView) {
      this.url = url;
      this.imageView = imageView;
    }
    @Override
    public void run() {
      if (imageViewReused(imageView, url)) {//判斷ImageView是否已經被復用
        removeTask(this);//如果已經被復用則刪除任務
        return;
      }
      Bitmap bmp = getBitmapByUrl(url);//從緩存文件或者網絡端獲取圖片
      mMemoryCache.put(url, bmp);// 將圖片放入到一級緩存中
      if (!imageViewReused(imageView, url)) {//若ImageView未加圖片則在ui線程中顯示圖片
      BitmapDisplayer bd = new BitmapDisplayer(bmp, imageView, url);            Activity a = (Activity) imageView.getContext();
      a.runOnUiThread(bd);//在UI線程調用bd組件的run方法,實現為ImageView控件加載圖片
      }
      removeTask(this);//從隊列中移除任務
    }
    public String getUrl() {
      return url;
    }
  }
  /**
   *
   *由UI線程中執行該組件的run方法
   */
  class BitmapDisplayer implements Runnable {
    private Bitmap bitmap;
    private ImageView imageView;
    private String url;
    public BitmapDisplayer(Bitmap b, ImageView imageView, String url) {
      bitmap = b;
      this.imageView = imageView;
      this.url = url;
    }
    public void run() {
      if (imageViewReused(imageView, url))
        return;
      if (bitmap != null)
        imageView.setImageBitmap(bitmap);
    }
  }
  /**
   * 釋放資源
   */
  public void destroy() {
    mMemoryCache.clear();
    mMemoryCache = null;
    mImageViews.clear();
    mImageViews = null;
    mTaskQueue.clear();
    mTaskQueue = null;
    mExecutorService.shutdown();
    mExecutorService = null;
  }
}
編寫完成之後,對於異步任務的執行只需調用AsyncImageLoader中的loadBitmap()方法即可非常方便,對於AsyncImageLoader組件的代碼最好結合注釋好好理解一下,這樣對於Android中線程之間的異步通信就會有深刻的認識。
4、工具類ImageUtil
public class ImageUtil {
  /**
   * 從網絡獲取圖片,並緩存在指定的文件中
   * @param url 圖片url
   * @param file 緩存文件
   * @return
   */
  public static Bitmap loadBitmapFromWeb(String url, File file) {
    HttpURLConnection conn = null;
    InputStream is = null;
    OutputStream os = null;
    try {
      Bitmap bitmap = null;
      URL imageUrl = new URL(url);
      conn = (HttpURLConnection) imageUrl.openConnection();
      conn.setConnectTimeout(30000);
      conn.setReadTimeout(30000);
      conn.setInstanceFollowRedirects(true);
      is = conn.getInputStream();
      os = new FileOutputStream(file);
      copyStream(is, os);//將圖片緩存到磁盤中
      bitmap = decodeFile(file);
      return bitmap;
    } catch (Exception ex) {
      ex.printStackTrace();
      return null;
    } finally {
      try {
        if(os != null) os.close();
        if(is != null) is.close();
        if(conn != null) conn.disconnect();
      } catch (IOException e) {  }
    }
  }
  public static Bitmap decodeFile(File f) {
    try {
      return BitmapFactory.decodeStream(new FileInputStream(f), null, null);
    } catch (Exception e) { }
    return null;
  }
  private static void copyStream(InputStream is, OutputStream os) {
    final int buffer_size = 1024;
    try {
      byte[] bytes = new byte[buffer_size];
      for (;;) {
        int count = is.read(bytes, 0, buffer_size);
        if (count == -1)
          break;
        os.write(bytes, 0, count);
      }
    } catch (Exception ex) {
      ex.printStackTrace();
    }
  }
}
四、測試應用
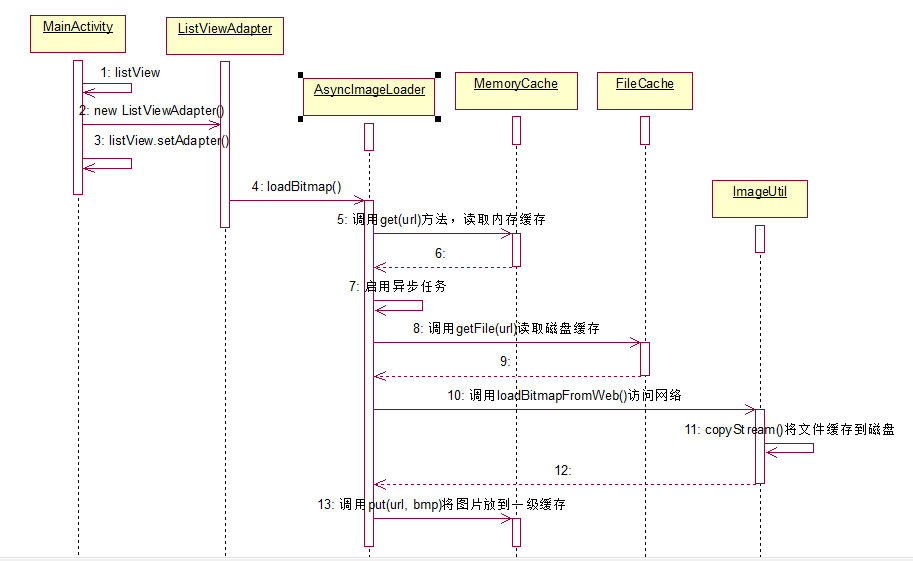
組件之間的時序圖:
1、編寫MainActivity
public class MainActivity extends Activity {
  ListView list;
  ListViewAdapter adapter;
  @Override
  public void onCreate(Bundle savedInstanceState) {
    super.onCreate(savedInstanceState);
    setContentView(R.layout.main);
    list=(ListView)findViewById(R.id.list);
    adapter=new ListViewAdapter(this, mStrings);
    list.setAdapter(adapter);
  }
  public void onDestroy(){
    list.setAdapter(null);
    super.onDestroy();
    adapter.destroy();
  }
 private String[] mStrings={
 "http://news.jb51.net/UserFiles/x_Image/x_20150606083511_0.jpg",
"http://news.jb51.net/UserFiles/x_Image/x_20150606082847_0.jpg",
…..};
2、編寫適配器
public class ListViewAdapter extends BaseAdapter {
  private Activity mActivity;
  private String[] data;
  private static LayoutInflater inflater=null;
  private AsyncImageLoader imageLoader;//異步組件
  public ListViewAdapter(Activity mActivity, String[] d) {
    this.mActivity=mActivity;
    data=d;
    inflater = (LayoutInflater)mActivity.getSystemService(
Context.LAYOUT_INFLATER_SERVICE);
    MemoryCache mcache=new MemoryCache();//內存緩存
 File sdCard = android.os.Environment.getExternalStorageDirectory();//獲得SD卡
    File cacheDir = new File(sdCard, "jereh_cache" );//緩存根目錄
  FileCache fcache=new FileCache(mActivity, cacheDir, "news_img");//文件緩存
    imageLoader = new AsyncImageLoader(mActivity, mcache,fcache);
  }
  public int getCount() {
    return data.length;
  }
  public Object getItem(int position) {
    return position;
  }
  public long getItemId(int position) {
    return position;
  }
  public View getView(int position, View convertView, ViewGroup parent) {
    ViewHolder vh=null;
    if(convertView==null){
      convertView = inflater.inflate(R.layout.item, null);
      vh=new ViewHolder();
      vh.tvTitle=(TextView)convertView.findViewById(R.id.text);
      vh.ivImg=(ImageView)convertView.findViewById(R.id.image);
      convertView.setTag(vh);
    }else{
      vh=(ViewHolder)convertView.getTag();
    }
    vh.tvTitle.setText("標題信息測試———— "+position);
    vh.ivImg.setTag(data[position]);
    //異步加載圖片,先從一級緩存、再二級緩存、最後網絡獲取圖片
    Bitmap bmp = imageLoader.loadBitmap(vh.ivImg, data[position]);
    if(bmp == null) {
      vh.ivImg.setImageResource(R.drawable.default_big);
    } else {
      vh.ivImg.setImageBitmap(bmp);
    }
    return convertView;
  }
  private class ViewHolder{
    TextView tvTitle;
    ImageView ivImg;
  }
  public void destroy() {
    imageLoader.destroy();
  }
}
想要了解更多內容的小伙伴,可以點擊查看源碼,親自運行測試。
 Android圖形圖像之以Bitmap作為Canvas畫布的材料
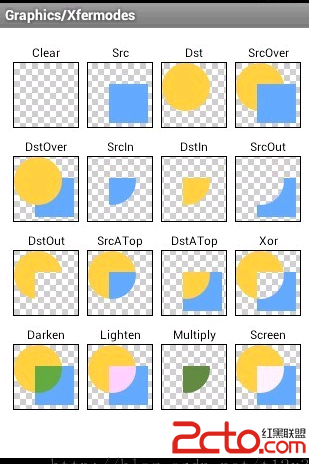
概述當以Bitmap作為畫布材料時,可以繪制出以下各種圖案:demo/** * 圖形圖像處理:在Bitmap上繪畫 */public class MyBitMapView
 Android開發筆記(一百二十二)循環器視圖RecyclerView
RecyclerViewRecyclerView是Android在support-v7庫中新推出控件,中文別名為循環器視圖,它的功能非常強大,可分別實現ListView、
 小米手環怎麼接入微信 小米手環接入微信方法
小米手環是小米公司自主研發的電子智能輔助器,最近小米手環APP迎來了一次更新,多了幾個新功能,同時在微信接入位置也發生了改變,今天當下小編就小米手環如何接入
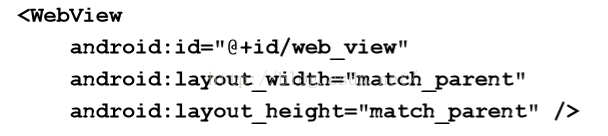 Android 網絡
WebView用法參考:《第一行代碼》布局文件:主體代碼: MainActivity中的代碼也很短,首先使用 findViewById()方法獲取到了 WebV