編輯:關於Android編程
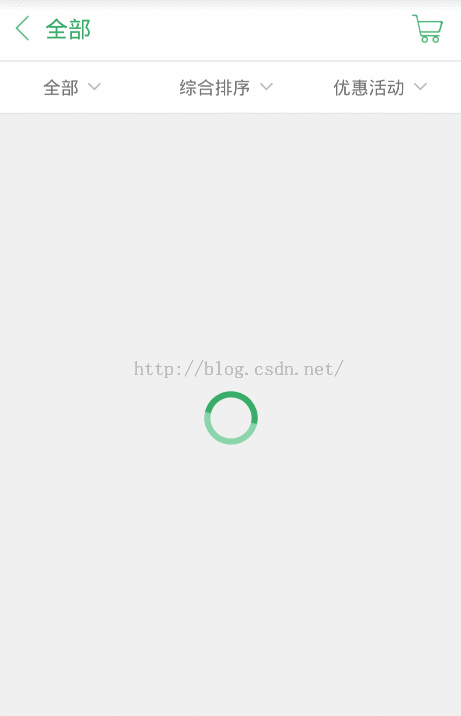
美團電商應用平台大家使用非常頻繁,下面小編通過本文給大家介紹電商應用平台中常用的選擇類別下拉列表的實現。先給大家展示下效果圖:
一、下拉列表的實現
其實實現方法有很多,這時實現的也沒有什麼技術含量,只是總結下自己在項目中的做法,也提供一個思路。
首先是列表的數據,一般數據都是從後台讀過來,這裡因為沒有後台,所以寫死在客戶端:
private void initMenuData() {
menuData = new ArrayList<map<string, string="">>();
String[] menuStr = new String[] { "全部", "糧油", "衣服", "圖書", "電子產品",
"酒水飲料", "水果" };
Map<string, string=""> map;
for (int i = , len = menuStr.length; i < len; ++i) {
map = new HashMap<string, string="">();
map.put("name", menuStr[i]);
menuData.add(map);
}
menuData = new ArrayList<map<string, string="">>();
String[] menuStr = new String[] { "綜合排序", "配送費最低" };
Map<string, string=""> map;
for (int i = , len = menuStr.length; i < len; ++i) {
map = new HashMap<string, string="">();
map.put("name", menuStr[i]);
menuData.add(map);
}
menuData = new ArrayList<map<string, string="">>();
String[] menuStr = new String[] { "優惠活動", "特價活動", "免配送費",
"可在線支付" };
Map<string, string=""> map3;
for (int i = 0, len = menuStr3.length; i < len; ++i) {
map3 = new HashMap<string, string="">();
map3.put("name", menuStr3[i]);
menuData3.add(map3);
}
}</string,></string,></map<string,></string,></string,></map<string,></string,></string,></map<string,>
就是做了簡單的封裝。彈出列表的實現考慮使用Popwindow。
popMenu = new PopupWindow(contentView,
LinearLayout.LayoutParams.MATCH_PARENT,
LinearLayout.LayoutParams.MATCH_PARENT);
popMenu.setOutsideTouchable(true);
popMenu.setBackgroundDrawable(new BitmapDrawable());
popMenu.setFocusable(true);
popMenu.setAnimationStyle(R.style.popwin_anim_style);
popMenu.setOnDismissListener(new OnDismissListener() {
public void onDismiss() {
productTv.setTextColor(Color.parseColor("#5a5959"));
sortTv.setTextColor(Color.parseColor("#5a5959"));
activityTv.setTextColor(Color.parseColor("#5a5959"));
}
});
接著將數據封裝到adapter中:
menuAdapter1 = new SimpleAdapter(this, menuData1,
R.layout.item_listview_popwin, new String[] { "name" },
new int[] { R.id.listview_popwind_tv });
menuAdapter2 = new SimpleAdapter(this, menuData2,
R.layout.item_listview_popwin, new String[] { "name" },
new int[] { R.id.listview_popwind_tv });
menuAdapter3 = new SimpleAdapter(this, menuData3,
R.layout.item_listview_popwin, new String[] { "name" },
new int[] { R.id.listview_popwind_tv });
設置點擊標題頭彈出列表,並改變標題頭的顏色
public void onClick(View v) {
// TODO Auto-generated method stub
switch (v.getId()) {
case R.id.supplier_list_product:
productTv.setTextColor(Color.parseColor("#ac"));
popListView.setAdapter(menuAdapter);
popMenu.showAsDropDown(product, , );
menuIndex = ;
break;
case R.id.supplier_list_sort:
sortTv.setTextColor(Color.parseColor("#ac"));
popListView.setAdapter(menuAdapter);
popMenu.showAsDropDown(product, , );
menuIndex = ;
break;
case R.id.supplier_list_activity:
activityTv.setTextColor(Color.parseColor("#ac"));
popListView.setAdapter(menuAdapter);
popMenu.showAsDropDown(product, , );
menuIndex = ;
break;
}
}
showAsDropDown是為了讓popwindow定位在Product這個選擇標題的正下方。從而實現上面那種方式。
最後完整的貼出代碼,還是蠻簡單的。最後也會提供代碼下載鏈接。
public class MainActivity extends Activity implements
OnClickListener {
private ListView listView, popListView;
private ProgressBar progressBar;
private List<map<string, string="">> menuData1, menuData2, menuData3;
private PopupWindow popMenu;
private SimpleAdapter menuAdapter1, menuAdapter2, menuAdapter3;
private LinearLayout product, sort, activity;
private ImageView cartIv;
private TextView productTv, sortTv, activityTv, titleTv;
private int green, grey;
private String currentProduct, currentSort, currentActivity;
private int menuIndex = 0;
private Intent intent;
@Override
protected void onCreate(Bundle savedInstanceState) {
super.onCreate(savedInstanceState);
setContentView(R.layout.activity_supplier_list);
findView();
initMenuData();
initPopMenu();
}
private void initMenuData() {
menuData1 = new ArrayList<map<string, string="">>();
String[] menuStr1 = new String[] { "全部", "糧油", "衣服", "圖書", "電子產品",
"酒水飲料", "水果" };
Map<string, string=""> map1;
for (int i = 0, len = menuStr1.length; i < len; ++i) {
map1 = new HashMap<string, string="">();
map1.put("name", menuStr1[i]);
menuData1.add(map1);
}
menuData2 = new ArrayList<map<string, string="">>();
String[] menuStr2 = new String[] { "綜合排序", "配送費最低" };
Map<string, string=""> map2;
for (int i = 0, len = menuStr2.length; i < len; ++i) {
map2 = new HashMap<string, string="">();
map2.put("name", menuStr2[i]);
menuData2.add(map2);
}
menuData3 = new ArrayList<map<string, string="">>();
String[] menuStr3 = new String[] { "優惠活動", "特價活動", "免配送費",
"可在線支付" };
Map<string, string=""> map3;
for (int i = 0, len = menuStr3.length; i < len; ++i) {
map3 = new HashMap<string, string="">();
map3.put("name", menuStr3[i]);
menuData3.add(map3);
}
}
@Override
public void onClick(View v) {
// TODO Auto-generated method stub
switch (v.getId()) {
case R.id.supplier_list_product:
productTv.setTextColor(Color.parseColor("#39ac69"));
popListView.setAdapter(menuAdapter1);
popMenu.showAsDropDown(product, 0, 2);
menuIndex = 0;
break;
case R.id.supplier_list_sort:
sortTv.setTextColor(Color.parseColor("#39ac69"));
popListView.setAdapter(menuAdapter2);
popMenu.showAsDropDown(product, 0, 2);
menuIndex = 1;
break;
case R.id.supplier_list_activity:
activityTv.setTextColor(Color.parseColor("#39ac69"));
popListView.setAdapter(menuAdapter3);
popMenu.showAsDropDown(product, 0, 2);
menuIndex = 2;
break;
}
}
protected void findView() {
listView = (ListView) findViewById(R.id.supplier_list_lv);
product = (LinearLayout) findViewById(R.id.supplier_list_product);
sort = (LinearLayout) findViewById(R.id.supplier_list_sort);
activity = (LinearLayout) findViewById(R.id.supplier_list_activity);
productTv = (TextView) findViewById(R.id.supplier_list_product_tv);
sortTv = (TextView) findViewById(R.id.supplier_list_sort_tv);
activityTv = (TextView) findViewById(R.id.supplier_list_activity_tv);
titleTv = (TextView) findViewById(R.id.supplier_list_title_tv);
cartIv = (ImageView) findViewById(R.id.supplier_list_cart_iv);
progressBar = (ProgressBar) findViewById(R.id.progress);
product.setOnClickListener(this);
sort.setOnClickListener(this);
activity.setOnClickListener(this);
cartIv.setOnClickListener(this);
}
private void initPopMenu() {
initMenuData();
View contentView = View.inflate(this, R.layout.popwin_supplier_list,
null);
popMenu = new PopupWindow(contentView,
LinearLayout.LayoutParams.MATCH_PARENT,
LinearLayout.LayoutParams.MATCH_PARENT);
popMenu.setOutsideTouchable(true);
popMenu.setBackgroundDrawable(new BitmapDrawable());
popMenu.setFocusable(true);
popMenu.setAnimationStyle(R.style.popwin_anim_style);
popMenu.setOnDismissListener(new OnDismissListener() {
public void onDismiss() {
productTv.setTextColor(Color.parseColor("#5a5959"));
sortTv.setTextColor(Color.parseColor("#5a5959"));
activityTv.setTextColor(Color.parseColor("#5a5959"));
}
});
popListView = (ListView) contentView
.findViewById(R.id.popwin_supplier_list_lv);
contentView.findViewById(R.id.popwin_supplier_list_bottom)
.setOnClickListener(new OnClickListener() {
public void onClick(View arg0) {
popMenu.dismiss();
}
});
menuAdapter1 = new SimpleAdapter(this, menuData1,
R.layout.item_listview_popwin, new String[] { "name" },
new int[] { R.id.listview_popwind_tv });
menuAdapter2 = new SimpleAdapter(this, menuData2,
R.layout.item_listview_popwin, new String[] { "name" },
new int[] { R.id.listview_popwind_tv });
menuAdapter3 = new SimpleAdapter(this, menuData3,
R.layout.item_listview_popwin, new String[] { "name" },
new int[] { R.id.listview_popwind_tv });
popListView.setOnItemClickListener(new OnItemClickListener() {
public void onItemClick(AdapterView arg0, View arg1, int pos,
long arg3) {
popMenu.dismiss();
if (menuIndex == 0) {
currentProduct = menuData1.get(pos).get("name");
titleTv.setText(currentProduct);
productTv.setText(currentProduct);
Toast.makeText(MainActivity.this, currentProduct, Toast.LENGTH_SHORT).show();
} else if (menuIndex == 1) {
currentSort = menuData2.get(pos).get("name");
titleTv.setText(currentSort);
sortTv.setText(currentSort);
Toast.makeText(MainActivity.this, currentSort, Toast.LENGTH_SHORT).show();
} else {
currentActivity = menuData3.get(pos).get("name");
titleTv.setText(currentActivity);
activityTv.setText(currentActivity);
Toast.makeText(MainActivity.this, currentActivity, Toast.LENGTH_SHORT).show();
}
}
});
}
}</string,></string,></map<string,></string,></string,></map<string,></string,></string,></map<string,></map<string,>
二、加載圓形ProgressBar的顯示
就是效果圖中的那種加載ProgressBar,圓形ProgresBar可以用原生的Bar來實現,但樣式單一,之前我做這種效果第一時間總是考慮到幀動畫,但用這種方式需要有很多圖片來鏈接起來,這樣一來實現麻煩,二來圖片多了占內存。下面用改變原生ProgressBar的動畫來實現這種效果,非常簡單:
<progressbar android:id="@+id/progress" android:indeterminatedrawable="@drawable/shape_progress" android:indeterminateduration="1000" android:layout_centerinparent="true" android:layout_height="wrap_content" android:layout_width="wrap_content"></progressbar>
indeterminateDrawable是加載背景圖片,indeterminateDuration是旋轉的速度。這裡的思路是用xml來畫一張圖,它是環形的,且環形圈中有漸變顏色。如下:
<rotate android:fromdegrees="" android:pivotx="%" android:pivoty="%" android:todegrees="" xmlns:android="http://schemas.android.com/apk/res/android">
<shape android:innerradiusratio="" android:shape="ring" android:thicknessratio="" android:uselevel="false">
<gradient android:centercolor="#cdaa" android:centery="." android:endcolor="#ffffff" android:startcolor="#ac" android:type="sweep" android:uselevel="false">
</gradient></shape>
</rotate>
rotate設置旋轉動畫,360度旋轉。shape="ring"設置背景為圓。android:innerRadiusRatio="3"設置內環半徑,android:thicknessRatio="10"設置外環半徑。最後為了讓環中顏色有漸變效果,使用gradient來設置。gradient可以有三種漸變方式,線性,輻射,掃描。這裡type要設置成掃描。然後設置中心點,開始顏色和結束顏色,就能實現上面的那種效果了。
以上內容是小編給大家介紹的Android仿美團下拉菜單(商品選購)實例代碼,希望對大家有所幫助!
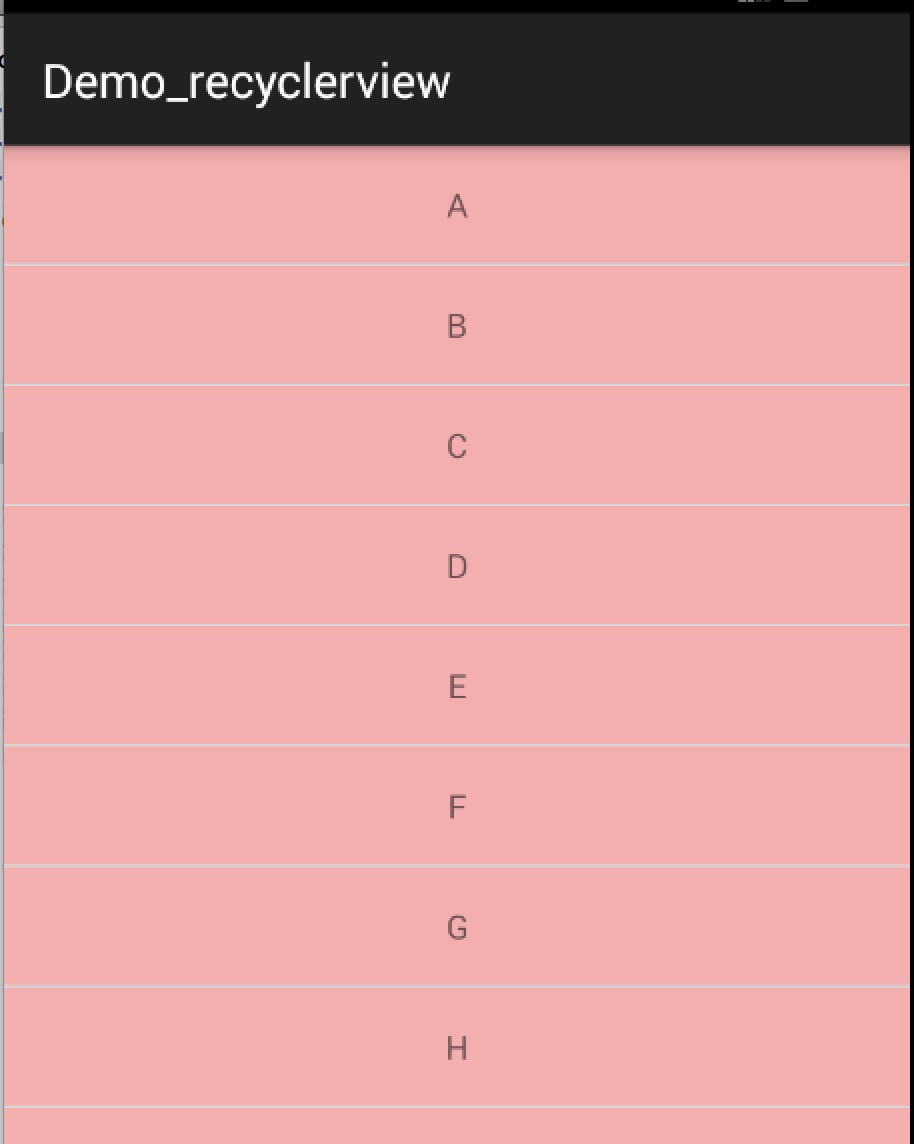 Android RecyclerView 使用完全解析
說到ListView和GridView大家肯定不陌生,相信也有很多人已經使用到了出神入化的地步,因為這兩個控件實在是太常用了,可以說任何項目都會有ListView的身影,
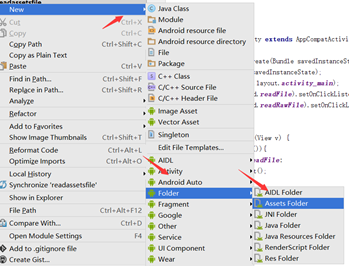 Android 讀取assets和raw文件內容實例代碼
android之文件操作——讀取assets和raw文件下的內容1.分別創建assets文件夾和res/raw文件夾:(要注意的raw文件是在res下new,然後創建一個
 Android學習筆記之Menu一級菜單、二級菜單的使用
(1)布局文件沒有做更改 (2)在res--menu目錄下的main.xml文件中代碼如下:
 Android ATCID客制化AT命令
ATCID主要用來處理PC端傳輸過來的AT命令,從AT命令實際處理的地方來說,主要分為3類: 1. 需要Modem來處理的AT命令; 2. 需