編輯:關於Android編程
SQLite數據庫是android系統內嵌的數據庫,小巧強大,能夠滿足大多數SQL語句的處理工作,而SQLite數據庫僅僅是個文件而已。雖然SQLite的有點很多,但並不是如同PC端的mysql般強大,而且android系統中不允許通過JDBC操作遠程數據庫,所以只能通過webservice等手段於php、servlet交互獲取數據。
SQLiteDatabase類,代表了一個數據庫對象,通過SQLiteDatabase來操作管理數據庫。
一些基本的用法:
static SQLiteDatabase openDatabase(String path,SQLiteDatabase.CUrsorFactory factory,int flag);
static SQLiteDatabase openOrCreateDatabase(File file,SQLiteDatabase.CursorFactory factory);
static SQLiteDatabase openOrCreateDatabase(String path,SQLiteDatabse.CursorFactory factory);
通過這些靜態方法可以很方便的打開和新建一個數據庫。
1、execSQL(String sql,Object[] bindArgs)
2、execSQL(String sql)
3、rawQuery(String sql,String[] selectionArgs);
4、beginTransaction()
5、endTransaction()
這些函數可以完成SQL功能,對於查詢出來的結果是用Cursor表示的,類似於JDBC中的ResultSet類,在這些類中通過方法move(int offset)、moveToFirst()、moveToLast()、moveToNext()、moveToPosition(int position)、moveToPrivious()獲取需要的結果行。
下面通過一個實例來說明一下SQLiteDatabase的基本使用:
main.xml:
<LinearLayout xmlns:android="http://schemas.android.com/apk/res/android"
  xmlns:tools="http://schemas.android.com/tools"
  android:layout_width="match_parent"
  android:layout_height="match_parent"
  android:orientation="vertical"
  tools:context=".Main" >

  <LinearLayout
    android:layout_width="match_parent"
    android:layout_height="wrap_content"
    android:orientation="horizontal" >

    <TextView
      android:layout_width="wrap_content"
      android:layout_height="wrap_content"
      android:gravity="center"
      android:text="key" />

    <EditText
      android:id="@+id/keys"
      android:layout_width="100sp"
      android:layout_height="wrap_content" />

    <TextView
      android:layout_width="wrap_content"
      android:layout_height="wrap_content"
      android:gravity="center"
      android:text="value" />

    <EditText
      android:id="@+id/values"
      android:layout_width="100sp"
      android:layout_height="wrap_content" />

    <Button
      android:id="@+id/btn"
      android:layout_width="100sp"
      android:layout_height="wrap_content"
      android:text="submit" />
  </LinearLayout>

  <LinearLayout
    android:layout_width="match_parent"
    android:layout_height="wrap_content" >

    <ListView
      android:id="@+id/lv"
      android:layout_width="match_parent"
      android:layout_height="wrap_content" />
  </LinearLayout>

</LinearLayout>
用於填充數據的mytextview.xml:
<?xml version="1.0" encoding="utf-8"?>
<LinearLayout xmlns:android="http://schemas.android.com/apk/res/android"
  android:layout_width="match_parent"
  android:layout_height="wrap_content"
  android:orientation="horizontal" >

  <TextView
    android:id="@+id/listkey"
    android:layout_width="wrap_content"
    android:layout_height="wrap_content"
    android:layout_gravity="left" />

  <TextView
    android:id="@+id/listvalue"
    android:layout_width="wrap_content"
    android:layout_height="wrap_content"
    android:layout_marginLeft="300sp" />

</LinearLayout>
Main.java
package com.app.main;

import android.annotation.SuppressLint;
import android.app.Activity;
import android.database.Cursor;
import android.database.sqlite.SQLiteDatabase;
import android.os.Bundle;
import android.view.View;
import android.view.View.OnClickListener;
import android.widget.Button;
import android.widget.CursorAdapter;
import android.widget.EditText;
import android.widget.ListView;
import android.widget.SimpleCursorAdapter;

public class Main extends Activity {

  EditText ed1 = null;
  EditText ed2 = null;
  Button btn = null;
  ListView lv = null;
  SQLiteDatabase db = null;

  @Override
  protected void onCreate(Bundle savedInstanceState) {
    super.onCreate(savedInstanceState);
    setContentView(R.layout.main);

    ed1 = (EditText) this.findViewById(R.id.keys);
    ed2 = (EditText) this.findViewById(R.id.values);
    btn = (Button) this.findViewById(R.id.btn);
    lv = (ListView) this.findViewById(R.id.lv);

    db = SQLiteDatabase.openOrCreateDatabase(this.getFilesDir().toString()
        + "/my.db3", null);

    btn.setOnClickListener(new OnClickListener() {

      @Override
      public void onClick(View view) {

        String key = ed1.getText().toString();

        String value = ed2.getText().toString();

        try {
          insertData(db, key, value);

          Cursor cursor = db.rawQuery("select * from tb_info", null);

          inflateListView(cursor);

        } catch (Exception e) {

          String sql = "create table tb_info(_id integer primary key autoincrement,db_key varchar(20),db_value varchar(50))";

          db.execSQL(sql);

          insertData(db, key, value);

          Cursor cursor = db.rawQuery("select * from tb_info", null);

          inflateListView(cursor);
        }

      }

    });

  }

  // 向數據庫中插入數據
  private void insertData(SQLiteDatabase db, String key, String value) {
    db.execSQL("insert into tb_info values (null,?,?)", new String[] { key,
        value });
    System.out.println("------------------");
  }

  // 向ListView中填充數據
  @SuppressLint("NewApi")
  public void inflateListView(Cursor cursor) {

    SimpleCursorAdapter adapter = new SimpleCursorAdapter(Main.this,
        R.layout.mytextview, cursor, new String[] { "db_key",
            "db_value" },
        new int[] { R.id.listkey, R.id.listvalue },
        CursorAdapter.FLAG_REGISTER_CONTENT_OBSERVER);

    lv.setAdapter(adapter);

  }

  @Override
  protected void onDestroy() {

    super.onDestroy();
    if (db != null && db.isOpen()) {
      db.close();
    }
  }

}
實現的效果:
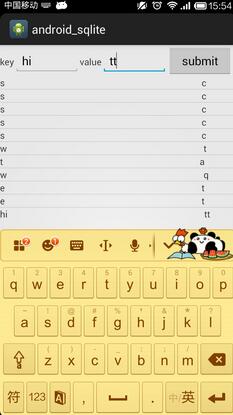
需要特別指出,在用SimpleCursorAdapter封裝Cursor的時候,要求底層數據庫表的主鍵列的列名為_id,因為SimpleCursorAdapter只能識別主鍵列名為_id的表。
以上就是本文的全部內容,希望能給大家一個參考,也希望大家多多支持本站。
 Android面試筆記之常問的Context
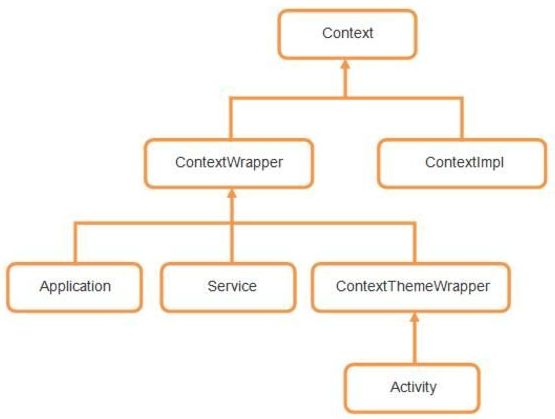
前言Context,在翻譯為上下文,也可以理解為環境,是提供一些程序的運行環境基礎信息。基本上在開發項目的時候,時刻都有接觸到。Android程序不像Java程序,隨便創
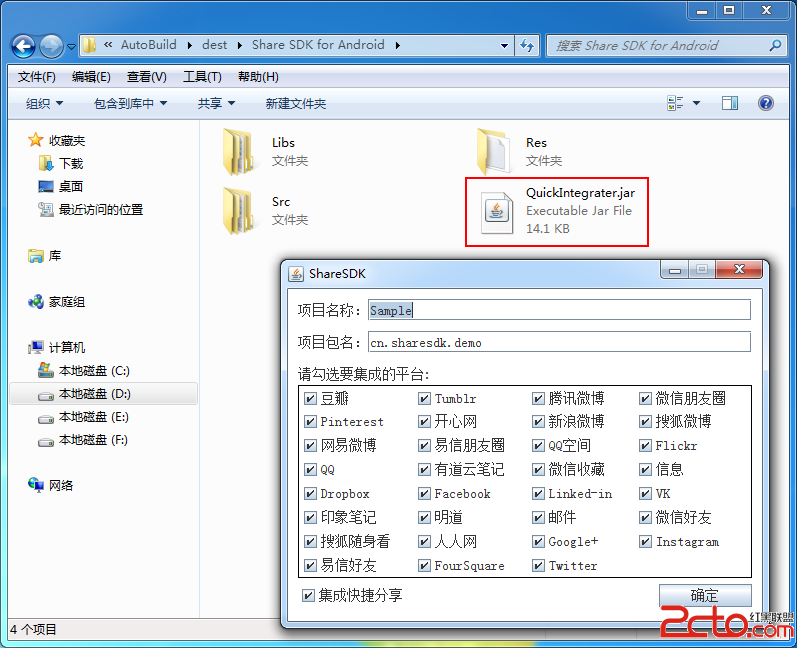 Android-shareSDK
1.當數據: 2.集成數據: DOS命令: java -jar QuickIntegrater.jar (輸入自己的項目名稱和包名) 把聲成的代碼復制進自
 Android 離線緩存的快速實現
離線緩存是指在有網絡的狀態下將從服務器獲取的網絡數據,如Json 數據緩存到本地,在斷網的狀態下啟動APP時讀取本地緩存數據顯示在界面上,常用的APP(網易新聞、知乎等等
 Android仿人人網滑動側邊欄效果
很多應用為了節省空間而又使界面能夠充足的顯示信息,大多數應用都采用了側邊欄的方式,如下圖: 來說說它