編輯:關於Android編程
本文實例講述了Android中Notification用法。分享給大家供大家參考,具體如下:
Notification可以理解為通知的意思一般用來顯示廣播信息 用Notification就必須要用到NotificationManager
想用Notification一般有三個步驟,如下所示
① 一般獲得系統級的服務NotificationManager。
調用Context.getSystemService(NOTIFICATION_SERVICE)方法即可返回NotificationManager實例
② 實例化Notification,並設置其屬性
用Notification構造函數 public Notification(int icon, CharSequence tickerText, long when)構造Notification實例
③ 通過NotificationManager發通知就OK了
NotificationManager有兩個方法:notify()發出通知 cancel(...)取消通知
下面通過一個代碼實例來介紹一下Notification
先初始化notificationManager和notification兩個成員變量
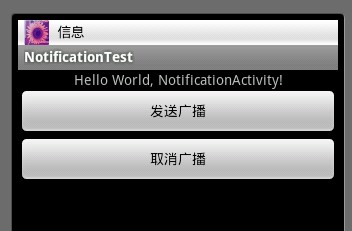
notificationManager = (NotificationManager)this.getSystemService(NOTIFICATION_SERVICE);
notification = new Notification(R.drawable.touxiang,"信息",System.currentTimeMillis());
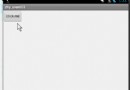
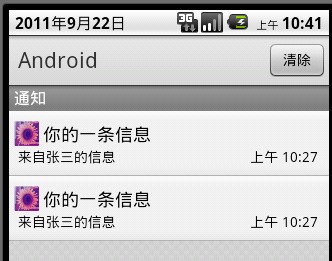
PS:Notification構造函數裡傳的參數就是這樣顯示的第一個參數是 圖像,第二個是標題 :信息 ,第三個是系統時間 (見圖一) 之所以在這說一下這個構造函數是想與下面的setLatestEventInfo(...)作個區別。
( 圖一 )
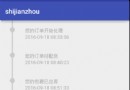
( 圖二 )
布局就不貼了 是兩個Button 看看發送按鈕
sendButton.setOnClickListener(new OnClickListener()
{
  @Override
  public void onClick(View v)
  {
    Intent intent = new Intent(NotificationActivity.this,NotificationActivity.class);
    PendingIntent pendingIntent = PendingIntent.getActivity(NotificationActivity.this, 0, intent, 0);
    notification.setLatestEventInfo(NotificationActivity.this, "你的一條信息", "來自張三的信息", pendingIntent);
    notificationManager.notify(ID,notification);
    notificationManager.notify(ID+1, notification);
  }
})
setLatestEventInfo(...)裡面所傳的參數的效果圖:(見圖二)通知裡面有兩條完全一樣的消息,是的 你沒看錯,這是因為我用notificationManager notify(通知)了兩次 而且ID不同,ID是int型是通知信息的標示符。雖然我上面兩條信息是一模一樣的,但由於ID的不同 , 所以Android還是會顯示兩條信息。
在此說一下參數pendingIntent的在setLatestEventInfo裡所扮演的角色,是啥子意思呢?pendingIntent可以在另外的地方執行,不是立即意圖。當用戶點擊擴展通知的時候 pendingIntent意圖才開始執行,例如圖二 我點擊其中一個消息後,立馬就進入另外一個Activity...
正如上面看到的那樣,除了為notification設置圖標,標題外還可以設置提示音,震動,閃光燈 詳情請見我轉的一片文章Notification使用詳解.....
package com.study.android;
import android.app.Activity;
import android.app.Notification;
import android.app.NotificationManager;
import android.app.PendingIntent;
import android.content.Context;
import android.content.Intent;
import android.os.Bundle;
import android.view.View;
import android.view.View.OnClickListener;
import android.widget.Button;
public class MainActivity extends Activity {
  private Button startBtn;
  private Button cancelBtn;
  private static final int HELLO_ID = 1;
  NotificationManager mNotificationManager;
  Notification mNotification;
  /** Called when the activity is first created. */
  @Override
  public void onCreate(Bundle savedInstanceState) {
    super.onCreate(savedInstanceState);
    setContentView(R.layout.main);
    startBtn = (Button)findViewById(R.id.startBtn);
    cancelBtn = (Button)findViewById(R.id.cancelBtn);
    // ① 獲取NotificationManager的引用
    String ns = Context.NOTIFICATION_SERVICE;
    mNotificationManager = (NotificationManager)this.getSystemService(ns);
    // ② 初始化Notification
    int icon = R.drawable.ic_launcher;
    CharSequence tickerText = "Hello";
    long when = System.currentTimeMillis();
    mNotification = new Notification(icon,tickerText,when);
    mNotification.defaults = Notification.DEFAULT_ALL;
    mNotification.flags |= Notification.FLAG_NO_CLEAR;
    mNotification.flags |= Notification.FLAG_SHOW_LIGHTS;
    // ③ 定義notification的消息 和 PendingIntent
    Context context = this;
    CharSequence contentTitle ="My notification";
    CharSequence contentText = "Hello World";
    Intent notificationIntent = new Intent(this,MainActivity.class);
    PendingIntent contentIntent = PendingIntent.getActivity(context, 0, notificationIntent,0 );
    mNotification.setLatestEventInfo(context, contentTitle, contentText, contentIntent);
    // ④ 把封裝好的notification傳入NotificationManager
    // 開啟通知
    startBtn.setOnClickListener(new OnClickListener() {
      @Override
      public void onClick(View v) {
        mNotificationManager.notify(HELLO_ID,mNotification);
      }
    });
    // 取消通知
    cancelBtn.setOnClickListener(new OnClickListener() {
      @Override
      public void onClick(View v) {
        mNotificationManager.cancel(HELLO_ID);
      }
    });
  }
}
代碼中有創建Notification步驟,詳情可以看一下。
更多關於Android相關內容感興趣的讀者可查看本站專題:《Android視圖View技巧總結》、《Android資源操作技巧匯總》、《Android文件操作技巧匯總》、《Android操作SQLite數據庫技巧總結》、《Android操作json格式數據技巧總結》、《Android數據庫操作技巧總結》、《Android編程開發之SD卡操作方法匯總》、《Android開發入門與進階教程》、《Android編程之activity操作技巧總結》及《Android控件用法總結》
希望本文所述對大家Android程序設計有所幫助。
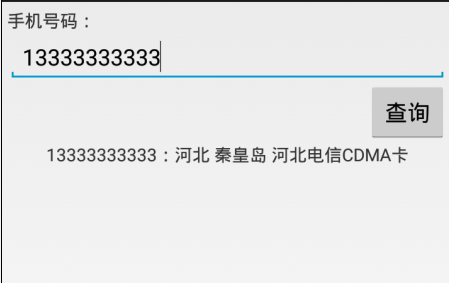 Android使用http請求手機號碼歸屬地查詢代碼分享
歸屬地數據源http://webservice.webxml.com.cn/WebServices/MobileCodeWS.asmxwebxml網站還支持其他請求方式
 魅族pro6與mx6有什麼區別 魅族MX6配置詳細介紹
魅族MX6正式發布上線開賣了,很多買家都在猶豫買魅族pro6還是魅族MX6?那魅族pro6與mx6有什麼區別呢?魅族MX6配置怎麼樣呢?有什麼機身尺寸呢?正
 詳解Android圖表 MPAndroidChart折線圖
1.介紹MPAndroidChart GitHub地址 MPAndroidChart的強大之處就不在多說了,目前最新的版本是3.0.1,在新版本中很多方法都被
 Android Ethernet從上至下解析一
最近遇到不少框架問題,比如關於網口的,開機後拔掉有線網,狀態欄和設置項中有線網顯示圖標不會更新,還有雙網口的需求,下面就帶著這個問題,以跟蹤網絡狀態問題為引線,本篇將貫穿
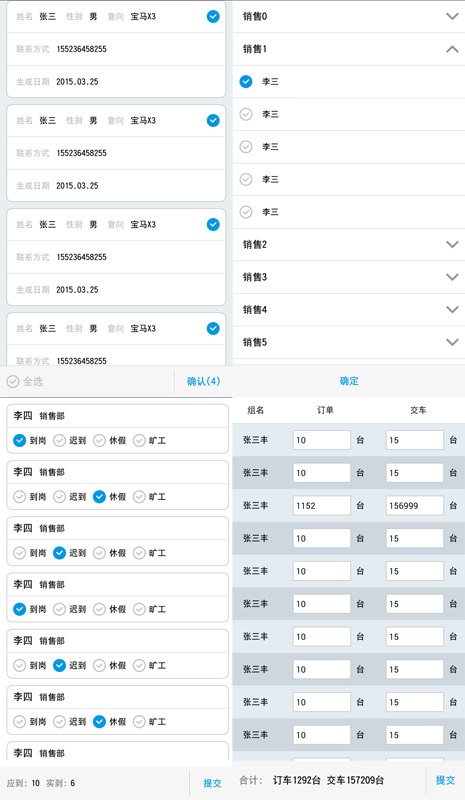 Android listview ExpandableListView實現多選,單選,全選,edittext實現批量輸入的實例代碼
最近在項目開發中,由於項目的需求要實現一些列表的單選,多選,全選,批量輸