編輯:關於Android編程
在如今的互聯網時代,微信已是一個超級App。這篇通過ViewPager + Fragment實現一個類似於微信的界面,之前有用FragmentTabHost實現過類似界面,ViewPager的實現方式相對於FragmentTabHost的方式更簡單明了。
ViewPager:
ViewPager繼承自ViewGroup,是一個容器類,可以往裡添加View.
ViewPager的使用很簡單,通過setAdapter()方法設置一個PagerAdapter即可,這個PagerAdapter需要自己寫,實現裡面的一些方法。本篇要和Fragment結合,所以實現的是FragmentPagerAdapter類,FragmentPagerAdapter繼承自PagerAdapter.
ViewPager通過addOnPageChangeListener()方法可以設置一個ViewPager.OnPageChangeListener監聽,當Pager發生變化時就調用相應的方法。
Fragment:
Fragment有自己的生命周期, 有興趣的可以自己通過各種方式研究下(自己打Log看是最簡單的一種方式),這裡就不在贅述。和ViewPager結合,有幾個Pager就需要實現幾個不同的Fragment.
先看一下最後實現的效果圖:
布局上分為三部分:
最上面的layout_top.xml,主要就是上面那個標題,就一個TextView,中間的ViewPager,最下面的layout_bottom.xml包括三個線性布局,每個線性布局包括一個ImageView和TextView.
activity_main.xml:
<?xml version="1.0" encoding="utf-8"?>
<LinearLayout xmlns:android="http://schemas.android.com/apk/res/android"
xmlns:tools="http://schemas.android.com/tools"
android:layout_width="match_parent"
android:layout_height="match_parent"
android:orientation="vertical"
tools:context="com.example.administrator.viewpagerl.MainActivity">
<include layout="@layout/layout_top"></include>
<android.support.v4.view.ViewPager
android:id="@+id/ViewPagerLayout"
android:layout_width="match_parent"
android:layout_height="match_parent"
android:layout_weight="1">
</android.support.v4.view.ViewPager>
<include layout="@layout/layout_bottom"></include>
</LinearLayout>
layout_top.xml
<?xml version="1.0" encoding="utf-8"?>
<LinearLayout xmlns:android="http://schemas.android.com/apk/res/android"
android:orientation="horizontal"
android:layout_width="match_parent"
android:layout_height="wrap_content"
android:paddingTop="3dp"
android:paddingBottom="3dp"
android:background="@android:color/darker_gray">
<TextView
android:id="@+id/ViewTitle"
android:layout_marginLeft="20dp"
android:layout_marginTop="5dp"
android:textSize="25sp"
android:layout_width="wrap_content"
android:layout_height="wrap_content" />
</LinearLayout>
layout_bottom.xml
<?xml version="1.0" encoding="utf-8"?>
<LinearLayout xmlns:android="http://schemas.android.com/apk/res/android"
android:orientation="horizontal" android:layout_width="match_parent"
android:layout_height="wrap_content"
android:layout_alignParentBottom="true"
android:paddingTop="3dp"
android:paddingBottom="3dp"
android:background="@android:color/holo_green_light">
<LinearLayout
android:id="@+id/firstLinearLayout"
android:layout_width="wrap_content"
android:layout_height="wrap_content"
android:orientation="vertical"
android:gravity="center_horizontal"
android:layout_weight="1">
<ImageView
android:id="@+id/firstImageView"
android:background="@drawable/tab_weixin"
android:layout_width="wrap_content"
android:layout_height="wrap_content" />
<TextView
android:id="@+id/firstTextView"
android:layout_width="wrap_content"
android:layout_height="wrap_content"
android:text="微信"
/>
</LinearLayout>
<LinearLayout
android:id="@+id/secondLinearLayout"
android:layout_width="wrap_content"
android:layout_height="wrap_content"
android:orientation="vertical"
android:gravity="center_horizontal"
android:layout_weight="1">
<ImageView
android:id="@+id/secondImageView"
android:layout_width="wrap_content"
android:layout_height="wrap_content"
android:background="@drawable/tab_setting"/>
<TextView
android:id="@+id/secondTextView"
android:layout_width="wrap_content"
android:layout_height="wrap_content"
android:text="朋友"
/>
</LinearLayout>
<LinearLayout
android:id="@+id/threeLinearLayout"
android:layout_width="wrap_content"
android:layout_height="wrap_content"
android:orientation="vertical"
android:gravity="center_horizontal"
android:layout_weight="1">
<ImageView
android:id="@+id/threeImageView"
android:layout_width="wrap_content"
android:layout_height="wrap_content"
android:background="@drawable/tab_find"/>
<TextView
android:id="@+id/threeTextView"
android:layout_width="wrap_content"
android:layout_height="wrap_content"
android:text="發現"
/>
</LinearLayout>
</LinearLayout>
上面有提到,ViewPager需要實現一個Pageradapter,很簡單繼承FragmentPagerAdapter,實現裡面的getItem()和getCount()方法即可。
ViewPagerFragmentAdapter .java
package com.example.administrator.viewpagerl;
import android.support.v4.app.Fragment;
import android.support.v4.app.FragmentManager;
import android.support.v4.app.FragmentPagerAdapter;
import android.util.Log;
import java.util.ArrayList;
import java.util.List;
public class ViewPagerFragmentAdapter extends FragmentPagerAdapter {
private List<Fragment> mList = new ArrayList<Fragment>();
public ViewPagerFragmentAdapter(FragmentManager fm , List<Fragment> list) {
super(fm);
this.mList = list;
}
@Override
public Fragment getItem(int position) {
return mList.get(position);
}
@Override
public int getCount() {
return mList != null ? mList.size() : 0;
}
}
ViewPager的每個Pager都需要一個Fragment,Fragment會實例化布局,顯示在ViewPager的每個Pager中
ChatFragment.java
package com.example.administrator.fragment;
import android.os.Bundle;
import android.support.annotation.Nullable;
import android.support.v4.app.Fragment;
import android.util.Log;
import android.view.LayoutInflater;
import android.view.View;
import android.view.ViewGroup;
import android.widget.TextView;
import com.example.administrator.viewpagerl.R;
public class ChatFragment extends Fragment {
View mView;
@Nullable
@Override
public View onCreateView(LayoutInflater inflater, @Nullable ViewGroup container, @Nullable Bundle savedInstanceState) {
if (mView == null) {
mView = inflater.inflate(R.layout.fragment_layout,null);
}
((TextView)mView.findViewById(R.id.mTextView)).setText("聊天界面");
return mView;
}
}
這裡需要三個Fragment,因為這裡使用的布局很簡單,三個布局基本是一致的,FriendFragment、FindFragment 這裡就都不貼出代碼了。微信裡面的聊天列表,朋友列表都是在Fragment裡面實例化的布局裡有個ListView,通過ListView的方式實現的,這裡只是為了記錄ViewPager就沒有實現那些,有興趣的可以自己搞搞,其實也不難。
在Activity裡面只需要給ViewPager設置上面那個Adapter,設置一個監聽知道Pager如何變化即可。點擊最下面微信、朋友、發現三個按鈕,通過ViewPager的setCurrentItem()方法就能跳轉到對應的Pager,除了這些還有就是通過一些簡單的邏輯,控制一下界面的改變就行,沒有太難的東西。
MainActivity.java
package com.example.administrator.viewpagerl;
import android.support.v4.app.Fragment;
import android.support.v4.app.FragmentManager;
import android.support.v4.view.ViewPager;
import android.support.v7.app.AppCompatActivity;
import android.os.Bundle;
import android.util.Log;
import android.view.View;
import android.widget.LinearLayout;
import android.widget.TextView;
import com.example.administrator.fragment.ChatFragment;
import com.example.administrator.fragment.FindFragment;
import com.example.administrator.fragment.FriendFragment;
import java.util.ArrayList;
import java.util.List;
public class MainActivity extends AppCompatActivity implements View.OnClickListener {
private static final String TAG = "MainActivity.TAG";
TextView titleTextView;
public LinearLayout firstLinearLayout;
public LinearLayout secondLinearLayout;
public LinearLayout threeLinearLayout;
ViewPager mViewPager;
ViewPagerFragmentAdapter mViewPagerFragmentAdapter;
FragmentManager mFragmentManager;
String[] titleName = new String[] {"微信","朋友","發現"};
List<Fragment> mFragmentList = new ArrayList<Fragment>();
@Override
protected void onCreate(Bundle savedInstanceState) {
super.onCreate(savedInstanceState);
mFragmentManager = getSupportFragmentManager();
setContentView(R.layout.activity_main);
initFragmetList();
mViewPagerFragmentAdapter = new ViewPagerFragmentAdapter(mFragmentManager,mFragmentList);
initView();
initViewPager();
}
@Override
protected void onResume() {
super.onResume();
}
public void initViewPager() {
mViewPager.addOnPageChangeListener(new ViewPagetOnPagerChangedLisenter());
mViewPager.setAdapter(mViewPagerFragmentAdapter);
mViewPager.setCurrentItem(0);
titleTextView.setText(titleName[0]);
updateBottomLinearLayoutSelect(true,false,false);
}
public void initFragmetList() {
Fragment chat = new ChatFragment();
Fragment friend = new FriendFragment();
Fragment find = new FindFragment();
mFragmentList.add(chat);
mFragmentList.add(friend);
mFragmentList.add(find);
}
public void initView() {
titleTextView = (TextView) findViewById(R.id.ViewTitle);
mViewPager = (ViewPager) findViewById(R.id.ViewPagerLayout);
firstLinearLayout = (LinearLayout) findViewById(R.id.firstLinearLayout);
firstLinearLayout.setOnClickListener(this);
secondLinearLayout = (LinearLayout) findViewById(R.id.secondLinearLayout);
secondLinearLayout.setOnClickListener(this);
threeLinearLayout = (LinearLayout) findViewById(R.id.threeLinearLayout);
threeLinearLayout.setOnClickListener(this);
}
@Override
public void onClick(View v) {
switch (v.getId()) {
case R.id.firstLinearLayout:
mViewPager.setCurrentItem(0);
updateBottomLinearLayoutSelect(true,false,false);
break;
case R.id.secondLinearLayout:
mViewPager.setCurrentItem(1);
updateBottomLinearLayoutSelect(false,true,false);
break;
case R.id.threeLinearLayout:
mViewPager.setCurrentItem(2);
updateBottomLinearLayoutSelect(false,false,true);
break;
default:
break;
}
}
private void updateBottomLinearLayoutSelect(boolean f, boolean s, boolean t) {
firstLinearLayout.setSelected(f);
secondLinearLayout.setSelected(s);
threeLinearLayout.setSelected(t);
}
class ViewPagetOnPagerChangedLisenter implements ViewPager.OnPageChangeListener {
@Override
public void onPageScrolled(int position, float positionOffset, int positionOffsetPixels) {
// Log.d(TAG,"onPageScrooled");
}
@Override
public void onPageSelected(int position) {
Log.d(TAG,"onPageSelected");
boolean[] state = new boolean[titleName.length];
state[position] = true;
titleTextView.setText(titleName[position]);
updateBottomLinearLayoutSelect(state[0],state[1],state[2]);
}
@Override
public void onPageScrollStateChanged(int state) {
Log.d(TAG,"onPageScrollStateChanged");
}
}
}
以上所述是小編給大家介紹的ViewPager 與 Fragment相結合實現微信界面實例代碼,希望對大家有所幫助,如果大家有任何疑問請給我留言,小編會及時回復大家的。在此也非常感謝大家對本站網站的支持!
 android項目實現帶進度條的系統通知欄消息
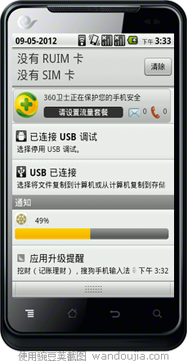
我們在做Android開發的時候經常會遇到後台線程執行的比如說下載文件的時候,這個時候我們希望讓客戶能看到後台有操作進行,這時候我們就可以使用進度條,那麼既然在後台運行,
 使用RoundedBitmapDrawable生成圓角圖片的方法
Bitmap src = BitmapFactory.decodeResource(getResources(), imageId); //獲取Bitmap圖片Round
 Android中底部菜單被輸入法頂上去的解決方案
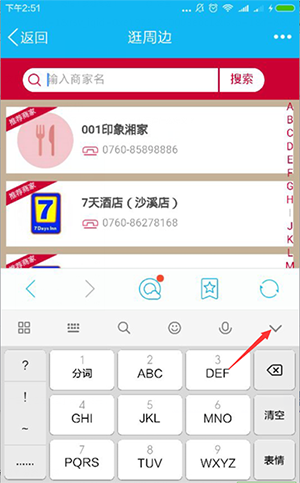
安卓手機輸入法彈出,消失會觸發window.onresize事件,我們一般的解決方法是獲取焦點,底部隱藏,失去焦點,底部菜單出現,但是,有些人會點擊這個按鈕收起鍵牌那麼,
 Android自定義水平進度條的圓角進度
平時項目中經常用到自定義進度條樣式,我們一般實現的也是下面的第一種,至於第二種的圓角進度,網上介紹的資料也不是很多,這裡一起展示一下這兩種的實現。下面開始看代碼,先從主界
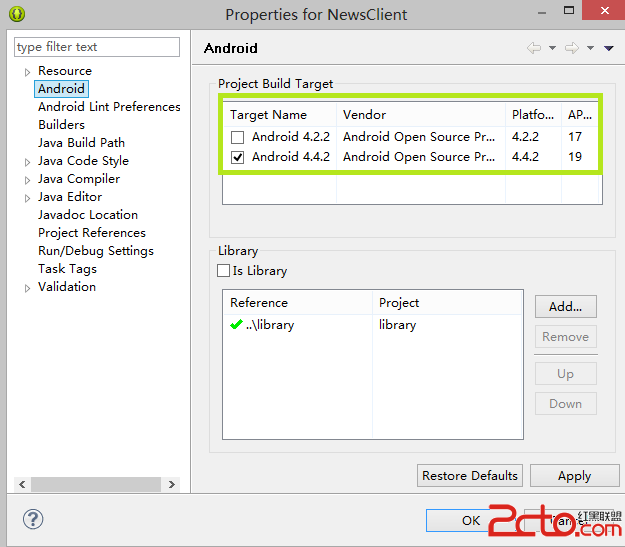 Android項目編譯的時候出現:Caused by: java.lang.ClassNotFoundException: com.example.aaa.MainActivity
錯誤類型: 04-28 06:10:15.508: E/Andro