編輯:關於Android編程
這裡簡單介紹一下ZXing庫。ZXing是一個開放源碼的,用Java實現的多種格式的1D/2D條碼圖像處理庫,它包含了聯系到其他語言的端口。Zxing可以實現使用手機的內置的攝像頭完成條形碼的掃描及解碼。該項目可實現的條形碼編碼和解碼。目前支持以下格式:UPC-A,UPC-E、EAN-8,EAN-13、39碼、93碼。ZXing是個很經典的條碼/二維碼識別的開源類庫,以前在功能機上,就有開發者使用J2ME運用ZXing了,不過要支持JSR-234規范(自動對焦)的手機才能發揮其威力。
ZXingGitHub地址
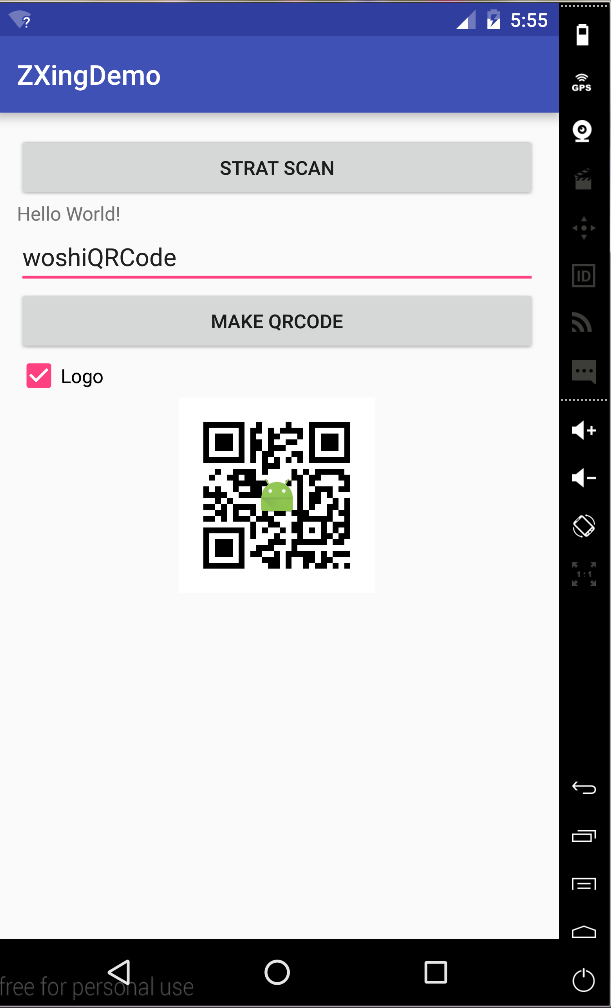
效果圖:
主要實現步驟:
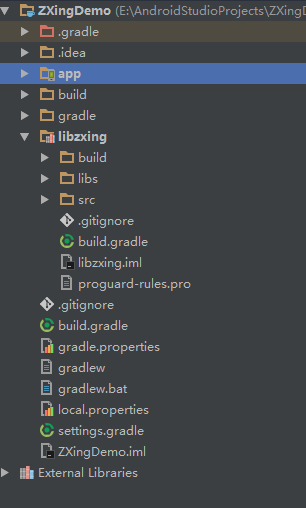
導入libzxing這個模塊
ZXing源代碼很大,功能也很多,這裡只是抽取了其中的一部分代碼整合到了一起
掃描
在main_activity中添加一個Button和一個TextView 點擊Button後開始調照相機功能,掃描二維碼
TextView會顯示掃描後的結果
<Button
android:text="Strat Scan"
android:layout_width="match_parent"
android:layout_height="wrap_content"
android:onClick="scan"/>
<TextView
android:id="@+id/tv_showResult"
android:layout_width="wrap_content"
android:layout_height="wrap_content"
android:text="Hello World!"/>
在ActivityMain中分別初始化這兩個控件
private TextView mTextView;
mTextView= (TextView) this.findViewById(R.id.tv_showResult);
//掃描二維碼
//https://cli.im/text?2dd0d2b267ea882d797f03abf5b97d88二維碼生成網站
public void scan(View view) {
startActivityForResult(new Intent(this, CaptureActivity.class),0);
}
@Override
protected void onActivityResult(int requestCode, int resultCode, Intent data) {
super.onActivityResult(requestCode, resultCode, data);
if (resultCode==RESULT_OK){
Bundle bundle = data.getExtras();
if (bundle != null) {
String result=bundle.getString("result");
mTextView.setText(result);
}
}
}
生成二維碼
這裡就把整個項目的XML文件都貼出來把,加上之前的掃描
<?xml version="1.0" encoding="utf-8"?>
<LinearLayout
xmlns:android="http://schemas.android.com/apk/res/android"
xmlns:tools="http://schemas.android.com/tools"
android:layout_width="match_parent"
android:layout_height="match_parent"
android:paddingBottom="@dimen/activity_vertical_margin"
android:paddingLeft="@dimen/activity_horizontal_margin"
android:paddingRight="@dimen/activity_horizontal_margin"
android:paddingTop="@dimen/activity_vertical_margin"
android:orientation="vertical"
tools:context="com.example.hfs.zxingdemo.MainActivity">
<Button
android:text="Strat Scan"
android:layout_width="match_parent"
android:layout_height="wrap_content"
android:onClick="scan"/>
<TextView
android:id="@+id/tv_showResult"
android:layout_width="wrap_content"
android:layout_height="wrap_content"
android:text="Hello World!"/>
<EditText
android:id="@+id/et_text"
android:hint="Imput"
android:layout_width="match_parent"
android:layout_height="wrap_content"/>
<Button
android:layout_width="match_parent"
android:layout_height="wrap_content"
android:onClick="make"
android:text="Make QRCode"/>
<CheckBox
android:id="@+id/cb_logo"
android:layout_width="wrap_content"
android:text="Logo"
android:layout_height="wrap_content"/>
<ImageView
android:id="@+id/img_shouw"
android:layout_width="wrap_content"
android:layout_gravity="center"
android:background="@mipmap/ic_launcher"
android:layout_height="wrap_content"/>
</LinearLayout>
MainActivity中代碼
package com.example.hfs.zxingdemo;
import android.content.Intent;
import android.graphics.Bitmap;
import android.graphics.BitmapFactory;
import android.hardware.camera2.CaptureRequest;
import android.support.v7.app.AppCompatActivity;
import android.os.Bundle;
import android.view.View;
import android.widget.CheckBox;
import android.widget.EditText;
import android.widget.ImageView;
import android.widget.TextView;
import android.widget.Toast;
import com.xys.libzxing.zxing.activity.CaptureActivity;
import com.xys.libzxing.zxing.encoding.EncodingUtils;
public class MainActivity extends AppCompatActivity {
private TextView mTextView;
private EditText mEditText;
private ImageView mImageView;
private CheckBox mCheckBox;
@Override
protected void onCreate(Bundle savedInstanceState) {
super.onCreate(savedInstanceState);
setContentView(R.layout.activity_main);
initView();
}
private void initView() {
mTextView= (TextView) this.findViewById(R.id.tv_showResult);
mEditText= (EditText) this.findViewById(R.id.et_text);
mImageView= (ImageView) this.findViewById(R.id.img_shouw);
mCheckBox= (CheckBox) this.findViewById(R.id.cb_logo);
}
//掃描二維碼
//https://cli.im/text?2dd0d2b267ea882d797f03abf5b97d88二維碼生成網站
public void scan(View view) {
startActivityForResult(new Intent(this, CaptureActivity.class),0);
}
@Override
protected void onActivityResult(int requestCode, int resultCode, Intent data) {
super.onActivityResult(requestCode, resultCode, data);
if (resultCode==RESULT_OK){
Bundle bundle = data.getExtras();
if (bundle != null) {
String result=bundle.getString("result");
mTextView.setText(result);
}
}
}
//生成二維碼 可以設置Logo
public void make(View view) {
String input = mEditText.getText().toString();
if (input.equals("")){
Toast.makeText(this,"輸入不能為空",Toast.LENGTH_SHORT).show();
}else{
Bitmap qrCode = EncodingUtils.createQRCode(input, 500, 500,
mCheckBox.isChecked()? BitmapFactory.decodeResource(getResources(),R.mipmap.ic_launcher):null);//CheckBox選中就設置Logo
mImageView.setImageBitmap(qrCode);
}
}
}
好了 到這裡就寫完了
項目地址
以上所述是小編給大家介紹的Android實現二維碼掃描和生成的簡單方法,希望對大家有所幫助,如果大家有任何疑問請給我留言,小編會及時回復大家的。在此也非常感謝大家對本站網站的支持!
 Android集成百度地圖SDK
本Demo中所含功能1:定位,顯示當前位置2:地圖多覆蓋物(地圖描點,彈出該點的詳細信息)3:坐標地址互相換算4:POI興趣點檢索5:線路查詢(步行,駕車,公交)6:繪制
 MPAndroidChart系列源碼解讀(五)
本篇主要是LineChart實戰相關知識和簡單的源碼剖析,相關源碼沒有,自己動手實踐學習才是最有效的方法。LineChart Simple運行效果圖個人感官覺得某些屬性設
 Android中訪問sdcard路徑的幾種方式
以前的Android(4.1之前的版本)中,SDcard路徑通過“/sdcard”或者“/mnt/sdcard”來表示,而在JellyBean(安卓4.1)系統中修改為了
 Android學習筆記——Menu介紹(三)
知識點今天繼續昨天沒有講完的Menu的學習,主要是Popup Menu的學習。Popup Menu(彈出式菜單)彈出式菜單是一種固定在View上的菜單模型。主要用於以下三