編輯:關於Android編程
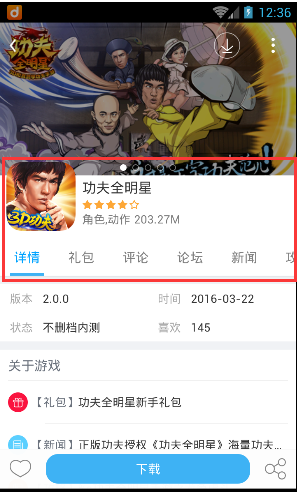
效果圖
思路
首先我們來分析一下實現九宮格解鎖的思路:當用戶的手指觸摸到某一個點時,先判斷該點是否在九宮格的某一格范圍之內,若在范圍內,則該格變成選中的狀態;之後用戶手指滑動的時候,以該格的圓心為中心,用戶手指為終點,兩點連線。最後當用戶手指抬起時,判斷劃過的九宮格密碼是否和原先的密碼匹配。
大致的思路流程就是上面這樣的了,下面我們可以來實踐一下。
Point 類
我們先來創建一個 Point 類,用來表示九宮格鎖的九個格子。除了坐標 x ,y 之外,還有三種模式:正常模式、按下模式和錯誤模式。根據模式不同該格子的顏色會有所不同,這會在下面中說明。
public class Point {

 private float x;
 private float y;
 // 正常模式
 public static final int NORMAL_MODE = 1;
 // 按下模式
 public static final int PRESSED_MODE = 2;
 // 錯誤模式
 public static final int ERROR_MODE = 3;
 private int state = NORMAL_MODE;
 // 表示該格的密碼,比如“1”、“2”等
 private String mark;

 public String getMark() {
  return mark;
 }

 public void setMark(String mark) {
  this.mark = mark;
 }

 public Point(float x, float y, String mark) {
  this.x = x;
  this.y = y;
  this.mark = mark;
 }

 public int getState() {
  return state;
 }

 public void setState(int state) {
  this.state = state;
 }

 public float getX() {
  return x;
 }

 public void setX(float x) {
  this.x = x;
 }

 public float getY() {
  return y;
 }

 public void setY(float y) {
  this.y = y;
 }

}
RotateDegrees類
有了上面的 Point 類之後,我們還要創建一個 RotateDegrees 類,主要作用是計算兩個 Point 坐標之間的角度:
public class RotateDegrees {

 /**
  * 根據傳入的point計算出它們之間的角度
  * @param a
  * @param b
  * @return
  */
 public static float getDegrees(Point a, Point b) {
  float degrees = 0;
  float aX = a.getX();
  float aY = a.getY();
  float bX = b.getX();
  float bY = b.getY();

  if (aX == bX) {
   if (aY < bY) {
    degrees = 90;
   } else {
    degrees = 270;
   }
  } else if (bY == aY) {
   if (aX < bX) {
    degrees = 0;
   } else {
    degrees = 180;
   }
  } else {
   if (aX > bX) {
    if (aY > bY) { // 第三象限
     degrees = 180 + (float) (Math.atan2(aY - bY, aX - bX) * 180 / Math.PI);
    } else { // 第二象限
     degrees = 180 - (float) (Math.atan2(bY - aY, aX - bX) * 180 / Math.PI);
    }
   } else {
    if (aY > bY) { // 第四象限
     degrees = 360 - (float) (Math.atan2(aY - bY, bX - aX) * 180 / Math.PI);
    } else { // 第一象限
     degrees = (float) (Math.atan2(bY - aY, bX - aX) * 180 / Math.PI);
    }
   }
  }
  return degrees;
 }

 /**
  * 根據point和(x,y)計算出它們之間的角度
  * @param a
  * @param bX
  * @param bY
  * @return
  */
 public static float getDegrees(Point a, float bX, float bY) {
  Point b = new Point(bX, bY, null);
  return getDegrees(a, b);
 }

}
ScreenLockView 類
然後我們要先准備好關於九宮格的幾張圖片,比如在九宮格的格子中,NORMAL_MODE 模式下是藍色的,被手指按住時九宮格的格子是綠色的,也就是對應著上面 Point 類的中 PRESSED_MODE 模式,還有 ERROR_MODE 模式下是紅色的。另外還有圓點之間的連線,也是根據模式不同顏色也會不同。在這裡我就不把圖片貼出來了。
有了圖片資源之後,我們要做的就是先在構造器中加載圖片:
public class ScreenLockView extends View {

 private static final String TAG = "ScreenLockView";
 // 錯誤格子的圖片
 private Bitmap errorBitmap;
 // 正常格子的圖片
 private Bitmap normalBitmap;
 // 手指按下時格子的圖片
 private Bitmap pressedBitmap;
 // 錯誤時連線的圖片
 private Bitmap lineErrorBitmap;
 // 手指按住時連線的圖片
 private Bitmap linePressedBitmap;
 // 偏移量,使九宮格在屏幕中央
 private int offset;
 // 九宮格的九個格子是否已經初始化
 private boolean init;
 // 格子的半徑
 private int radius;
 // 密碼
 private String password = "123456";
 // 九個格子
 private Point[][] points = new Point[3][3];
 private int width;
 private int height;
 private Matrix matrix = new Matrix();
 private float moveX = -1;
 private float moveY = -1;
 // 是否手指在移動
 private boolean isMove;
 // 是否可以觸摸,當用戶抬起手指,劃出九宮格的密碼不正確時為不可觸摸
 private boolean isTouch = true;
 // 用來存儲記錄被按下的點
 private List<Point> pressedPoint = new ArrayList<>();
 // 屏幕解鎖監聽器
 private OnScreenLockListener listener;

 public ScreenLockView(Context context) {
  this(context, null);
 }

 public ScreenLockView(Context context, AttributeSet attrs) {
  this(context, attrs, 0);
 }

 public ScreenLockView(Context context, AttributeSet attrs, int defStyleAttr) {
  super(context, attrs, defStyleAttr);
  errorBitmap = BitmapFactory.decodeResource(getResources(), R.drawable.bitmap_error);
  normalBitmap = BitmapFactory.decodeResource(getResources(), R.drawable.bitmap_normal);
  pressedBitmap = BitmapFactory.decodeResource(getResources(), R.drawable.bitmap_pressed);
  lineErrorBitmap = BitmapFactory.decodeResource(getResources(), R.drawable.line_error);
  linePressedBitmap = BitmapFactory.decodeResource(getResources(), R.drawable.line_pressed);
  radius = normalBitmap.getWidth() / 2;
 }
 ...
}
在構造器中我們主要就是把圖片加載完成,並且得到了格子的半徑,即圖片寬度的一半。
之後我們來看看 onMeasure(int widthMeasureSpec, int heightMeasureSpec) 方法:
@Override
protected void onMeasure(int widthMeasureSpec, int heightMeasureSpec) {
 int widthSize = MeasureSpec.getSize(widthMeasureSpec);
 int widthMode = MeasureSpec.getMode(widthMeasureSpec);
 int heightSize = MeasureSpec.getSize(heightMeasureSpec);
 int heightMode = MeasureSpec.getMode(heightMeasureSpec);
 if (widthSize > heightSize) {
  offset = (widthSize - heightSize) / 2;
 } else {
  offset = (heightSize - widthSize) / 2;
 }
 setMeasuredDimension(widthSize, heightSize);
}
在 onMeasure(int widthMeasureSpec, int heightMeasureSpec) 方法中,主要得到對應的偏移量,以便在下面的 onDraw(Canvas canvas) 把九宮格繪制在屏幕中央。
下面就是 onDraw(Canvas canvas) 方法:
@Override
protected void onDraw(Canvas canvas) {
 if (!init) {
  width = getWidth();
  height = getHeight();
  initPoint();
  init = true;
 }
 // 畫九宮格的格子
 drawPoint(canvas);

 if (moveX != -1 && moveY != -1) {
  // 畫直線
  drawLine(canvas);
 }
}
首先判斷了是否為第一次調用 onDraw(Canvas canvas) 方法,若為第一次則對 points 進行初始化:
// 初始化點
private void initPoint() {
 points[0][0] = new Point(width / 4, offset + width / 4, "0");
 points[0][1] = new Point(width / 2, offset + width / 4, "1");
 points[0][2] = new Point(width * 3 / 4, offset + width / 4, "2");

 points[1][0] = new Point(width / 4, offset + width / 2, "3");
 points[1][1] = new Point(width / 2, offset + width / 2, "4");
 points[1][2] = new Point(width * 3 / 4, offset + width / 2, "5");

 points[2][0] = new Point(width / 4, offset + width * 3 / 4, "6");
 points[2][1] = new Point(width / 2, offset + width * 3 / 4, "7");
 points[2][2] = new Point(width * 3 / 4, offset + width * 3 / 4, "8");
}
在 initPoint() 方法中主要創建了九個格子,並設置了相應的位置和密碼。初始化完成之後把 init 置為 false ,下次不會再調用。
回過頭再看看 onDraw(Canvas canvas) 中其他的邏輯,接下來調用了 drawPoint(canvas) 來繪制格子:
// 畫九宮格的格子
private void drawPoint(Canvas canvas) {
 for (int i = 0; i < points.length; i++) {
  for (int j = 0; j < points[i].length; j++) {
   int state = points[i][j].getState();
   if (state == Point.NORMAL_MODE) {
    canvas.drawBitmap(normalBitmap, points[i][j].getX() - radius, points[i][j].getY() - radius, null);
   } else if (state == Point.PRESSED_MODE) {
    canvas.drawBitmap(pressedBitmap, points[i][j].getX() - radius, points[i][j].getY() - radius, null);
   } else {
    canvas.drawBitmap(errorBitmap, points[i][j].getX() - radius, points[i][j].getY() - radius, null);
   }
  }
 }
}
在繪制格子還是很簡單的,主要分為了三種:普通模式下的格子、按下模式下的格子以及錯誤模式下的格子。
onTouchEvent
在繪制好了格子之後,我們先不看最後的 drawLine(canvas) 方法,因為繪制直線是和用戶手指的觸摸事件息息相關的,所以我們先把目光轉向 onTouchEvent(MotionEvent event) 方法:
@Override
public boolean onTouchEvent(MotionEvent event) {
 if (isTouch) {
  float x = event.getX();
  float y = event.getY();
  Point point;
  switch (event.getAction()) {
   case MotionEvent.ACTION_DOWN:
   // 判斷用戶觸摸的點是否在九宮格的任意一個格子之內
    point = isPoint(x, y);
    if (point != null) {
     point.setState(Point.PRESSED_MODE); // 切換為按下模式
     pressedPoint.add(point);
    }
    break;
   case MotionEvent.ACTION_MOVE:
    if (pressedPoint.size() > 0) {
     point = isPoint(x, y);
     if (point != null) {
      if (!crossPoint(point)) {
       point.setState(Point.PRESSED_MODE);
       pressedPoint.add(point);
      }
     }
     moveX = x;
     moveY = y;
     isMove = true;
    }
    break;
   case MotionEvent.ACTION_UP:
    isMove = false;
    String tempPwd = "";
    for (Point p : pressedPoint) {
     tempPwd += p.getMark();
    }
    if (listener != null) {
     listener.getStringPassword(tempPwd);
    }

    if (tempPwd.equals(password)) {
     if (listener != null) {
      listener.isPassword(true);
     }
    } else {
     for (Point p : pressedPoint) {
      p.setState(Point.ERROR_MODE);
     }
     isTouch = false;
     this.postDelayed(runnable, 1000);
     if (listener != null) {
      listener.isPassword(false);
     }
    }
    break;
  }
  invalidate();
 }
 return true;
}

public interface OnScreenLockListener {
 public void getStringPassword(String password);
 public void isPassword(boolean flag);
}

public void setOnScreenLockListener(OnScreenLockListener listener) {
 this.listener = listener;
}
在 MotionEvent.ACTION_DOWN 中,先在 isPoint(float x, float y) 方法內判斷了用戶觸摸事件的坐標點是否在九宮格的任意一格之內。如果是,則需要把該九宮格的格子添加到 pressedPoint 中:
// 該觸摸點是否為格子
private Point isPoint(float x, float y) {
 Point point;
 for (int i = 0; i < points.length; i++) {
  for (int j = 0; j < points[i].length; j++) {
   point = points[i][j];
   if (isContain(point, x, y)) {
    return point;
   }
  }
 }
 return null;
}

// 該點(x,y)是否被包含
private boolean isContain(Point point, float x, float y) {
 // 該點的(x,y)與格子圓心的距離若小於半徑就是被包含了
 return Math.sqrt(Math.pow(x - point.getX(), 2f) + Math.pow(y - point.getY(), 2f)) <= radius;
}
接下來就是要看 MotionEvent.ACTION_MOVE 的邏輯了。一開始判斷了用戶觸摸的點是否為九宮格的某個格子。但是比 MotionEvent.ACTION_DOWN 還多了一個步驟:若用戶觸摸了某個格子,還要判斷該格子是否已經被包含在 pressedPoint 裡面了。
// 是否該格子已經被包含在pressedPoint裡面了
private boolean crossPoint(Point point) {
 if (pressedPoint.contains(point)) {
  return true;
 }
 return false;
}
最後來看看 MotionEvent.ACTION_UP ,把 pressedPoint 裡保存的格子遍歷後得到用戶劃出的密碼,再和預先設置的密碼比較,若相同則回調 OnScreenLockListener 監聽器;不相同則把 pressedPoint 中的所有格子的模式設置為錯誤模式,並在 runnable 中調用 reset() 清空 pressedPoint ,重繪視圖,再回調監聽器。
private Runnable runnable = new Runnable() {
 @Override
 public void run() {
  isTouch = true;
  reset();
  invalidate();
 }
};

// 重置格子
private void reset(){
 for (int i = 0; i < points.length; i++) {
  for (int j = 0; j < points[i].length; j++) {
   points[i][j].setState(Point.NORMAL_MODE);
  }
 }
 pressedPoint.clear();
}
現在我們回過頭來看看之前在 onDraw(Canvas canvas) 裡面的 drawLine(Canvas canvas) 方法:
// 畫直線
private void drawLine(Canvas canvas) {

 // 將pressedPoint中的所有格子依次遍歷,互相連線
 for (int i = 0; i < pressedPoint.size() - 1; i++) {
  // 得到當前格子
  Point point = pressedPoint.get(i);
  // 得到下一個格子
  Point nextPoint = pressedPoint.get(i + 1);
  // 旋轉畫布
  canvas.rotate(RotateDegrees.getDegrees(point, nextPoint), point.getX(), point.getY());

  matrix.reset();
  // 根據距離設置拉伸的長度
  matrix.setScale(getDistance(point, nextPoint) / linePressedBitmap.getWidth(), 1f);
  // 進行平移
  matrix.postTranslate(point.getX(), point.getY() - linePressedBitmap.getWidth() / 2);


  if (point.getState() == Point.PRESSED_MODE) {
   canvas.drawBitmap(linePressedBitmap, matrix, null);
  } else {
   canvas.drawBitmap(lineErrorBitmap, matrix, null);
  }
  // 把畫布旋轉回來
  canvas.rotate(-RotateDegrees.getDegrees(point, nextPoint), point.getX(), point.getY());
 }

 // 如果是手指在移動的情況
 if (isMove) {
  Point lastPoint = pressedPoint.get(pressedPoint.size() - 1);
  canvas.rotate(RotateDegrees.getDegrees(lastPoint, moveX, moveY), lastPoint.getX(), lastPoint.getY());

  matrix.reset();
  Log.i(TAG, "the distance : " + getDistance(lastPoint, moveX, moveY) / linePressedBitmap.getWidth());
  matrix.setScale(getDistance(lastPoint, moveX, moveY) / linePressedBitmap.getWidth(), 1f);
  matrix.postTranslate(lastPoint.getX(), lastPoint.getY() - linePressedBitmap.getWidth() / 2);
  canvas.drawBitmap(linePressedBitmap, matrix, null);

  canvas.rotate(-RotateDegrees.getDegrees(lastPoint, moveX, moveY), lastPoint.getX(), lastPoint.getY());
 }
}

// 根據point和坐標點計算出之間的距離
private float getDistance(Point point, float moveX, float moveY) {
 Point b = new Point(moveX,moveY,null);
 return getDistance(point,b);
}

// 根據兩個point計算出之間的距離
private float getDistance(Point point, Point nextPoint) {
 return (float) Math.sqrt(Math.pow(nextPoint.getX() - point.getX(), 2f) + Math.pow(nextPoint.getY() - point.getY(), 2f));
}
drawLine(Canvas canvas) 整體的邏輯並不復雜,首先將 pressedPoint 中的所有格子依次遍歷,將它們連線。之後若是用戶的手指還有滑動的話,把最後一個格子和用戶手指觸摸的點連線。
總結
ScreenLockView 中的代碼差不多就是這些了,實現效果還算不錯吧,當然你也可以自己設置喜歡的九宮格圖片,只要替換一下就可以了。如果對本篇文章有疑問可以留言。希望本文的內容對大家開發Android能有所幫助。
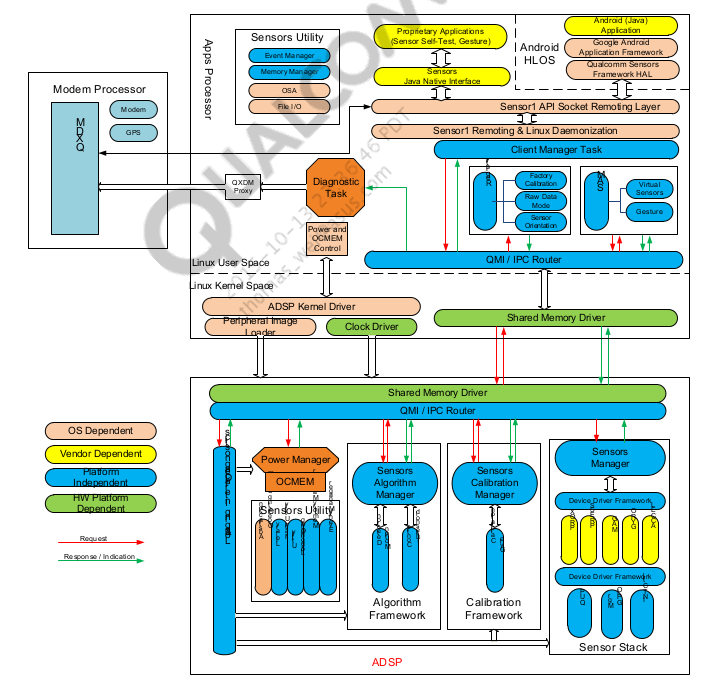 Android Sensor詳解(1)簡介與架構
序最近在學習有關如何porting sensor的東西,僅借此機會寫博客來督促自己進步,當然如果,有人對博客提出不同的理解,我覺得這是極好的,大家可以共同進步。在這一期的
 打造android萬能上拉下拉刷新框架——XRefreshView (二)
一、前言自從上次發表了打造android萬能上拉下拉刷新框架——XRefreshView (一)之後,期間的大半個月一直都很忙,但是我每天晚上下班
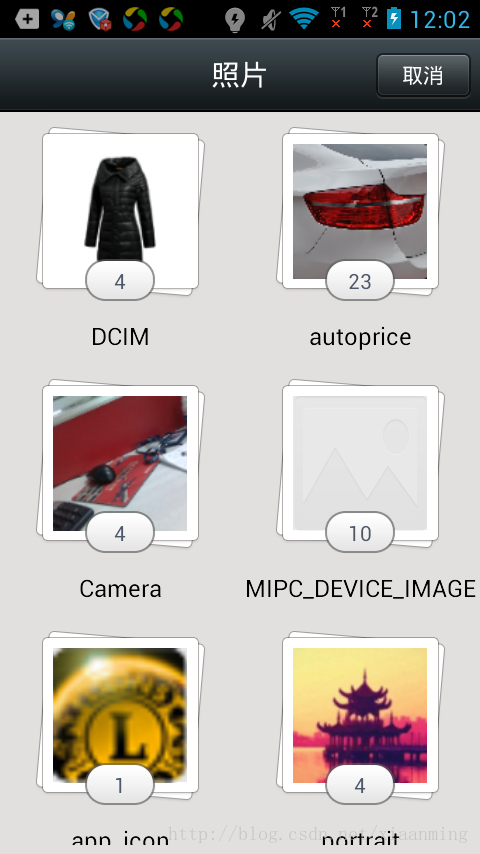 Android應用中使用ContentProvider掃描本地圖片並顯示
之前群裡面有朋友問我,有沒有關於本地圖片選擇的Demo,類似微信的效果,他說網上沒有這方面的Demo,問我能不能寫一篇關於這個效果的Demo,於是我研究了下微信的本地圖片
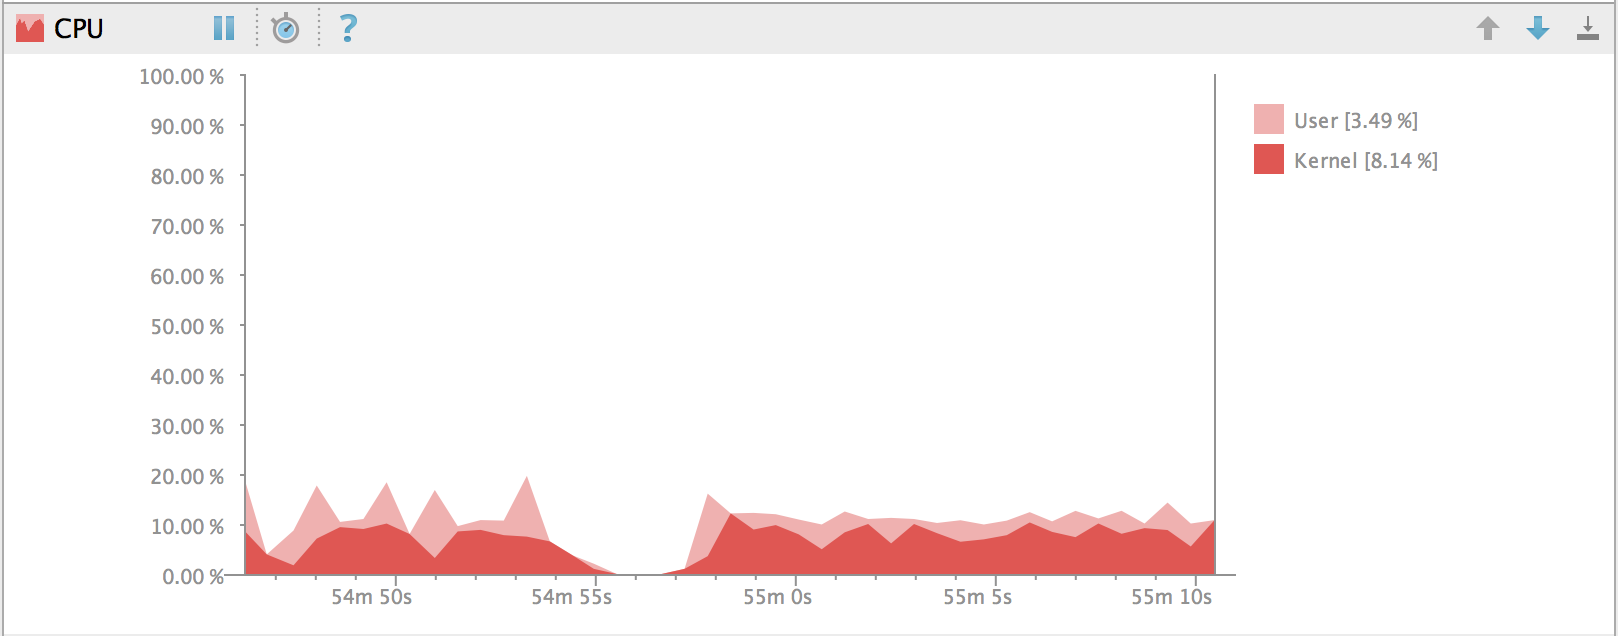 6.3、Android Studio的CPU Monitor
Android Monitor包含一個CPU Monitor,可以讓你非常方便的監測你的應用的CPU的使用。它顯示試試的CPU使用。在CPU Monitor顯示正在運行的