編輯:關於Android編程
一、前言
作為一個安卓開發者,我們一般把焦點放在app的功能上。但是僅僅有功能是不夠的,界面和功能一樣重要。有兩種方法可以改變app的外觀。第一種就是直接在xml中直接修改View的屬性。這種方法只適合於只有幾個View和Activity的簡單app。第二種方法就是創建自定義的樣式和主題。如果你對web開發熟悉,第一種方法類似於使用內聯的CSS樣式,而第二種類似於使用style sheets。
這篇文章我們將介紹如何創建自定義的樣式和主題。
二、創建Styles
樣式顯然是應用到UI控件上面的。因此,讓我們先創建一個新的空activity並添加兩個View到布局文件中。
<View android:layout_width="100dp"
 android:layout_height="100dp"
 android:layout_margin="5dp"
 android:background="#009688"
 android:id="@+id/box1" />

<View android:layout_width="100dp"
 android:layout_height="100dp"
 android:background="#00BCD4"
 android:layout_margin="5dp"
 android:id="@+id/box2" />
就如你看到的,屬性layout_width 和 layout_margin是被顯式的定義在每個View中。
要為這個View創建一個新的樣式,右鍵它並選擇Refactor > Extract > Style。
現在你會看到一個對話框,裡面可以為樣式設置名字,還可以選擇要包含的屬性。我們命名為MyBox,並選擇除了background之外的所有屬性。
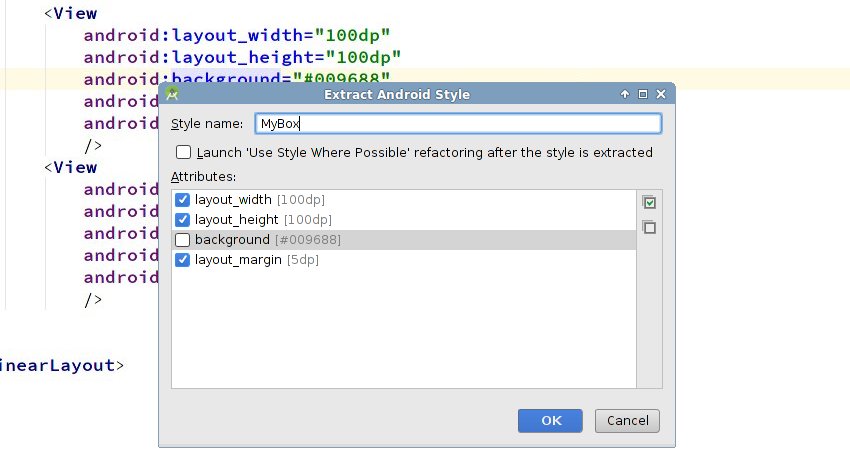
當你點擊ok之後,你會看到第一個View的代碼已經變了。
<View android:background="#009688"
 android:id="@+id/box1"
  />
這個View現在有了一個指向MyBox 樣式的style屬性。你可以打開res/values/styles.xml來查看這個樣式的定義
<style name="MyBox">
 <item name="android:layout_width">100dp</item>
 <item name="android:layout_height">100dp</item>
 <item name="android:layout_margin">5dp</item>
</style>
一旦一個樣式被定義好,你就可以應用到任何View中。比如,把MyBox應用到第二個View:
<View android:background="#00BCD4"
 android:id="@+id/box2"
  />
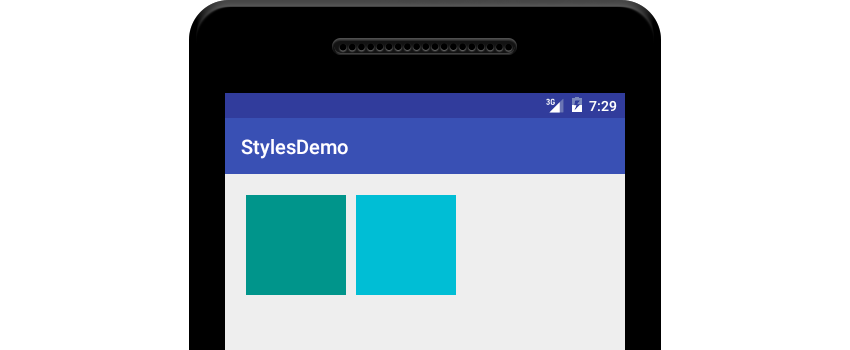
應用了樣式之後,activity中的兩個View就是這個樣子:
三、繼承 Styles
Android允許你在其他樣式的基礎上創建一個新樣式。換句話說就是允許你繼承style。
繼承一個style有兩種不同的語法。第一種語法被稱為隱式的語法,使用.號作為標記。比如,如果你要創建兩個parent為MyBox,名為 TEAL和CYAN的子樣式:
<style name="MyBox.TEAL">
 <item name="android:background">#009688</item>
</style>

<style name="MyBox.CYAN">
 <item name="android:background">#00BCD4</item>
</style>
你也許能猜到MyBox.TEAL 和 MyBox.CYAN 都具有MyBox的所有屬性,除此之外,它們還有android:background屬性。
第二種語法通常叫做顯式的語法。它使用一個parent屬性,其值就是parent style的名稱。這裡是一個定義名為TealBox的樣式的代碼片段:
<style name="TealBox" parent="MyBox">
 <item name="android:background">#009688</item>
</style>
應用一個派生的style跟應用一個普通的沒有區別。
<View android:id="@+id/box1"
  />

<View android:id="@+id/box2"
  />
大多數開發者在繼承自己的style時使用隱式的語法,而繼承系統style時使用顯式的語法。
四、創建Themes
目前為止,我們只是把style應用到activity裡面的View中。Android還允許你把style應用到整個activity和應用中。當一個樣式被應用到activity或者application中時,就變成了一個一個theme(主題)。
默認,使用最新版本Android Studio創建的所有的app都使用一個叫做AppTheme的主題。AppTheme是AppCompat的子類,一個非常大而廣泛的主題,影響到幾乎所有常用視圖的外觀。
你可以在styles.xml中找到AppTheme的定義:
<!-- Base application theme. -->
<style name="AppTheme" parent="Theme.AppCompat.Light.DarkActionBar">
 <item name="colorPrimary">@color/colorPrimary</item>
 <item name="colorPrimaryDark">@color/colorPrimaryDark</item>
 <item name="colorAccent">@color/colorAccent</item>
</style>
AppTheme遵循Material Design.因此,為了創建符合Material Design spec的主題,使用AppTheme作為parent是一個不錯的主題。要不然,你也可以直接使用Theme.AppCompat作為parent。
雖然你可以書寫XML代碼來創建主題-記住,它們只是樣式而已-但是在本教程,我將演示如何使用Android Studio的主題編輯器來做這些復雜的工作。
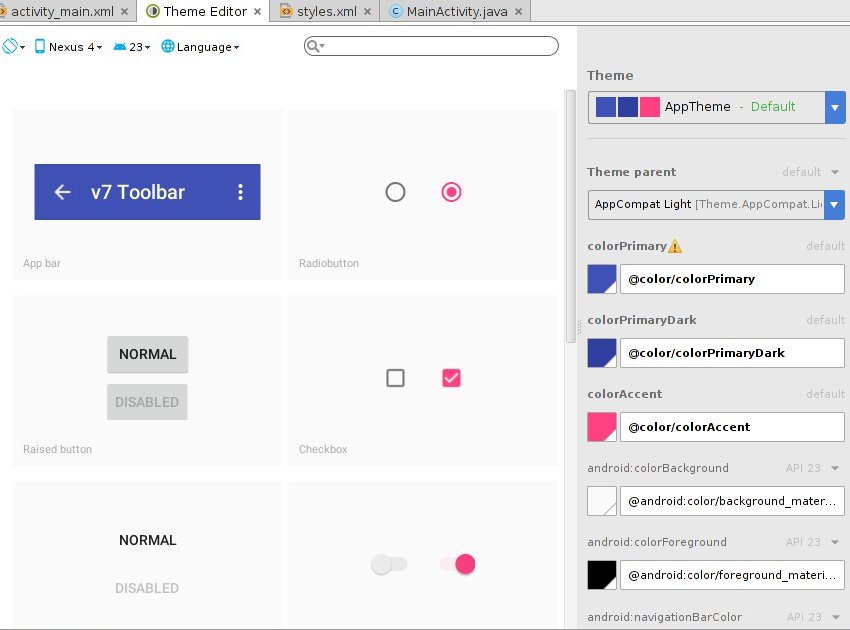
要打開主題編輯器,打開Tools菜單選擇Android > Theme Editor。
在主題編輯器窗口的右邊,你不僅有修改主題的控件,還有創建一個新主題的控件。左邊展示主題修改後的預覽結果。
要創建一個新主題,點擊Theme下拉菜單,選擇Create New Theme選項。
在彈出的對話框中,設置新主題的名稱為MyTheme然後點擊ok。

到此時, styles.xml將有一行新代碼:
<style name="MyTheme" parent="AppTheme" />
讓我們使用主題編輯器來修改MyTheme。為了讓事情變的簡單,本教程只修改colorPrimary, colorPrimaryDark, 以及 colorAccent屬性的值。
要修改colorPrimary的值,點擊colorPrimary按鈕。主題編輯器將顯示一個顏色對話框。選擇你想要的顏色,但是記住給它一個新名字,如果你忘記了,主題編輯器將覆蓋AppTheme的這個顏色。
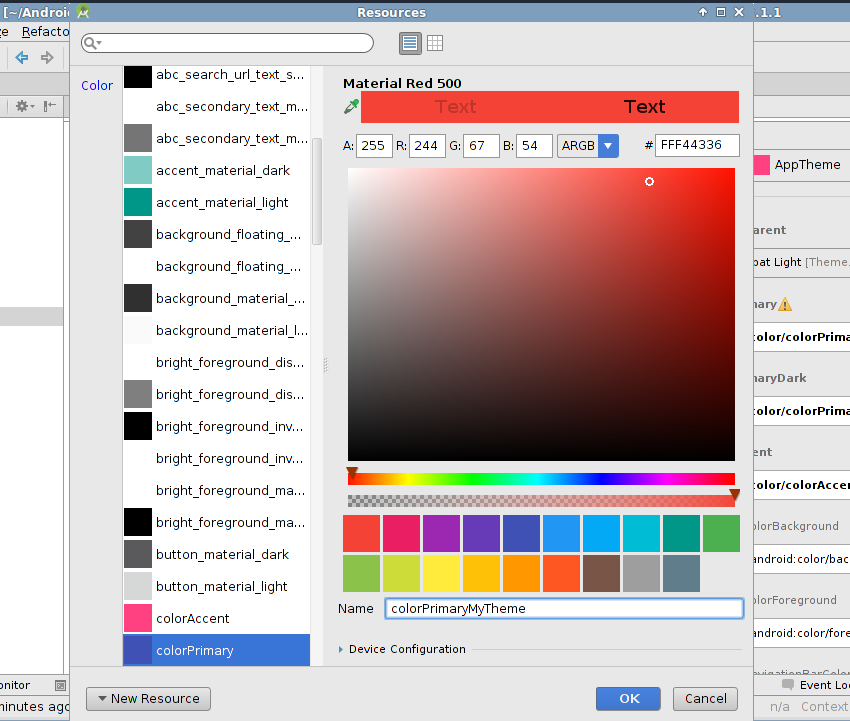
修改colorPrimaryDark和colorAccent的值是相同的步驟。主題編輯器將自動根據你選擇的colorPrimary推薦合適的bothcolorPrimaryDark和colorAccent。
現在MyTheme的定義看起來就是這樣:
<style name="MyTheme" parent="AppTheme" >
 <item name="colorPrimary">@color/colorPrimaryMyTheme</item>
 <item name="colorPrimaryDark">@color/colorPrimaryDarkMyTheme</item>
 <item name="colorAccent">@color/colorAccentMyTheme</item>
</style>
五、 應用Themes
在應用我們創建的主題之前,讓我們先添加幾個常用的控件到activity中。這樣更容易看到主題的效果。
下面的代碼創建了一個普通的Button,一個無邊框的Button,一個彩色的Button,一個Checkbox,一個RadioButton,一個Switch,一個Seekbar,一個TextView以及一個EditText:
<Button android:layout_width="match_parent"
 android:layout_height="wrap_content"
 android:text="normal"
 android:id="@+id/normal_button" />

<Button android:layout_width="match_parent"
 android:layout_height="wrap_content"
 android:text="borderless"
 android:id="@+id/borderless_button"
  />

<Button android:layout_width="match_parent"
 android:layout_height="wrap_content"
 android:text="colored"
 android:id="@+id/colored_button"
  />

<CheckBox android:layout_width="match_parent"
 android:layout_height="wrap_content"
 android:text="New CheckBox"
 android:id="@+id/checkBox" />

<RadioButton android:layout_width="match_parent"
 android:layout_height="wrap_content"
 android:text="New RadioButton"
 android:id="@+id/radioButton" />

<Switch android:layout_width="match_parent"
 android:layout_height="wrap_content"
 android:text="New Switch"
 android:id="@+id/switchButton" />

<SeekBar android:layout_width="match_parent"
 android:layout_height="wrap_content"
 android:id="@+id/seekBar" />

<TextView android:layout_width="match_parent"
 android:layout_height="wrap_content"
 android:text="New Text"
 android:id="@+id/textView" />

<EditText android:layout_width="match_parent"
 android:layout_height="wrap_content"
 android:id="@+id/editText"
 android:hint="Input" />
當添加了這些View之後,布局看起來就是這樣的:
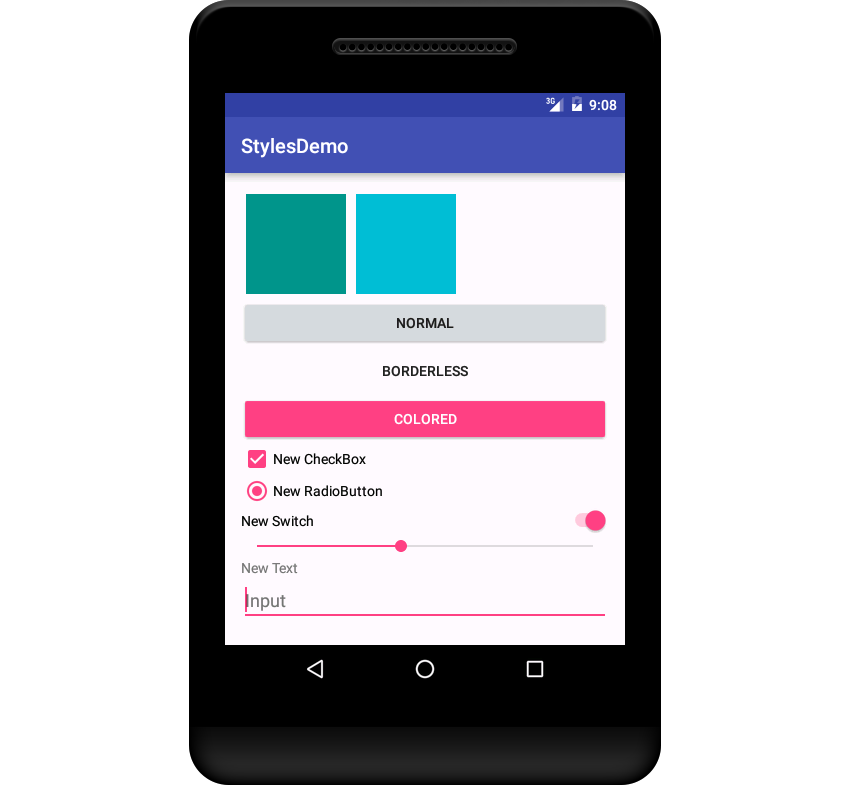
如果你讀過Material Design spec。我確定你可以看出來此時的activity為colorPrimary 和 colorPrimaryDark使用了靛藍色。而colorAccent使用的是粉色。這些都是Android Studio默認的顏色。你可以在項目的res/values/colors.xml中找到它們的hex值。
要在activity中使用這個主題,打開項目的manifest文件,在定義activity的地方添加android:theme屬性,把值設為@style/MyTheme。
<activity android:name=".MainActivity"
 android:theme="@style/MyTheme">
 <intent-filter>
  <action android:name="android.intent.action.MAIN" />
  <category android:name="android.intent.category.LAUNCHER" />
 </intent-filter>
</activity>
同樣,你還可以通過設置application的android:theme屬性把這個主題應用到整個app。
如果你現在看看你的activity,它應該有很大不同。

六、總結
在這個教程中,你學會了如何創建和應用自定義的樣式和主題。你可以把這些知識用來讓你的app變的更好看。現在多數用戶都已經習慣了 Material Design,偏離規則太遠會干擾到他們。以上就是這篇文章的全部內容,希望對大家的學習和工作能帶來一定的幫助,如果有疑問可以留言交流。
 Android高級控件——GridView ScrollView ViewPager (上)
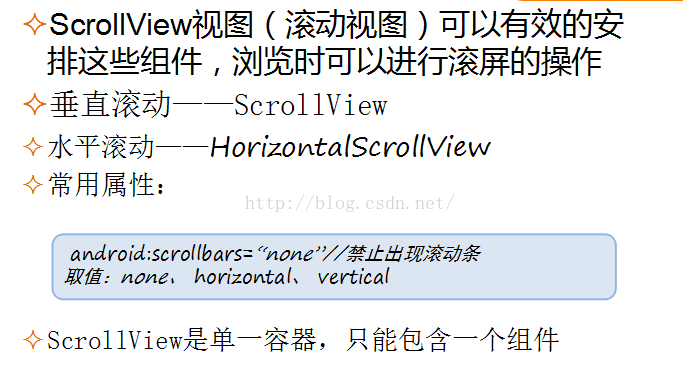
GridView網格視圖,網格視圖組件,九宮圖顯示數據表格(一種控件)ScrollView滾動視圖是一個單一容器,只能包含一個組件。ViewPager左右滑動SlideM
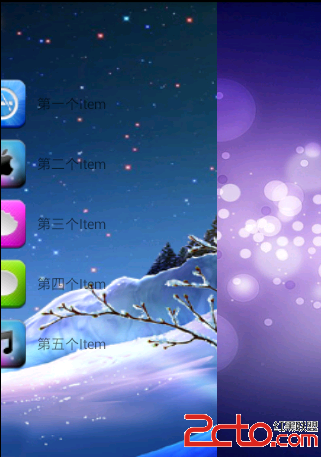 自定義android側滑菜單
這裡實現兩種側滑菜單效果,第一種拖拽內容部分,菜單像是被拖出來的感覺的這種效果,第二種是拖拽內容部分,菜單在內容後面不動,感覺有一種層次感的效果,如下 packa
 Android activity四大啟動模式詳解
Activity中四大啟動模式 在AndroidManifest.xml中 ,有一個默認的activity 在它裡面可以設置activity啟動模式, android
 Android中自定義View和自定義動畫
Android FrameWork 層給我們提供了很多界面組件,但是在實際的商業開發中這些組件往往並不能完全滿足我們的需求,這時候我們就需要自定義我們自己的視圖和動畫。