編輯:關於Android編程
本文實例講述了Android編程動態加載布局的方法。分享給大家供大家參考,具體如下:
由於前段時間項目需要,需要在一個頁面上加載根據不同的按鈕加載不同的布局頁面,當時想到用 tabhot 。不過美工提供的界面圖完全用不上tabhot ,所以想到了動態加載的方法來解決這一需求。在這裡我整理了一下,寫了一個 DEMO 希望大家以後少走點彎路。
首先,我們先把界面的框架圖畫出來,示意圖如下:
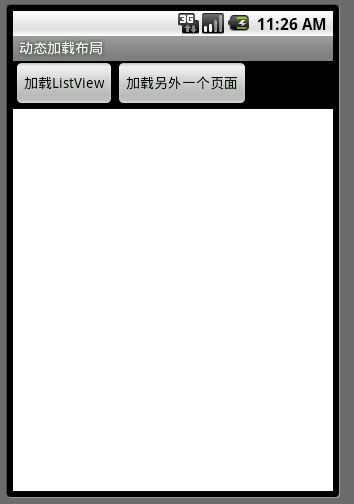
中間白色部門是一個線性布局文件,我喜歡在畫圖的時候用不同的顏色將一塊布局標示出來,方便查看。布局文件代碼如下:
<?xml version="1.0" encoding="utf-8"?>
<LinearLayout xmlns:android="http://schemas.android.com/apk/res/android"
 android:orientation="vertical" android:layout_width="fill_parent"
 android:layout_height="fill_parent">
 <LinearLayout android:orientation="horizontal"
  android:layout_width="wrap_content" android:layout_height="wrap_content">
  <Button android:text="加載ListView" android:id="@+id/Button01"
   android:layout_width="wrap_content" android:layout_height="wrap_content">
  </Button>
  <Button android:text="加載另外一個頁面" android:id="@+id/Button02"
   android:layout_width="wrap_content" android:layout_height="wrap_content"></Button>
 </LinearLayout>
 <LinearLayout android:id="@+id/LinearLayout01" android:background="#FFFFFF"
  android:layout_width="fill_parent" android:layout_height="fill_parent"></LinearLayout>
</LinearLayout>
從上面的效果圖可以看出,那塊白色的線性布局是用來動態加載傳進來的布局文件。好了,我們就來做如果把布局文件動態的加載進來。下面我們一步一步來實現這個效果,首先,先把需要的 XML 勾畫出來,分為步驟如下。
新建一個布局用來存放 ListView 頁面,代碼如下:
<?xml version="1.0" encoding="UTF-8"?>
<LinearLayout android:id="@+id/layout"
 android:layout_width="fill_parent" android:layout_height="fill_parent"
 xmlns:android="http://schemas.android.com/apk/res/android">
 <ListView android:id="@+id/ListView01" android:layout_width="wrap_content"
  android:layout_height="wrap_content"></ListView>
</LinearLayout>
新建一個 ListView 每一行數據的樣式,代碼如下:
<?xml version="1.0" encoding="UTF-8"?>
<LinearLayout android:id="@+id/LinearLayout01"
 android:layout_width="fill_parent" android:layout_height="fill_parent"
 xmlns:android="http://schemas.android.com/apk/res/android">
 <TextView android:text="@+id/TextView01" android:id="@+id/TextView01"
  android:layout_width="wrap_content" android:layout_height="wrap_content"></TextView>
</LinearLayout>
新建另外一個頁面,用來區分此頁面是動態加載的,代碼如下:
<?xml version="1.0" encoding="UTF-8"?>
<LinearLayout android:id="@+id/hellolayout"
 android:layout_width="fill_parent" android:layout_height="fill_parent"
 xmlns:android="http://schemas.android.com/apk/res/android">
 <TextView android:text="HELLO"
  android:layout_width="wrap_content" android:layout_height="wrap_content"></TextView>
</LinearLayout>
實現ListView 的添充數據,這裡不詳細介紹如何填充ListView 每行數據,有不解的朋友可以查看前面ListView相關文章 ,代碼如下:
package com.terry;
import java.util.ArrayList;
import java.util.HashMap;
import android.content.Context;
import android.view.LayoutInflater;
import android.view.View;
import android.view.ViewGroup;
import android.widget.BaseAdapter;
import android.widget.TextView;
public class listAdapter extends BaseAdapter {
 ArrayList<HashMap<String, Object>> list = new ArrayList<HashMap<String, Object>>();
 private LayoutInflater inflater;
 public listAdapter(Context contex)
 {
  inflater=LayoutInflater.from(contex);
  HashMap<String, Object> map=new HashMap<String, Object>();
  for (int i = 0; i < 10; i++) {
   map.put("name", "例子");
   list.add(map);
  }
 }
 @Override
 public int getCount() {
  // TODO Auto-generated method stub
  return list.size();
 }
 @Override
 public Object getItem(int position) {
  // TODO Auto-generated method stub
  return list.get(position);
 }
 @Override
 public long getItemId(int position) {
  // TODO Auto-generated method stub
  return position;
 }
 @Override
 public View getView(int position, View convertView, ViewGroup parent) {
  // TODO Auto-generated method stub
  final viewHolder myHolder;
  if (convertView==null) {
   myHolder=new viewHolder();
   convertView=inflater.inflate(R.layout.list_view_row, null);
   myHolder.tv=(TextView)convertView.findViewById(R.id.TextView01);
   convertView.setTag(myHolder);
  }
  else
  {
   myHolder=(viewHolder)convertView.getTag();
  }
  myHolder.tv.setText(list.get(position).get("name").toString());
  return convertView;
 }
}
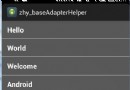
項目大綱如下圖:

好了,到此我們的准備工作就己經完成,接下來就是要教大家如何實現動態加載上面所畫的布局頁面了,先看一下效果圖:
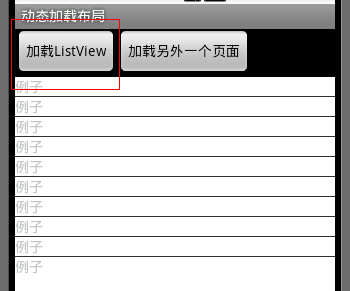
點擊第一個按鈕
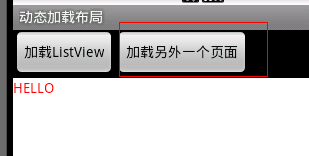
點擊第二個按鈕
動態加載代碼如下:
package com.terry;
import android.app.Activity;
import android.graphics.Color;
import android.os.Bundle;
import android.view.LayoutInflater;
import android.view.View;
import android.view.View.OnClickListener;
import android.widget.Button;
import android.widget.LinearLayout;
import android.widget.ListView;
import android.widget.TextView;
public class dynaActivity extends Activity {
 /** Called when the activity is first created. */
 @Override
 public void onCreate(Bundle savedInstanceState) {
  super.onCreate(savedInstanceState);
  setContentView(R.layout.main);
  final LayoutInflater inflater = LayoutInflater.from(this);
  Button btn = (Button) findViewById(R.id.Button01);
  Button btn2 = (Button) findViewById(R.id.Button02);
  final LinearLayout lin = (LinearLayout) findViewById(R.id.LinearLayout01);
  btn.setOnClickListener(new OnClickListener() {
   @Override
   public void onClick(View v) {
    // TODO Auto-generated method stub
    LinearLayout layout = (LinearLayout) inflater.inflate(
      R.layout.listview, null).findViewById(R.id.layout);
    ListView lv=(ListView)layout.getChildAt(0);
    lv.setAdapter(new listAdapter(dynaActivity.this));
    lin.removeAllViews();
    lin.addView(layout);
   }
  });
  btn2.setOnClickListener(new OnClickListener() {
   @Override
   public void onClick(View v) {
    // TODO Auto-generated method stub
    LinearLayout layout = (LinearLayout) inflater.inflate(
      R.layout.hello, null).findViewById(R.id.hellolayout);
     TextView lv=(TextView)layout.getChildAt(0);
     lv.setTextColor(Color.RED);
    lin.removeAllViews();
    lin.addView(layout);
   }
  });
 }
}
上面通過使用LayoutInflater 每次點擊按鈕時候去讀取布局文件,然後找到布局文件裡面的各個VIEW 操作完VIEW 後加載進我們setContentView 方面裡面的要放的布局文件裡面,每次動態加載文件必需 調用 removeAllViews方法,清除之前的加載進來的 View 。是不是很簡單?當然動態加載VIEW 還有許多種方法,多嘗試不同寫法。可能會領會不一樣的心得,祝你早上掌握android 的開發技術。
Tip:因為是基於VIEW 操作,因此你可以用 Animation 的動畫效果使其更換界面更為自然,觀賞性更強。
完整實例源碼點擊此處本站下載。
更多關於Android相關內容感興趣的讀者可查看本站專題:《Android布局layout技巧總結》、《Android開發入門與進階教程》、《Android調試技巧與常見問題解決方法匯總》、《Android多媒體操作技巧匯總(音頻,視頻,錄音等)》、《Android基本組件用法總結》、《Android視圖View技巧總結》及《Android控件用法總結》
希望本文所述對大家Android程序設計有所幫助。
 Android 快速開發系列 打造萬能的ListView GridView 適配器
1、概述 相信做Android開發的寫得最多的就是ListView,GridView的適配器吧,記得以前開發一同事開發項目,一個項目下來基本就一直在寫Lis
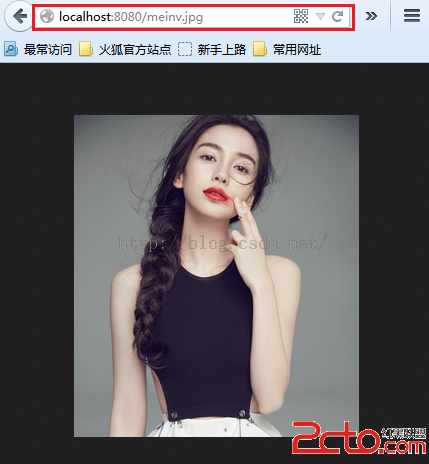 Android 網絡學習之獲取服務器的圖片
首先需要搭建一個Tomcat服務器,然後測試服務器上的圖片使用PC上的浏覽器是否可以正常下載下來可以看到服務器上的圖片數據是可以正常訪問的。圖片的地址:http://lo
 Android——ViewPager和內部view之間的事件分發及輪播圖
viewpager 在滑動的過程中是如何觸發view身上的事件的,換句話說,viewpager在滑動的過程中到底是滑動的它裡面的view,還是滑動的viewpager本身
 Android App開發中自定義View和ViewGroup的實例教程
ViewAndroid所有的控件都是View或者View的子類,它其實表示的就是屏幕上的一塊矩形區域,用一個Rect來表示,left,top表示View相對於它的pare