編輯:關於Android編程
Android自定義相機實現自動對焦和手動對焦:
不調用系統相機,因為不同的機器打開相機呈現的界面不統一也不能滿足需求。
所以為了讓程序在不同的機器上呈現出統一的界面,並且可以根據需求進行布局,做了此demo。
程序實現代碼如下:
import java.io.File;
import java.io.FileNotFoundException;
import java.io.FileOutputStream;
import java.io.IOException;
import java.lang.reflect.Method;

import android.graphics.PixelFormat;
import android.hardware.Camera;
import android.hardware.Camera.AutoFocusCallback;
import android.hardware.Camera.Parameters;
import android.hardware.Camera.PictureCallback;
import android.hardware.Camera.ShutterCallback;
import android.os.Build;
import android.os.Bundle;
import android.util.Log;
import android.view.SurfaceHolder;
import android.view.SurfaceView;
import android.view.View;
import android.view.View.OnClickListener;
import android.widget.Button;

import com.hp.classes.config.Constants;
import com.hp.classes.tools.CommonUtils;
import com.hp.classes.ui.BaseActivity;

@SuppressWarnings("deprecation")
public class PhotographActivity extends BaseActivity implements OnClickListener, SurfaceHolder.Callback {
  private SurfaceView surfaceView;
  private Camera camera;
  private Camera.Parameters parameters;
  private Button btn_goback, btn_takephoto;
  private SurfaceHolder surfaceHolder;

  @Override
  protected void onDestroy() {
    super.onDestroy();
    if(camera != null){
      camera.stopPreview();
      camera.release();
      camera = null;
    }
  }

  @Override
  protected void onCreate(Bundle savedInstanceState) {
    super.onCreate(savedInstanceState);
    setContentView(R.layout.classes_activity_takephoto);
    initView();
  }

  @Override
  protected void onResume() {
    super.onResume();
    initCamera();
  }
  private void initView(){
    btn_goback = (Button) findViewById(R.id.btn_goback);
    btn_goback.setOnClickListener(this);
    btn_takephoto = (Button) findViewById(R.id.btn_takephoto);
    btn_takephoto.setOnClickListener(this);

    surfaceView = (SurfaceView) findViewById(R.id.surfaceView);
    surfaceView.setFocusable(true);
    surfaceView.setOnClickListener(this);
    surfaceView.setBackgroundColor(TRIM_MEMORY_BACKGROUND);
    surfaceHolder = surfaceView.getHolder();
    surfaceHolder.setType(SurfaceHolder.SURFACE_TYPE_PUSH_BUFFERS);
    surfaceHolder.setKeepScreenOn(true);
    surfaceHolder.setFixedSize(400, 300);
    surfaceHolder.addCallback(this);
  }
  @Override
  public void surfaceDestroyed(SurfaceHolder holder) {
    // TODO Auto-generated method stub
    camera.stopPreview();
    camera.release();
    camera = null;

  }

  @Override
  public void surfaceCreated(SurfaceHolder holder) {
    // TODO Auto-generated method stub
    try {
      camera.setPreviewDisplay(surfaceHolder);
    } catch (IOException e) {
      e.printStackTrace();
    }
  }

  @Override
  public void surfaceChanged(SurfaceHolder holder, int format, int width, int height) {
    // 實現自動對焦
    camera.autoFocus(new AutoFocusCallback() {
      @Override
      public void onAutoFocus(boolean success, Camera camera) {
        if (success) {
          camera.cancelAutoFocus();// 只有加上了這一句,才會自動對焦
          doAutoFocus();
        }
      }
    });
  }

  // 相機參數的初始化設置
  private void initCamera() {
    if (null == camera) {
      camera = Camera.open();
    }
    parameters = camera.getParameters();
    parameters.setPictureFormat(PixelFormat.JPEG);
    parameters.setFlashMode(Parameters.FLASH_MODE_TORCH);
    if (!Build.MODEL.equals("KORIDY H30")) {
      parameters.setFocusMode(Camera.Parameters.FOCUS_MODE_CONTINUOUS_PICTURE);// 1連續對焦
    }else{
      parameters.setFocusMode(Camera.Parameters.FOCUS_MODE_AUTO);
    }
    camera.setParameters(parameters);
    setDispaly(camera);
    camera.startPreview();
    camera.cancelAutoFocus();// 2如果要實現連續的自動對焦,這一句必須加上
  }

  // 控制圖像的正確顯示方向
  private void setDispaly(Camera camera) {
    if (Integer.parseInt(Build.VERSION.SDK) >= 8) {
      setDisplayOrientation(camera, -90);
    } else {
      parameters.setRotation(-90);
    }

  }

  // 實現的圖像的正確顯示
  private void setDisplayOrientation(Camera camera, int i) {
    Method downPolymorphic;
    try {
      downPolymorphic = camera.getClass().getMethod("setDisplayOrientation", new Class[] { int.class });
      if (downPolymorphic != null) {
        downPolymorphic.invoke(camera, new Object[] { i });
      }
    } catch (Exception e) {
      Log.e("Came_e", "圖像出錯");
    }
  }

  @Override
  public void onClick(View v) {
    switch (v.getId()) {
    case R.id.surfaceView:
      doAutoFocus();
      break;
    case R.id.btn_takephoto:
      takePicture();
      break;
    case R.id.btn_goback:
      finish();
      break;
    default:
      break;
    }
  }

  // handle button auto focus
  private void doAutoFocus() {
    parameters = camera.getParameters();
    parameters.setFocusMode(Camera.Parameters.FOCUS_MODE_AUTO);
    camera.setParameters(parameters);
    camera.autoFocus(new AutoFocusCallback() {
      @Override
      public void onAutoFocus(boolean success, Camera camera) {
        if (success) {
          camera.cancelAutoFocus();// 只有加上了這一句,才會自動對焦。
          if (!Build.MODEL.equals("KORIDY H30")) {
            parameters = camera.getParameters();
            parameters.setFocusMode(Camera.Parameters.FOCUS_MODE_CONTINUOUS_PICTURE);// 1連續對焦
            camera.setParameters(parameters);
          }else{
            parameters = camera.getParameters();
            parameters.setFocusMode(Camera.Parameters.FOCUS_MODE_AUTO);
            camera.setParameters(parameters);
          }
        }
      }
    });
  }

  private void takePicture() {
    camera.takePicture(shutterCallback, rawCallback, jpegCallback);
  }

  // define shutterCallback
  ShutterCallback shutterCallback = new ShutterCallback() {
    public void onShutter() {
      // TODO Do something when the shutter closes.
    }
  };

  PictureCallback rawCallback = new PictureCallback() {
    public void onPictureTaken(byte[] data, Camera camera) {
      // TODO Do something with the image RAW data.
    }
  };

  // stroe the picture in format jpeg
  PictureCallback jpegCallback = new PictureCallback() {
    public void onPictureTaken(byte[] data, Camera camera) {
      // Save the image JPEG data to the SD card
      FileOutputStream outStream = null;
      try {
        //修改圖片路徑和名稱
        String tempFilename = String.valueOf(System.currentTimeMillis()) + ".jpg";
        File folder = Constants.CACHE_FOLDER;
        if (!folder.isDirectory()) {
          folder.mkdirs();
        }
        String path = Constants.CACHE_FOLDER + File.separator + tempFilename;
        outStream = new FileOutputStream(path);
        outStream.write(data);
        outStream.flush();
        outStream.close();
        surfaceView.setBackgroundDrawable(new BitmapDrawable(BitmapFactory.decodeByteArray(data, 0, data.length)));
      } catch (FileNotFoundException e) {
        Log.e("TAG", "File Note Found", e);
      } catch (IOException e) {
        Log.e("TAG", "IO Exception", e);
      }
    }
  };
}
classes_activity_takephoto.xml代碼如下:
<?xml version="1.0" encoding="utf-8"?>
<RelativeLayout xmlns:android="http://schemas.android.com/apk/res/android"
  android:layout_width="match_parent"
  android:layout_height="match_parent" >

  <SurfaceView
    android:id="@+id/surfaceView"
    android:layout_width="match_parent"
    android:layout_height="match_parent"
    android:layout_alignParentLeft="true"
    android:layout_toLeftOf="@+id/rlright" />

  <LinearLayout
    android:id="@+id/rlright"
    android:layout_width="40dp"
    android:layout_height="match_parent"
    android:layout_alignParentRight="true"
    android:background="#2b2b2b"
    android:gravity="center_horizontal"
    android:orientation="vertical" >

    <LinearLayout
      android:layout_width="wrap_content"
      android:layout_height="0dip"
      android:layout_weight="1"
      android:gravity="center" >

      <Button
        android:id="@+id/btn_goback"

        android:text="返回"/>
    </LinearLayout>

    <LinearLayout
      android:layout_width="wrap_content"
      android:layout_height="0dip"
      android:layout_weight="1"
      android:gravity="center" >

      <Button
        android:id="@+id/btn_takephoto"

        android:text="拍照" />
    </LinearLayout>
  </LinearLayout>

</RelativeLayout>
在清單文件需要添加相應權限:
  <uses-permission android:name="android.permission.CAMERA"/>
  <uses-feature android:name="android.hardware.camera"/>
  <uses-feature android:name="android.hardware.camera.autofocus"/>
以上就是本文的全部內容,希望對大家的學習有所幫助,也希望大家多多支持本站。
 Android自定義View實現水面上漲效果
實現效果如下:實現思路:1、如何實現圓中水面上漲效果:利用Paint的setXfermode屬性為PorterDuff.Mode.SRC_IN畫出進度所在的矩形與圓的交集
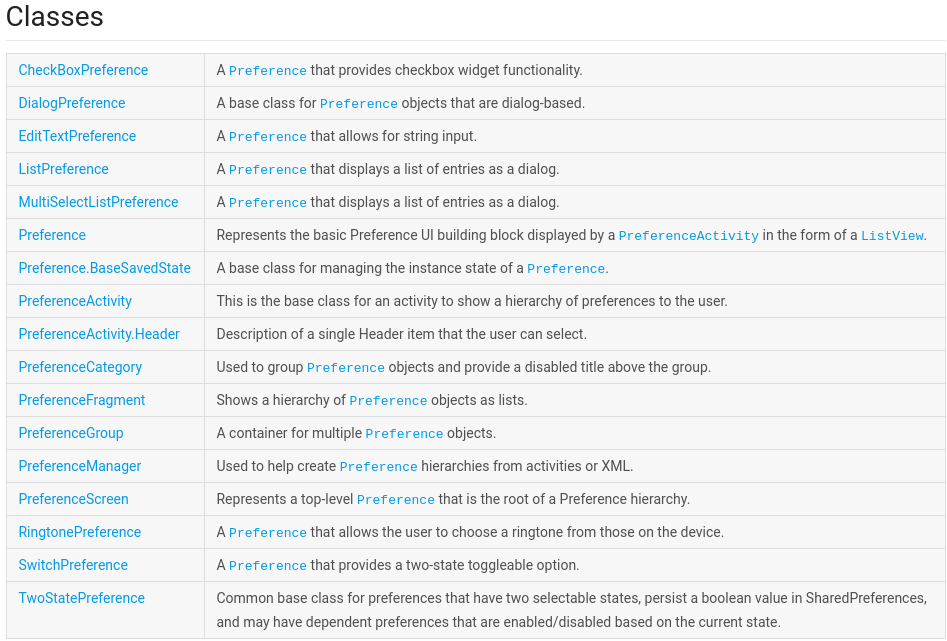 Android Settings(Preferences)開發
在Android的app開發中,很多時候我們的app需要提供用戶一個用戶體驗統一的,友好的setting界面,也就是設置界面。在android系統中,就有一個settin
 Android架構(一)MVP全解析
前言關於架構的文章,博主很早就想寫了,雖說最近比較流行MVVM,但是MVP以及MVC也沒有過時之說,最主要還是要根據業務來選擇合適的架構。當然現在寫MVP的文章很多,也有
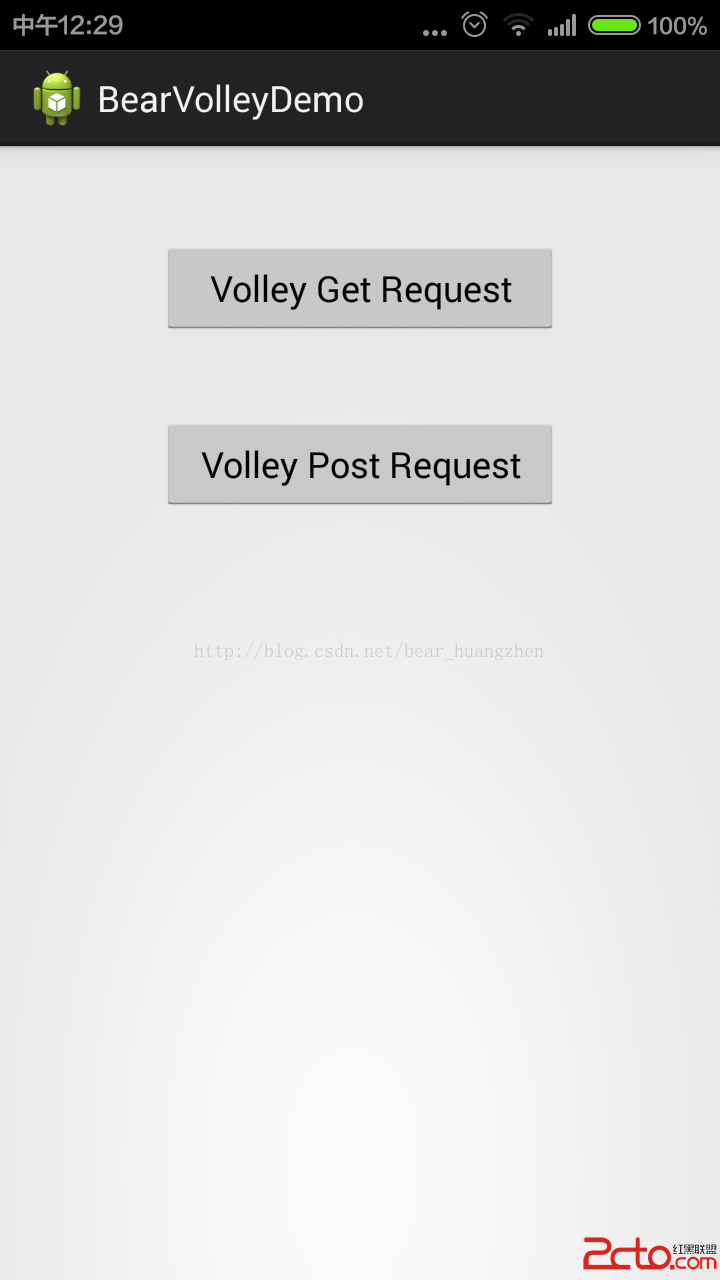 Android之Volley
簡介:Volley是Google I/O 2013上Google官方發布的一款Android平台上的網絡通信庫。以前的網絡請求,要考慮開啟線程、內存洩漏、性能等等復雜的問