編輯:關於Android編程
我們先來照圖分析一下:
(1)限制輸入6位,每一位都有自己的框格,每個格顯示一位;
(2)有回退/取消支付按鈕;
(3)有忘記密碼鏈接;
(4)自定義的只能輸入數字的鍵盤輸入區;
(5)在6位輸完後自動進行密碼校驗和支付交易。如上圖左邊是iOS支付寶支付密碼輸入控件,右邊是我模仿實現的效果。
首先,我們需要一個頁面來完成以上的靜態布局,.xml代碼如下:
<?xml version="1.0" encoding="utf-8"?>
<RelativeLayout xmlns:android="http://schemas.android.com/apk/res/android"
  android:layout_width="match_parent"
  android:layout_height="match_parent"
  android:background="#EEEEEE"
  android:gravity="bottom">

  <LinearLayout
    android:id="@+id/linear_pass"
    android:layout_width="match_parent"
    android:layout_height="wrap_content"
    android:orientation="vertical">

    <RelativeLayout
      android:layout_width="match_parent"
      android:layout_height="wrap_content"
      android:layout_margin="5dp">

      <!-- 取消按鈕 -->
      <ImageView
        android:id="@+id/img_cancel"
        android:layout_width="wrap_content"
        android:layout_height="wrap_content"
        android:background="@drawable/icon_clean" />

      <TextView
        android:layout_width="wrap_content"
        android:layout_height="wrap_content"
        android:layout_centerInParent="true"
        android:text="輸入密碼"
        android:textColor="#898181"
        android:textSize="20sp" />
    </RelativeLayout>

    <View
      android:layout_width="match_parent"
      android:layout_height="0.5dp"
      android:background="#555555" />

    <!-- 6位密碼框布局,需要一個圓角邊框的shape作為layout的背景 -->
    <LinearLayout
      android:layout_width="match_parent"
      android:layout_height="wrap_content"
      android:layout_marginLeft="40dp"
      android:layout_marginRight="40dp"
      android:layout_marginTop="20dp"
      android:background="@drawable/shape_input_area"
      android:orientation="horizontal">

      <!-- inputType設置隱藏密碼明文
         textSize設置大一點,否則“點”太小了,不美觀 -->
      <TextView
        android:id="@+id/tv_pass1"
        android:layout_width="0dp"
        android:layout_height="wrap_content"
        android:layout_weight="1"
        android:gravity="center"
        android:inputType="numberPassword"
        android:textSize="32sp" />

      <View
        android:layout_width="1dp"
        android:layout_height="match_parent"
        android:background="#999999" />

      <TextView
        android:id="@+id/tv_pass2"
        android:layout_width="0dp"
        android:layout_height="wrap_content"
        android:layout_weight="1"
        android:gravity="center"
        android:inputType="numberPassword"
        android:textSize="32sp" />

      <View
        android:layout_width="1dp"
        android:layout_height="match_parent"
        android:background="#999999" />

      <TextView
        android:id="@+id/tv_pass3"
        android:layout_width="0dp"
        android:layout_height="wrap_content"
        android:layout_weight="1"
        android:gravity="center"
        android:inputType="numberPassword"
        android:textSize="32sp" />

      <View
        android:layout_width="1dp"
        android:layout_height="match_parent"
        android:background="#999999" />

      <TextView
        android:id="@+id/tv_pass4"
        android:layout_width="0dp"
        android:layout_height="wrap_content"
        android:layout_weight="1"
        android:gravity="center"
        android:inputType="numberPassword"
        android:textSize="32sp" />

      <View
        android:layout_width="1dp"
        android:layout_height="match_parent"
        android:background="#999999" />

      <TextView
        android:id="@+id/tv_pass5"
        android:layout_width="0dp"
        android:layout_height="wrap_content"
        android:layout_weight="1"
        android:gravity="center"
        android:inputType="numberPassword"
        android:textSize="32sp" />

      <View
        android:layout_width="1dp"
        android:layout_height="match_parent"
        android:background="#999999" />

      <TextView
        android:id="@+id/tv_pass6"
        android:layout_width="0dp"
        android:layout_height="wrap_content"
        android:layout_weight="1"
        android:gravity="center"
        android:inputType="numberPassword"
        android:textSize="32sp" />
    </LinearLayout>

    <!-- 忘記密碼鏈接 -->
    <TextView
      android:id="@+id/tv_forgetPwd"
      android:layout_width="wrap_content"
      android:layout_height="wrap_content"
      android:layout_gravity="right"
      android:layout_margin="15dp"
      android:text="忘記密碼?"
      android:textColor="#354EEF" />
  </LinearLayout>

  <!-- 輸入鍵盤 -->
  <GridView
    android:id="@+id/gv_keybord"
    android:layout_width="match_parent"
    android:layout_height="wrap_content"
    android:layout_below="@id/linear_pass"
    android:layout_marginTop="40dp"
    android:background="@android:color/black"
    android:horizontalSpacing="0.5dp"
    android:numColumns="3"
    android:verticalSpacing="0.5dp" />
</RelativeLayout>
其中需要圓角背景shape_input_area.xml:
<?xml version="1.0" encoding="utf-8"?>
<shape xmlns:android="http://schemas.android.com/apk/res/android">
  <corners android:radius="5dp"/>
  <stroke android:color="@android:color/darker_gray"
    android:width="1dp"/>
  <solid android:color="@android:color/white"/>
</shape>
需要數字按鈕的背景selector_gride.xml:
<?xml version="1.0" encoding="utf-8"?>
<selector xmlns:android="http://schemas.android.com/apk/res/android">
  <item android:state_enabled="false">
    <shape>
      <solid android:color="#C0C4C7" />
    </shape>
  </item>
  <item android:state_enabled="true" android:state_pressed="false">
    <shape>
      <solid android:color="@android:color/white" />
    </shape>
  </item>
  <item android:state_enabled="true" android:state_pressed="true">
    <shape>
      <solid android:color="#C0C4C7" />
    </shape>
  </item>
</selector>
需要回退鍵背景selector_key_del.xml:
<?xml version="1.0" encoding="utf-8"?>
<selector xmlns:android="http://schemas.android.com/apk/res/android">
  <item android:state_enabled="false">
    <shape>
      <solid android:color="#C0C4C7" />
    </shape>
  </item>
  <item android:state_enabled="true" android:state_pressed="false">
    <shape>
      <solid android:color="#C0C4C7" />
    </shape>
  </item>
  <item android:state_enabled="true" android:state_pressed="true">
    <shape>
      <solid android:color="@android:color/white" />
    </shape>
  </item>
</selector>
下面來完成我們的自定義控件PasswordView.Java:
public class PasswordView extends RelativeLayout implements View.OnClickListener {
  Context context;

  private String strPassword;   //輸入的密碼
  private TextView[] tvList;   //用數組保存6個TextView,為什麼用數組?
                  //因為就6個輸入框不會變了,用數組內存申請固定空間,比List省空間(自己認為)
  private GridView gridView;  //用GrideView布局鍵盤,其實並不是真正的鍵盤,只是模擬鍵盤的功能
  private ArrayList<Map<String, String>> valueList;  //有人可能有疑問,為何這裡不用數組了?
                            //因為要用Adapter中適配,用數組不能往adapter中填充

  private ImageView imgCancel;
  private TextView tvForget;
  private int currentIndex = -1;  //用於記錄當前輸入密碼格位置

  public PasswordView(Context context) {
    this(context, null);
  }

  public PasswordView(Context context, AttributeSet attrs) {
    super(context, attrs);
    this.context = context;
    View view = View.inflate(context, R.layout.layout_popup_bottom, null);

    valueList = new ArrayList<Map<String, String>>();
    tvList = new TextView[6];

    imgCancel = (ImageView) view.findViewById(R.id.img_cancel);
    imgCancel.setOnClickListener(this);

    tvForget = (TextView) findViewById(R.id.tv_forgetPwd);
    tvForget.setOnClickListener(this);

    tvList[0] = (TextView) view.findViewById(R.id.tv_pass1);
    tvList[1] = (TextView) view.findViewById(R.id.tv_pass2);
    tvList[2] = (TextView) view.findViewById(R.id.tv_pass3);
    tvList[3] = (TextView) view.findViewById(R.id.tv_pass4);
    tvList[4] = (TextView) view.findViewById(R.id.tv_pass5);
    tvList[5] = (TextView) view.findViewById(R.id.tv_pass6);

    gridView = (GridView) view.findViewById(R.id.gv_keybord);

    setView();

    addView(view);   //必須要,不然不顯示控件
  }

  @Override
  public void onClick(View v) {
    switch (v.getId()) {
      case R.id.img_cancel:
        Toast.makeText(context, "Cancel", Toast.LENGTH_SHORT).show();
        break;
      case R.id.tv_forgetPwd:
        Toast.makeText(context, "Forget", Toast.LENGTH_SHORT).show();
        break;
    }
  }

  private void setView() {
    /* 初始化按鈕上應該顯示的數字 */
    for (int i = 1; i < 13; i++) {
      Map<String, String> map = new HashMap<String, String>();
      if (i < 10) {
        map.put("name", String.valueOf(i));
      } else if (i == 10) {
        map.put("name", "");
      } else if (i == 12) {
        map.put("name", "<<-");
      } else if (i == 11) {
        map.put("name", String.valueOf(0));
      }
      valueList.add(map);
    }

    gridView.setAdapter(adapter);
    gridView.setOnItemClickListener(new AdapterView.OnItemClickListener() {
      @Override
      public void onItemClick(AdapterView<?> parent, View view, int position, long id) {
        if (position < 11 && position != 9) {  //點擊0~9按鈕
          if (currentIndex >= -1 && currentIndex < 5) {   //判斷輸入位置————要小心數組越界
            tvList[++currentIndex].setText(valueList.get(position).get("name"));
          }
        } else {
          if (position == 11) {   //點擊退格鍵
            if (currentIndex - 1 >= -1) {   //判斷是否刪除完畢————要小心數組越界
              tvList[currentIndex--].setText("");
            }
          }
        }
      }
    });
  }

  //設置監聽方法,在第6位輸入完成後觸發
  public void setOnFinishInput(final OnPasswordInputFinish pass) {
    tvList[5].addTextChangedListener(new TextWatcher() {
      @Override
      public void beforeTextChanged(CharSequence s, int start, int count, int after) {

      }

      @Override
      public void onTextChanged(CharSequence s, int start, int before, int count) {

      }

      @Override
      public void afterTextChanged(Editable s) {
        if (s.toString().length() == 1) {
          strPassword = "";   //每次觸發都要先將strPassword置空,再重新獲取,避免由於輸入刪除再輸入造成混亂
          for (int i = 0; i < 6; i++) {
            strPassword += tvList[i].getText().toString().trim();
          }
          pass.inputFinish();  //接口中要實現的方法,完成密碼輸入完成後的響應邏輯
        }
      }
    });
  }

  /* 獲取輸入的密碼 */
  public String getStrPassword() {
    return strPassword;
  }

  /* 暴露取消支付的按鈕,可以靈活改變響應 */
  public ImageView getCancelImageView() {
    return imgCancel;
  }

  /* 暴露忘記密碼的按鈕,可以靈活改變響應 */
  public TextView getForgetTextView() {
    return tvForget;
  }

  //GrideView的適配器
  BaseAdapter adapter = new BaseAdapter() {
    @Override
    public int getCount() {
      return valueList.size();
    }

    @Override
    public Object getItem(int position) {
      return valueList.get(position);
    }

    @Override
    public long getItemId(int position) {
      return position;
    }

    @Override
    public View getView(int position, View convertView, ViewGroup parent) {
      ViewHolder viewHolder;
      if (convertView == null) {
        convertView = View.inflate(context, R.layout.item_gride, null);
        viewHolder = new ViewHolder();
        viewHolder.btnKey = (TextView) convertView.findViewById(R.id.btn_keys);
        convertView.setTag(viewHolder);
      } else {
        viewHolder = (ViewHolder) convertView.getTag();
      }
      viewHolder.btnKey.setText(valueList.get(position).get("name"));
      if(position == 9){
        viewHolder.btnKey.setBackgroundResource(R.drawable.selector_key_del);
        viewHolder.btnKey.setEnabled(false);
      }
      if(position == 11){
        viewHolder.btnKey.setBackgroundResource(R.drawable.selector_key_del);
      }

      return convertView;
    }
  };

  /**
   * 存放控件
   */
  public final class ViewHolder {
    public TextView btnKey;
  }
}
自認為代碼注釋還是可以的。就是在實現過程中要注意數組的越界問題,在輸入邏輯響應中要注意邏輯處理,也就是grideView的OnItemClickListener事件處理。其中用到自定義的接口OnPasswordInputFinish來實現輸入完成的事件回掉:
/**
 * Belong to the Project —— MyPayUI
 * Created by WangJ on 2015/11/25 17:15.
 *
 * 自定義接口,用於給密碼輸入完成添加回掉事件
 */
public interface OnPasswordInputFinish {
  void inputFinish();
}
還有就是Adapter中用到的每個按鈕Item的布局item_gride.xml:
<?xml version="1.0" encoding="utf-8"?>
<LinearLayout xmlns:android="http://schemas.android.com/apk/res/android"
  android:layout_width="match_parent"
  android:layout_height="match_parent">

  <!-- 模擬鍵盤按鈕,當然你可以用Button,但要注意Button和GrideView的點擊響應問題 -->
  <TextView
    android:id="@+id/btn_keys"
    android:layout_width="match_parent"
    android:layout_height="match_parent"
    android:padding="10dp"
    android:gravity="center"
    android:textSize="25sp"
    android:background="@drawable/selector_gride"/>
</LinearLayout>
好了,到此我們的自定義控件——模仿支付寶6位支付密碼輸入控件就完成了,下邊我們在Activity中用一下,檢驗一下效果:
我們在MianActivity中用用一下我們定義好的控件:
public class MainActivity extends Activity {

  @Override
  protected void onCreate(Bundle savedInstanceState) {
    super.onCreate(savedInstanceState);

    /************* 第一種用法————開始 ***************/
    setContentView(R.layout.activity_main);

    final PasswordView pwdView = (PasswordView) findViewById(R.id.pwd_view);

    //添加密碼輸入完成的響應
    pwdView.setOnFinishInput(new OnPasswordInputFinish() {
      @Override
      public void inputFinish() {
        //輸入完成後我們簡單顯示一下輸入的密碼
        //也就是說——>實現你的交易邏輯什麼的在這裡寫
        Toast.makeText(MainActivity.this, pwdView.getStrPassword(), Toast.LENGTH_SHORT).show();
      }
    });

    /**
     * 可以用自定義控件中暴露出來的cancelImageView方法,重新提供相應
     * 如果寫了,會覆蓋我們在自定義控件中提供的響應
     * 可以看到這裡toast顯示 "Biu Biu Biu"而不是"Cancel"*/
    pwdView.getCancelImageView().setOnClickListener(new View.OnClickListener() {
      @Override
      public void onClick(View v) {
        Toast.makeText(MainActivity.this, "Biu Biu Biu", Toast.LENGTH_SHORT).show();
      }
    });
    /************ 第一種用法————結束 ******************/


    /************* 第二種用法————開始 *****************/
//    final PasswordView pwdView = new PasswordView(this);
//    setContentView(pwdView);
//    pwdView.setOnFinishInput(new OnPasswordInputFinish() {
//      @Override
//      public void inputFinish() {
//        Toast.makeText(MainActivity.this, pwdView.getStrPassword(), Toast.LENGTH_SHORT).show();
//      }
//    });
    /************** 第二種用法————結束 ****************/
  }
}
在第一種方法中我們用到的布局文件:
<?xml version="1.0" encoding="utf-8"?>
<RelativeLayout
  android:id="@+id/xxx"
  xmlns:android="http://schemas.android.com/apk/res/android"
  android:layout_width="match_parent"
  android:layout_height="match_parent"
  android:background="#624762">

  <com.wangj.mypayview.PasswordView
    android:id="@+id/pwd_view"
    android:layout_width="match_parent"
    android:layout_height="wrap_content"
    android:layout_alignParentBottom="true"/>
</RelativeLayout>
以上就是本文的全部內容,希望對大家的學習有所幫助,也希望大家多多支持本站。
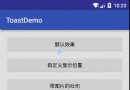
 詳解Android應用開發--MP3音樂播放器代碼實現(一)
需求1:將內存卡中的MP3音樂讀取出來並顯示到列表當中1.從數據庫中查詢所有音樂數據,保存到List集合當中,List當中存放的是Mp3Info對象2.迭代List集合,
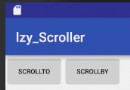 Android Scroller的用法詳解並完成ListView側滑菜單
Scroller是用於實現View的彈性滑動,在使用View的scrollTo或者scrollBy來進行滑動時,過程是瞬間完成的,這樣用戶體驗相當的不好。這時我們就要使用
 Android js啟動APK
1.在移動設備訪問m.alipay.com時,如果本地安裝了支付寶客戶端,則浏覽器會調用本地客戶端,沒有安裝則會跳轉到下載頁面,提示安裝。剛好有這樣的需求,就分析了下支付
 Android控件系列之XML靜態資源使用介紹
學習目的: 1、了解在Android中如何設置和調用XML資源 2、掌握如何利用XML和JAVA代碼進行協同開發界面 3、理解R文件的作用 開發Android時,總能看到