編輯:關於Android編程
在Android中,調用系統相機拍照時,將會接收到返回的圖像數據,但是這些圖片並不是全尺寸的圖像,而是系統給的縮略圖,當對拍照的圖片進行裁切後顯示時,得到的卻是模糊的圖片。下面針對這個問題提出解決的方法。
首先,我們知道調用系統的裁切是通過Intent intent = new Intent(“com.android.camera.action.CROP”);
但是intent到底能夠攜帶哪些數據呢,都有什麼含義呢,我們可以看到如下:
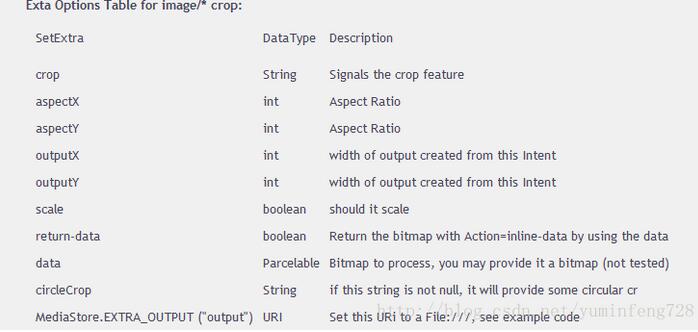
上面包含了所有可選的操作,其中有一些非常重要的參數。
intent.putExtra(“return-data”, true):表示裁剪後返回的數據為Bitmap,是存在內存中的縮略圖,效果模糊。獲取的方式為,在Activity中的onActivityResult方法中:
Bundle bundle = data.getExtras();
Bitmap bitmap = bundle.getParcelable("data");
為了獲取到裁切後的原圖,我們選擇將剪切的圖片保存在本地,然後調用本地的圖片,並不直接返回Bitmap.
intent.putExtra("return-data", false);
intent.putExtra("outputFormat", Bitmap.CompressFormat.JPEG.toString());
intent.putExtra(MediaStore.EXTRA_OUTPUT, uri);
下面代碼實現拍照/剪切並進行顯示的
 public static int TAKE_PHOTO_REQUEST_CODE = 1; //拍照
 public static int PHOTO_REQUEST_CUT = 2; //裁切
 public static int PHOTO_REQUEST_GALLERY = 3; //相冊
 public Uri imageUri;

 /**
  * 打開相機拍照
  */
 private void takePhotos() {

  imageUri = Uri.fromFile(getImageStoragePath(this));
  Intent intent = new Intent(MediaStore.ACTION_IMAGE_CAPTURE);
  //指定照片存儲路徑
  intent.putExtra(MediaStore.EXTRA_OUTPUT, imageUri);
  startActivityForResult(intent,TAKE_PHOTO_REQUEST_CODE);
 }

  /**
  * 打開相冊選擇圖片
  */
 private void choicePicFromAlbum() {
  Intent intent = new Intent(Intent.ACTION_PICK, MediaStore.Images.Media.EXTERNAL_CONTENT_URI);
  intent.setDataAndType(MediaStore.Images.Media.EXTERNAL_CONTENT_URI, "image/*");
  startActivityForResult(intent, PHOTO_REQUEST_GALLERY);
 }

  /**
  * 設置圖片保存路徑
  * @return
  */
 private File getImageStoragePath(Context context){
  if (Environment.getExternalStorageState().equals(Environment.MEDIA_MOUNTED)){
   File file = new File(context.getExternalFilesDir(Environment.DIRECTORY_PICTURES),"temp.jpg");
   return file;
  }
  return null;
 }

 @Override
 protected void onActivityResult(int requestCode, int resultCode, Intent data) {
  super.onActivityResult(requestCode, resultCode, data);
  if (requestCode == TAKE_PHOTO_REQUEST_CODE){
   if (imageUri != null){
    startPhotoZoom(imageUri);
   }
  }else if (requestCode == PHOTO_REQUEST_CUT){
   if (imageUri != null) {
    Bitmap bitmap = decodeUriBitmap(imageUri);
    imageView.setImageBitmap(bitmap);
   }
  }else if (requestCode == PHOTO_REQUEST_GALLERY){
   if (data != null) {
    imageUri = data.getData();
    Bitmap bitmap = decodeUriBitmap(imageUri);
    imageView.setImageBitmap(bitmap);
   }
  }
 }

 private Bitmap decodeUriBitmap(Uri uri) {
  Bitmap bitmap = null;
  try {
   bitmap = BitmapFactory.decodeStream(getContentResolver().openInputStream(uri));
  } catch (FileNotFoundException e) {
   e.printStackTrace();
   return null;
  }
  return bitmap;
 }

 /**
  * 調用系統裁剪
  *
  * @param uri
  */
 public void startPhotoZoom(Uri uri) {
  Intent intent = new Intent("com.android.camera.action.CROP");

  intent.setDataAndType(uri, "image/*");
  // crop為true是設置在開啟的intent中設置顯示的view可以剪裁
  intent.putExtra("crop", "true");
  intent.putExtra("scale", true);
  // aspectX aspectY 是寬高的比例
  intent.putExtra("aspectX", 1);
  intent.putExtra("aspectY", 1);

  // outputX,outputY 是剪裁圖片的寬高
  intent.putExtra("outputX", 800);
  intent.putExtra("outputY", 800);

  //設置了true的話直接返回bitmap,可能會很占內存
  intent.putExtra("return-data", false);
  //設置輸出的格式
  intent.putExtra("outputFormat", Bitmap.CompressFormat.JPEG.toString());
  //設置輸出的地址
  intent.putExtra(MediaStore.EXTRA_OUTPUT, uri);
  //不啟用人臉識別
  intent.putExtra("noFaceDetection", true);
  startActivityForResult(intent, PHOTO_REQUEST_CUT);
 }
以上就是本文的全部內容,希望對大家的學習有所幫助,也希望大家多多支持本站。
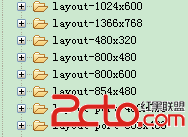 Android字體大小怎麼自適應不同分辨率?
今天有人問我,android系統不同分辨率,不同大小的手機,字體大小怎麼去適應呢?其實字體的適應和圖片的適應是一個道理的。 一、 原理如下: 假設需要適應320x240,
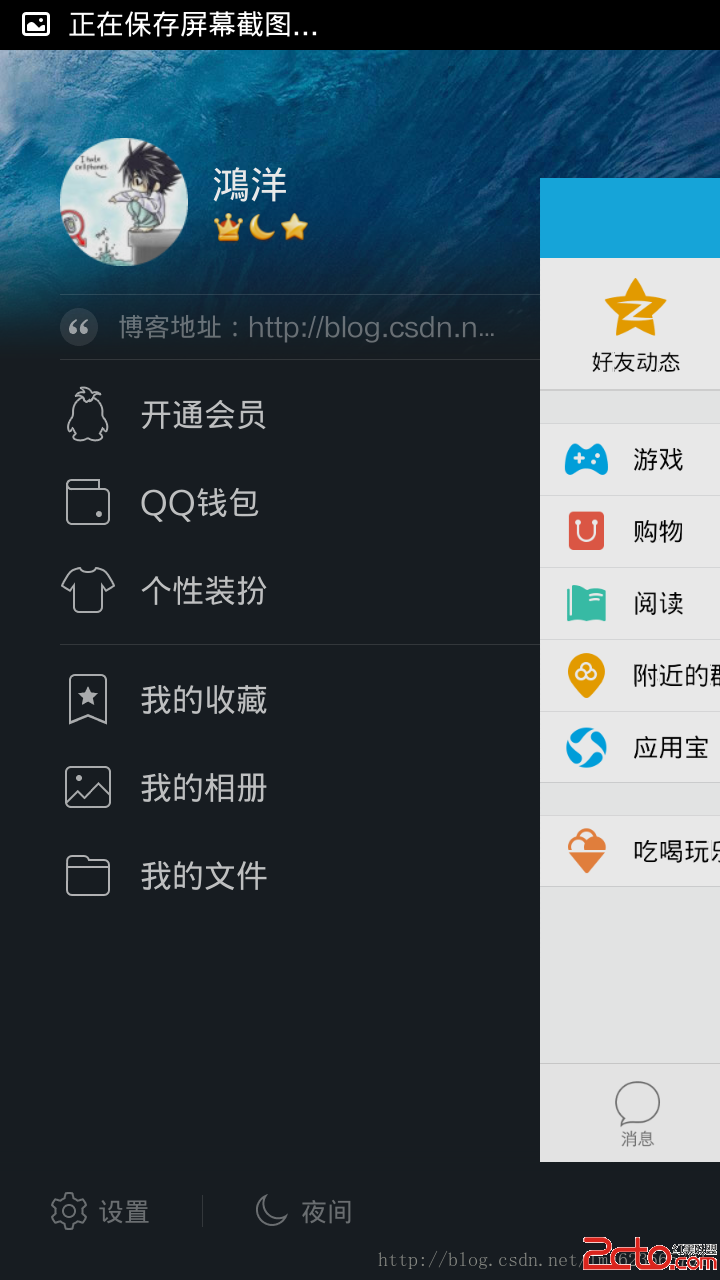 Android 高仿 QQ5.0 側滑菜單效果 自定義控件來襲
上一篇博客帶大家實現了:Android 自定義控件打造史上最簡單的側滑菜單 ,有兄弟看了以後說,你這滑動菜單過時了呀~QQ5.0的效果還不錯~~嗯,的確,上
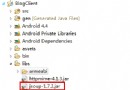 Android應用開發-小巫CSDN博客客戶端Jsoup篇
Android應用開發-小巫CSDN博客客戶端Jsoup篇 距上一篇博客已經過去了兩個星期,小巫也覺得非常抱歉,因為在忙著做另外一個項目,幾乎抽不出空來,這不小巫會把剩下
 Android顏色編輯器的制作中遇到的問題分析
Android沒有自帶顏色編輯器,為了讓用戶直觀的選擇顏色,做了這麼一個控件,效果圖如下:上方顏色條為主顏色條,用戶可以選擇大致需要的顏色,下方是該顏色的平衡調節,可以調