編輯:關於Android編程
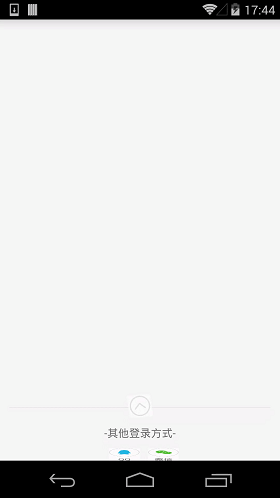
Android的UI和交互是很重要的一部分,直接影響到用戶對軟件的體驗。隨著項目經驗的積累,發現Android中動畫的運用越來越重要。本篇文章抽出了項目登錄界面中實現的第三方登錄,用戶可以上拉展開,下拉隱藏第三方登錄這麼一個效果,提高用戶和軟件的交互性。
實現效果:
(1)activity_main.xml
<?xml version="1.0" encoding="utf-8"?>
<RelativeLayout xmlns:android="http://schemas.android.com/apk/res/android"
  xmlns:tools="http://schemas.android.com/tools"
  android:layout_width="match_parent"
  android:layout_height="match_parent"
  tools:context="com.example.propertyanimation.MainActivity">

  <RelativeLayout
    android:layout_width="match_parent"
    android:layout_height="wrap_content"
    android:layout_alignParentBottom="true"
    android:orientation="vertical">

    <RelativeLayout
      android:id="@+id/re_ControlshowhideView"
      android:layout_width="match_parent"
      android:layout_height="wrap_content"
      android:layout_marginBottom="10dp"
      android:orientation="vertical">

      <RelativeLayout
        android:id="@+id/re_showarrowhead"
        android:layout_width="match_parent"
        android:layout_height="wrap_content">

        <View
          android:layout_width="match_parent"
          android:layout_height="0.1dp"
          android:layout_marginLeft="12dp"
          android:layout_marginRight="12dp"
          android:layout_marginTop="17dip"
          android:background="#dadada" />

        <ImageView
          android:id="@+id/arrowhead"
          android:layout_width="30dip"
          android:layout_height="30dip"
          android:layout_centerInParent="true"
          android:src="@drawable/jiantoubelow" />

      </RelativeLayout>

      <TextView
        android:layout_width="match_parent"
        android:layout_height="wrap_content"
        android:layout_below="@id/re_showarrowhead"
        android:layout_marginTop="10dp"
        android:gravity="center"
        android:text="-其他登錄方式-" />

    </RelativeLayout>

    <RelativeLayout
      android:id="@+id/showhideView"
      android:layout_width="match_parent"
      android:layout_height="wrap_content"
      android:layout_below="@id/re_ControlshowhideView"
      android:gravity="center"
      android:visibility="gone"
      android:orientation="vertical">

      <Button
        android:id="@+id/btn_qq"
        android:layout_width="40dp"
        android:layout_height="57.5dp"
        android:layout_gravity="center_vertical"
        android:layout_marginLeft="10dp"
        android:background="@drawable/qqlogin"
        android:clickable="true"
        android:gravity="center"
        android:paddingLeft="10dp"
        android:textSize="16sp" />

      <Button
        android:id="@+id/btn_weixin"
        android:layout_width="40dp"
        android:layout_height="57.5dp"
        android:layout_gravity="center_vertical"
        android:layout_marginLeft="10dp"
        android:layout_toRightOf="@+id/btn_qq"
        android:background="@drawable/weixinlogin"
        android:clickable="true"
        android:gravity="center"
        android:paddingLeft="10dp"
        android:textSize="16sp" />
    </RelativeLayout>

  </RelativeLayout>


</RelativeLayout>
(2)PropertyAnimation.java 這個文件主要是把實現的屬性動畫封裝到一個類裡,這樣一個功能就成為一個模塊。其它調用者也可以很方便的使用。
package com.example.propertyanimation;


import android.animation.Animator;
import android.animation.AnimatorListenerAdapter;
import android.animation.ValueAnimator;
import android.content.Context;
import android.view.View;
import android.view.ViewGroup;
import android.view.animation.Animation;
import android.view.animation.RotateAnimation;

public class PropertyAnimation {

  private float mDensity;

  private int mHiddenViewMeasuredHeight; //點擊箭頭的時候,需要隱藏的控件最終到達一個高度,
                      // 這個就是我們要控件到達的目標值。

  public PropertyAnimation(Context context){
    //點擊箭頭的時候,需要隱藏的控件最終到達一個高度,這個就是我們的目標值,只需要通過布局中的dp轉換成像素就行了。
    mDensity = context.getResources().getDisplayMetrics().density;
    mHiddenViewMeasuredHeight = (int) (mDensity * 57.5 + 0.5);
  }

  public void animateOpen(View v) {
    v.setVisibility(View.VISIBLE);
    //createDropAnimator()自定義的一個動畫效果函數
    ValueAnimator animator = createDropAnimator(v, 0,
        mHiddenViewMeasuredHeight);
    animator.start();
  }

  /**
   * 給控制動畫的箭頭設置動畫.
   * 給箭頭設置向上的動畫
   * @param view  控件
   */
  public void animationIvOpen(View view) {
    //旋轉動畫,參數說明:new RotateAnimation(旋轉的開始角度,旋轉的結束角度,X軸的伸縮模式:可以取值為ABSOLUTE、
    // RELATIVE_TO_SELF、RELATIVE_TO_PARENT,X坐標的伸縮值,Y軸的伸縮模式:可以取值為ABSOLUTE、RELATIVE_TO_SELF、
    // RELATIVE_TO_PARENT,Y坐標的伸縮值);
    RotateAnimation animation = new RotateAnimation(0, 180,
        Animation.RELATIVE_TO_SELF, 0.5f, Animation.RELATIVE_TO_SELF,
        0.5f);
    //動畫執行完後是否停留在執行完的狀態
    animation.setFillAfter(true);
    //持續時間
    animation.setDuration(100);
    //為箭頭圖片綁定動畫
    view.startAnimation(animation);
  }

  /**
   * 給控制動畫的箭頭設置動畫.
   * 給箭頭設置向下的動畫
   * @param view
   */
  public void animationIvClose(View view) {
    RotateAnimation animation = new RotateAnimation(180, 0,
        Animation.RELATIVE_TO_SELF, 0.5f, Animation.RELATIVE_TO_SELF,
        0.5f);
    animation.setFillAfter(true);
    animation.setDuration(100);
    view.startAnimation(animation);
  }

  /**
   * 設置隱藏動畫
   *
   * @param view //動畫作用的控件
   */
  public void animateClose(final View view) {
    //獲得控件的高度
    int origHeight = view.getHeight();
    //createDropAnimator()自定義的一個動畫效果函數
    ValueAnimator animator = createDropAnimator(view, origHeight, 0);
    //如果你不想實現Animator.AnimatorListener中的所有接口,你可以通過繼承AnimatorListenerAdapter。
    //AnimatorListenerAdapter類為所有的方法提供了一個空實現,所以你可以根據需要實現你需要的,覆蓋AnimatorListenerAdapter原來的方法
    animator.addListener(new AnimatorListenerAdapter() {
      @Override
      public void onAnimationEnd(Animator animation) {  //動畫結束時調用
        view.setVisibility(View.GONE);
      }
    });
    animator.start();
  }

  /**
   * 自定義的動畫效果
   *
   * @param v   //動畫作用的控件
   * @param start //動畫的開始值
   * @param end  //動畫的結束值
   * @return
   */
  private ValueAnimator createDropAnimator(final View v, int start, int end) {
    //這裡我們利用ValueAnimator.ofInt創建了一個值從start到end的動畫
    ValueAnimator animator = ValueAnimator.ofInt(start, end);
    //為ValueAnimator注冊AnimatorUpdateListener監聽器,在該監聽器中可以
    // 監聽ValueAnimator計算出來的值的改變,並將這些值應用到指定對象
    animator.addUpdateListener(new ValueAnimator.AnimatorUpdateListener() {

      @Override
      public void onAnimationUpdate(ValueAnimator arg0) {
        //獲取動畫當前值
        int value = (int) arg0.getAnimatedValue();
        //得到控件的屬性集合
        ViewGroup.LayoutParams layoutParams = v.getLayoutParams();
        //設置控件的高屬性
        layoutParams.height = value;
        //把屬性綁定到需要動畫的控件上
        v.setLayoutParams(layoutParams);
      }
    });
    return animator;
  }

}
(3)MainActivity.java 這個文件開始使用封裝好的屬性動畫了。
package com.example.propertyanimation;

import android.app.Activity;
import android.os.Bundle;
import android.view.View;
import android.widget.Button;
import android.widget.ImageView;
import android.widget.RelativeLayout;
import android.widget.Toast;

public class MainActivity extends Activity implements View.OnClickListener{

  private ImageView mIv_arrowhead;

  private RelativeLayout mHiddenLayout;

  private PropertyAnimation propertyAnimation;

  private Button btn_qq;  //QQ登錄按鈕

  private Button btn_weixin;  //微信登錄按鈕

  @Override
  protected void onCreate(Bundle savedInstanceState) {
    super.onCreate(savedInstanceState);
    setContentView(R.layout.activity_main);
    //自己定義的屬性動畫類
    propertyAnimation=new PropertyAnimation(this);
    //隱藏/顯示第三方登錄的箭頭圖標
    mIv_arrowhead = (ImageView) this.findViewById(R.id.arrowhead);
    mIv_arrowhead.setOnClickListener(this);
    //隱藏/顯示的布局
    mHiddenLayout = (RelativeLayout) this.findViewById(R.id.showhideView);
    //QQ登錄
    btn_qq = (Button) this.findViewById(R.id.btn_qq);
    btn_qq.setOnClickListener(this);
    //微信登錄
    btn_weixin=(Button)this.findViewById(R.id.btn_weixin);
    btn_weixin.setOnClickListener(this);

  }

  @Override
  public void onClick(View v) {
    switch (v.getId()) {
      case R.id.arrowhead:
        if (mHiddenLayout.getVisibility() == View.GONE) {
          propertyAnimation.animateOpen(mHiddenLayout);
          propertyAnimation.animationIvOpen(mIv_arrowhead);
        } else {
          propertyAnimation.animateClose(mHiddenLayout);
          propertyAnimation.animationIvClose(mIv_arrowhead);
        }
        break;
      case R.id.btn_qq:   //QQ授權登錄
        Toast.makeText(this,"QQ登錄",Toast.LENGTH_SHORT).show();
        break;
      case R.id.btn_weixin: //微信授權登錄
        Toast.makeText(this,"微信登錄",Toast.LENGTH_SHORT).show();
        break;
    }

  }
}
以上就是本文的全部內容,希望對大家的學習有所幫助,也希望大家多多支持本站。
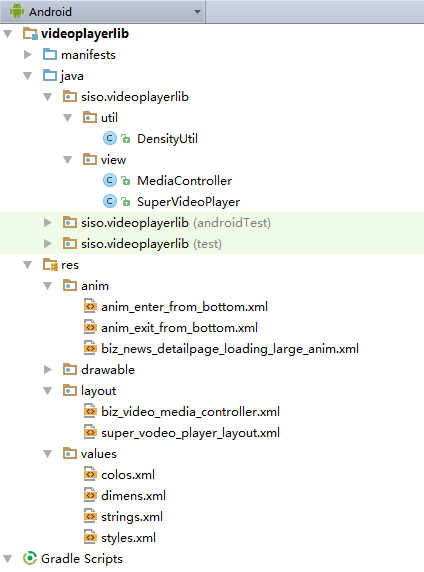 安卓Andriod使用入門(十九)【網絡視頻播放器】
MainActivity.java代碼:package siso.supervideoplayer;import android.content.pm.ActivityI
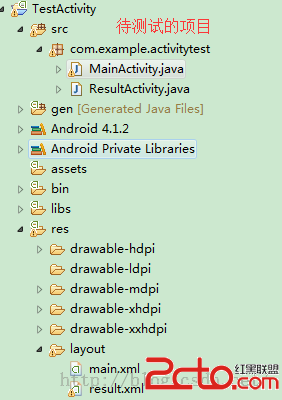 [Android初級]android單元測試之Activity單獨測試
有種情況,我們開發人員可能要對已經完成的應用做維護,其中某個界面可能存在bug,所以為了測試某個可能存在問題的功能界面而從入口一直開始跳至該界面,這個情況,我們測試人員可
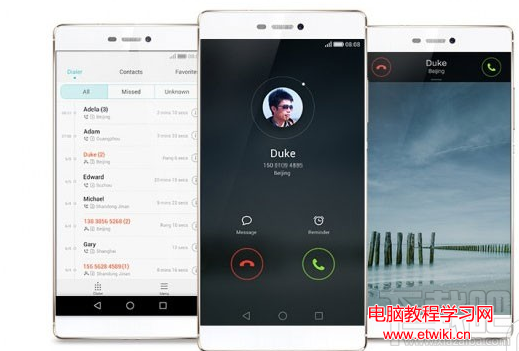 華為EMUI 5.0新系統怎麼樣 EMUI 5.0新系統什麼時候發布
華為手機基於Android打造了EMUI系統,目前最新版本是EMUI 4.1,版本是Android 6.0。據荷蘭媒體報道,他們從產業鏈獲悉,華為正在秘研E
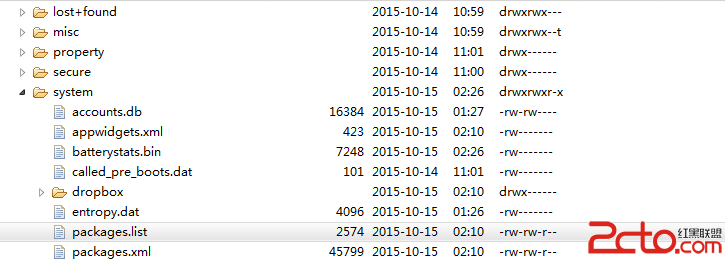 Android_02_文件訪問權限(待更新)
前言:打開 File Explorer可以看到: 10個字母表示的意義:drwxrwxrwx第一個字母:* d:表示文件夾* -:表示文件第一組rwx:表示的是