編輯:關於Android編程
先看看效果圖:
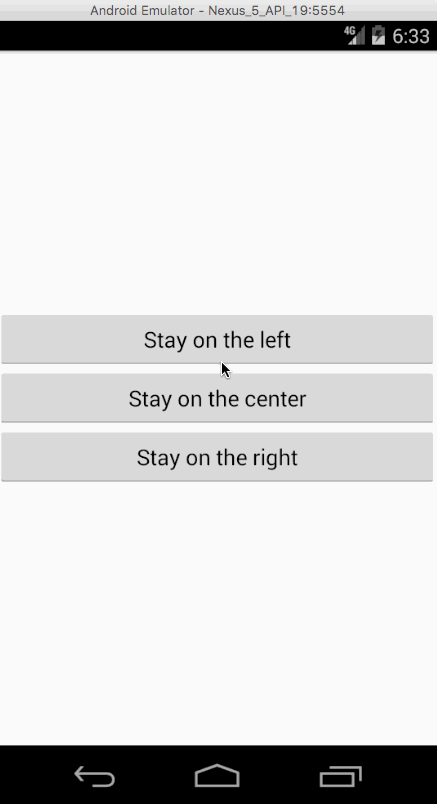
停在中間自動翻頁
序言:最近接到一個任務,做一個類似上面自動翻頁的功能。可以看到,這一屏中有三張圖片顯示出來了,有兩張沒有顯示完全,看到設計圖的時候第一反應是可以用viewpager來實現,但是任務卻跟你開了一個天大的玩笑,要求是以最左邊的圖片為基准,也就是說,左邊的圖片也得顯示完全,就像下圖所示,後來仔細想想viewpager好像沒有這樣的功能,也有可能是我不知道,我也沒有找到這樣的文章或者信息,希望知道的簡友私戳交流一下,感激不盡,好了,言歸正傳
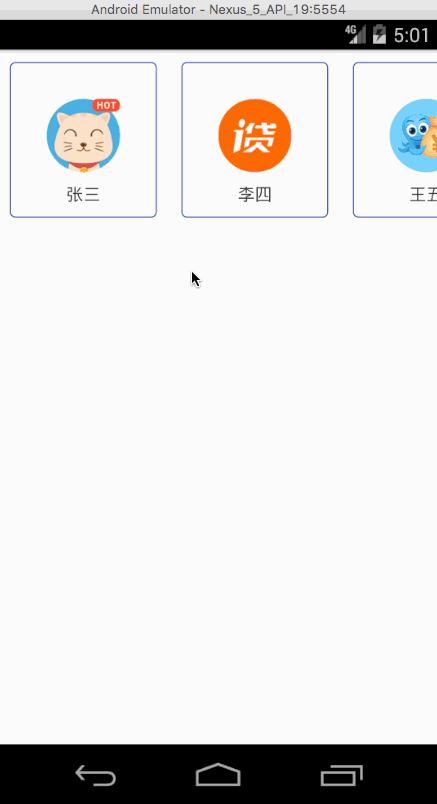
停在左邊
在開始之前呢,首先介紹一個Google最新(其實在24.2.0版本的時候就已經發布了)發布的一個東西SnapHelper,這玩意兒是對RecyclerView功能的一個拓展,有興趣的同學可以去看看它的源碼,SnapHelper的實現原理是監聽RecyclerView.OnFlingListener中的onFling接口,可以使RecyclerView實現類似ViewPager的功能,無論怎麼滑動最終停留在某頁正中間,那它和ViewPager的區別是什麼呢?就是ViewPager不能一次連續滑動多張圖片,而且不能定制(停在左邊,還是停在右邊)。下面我們一起來看看吧!
首先導入所需要的包,最低版本是v7-24.2.0,低了就沒有這個類了:
compile 'com.android.support:appcompat-v7:24.2.0'
compile 'com.android.support:recyclerview-v7:24.2.0'
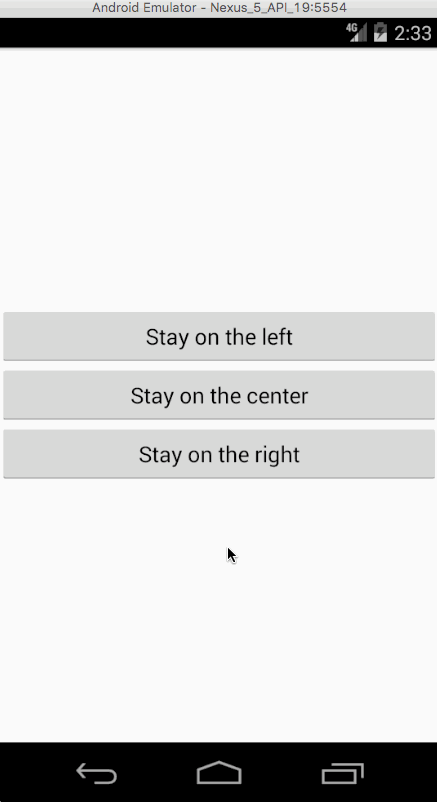
這裡系統自帶有一個類LinearSnapHelper,LinearSnapHelper繼承自SnapHelper,這個默認是讓視圖停在中間的,你只需要將RecyclerView和LinearSnapHelper綁定在一起就行了:
LinearSnapHelper mLinearSnapHelper = new LinearSnapHelper();
mLinearSnapHelper.attachToRecyclerView(mRecyclerview);
效果如下:
當然了,SnapHelper的功能絕不僅僅在此,你還可以定制化,讓他停在左邊,或者右邊,而你不需要重新繼承SnapHelper,直接繼承LinearSnapHelper就可以了,這裡面有很多寫好的方法,然後你再重寫裡面的兩個方法:
* (1)、calculateDistanceToFinalSnap:當拖拽或滑動結束時會回調該方法,返回一個out = int[2],out[0]x軸,out[1] y軸 ,這個值就是需要修正的你需要的位置的偏移量。 *
* (2)、findSnapView:這個方法用來獲取特定的視圖,當返回null時,表示沒有獲取到任何視圖 。*
完整的代碼:
public class LeftSnapHelper extends LinearSnapHelper {

 private OrientationHelper mHorizontalHelper;

 /**
 * 當拖拽或滑動結束時會回調該方法,該方法返回的是一個長度為2的數組,out[0]表示橫軸,x[1]表示縱軸,這兩個值就是你需要修正的位置的偏移量
 *
 * @param layoutManager
 * @param targetView
 * @return
 */
 @Override
 public int[] calculateDistanceToFinalSnap(RecyclerView.LayoutManager layoutManager, View targetView) {
 //注:由於是橫向滾動,在這裡我們只考慮橫軸的值
 int[] out = new int[2];
 if (layoutManager.canScrollHorizontally()) {
  out[0] = distanceToStart(targetView, getHorizontalHelper(layoutManager));
 } else {
  out[0] = 0;
 }
 return out;
 }

 /**
 * 這個方法是計算偏移量
 *
 * @param targetView
 * @param helper
 * @return
 */
 private int distanceToStart(View targetView, OrientationHelper helper) {
 return helper.getDecoratedStart(targetView) - helper.getStartAfterPadding();
 }

 @Override
 public View findSnapView(RecyclerView.LayoutManager layoutManager) {
 return findStartView(layoutManager, getHorizontalHelper(layoutManager));
 }

 /**
 * 找到第一個顯示的view
 * @param layoutManager
 * @param helper
 * @return
 */
 private View findStartView(RecyclerView.LayoutManager layoutManager,
    OrientationHelper helper) {
 if (layoutManager instanceof LinearLayoutManager) {
  int firstChild = ((LinearLayoutManager) layoutManager).findFirstVisibleItemPosition();
  int lastChild = ((LinearLayoutManager) layoutManager).findLastVisibleItemPosition();
  if (firstChild == RecyclerView.NO_POSITION) {
  return null;
  }

  //這是為了解決當翻到最後一頁的時候,最後一個Item不能完整顯示的問題
  if (lastChild == layoutManager.getItemCount() - 1) {
  return layoutManager.findViewByPosition(lastChild);
  }
  View child = layoutManager.findViewByPosition(firstChild);

  //得到此時需要左對齊顯示的條目
  if (helper.getDecoratedEnd(child) >= helper.getDecoratedMeasurement(child) / 2
   && helper.getDecoratedEnd(child) > 0) {
  return child;
  } else {
  return layoutManager.findViewByPosition(firstChild + 1);
  }
 }
 return super.findSnapView(layoutManager);
 }

 /**
 * 獲取視圖的方向
 *
 * @param layoutManager
 * @return
 */
 private OrientationHelper getHorizontalHelper(@NonNull RecyclerView.LayoutManager layoutManager) {
 if (mHorizontalHelper == null) {
  mHorizontalHelper = OrientationHelper.createHorizontalHelper(layoutManager);
 }
 return mHorizontalHelper;
 }
}
當然了,你也可以讓它停在右邊:只需要在上面的基礎上修改findSnapView方法即可:
public class RightSnapHelper extends LinearSnapHelper {

 private OrientationHelper mHorizontalHelper;

 /**
 * 當拖拽或滑動結束時會回調該方法,該方法返回的是一個長度為2的數組,out[0]表示橫軸,x[1]表示縱軸,這兩個值就是你需要修正的位置的偏移量
 *
 * @param layoutManager
 * @param targetView
 * @return
 */
 @Override
 public int[] calculateDistanceToFinalSnap(RecyclerView.LayoutManager layoutManager, View targetView) {
 //注:由於是橫向滾動,在這裡我們只考慮橫軸的值
 int[] out = new int[2];
 if (layoutManager.canScrollHorizontally()) {
  out[0] = distanceToEnd(targetView, getHorizontalHelper(layoutManager));
 } else {
  out[0] = 0;
 }
 return out;
 }

 /**
 * 這個方法是計算偏移量
 *
 * @param targetView
 * @param helper
 * @return
 */
 private int distanceToEnd(View targetView, OrientationHelper helper) {
 return helper.getDecoratedEnd(targetView) - helper.getEndAfterPadding();
 }

 @Override
 public View findSnapView(RecyclerView.LayoutManager layoutManager) {
 return findEndView(layoutManager, getHorizontalHelper(layoutManager));
 }

 /**
 * 找到第一個顯示的view
 *
 * @param layoutManager
 * @param helper
 * @return
 */
 private View findEndView(RecyclerView.LayoutManager layoutManager, OrientationHelper helper) {
 if (layoutManager instanceof LinearLayoutManager) {
  int lastChild = ((LinearLayoutManager) layoutManager).findLastVisibleItemPosition();
  if (lastChild == RecyclerView.NO_POSITION) {
  return null;
  }

  View child = layoutManager.findViewByPosition(lastChild);

  //得到此時需要右對齊顯示的條目
  if (helper.getDecoratedStart(child) >= helper.getDecoratedMeasurement(child) / 2
   && helper.getDecoratedStart(child) > 0) {
  return child;
  } else {
  return layoutManager.findViewByPosition(lastChild - 1);
  }
 }
 return super.findSnapView(layoutManager);
 }

 /**
 * 獲取視圖的方向
 *
 * @param layoutManager
 * @return
 */
 private OrientationHelper getHorizontalHelper(@NonNull RecyclerView.LayoutManager layoutManager) {
 if (mHorizontalHelper == null) {
  mHorizontalHelper = OrientationHelper.createHorizontalHelper(layoutManager);
 }
 return mHorizontalHelper;
 }
}
效果:
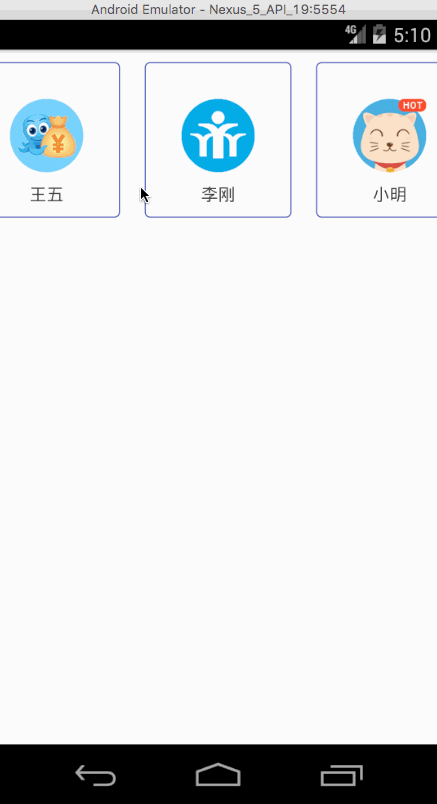
停在右邊
那如何讓它能無限的滑動呢?
這個當然是要在Adapter裡面“做手腳”了,讓獲取Item總數的方法返回Integer.MAX_VALUE就可以了:
@Override
public int getItemCount() {
 return Integer.MAX_VALUE;
}
然後在onBindViewHolder中獲取list中的值時相應的取余就好了:
@Override
public void onBindViewHolder(RecyclerViewHolder holder, int position) {
 Glide.with(mContext).load(mList.get(position % mList.size())
  .getImageUrl()).placeholder(R.mipmap.ic_launcher)
  .into(holder.ivImage);
 holder.tvName.setText(mList.get(position % mList.size()).getName());
}
好了,做到這裡就完成了80%了,接下來我們要讓它能夠自動滾動,如何能自動滾動呢?這裡可以參考一下ViewPager中自動滾動的效果,這裡LZ使用的是Timer來實現,Timer有一個每隔多長時間執行一次的功能,在這裡正好:
private int cnt = 2; //表示當前最右邊顯示的item的position
private boolean isSlidingByHand = false; //表示是否是手在滑動
private boolean isSlidingAuto = true; //表示是否自動滑動

timer.schedule(new TimerTask() {
 @Override
 public void run() {
  if (isSlidingAuto) {
  myHandler.sendEmptyMessage(CHANGE_ITEM);
  }
 }
 }, 1000, 3000);
考慮到這裡有兩種滑動,一種是用戶手動的滑動,另一種是我們的Timer來出發滑動,我們還得對RecyclerView設置監聽,來簡單判斷一下是用戶觸發的還是Timer觸發的:
alRecyclerview.addOnScrollListener(new RecyclerView.OnScrollListener() {
 @Override
 public void onScrollStateChanged(RecyclerView recyclerView, int newState) {
  LinearLayoutManager manager = (LinearLayoutManager) recyclerView.getLayoutManager();
  int firstVisibleItemPosition = manager.findFirstVisibleItemPosition();
  switch (newState) {
  case SCROLL_STATE_IDLE: //(靜止沒有滾動)
   if (isSlidingByHand) {
   Message msg = myHandler.obtainMessage();
   msg.arg1 = firstVisibleItemPosition;
   msg.what = CHANGE_ITEM;
   myHandler.sendMessage(msg);
   }
   break;
  case SCROLL_STATE_DRAGGING: //(正在被外部拖拽,一般為用戶正在用手指滾動)
   isSlidingByHand = true;
   isSlidingAuto = false;
   break;
  case SCROLL_STATE_SETTLING: //(自動滾動)
   if (isSlidingByHand) {
   isSlidingAuto = false;
   } else {
   isSlidingAuto = true;
   }
   break;
  }
 }
 });
最後的處理結果當然是交給Handler來了:
private static class MyHandler extends Handler {
 //采用弱引用的方式,防止內存洩漏
 WeakReference<CenterActivity> weakReference;

 public MyHandler(CenterActivity mActivity) {
 this.weakReference = new WeakReference<>(mActivity);
 }

 @Override
 public void handleMessage(Message msg) {
 final CenterActivity mActivity = weakReference.get();
 Log.d(TAG, "handleMessage: " + "handler is running");
 if (mActivity.isSlidingByHand) {
  mActivity.cnt = msg.arg1;
  mActivity.isSlidingByHand = false;
  mActivity.isSlidingAuto = true;
  mActivity.cnt+=2;
  //讓RecyclerView平滑的滾動
  mActivity.alRecyclerview.smoothScrollToPosition(++mActivity.cnt);
 } else {
  mActivity.alRecyclerview.smoothScrollToPosition(++mActivity.cnt);
 }
 }
}
這樣差不多就好了,但是還有一個問題不知道各位有沒有關注到,滾動的時候並沒有那麼平滑,找了好久不知道是什麼原因,希望知道的朋友底下評論告知一聲。
參考文章:
OrientationHelper API
Android24.2.0支持庫中的SnapHelper學習和使用
感謝以上資料的幫助。
源碼我已上傳至Github,想了解的朋友可以自行下載,當然,如果有更好的想法,也可以一起交流。
以上就是本文的全部內容,希望對大家的學習有所幫助,也希望大家多多支持本站。
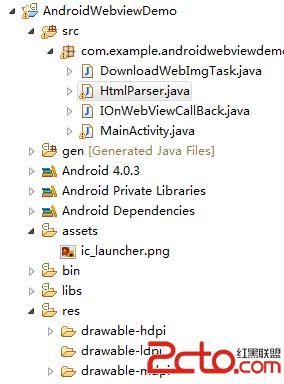 Android中WebView的相關使用
最近做的項目中,遇到個很棘手的問題: 客戶給我的數據是有限制的,因此,在返回某條具體頁面內容的時候,他只能給我一個html片段,裡面包含 文字,圖片以及附件的下載地址。如
 Android開發本地及網絡Mp3音樂播放器(十八)新下載歌曲加載准備SdcardSearchToList
掃描本地文件加載到item不限於應用到音樂播放器,其他Android工程,也可以使用SdcardSearchToList其他Android工程也可以使用,我現在做了很小的
 A09_Spinner(下拉列表)自定義設置
Spinner控件是一個下拉列表 1.實現Spinner的系統默認設置 2.實現自定義設置: 3.使用的監聽器接口是:OnItemSelectedListener系統默認
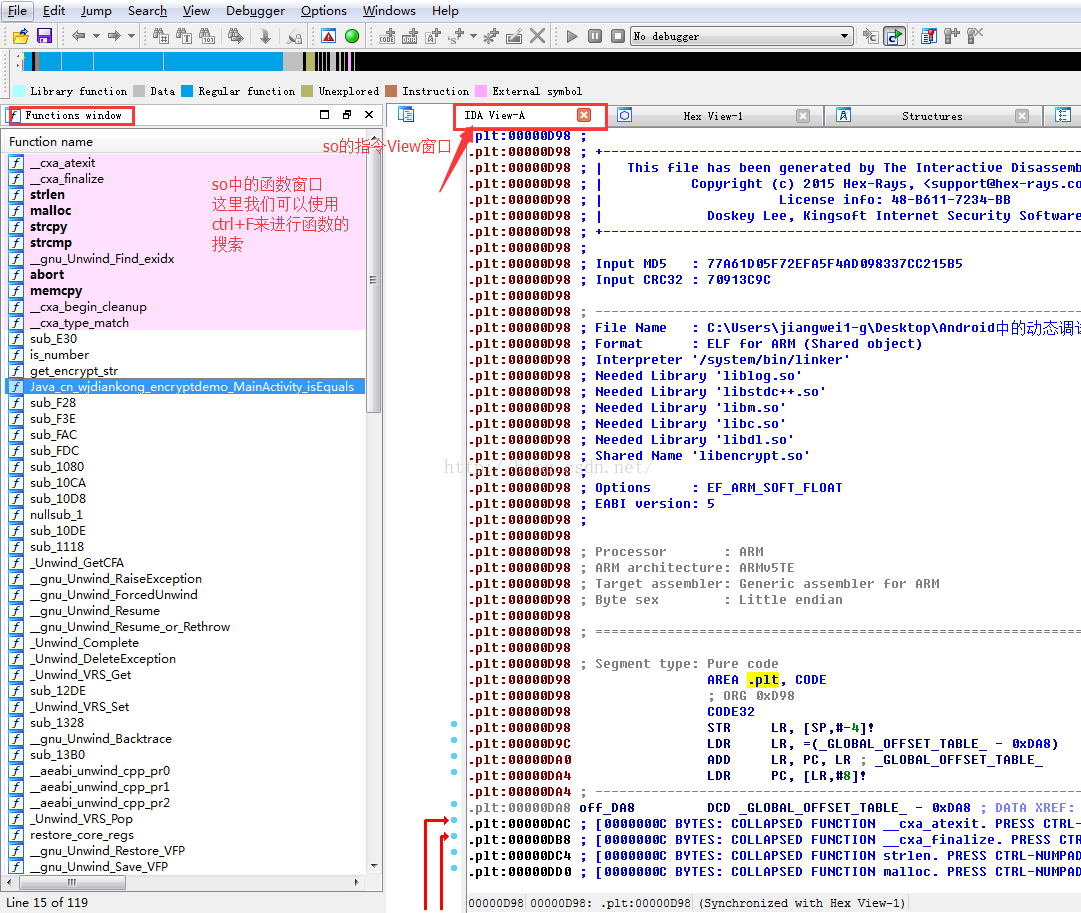 Android逆向之旅---動態方式破解apk進階篇(IDA調試so源碼)
一、前言今天我們繼續來看破解apk的相關知識,在前一篇:Eclipse動態調試smali源碼破解apk我們今天主要來看如何使用IDA來調試Android中的native源