編輯:Android開發實例
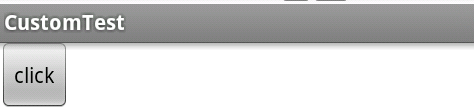
首先看看效果:
// 寬和高
private int width = 100;
private int height = 100;
其實獲取屏幕寬高的原因是為了適應android多種屏幕的變化,雖然很多時候可以用xml裡的dip定位,但是更多時候卻需要動態添加一些組件,然而在代碼裡面設置的值都是以xp來計算的,這樣做出來的軟件或者游戲根本就不能很好的適應屏幕。所以,如果不通過xml布局而要動態解決,那我覺得軟件界面的設計主要就是自己將界面寬高各分成十份(當然這裡分的粒度越少界面控制得越精細,不過管理起來也較為麻煩),然後在根據需要給它以寬和高。我也是說說自己做這些的感想,如果大家有更好的建議,不吝請教^-^
//例子
private String list = "3 5 7 9 0 43";
//要給組件的動畫的集合
private static final int[] INTERPOLATORS = {
android.R.anim.accelerate_interpolator,
android.R.anim.decelerate_interpolator,
android.R.anim.accelerate_decelerate_interpolator,
android.R.anim.anticipate_interpolator,
android.R.anim.overshoot_interpolator,
android.R.anim.anticipate_overshoot_interpolator,
android.R.anim.bounce_interpolator };
/////////balls_item.xml
<?xml version="1.0" encoding="utf-8"?>
<RelativeLayout xmlns:android="http://schemas.android.com/apk/res/android"
android:layout_width="fill_parent" android:layout_height="fill_parent"
android:orientation="horizontal">
<LinearLayout android:layout_width="fill_parent"
android:layout_height="wrap_content" android:orientation="horizontal"
android:id="@+id/layout" android:paddingRight="35dip"></LinearLayout>
<ImageView android:id="@+id/delete" android:scaleType="fitXY"
android:src="@drawable/delete" android:layout_width="30dip"
android:layout_height="30dip" android:layout_alignParentRight="true">
</ImageView>
</RelativeLayout>
/////////testBallSliding.java
public void onCreate(Bundle savedInstanceState) {
super.onCreate(savedInstanceState);
setContentView(R.layout.balls_item);
width = getWindowManager().getDefaultDisplay().getWidth();
height = getWindowManager().getDefaultDisplay().getHeight();
LinearLayout layout = (LinearLayout) findViewById(R.id.layout);
String[] buttons = list.split(" ");
for (int i = 0; i < buttons.length; i++) {
Button button = new Button(this);
button.setPadding(2, 2, 2, 2);
//這裡就是控制動畫的顯示位置
Animation animation = new TranslateAnimation(width + 50, i * 40, 0,
0);
//設置動畫的運動效果
animation.setInterpolator(getApplicationContext(), INTERPOLATORS[i
% INTERPOLATORS.length]);
animation.setDuration(4000 - 50 * i);
button.setAnimation(animation);
button.setText(buttons[i]);
button.setBackgroundResource(R.drawable.redball);
ImageView delete = (ImageView) findViewById(R.id.delete);
// 刪除的監聽
// .........
layout.addView(button,new LayoutParams(40, 40));
}
}
這裡先介紹簡單為後面的內容做一下鋪墊。
代碼下載
testBallSliding.zip
 使用ViewPager實現左右循環滑動及滑動跳轉
前面一篇文章實現了使用ViewPager實現高仿launcher拖動效果 ,後來很多朋友問能不能實現左右循環滑動效果和引導頁面。今天實現了左右滑動,至於在最後一頁
 Android中用ViewPager實現多頁面滑動切換及動畫效果的實例
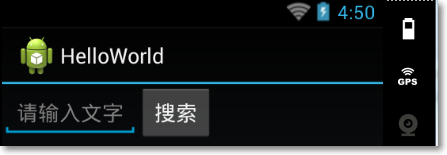
一、首先,我們來看一下效果圖,這是新浪微博的Tab滑動效果。&nbs
 Android控件之TextView的分析探究
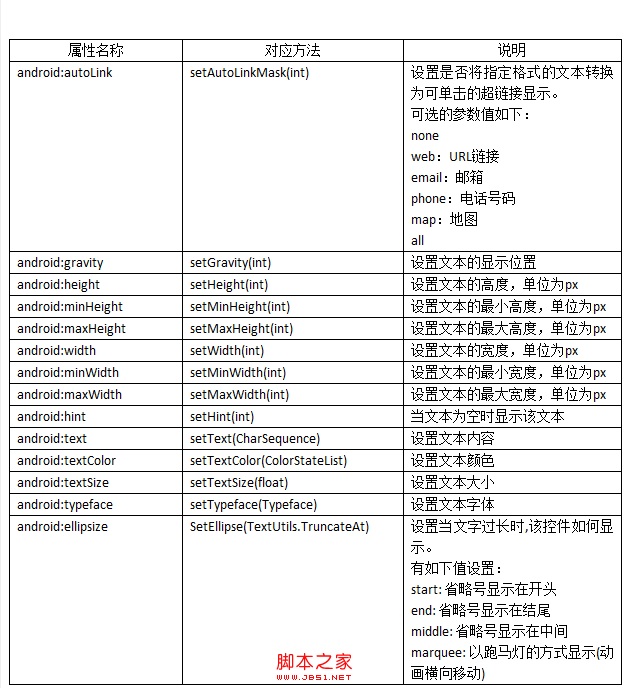
在android中,文本控件主要包括TextView控件和EditView控件,本節先對TextView控件的用法進行詳細介紹。 &nb
 Android開發自學筆記(四):APP布局下
篇幅較長遂分成上下兩篇,上一篇我們已經快要一氣呵成了,但是美中不足的是,這個界面並不能討得美工MM的歡心,美工MM曾寄希望於您,卻交出這麼作出這麼一副死型樣,我都