編輯:Android開發實例
在Android中通過WebView控件,可以實現要加載的頁面與Android方法相互調用,我們要實現WebView中的addJavascriptInterface方法,這樣html才能調用android方法,在這裡我個人覺得有點和DWR相似。
為了讓大家容易理解,我寫了一個簡單的Demo,具體步驟如下:
第一步:新建一個Android工程,命名為WebViewDemo(這裡我在assets裡定義了一個html頁面)。
第二步:修改main.xml布局文件,增加了一個WebView控件還有Button控件,代碼如下:
- <?xml version="1.0" encoding="utf-8"?>
- <LinearLayout xmlns:android="http://schemas.android.com/apk/res/android"
- android:orientation="vertical"
- android:layout_width="fill_parent"
- android:layout_height="fill_parent"
- >
- <TextView
- android:layout_width="fill_parent"
- android:layout_height="wrap_content"
- android:text="Welcome to Mr Wei's Blog."
- />
- <WebView
- android:id="@+id/webview"
- android:layout_width="fill_parent"
- android:layout_height="wrap_content"
- />
- <Button
- android:id="@+id/button"
- android:layout_width="fill_parent"
- android:layout_height="wrap_content"
- android:text="Change the webview content"
- />
- </LinearLayout>
第三步:在assets目錄下新建一個demo.html文件,代碼如下(這裡不知道為何多了mce:這幾個東東,<script></script>這樣是對的):
- <html>
- <mce:script language="javascript"><!--
- function fillContent(){
- document.getElementById("content").innerHTML =
- "This Content is showed by Android invoke Javascript function.";
- }
- // --></mce:script>
- <body>
- <p><a onClick="window.demo.startMap()" href="">Start GoogleMap</a></p>
- <p id="content"></p>
- <p>A Demo ----Android and Javascript invoke each other.</p>
- <p>Author:Frankiewei</p>
- </body>
- </html>
第四步:修改主核心程序WebViewDemo.java,代碼如下:
- package com.tutor.webwiewdemo;
- import android.app.Activity;
- import android.content.ComponentName;
- import android.content.Intent;
- import android.os.Bundle;
- import android.view.View;
- import android.webkit.WebSettings;
- import android.webkit.WebView;
- import android.widget.Button;
- public class WebViewDemo extends Activity {
- private WebView mWebView;
- private Button mButton;
- public void onCreate(Bundle savedInstanceState) {
- super.onCreate(savedInstanceState);
- setContentView(R.layout.main);
- setupViews();
- }
- //初始化
- private void setupViews() {
- mWebView = (WebView) findViewById(R.id.webview);
- WebSettings mWebSettings = mWebView.getSettings();
- //加上這句話才能使用javascript方法
- mWebSettings.setJavaScriptEnabled(true);
- //增加接口方法,讓html頁面調用
- mWebView.addJavascriptInterface(new Object() {
- //這裡我定義了一個打開地圖應用的方法
- public void startMap() {
- Intent mIntent = new Intent();
- ComponentName component = new ComponentName(
- "com.google.android.apps.maps",
- "com.google.android.maps.MapsActivity");
- mIntent.setComponent(component);
- startActivity(mIntent);
- }
- }, "demo");
- //加載頁面
- mWebView.loadUrl("file:///android_asset/demo.html");
- mButton = (Button) findViewById(R.id.button);
- //給button添加事件響應,執行JavaScript的fillContent()方法
- mButton.setOnClickListener(new Button.OnClickListener() {
- public void onClick(View v) {
- mWebView.loadUrl("javascript:fillContent()");
- }
- });
- }
- }
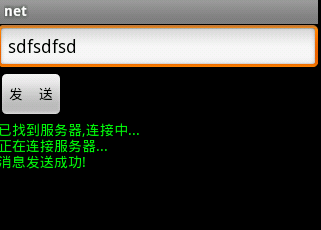
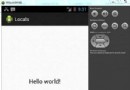
第五步:運行上述工程,查看效果。
首界面 點擊按鈕時,html內容改變
點擊html的startGoogleMap啟動地圖應用
 Android本地化
Android應用程序可以在許多不同地區的許多設備上運行。為了使應用程序更具交互性,應用程序應該處理以適合應用程序將要使用的語言環境方面的文字,數字,文件等。在本章中,我
 實戰解析Android架構設計原則
經過一段時間收集了大量反饋意見後,我認為應該來說說這個話題了。我會在這裡給出我認為構建現代移動應用
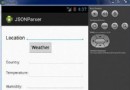 Android JSON解析器
JSON代表JavaScript對象符號。它是一個獨立的數據交換格式,是XML的最佳替代品。本章介紹了如何解析JSON文件,並從中提取所需的信息。Android提供了四個
 Android JSON解析器
JSON代表JavaScript對象符號。它是一個獨立的數據交換格式,是XML的最佳替代品。本章介紹了如何解析JSON文件,並從中提取所需的信息。Android提供了四個