編輯:Android開發實例
大家好,今天給大家分享的是Android中UI設計的一些技巧,本節內容主要有兩點:一是Android按鈕(Button)的UI設計,二是:ListView以及GridView的UI設計。
按鈕的狀態:
我們一般搞UI設計,按鈕通常有三個狀態:normal(正常狀態);focus(焦點狀態),pressed(按下狀態)。如下圖所示:
我們會在res/drawable目錄下定義一個資源文件,比如我們本例中要用到的handle.xml,在裡面定義三種狀態,每種狀態對應一張圖片:
代碼如下:
- <?xml version="1.0" encoding="utf-8"?>
- <selector xmlns:android="http://schemas.android.com/apk/res/android">
- <item android:state_window_focused="false" android:drawable="@drawable/handle_normal" />
- <item android:state_focused="true" android:drawable="@drawable/handle_focused" />
- <item android:state_pressed="true" android:drawable="@drawable/handle_pressed" />
- </selector>
而我們使用這個資源文件的用法只需要引用drawable裡的資源文件(android:background="@drawable/handle")代碼如下:
- <Button
- android:id="@+id/handle"
- android:layout_width="wrap_content"
- android:layout_height="fill_parent"
- android:background="@drawable/handle"
- />
Android中的層:
看過《盜夢空間》的人都知道,夢境有多少層,而Android中也有層次之分,在Android中第一層"夢境",我們可以認為是壁紙。第二層就是應用的Activity,第三層就是放在Activity上的容器(ViewGroup以及它的子類FrameLayout,LinearLayout等布局對象),當然容器中還可以放容器,你也可以放到N層(最多放多少我還沒驗證過),總之最後一層就是那些繼承於View的控件了(諸如,Button,TextView等.)
而ListView以及GridView中UI是怎麼設計的呢,下面我們看一下效果圖:
上圖是一個ListView的效果圖,正常狀態下是白色背景黑色字體,當我們點擊一列時會出現黃色背景。這一效果是如何做到的呢?
ListView單元格顯示的內容其實是我們事先定義在Layout目錄下的一個布局文件,從這個效果來看,我們可以看出它一共有三個“層”
第一層容器(LinearLayout) 背景色為白色:
第二層也是容器(LinearLayout)當按下時,背景色為黃色,把第一層擋住(具體做法可以參照按鈕):
第三層是控件(TextView)。
實例 :
上面說了一些,有些人肯定會雲裡霧裡,所以我們直接來個實例,實例做完後,再看一下,效果會更好,大家按照步驟跟我來:
第一步:首先准備素材,准備三個按鈕,以及ListView的背景圖(上面三個按鈕已經有了,下面我只貼一個ListView背景圖片):
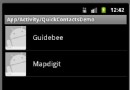
第二步:新建一個Android工程,命名為UIDemo.目錄結構如下圖所示:
第三步:在res目錄下新建一個drawable文件夾,定義兩個資源文件一個是handle.xml另一個為listview_selected.xml,其中handle.xml代碼已經在上面貼出,listview_selected.xml代碼如下:
- <?xml version="1.0" encoding="utf-8"?>
- <selector xmlns:android="http://schemas.android.com/apk/res/android">
- <item android:state_pressed="true" android:drawable="@drawable/list_selector_background_pressed" />
- </selector>
第四步:修改main.xml布局文件,這裡我用到了SliddingDrawer控件,代碼如下:
- <?xml version="1.0" encoding="utf-8"?>
- <LinearLayout xmlns:android="http://schemas.android.com/apk/res/android"
- android:orientation="vertical"
- android:layout_width="fill_parent"
- android:layout_height="fill_parent"
- >
- <SlidingDrawer
- android:id="@+id/slidingdrawer"
- android:layout_width="fill_parent"
- android:layout_height="fill_parent"
- android:orientation="horizontal"
- android:handle="@+id/handle"
- android:content="@+id/content">
- <Button
- android:id="@+id/handle"
- android:layout_width="wrap_content"
- android:layout_height="fill_parent"
- android:background="@drawable/handle"
- />
- <ListView
- android:id="@+id/content"
- android:layout_width="fill_parent"
- android:layout_height="wrap_content"
- />
- </SlidingDrawer>
- </LinearLayout>
我們這裡用到了ListView控件,而我們ListView控件顯示的內容我事先在layout目錄下定義兩個TextView,命名為listview_layout.xml,代碼如下(這裡有三層哦!):
- <?xml version="1.0" encoding="utf-8"?>
- <LinearLayout xmlns:android="http://schemas.android.com/apk/res/android"
- android:orientation="vertical"
- android:layout_width="fill_parent"
- android:layout_height="fill_parent"
- android:background="#ffffff"
- >
- <LinearLayout
- android:orientation="vertical"
- android:layout_width="fill_parent"
- android:layout_height="fill_parent"
- android:background="@drawable/listview_selected"
- android:padding="6px"
- >
- <TextView
- android:id="@+id/bookname"
- android:layout_width="fill_parent"
- android:layout_height="wrap_content"
- android:textSize="20px"
- android:textColor="#000000"
- />
- <TextView
- android:id="@+id/author"
- android:layout_width="fill_parent"
- android:layout_height="wrap_content"
- android:textSize="16px"
- android:textColor="#000000"
- />
- </LinearLayout>
- </LinearLayout>
第五步:修改主核心程序UIDemo.java,代碼如下:
- package com.tutor.uidemo;
- import android.app.Activity;
- import android.os.Bundle;
- import android.view.LayoutInflater;
- import android.view.View;
- import android.view.ViewGroup;
- import android.widget.BaseAdapter;
- import android.widget.ListView;
- import android.widget.TextView;
- public class UIDemo extends Activity {
- private ListView mListView;
- @Override
- public void onCreate(Bundle savedInstanceState) {
- super.onCreate(savedInstanceState);
- setContentView(R.layout.main);
- setupViews();
- }
- private void setupViews(){
- mListView = (ListView)findViewById(R.id.content);
- mListView.setAdapter(new ListViewAdapter());
- }
- private class ListViewAdapter extends BaseAdapter{
- //這裡返回10行,ListView有多少行取決於getCount()方法
- public int getCount() {
- return 10;
- }
- public Object getItem(int arg0) {
- return null;
- }
- public long getItemId(int arg0) {
- return 0;
- }
- public View getView(int position, View v, ViewGroup parent) {
- final LayoutInflater inflater = LayoutInflater.from(getApplicationContext());
- if(v == null){
- v = inflater.inflate(R.layout.listview_layout, null);
- }
- TextView mBookName = (TextView)v.findViewById(R.id.bookname);
- TextView mBookAuthor = (TextView)v.findViewById(R.id.author);
- mBookName.setText("Android傻瓜教程" + position);
- mBookAuthor.setText("Frankiewei" + position);
- return v;
- }
- }
- }
第六步:運行上述工程,查看效果:
運行效果1:
點擊按鈕效果2:
ListView正常效果3:
ListView點擊效果4:
PS:上面用到了SliddingDrawer控件以及適配器的內容,如果讀者對上面兩個不了解的,可以參照本人的其他文章學習:
Android高手進階教程(二)之----Android Launcher抽屜類SlidingDrawer的使用!
Android高手進階教程(十六)之---Android中萬能的 BaseAdapter(Spinner,ListView,GridView)的使用!
 Android APK的安裝實例
打開packages\apps\PackageInstaller下的清單文件XML/HTML代碼
 Android加載Spinner
可以顯示在的Android任務,通過加載進度條的進展。進度條有兩種形狀。加載欄和加載微調(spinner)。在本章中,我們將討論微調(spinner)。Spinner 用
 Android程序載入界面的開發實例
很多程序在完全載入之前往往會先顯示一個載入界面,提示用戶等待,這樣對提高用戶體
 android GridView多選效果的實例代碼
具體代碼如下: main.xml 代碼如下:<LinearLayout xmlns:android=http://schemas.android.com/