編輯:Android開發實例
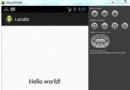
看看效果先
自己調試了一下午終於搞定了這裡來整理一下吧 直接上代碼吧
- Paint paint = new Paint();
- Point myScreenCoords = new Point();
- //轉換當前地圖位置到屏幕坐標點
- mv.getProjection().toPixels(gp1, myScreenCoords);
- paint.setStrokeWidth(1);
- paint.setARGB(255,255,0,0);
- paint.setStyle(Paint.Style.FILL);
- Bitmap bm = BitmapFactory.decodeResource(getResources(),R.drawable.icon001);
- canvas.save(Canvas.MATRIX_SAVE_FLAG);
- //加載兩次圖片資源
- Drawable drawable = getResources().getDrawable(R.drawable.icon001);
- //這裡調用mutate 做測試
- Drawable drawable1 = getResources().getDrawable(R.drawable.icon001).mutate();
- drawable.setBounds(myScreenCoords.x, myScreenCoords.y, myScreenCoords.x+drawable.getIntrinsicWidth(), myScreenCoords.y+drawable.getIntrinsicHeight());
- drawable1.setBounds(0, 0, drawable1.getIntrinsicWidth(), drawable1.getIntrinsicHeight());
- //位置的調節操作
- boundCenterBottom(drawable);
- drawable.draw(canvas);
- canvas.restore();
- canvas.save(Canvas.MATRIX_SAVE_FLAG);
- //顏色的過濾
- drawable1.setColorFilter(0x7f000000, PorterDuff.Mode.SRC_IN);
- //位移操作
- canvas.translate(myScreenCoords.x, myScreenCoords.y);
- //傾斜操作
- canvas.skew(-0.9F, 0.0F);
- //進行縮放
- canvas.scale(1.0F, 0.5F);
- boundCenterBottom(drawable1);
- drawable1.draw(canvas);
- //這裡清除顏色過濾
- drawable1.clearColorFilter();
- canvas.restore();
剛開始做的時候老是出現圖片本身和陰影的顏色都被過濾了 但是我僅僅是調用了drawable1 的顏色過濾方法
後來發現了資源狀態共享的問題
下面了解一下 mutate()方法
Make this drawable mutable. This operation cannot be reversed. A mutable drawable is guaranteed to not share its state with any other drawable. This is especially useful when you need to modify properties of drawables loaded from resources. By default, all drawables instances loaded from the same resource share a common state; if you modify the state of one instance, all the other instances will receive the same modification. Calling this method on a mutable Drawable will have no effect
大概就是改變當前資源狀態 變為活動的可變的 因為 drawable資源不管加載幾次 它的狀態是共享的,所以在改變一個對象的狀態的時候其它的引用到該資源的對象也會改變 所以讓drawable1調用該方法 鎖定這個對象調用的資源狀態
下面clearColorFilter()這個方法也是起到同樣的作用 可以解決這個問題
反正解決了就行了。。具體有什麼不同就不深究了
還有注意的就是 setBounds() 兩個設置的不同, 因為drawable1還要經過位移
中間還有個方法
- protected Drawable boundCenterBottom(Drawable balloon) {
- int markerWidth=balloon.getIntrinsicWidth();
- int markerHeight=balloon.getIntrinsicHeight();
- Rect srcRect=balloon.getBounds();
- srcRect.offset(-markerWidth/2, -markerHeight);
- balloon.setBounds(srcRect);
- return balloon;
- }
就是移動位置到點坐標的正上方 圖標嘛 就是這個坐標的具體位置的解釋嘛 不能把它給覆蓋了
 Android加載Spinner
可以顯示在的Android任務,通過加載進度條的進展。進度條有兩種形狀。加載欄和加載微調(spinner)。在本章中,我們將討論微調(spinner)。Spinner 用
 Android提高之手游轉電視游戲的模擬操控
目前智能電視終端(智能電視和智能電視盒子)已經越來越火,過去主打視頻功能,如今的智能電視終端不僅會繼續完善視頻功能,還會加入電視游戲功能,同時這也趕上了“電視游戲
 Android加載Spinner
可以顯示在的Android任務,通過加載進度條的進展。進度條有兩種形狀。加載欄和加載微調(spinner)。在本章中,我們將討論微調(spinner)。Spinner 用
 Android加載Spinner
可以顯示在的Android任務,通過加載進度條的進展。進度條有兩種形狀。加載欄和加載微調(spinner)。在本章中,我們將討論微調(spinner)。Spinner 用