編輯:Android開發實例
Intent Filter是android裡非常有特色的一個概念。他的用戶體驗和windows下的文件管理器的彈出菜單裡的“打開方式”非常相似。在windows中,當用戶選擇了打開方式菜單後,系統讓用戶選擇應用來打開所選擇的文件。而在android中的文件已經被uri資源代替了。
Intent Filter在android中的應用非常普遍,尤其在資源共享中。例如,當用戶選擇了一個圖片,選擇了共享,我們常常會發現一個選擇列表。這個選擇列表是動態生成的,不是一成不變的。假如你新安裝了facebook應用,那麼facebook就會出現在這個列表裡面。從這個例子可以發現,intent filter的設計使得android系統顯得更加靈活了。
要實現一個Intent Filter, 我們要在AndroidManifest.xml中加入必要的設置,以通知系統某個activity都能夠處理什麼類型的URI資源,然後要在activity的onCreate中加入必要的代碼以處理系統傳遞過來rui資源。
一個Service、 Activity 或者 Brodcast Reciever 的Intent Filter , 的事件過濾器, 我們用著大家都很了然的說法來描述之吧, 實際上描述了擁有這些過濾器組建在系統中所具有能力。
Filter 的創建都是通過 manifest.xml 文件, 但是對於 Broadcast Reciever 用 Context.registerReceiver() 來創建。Filter 可以包含三種類型的過濾條件 <action> <category> <data>
一個Intent 是否能夠通過一個過濾器到達對應的處理器取決於, Intent 所包含的 所有Categroy 是夠都在 過濾器中的catergory 列表裡出現。 換句話說, 沒有 catergory字段的Inteng 可以通過任何過濾器, 而一個過濾器, 必須至少要有一個可以通過的限定,Category 或者 Action。 對於Action 也一樣, 能夠通過Filter 的Itent的 Action 必須被列與 Category中。同樣, 沒有Action 的Intent 也可以通過所有的Filter。
對於 <data> 過濾條件稍微復雜點, 但是總的原則還是, 只有Intent 能夠通過 Filter, 那麼Intent 中的信息,必須出現在Filter中。 <data> 需要指定 scheme://host:port/path , 條件順序的優先級隨著范圍縮小而降低,相當於,看作目錄,在子目錄下匹配。 比如, Filter指定了 scheme, 那麼所有具有這個 scheme 的 Intent 都能通過,這個Filter, 類似的通配符的情況也是允許的。
這裡翻譯文檔中的四個例子情況:
a.如果沒有定義URI 和數據類型, 則,該Intent只能通過沒有定義URI和 數據類型的 過濾器。
b.只定義了URI的 Intent 只能通過只定義了 URI 的過濾器。
c.只定義了 數據類型的 Intent 也只能通過只定義了 數據類型的過濾器。
d. 如果一個Intent同事定義了URI和 數據類型, 或者數據類型可以由URI推定, 則只有具備了對應的數據類型,或者 content: 或者 file: 類型,並且沒有定義URI的過濾器。(這種情況, 你自己代碼一下就明白了, 在寫下去,我也不鳥鳥了。)
如果通向Activities 的Intent 引起了多個響應, 就會出現需要用戶指定的提示, 或者是異常。
差不多就是這樣的情況了, android 的這種機制非常適合移動設備之間的應用相互調用, 以便在更大的粒度上達成復用。很強大。
/Chapter06_Intent_Filter/src/com/amaker/ch06/app/MainActivity.java
package com.amaker.ch06.app;

import com.amaker.ch06.app.R;

import android.app.Activity;
import android.content.Intent;
import android.net.Uri;
import android.os.Bundle;
import android.view.View;
import android.view.View.OnClickListener;
import android.widget.Button;
/**
 *
 * Intent Filter 測試
 */
public class MainActivity extends Activity {
    // 聲明Button
    private Button btn;
    private static final String ACTION1 = "com.amaker.ch06.app.TEST_ACTION1";
    private static final String ACTION2 = "com.amaker.ch06.app.TEST_ACTION2";
    private static final String ACTION3 = "com.amaker.ch06.app.TEST_ACTION3";

    private static final String CATEGORY1 = "com.amaker.ch06.app.CATEGORY1";
    @Override
    public void onCreate(Bundle savedInstanceState) {
        super.onCreate(savedInstanceState);
        // 設置內容布局
        setContentView(R.layout.main);
        //實例化按鈕
        btn = (Button)findViewById(R.id.Button01);

        String a = Intent.ACTION_VIEW;
        // 添加單擊監聽器
        btn.setOnClickListener(new OnClickListener() {
            @Override
            public void onClick(View view) {
                  Intent intent = new Intent();
                  //intent.setAction(ACTION1);
                  //Uri data = Uri.parse("content://com.amaker.ch07.app/abc");
                  //intent.setData(data);

                  intent.addCategory(CATEGORY1);

                  intent.setAction("android.intent.action.VIEW");
                  intent.setData(Uri.parse("http://www.google.com"));

                  startActivity(intent);
            }
        });
    }
}
/Chapter06_Intent_Filter/src/com/amaker/ch06/app/TestActivity.java
package com.amaker.ch06.app;

import com.amaker.ch06.app.R;

import android.app.Activity;
import android.os.Bundle;
/**
 * 測試Intent Filter
 */
public class TestActivity extends Activity {
    @Override
    public void onCreate(Bundle savedInstanceState) {
        super.onCreate(savedInstanceState);
        setContentView(R.layout.main1);
    }
}
/Chapter06_Intent_Filter/res/layout/main.xml
<?xml version="1.0" encoding="utf-8"?>
<LinearLayout xmlns:android="http://schemas.android.com/apk/res/android"
    android:orientation="vertical"
    android:layout_width="fill_parent"
    android:layout_height="fill_parent"
    >
    <Button
        android:text="測試Intent Filter"
        android:id="@+id/Button01"
        android:layout_width="wrap_content"
        android:layout_height="wrap_content"></Button>
</LinearLayout>
/Chapter06_Intent_Filter/res/layout/main1.xml
<?xml version="1.0" encoding="utf-8"?>
<LinearLayout xmlns:android="http://schemas.android.com/apk/res/android"
    android:orientation="vertical"
    android:layout_width="fill_parent"
    android:layout_height="fill_parent"
    >

    <TextView
        android:text="測試Intent Filter"
        android:id="@+id/TextView01"
        android:layout_width="wrap_content"
        android:layout_height="wrap_content"></TextView>

</LinearLayout>
/Chapter06_Intent_Filter/AndroidManifest.xml
<?xml version="1.0" encoding="utf-8"?>
<manifest xmlns:android="http://schemas.android.com/apk/res/android"
      package="com.amaker.ch06.app"
      android:versionCode="1"
      android:versionName="1.0">
    <application android:icon="@drawable/icon" android:label="@string/app_name">
        <activity android:name=".MainActivity"
                  android:label="@string/app_name">
            <intent-filter>
                <action android:name="android.intent.action.MAIN" />
                <category android:name="android.intent.category.LAUNCHER" />
            </intent-filter>
        </activity>

        <activity android:name="TestActivity" >
            <intent-filter>
                <action android:name="com.amaker.ch06.app.TEST_ACTION1"/>
                <action android:name="com.amaker.ch06.app.TEST_ACTION2"/>
                <action android:name="com.amaker.ch06.app.TEST_ACTION3"/>

                <action android:name="android.intent.action.VIEW"/>


                <data android:scheme="content" android:path="com.amaker.ch07.app/abc"/>
                <data android:scheme="http" android:path="www.google.com" />

                <category android:name="android.intent.category.DEFAULT"/>
                <category android:name="android.intent.category.BROWSABLE" />
                <category  android:name="com.amaker.ch07.app.CATEGORY1"/>

            </intent-filter>
        </activity>

    </application>
    <uses-sdk android:minSdkVersion="3" />

</manifest>
 Android仿微信朋友圈圖片查看器
這篇文章主要為大家詳細介紹了Android仿微信朋友圈圖片查看器的具體實現代碼,具有一定的參考價值,感興趣的小伙伴們可以參考一下 再看文
 使用ViewPager實現高仿launcher左右拖動效果
前面一篇高仿launcher和墨跡左右拖動效果獲得了很多朋友的好評,上一篇文章主要是通過自定義ViewGroup實現的,有點麻煩。今天用ViewPager這個類實
 Android中庫項目的使用方法圖文介紹
在軟件開發過程中,程序代碼的復用,是非常重要的概念。我們總是需要使用一些現有的模塊、包、框架,或開發自己的模塊、包、框架,來實現對程序代碼的復用。比如在JavaW
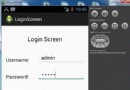 Android登錄實例
登錄應用程序的屏幕,詢問憑據登錄到一些特定的應用。可能需要登錄到Facebook,微博等本章介紹了,如何創建一個登錄界面,以及如何管理安全問題和錯誤嘗試。首先,必須定義兩