編輯:Android開發實例
用戶查詢POI點後會在MapView中以Overlay的方式顯示POI點信息 用戶點擊Overlay後可以顯示詳細信息
先看效果如圖
在相應的Overlay所在的GeoPoint顯示該提示
下面看實現:
首先背景為9patch圖片
這樣就可以隨意在裡面加內容了 我這裡通過一個布局文件來進行控制
- <RelativeLayout xmlns:android="http://schemas.android.com/apk/res/android"
- android:background="@drawable/info_bubble"
- android:layout_width="wrap_content"
- android:layout_height="wrap_content"
- android:paddingLeft="5px"
- android:paddingTop="5px"
- android:paddingRight="5px"
- android:paddingBottom="20px"
- >
- <TextView android:id="@+id/map_bubbleTitle"
- android:ellipsize="marquee"
- android:layout_width="120px"
- android:layout_height="wrap_content"
- android:gravity="center_horizontal"
- android:singleLine="true" />
- <ImageView android:id="@+id/map_bubbleImage"
- android:background="@drawable/close"
- android:layout_width="30px"
- android:layout_toRightOf="@id/map_bubbleTitle"
- android:layout_height="wrap_content" />
- <TextView android:id="@+id/map_bubbleText"
- android:layout_width="150px"
- android:layout_below="@id/map_bubbleTitle"
- android:layout_height="wrap_content"
- android:singleLine="false" />
- </RelativeLayout>
用了RelativeLayout的布局 對文字的寬度進行了設置,防止文字過多導致超出屏幕范圍
那這裡也可以根據手機屏幕寬度進行動態設置
然後再oncreate中初始化這個View
- popView = super.getLayoutInflater().inflate(R.layout.overlay_pop, null);
- mapView.addView( popView,
- new MapView.LayoutParams(MapView.LayoutParams.WRAP_CONTENT, MapView.LayoutParams.WRAP_CONTENT,
- null, MapView.LayoutParams.BOTTOM_CENTER));
- popView.setVisibility(View.GONE);
這裡沒有設置GeoPoint 由於氣泡的尾巴是在下邊居中的,因此要設置成MapView.LayoutParams.BOTTOM_CENTER.
默認是不可見的。。這裡必須要設置為View.GONE 因為 View.INVISIBLE還是會在onlayout中給View定位的 這裡沒有設置GeoPoint就會報錯
然後就可以在自己實現的ItemizedOverlay<OverlayItem> 類中的方法onTap中顯示該View
- MapView.LayoutParams geoLP = (MapView.LayoutParams) mContext.popView.getLayoutParams();
- geoLP.point = GeoList.get(i).getPoint();
- mContext.mapView.updateViewLayout(mContext.popView, geoLP);
- mContext.popView.setVisibility(View.VISIBLE);
- textView1 = (TextView) mContext.findViewById(R.id.map_bubbleTitle);
- textView2 = (TextView) mContext.findViewById(R.id.map_bubbleText);
- textView1.setText("提示信息");
- textView2.setText("aaaaaaaaaaaaaaaaaaaaaaaaa===="+GeoList.get(i).getSnippet());
- ImageView imageView = (ImageView) mContext.findViewById(R.id.map_bubbleImage);
- imageView.setOnClickListener(new View.OnClickListener(){
- @Override
- public void onClick(View v) {
- mContext.popView.setVisibility(View.GONE);
- }
- });
其中mContext就是自己實現的MapActivity
這裡根據當前點擊的Overlay拿到該GeoPoint 然後設置到MapView.LayoutParams中
然後設置為可見 就會顯示說明信息了。。同樣點擊關閉按鈕就會設置為View.GONE
代碼下載地址: googlemaptest.rar
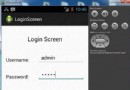
 Android登錄實例
登錄應用程序的屏幕,詢問憑據登錄到一些特定的應用。可能需要登錄到Facebook,微博等本章介紹了,如何創建一個登錄界面,以及如何管理安全問題和錯誤嘗試。首先,必須定義兩
 Android編程實現ViewPager多頁面滑動切換及動畫效果的方法
本文實例講述了Android編程實現ViewPager多頁面滑動切換及動畫效果的方法。分享給大家供大家參考,具體如下: 一、首先,我們來看一下效果圖,這是新浪微博
 Android加載Spinner
可以顯示在的Android任務,通過加載進度條的進展。進度條有兩種形狀。加載欄和加載微調(spinner)。在本章中,我們將討論微調(spinner)。Spinner 用
 Android登錄實例
登錄應用程序的屏幕,詢問憑據登錄到一些特定的應用。可能需要登錄到Facebook,微博等本章介紹了,如何創建一個登錄界面,以及如何管理安全問題和錯誤嘗試。首先,必須定義兩