編輯:Android開發實例
官方的描述:
請參考:http://developer.android.com/sdk/compatibility-library.html#Notes
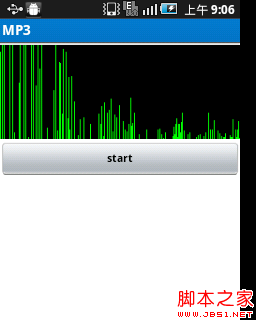
下面是一個效果圖 圖1: 圖2: 二、ViewPager的下載與安裝 ViewPager來源於google 的補充組件android-support-v13.jar. 首先啟動Android SDK Manager的,然後選中Extras的“Android support package”進行下載更新。 在下載更新後,在eclipse中工程上點擊右鍵,選擇android tools -> add compatibility library即可完成安裝。 另外也可以手工通過工程屬性中的"Java Build Path"->"Libraries"->"Add External JARS..."把android-support-v13.jar導到Android工程中, jar包所在位置是\android-sdk\extras\android\compatibility\v4\android-support-v13.jar 二、使用ViewPager控件 2.1 在布局文件中引用ViewPager控件 <android.support.v4.view.ViewPager android:id="@+id/viewPager1" android:layout_width="fill_parent" android:layout_height="fill_parent" android:layout_alignLeft="@+id/textView1" android:layout_above="@id/adLayout" android:layout_below="@id/topText" android:layout_centerVertical="true" /> 2.2 設置ViewPager控件的適配器 ViewPager的適配器必須繼承於PagerAdapter,並實現以下四個方法 //獲取當前窗體界面數 public int getCount() //初始化position位置的界面 public Object instantiateItem(View collection, int position) //銷毀position位置的界面 public void destroyItem(View collection, int position, Object view) // 判斷是否由對象生成界面 public boolean isViewFromObject(View arg0, Object arg1) 2.3 初始化ViewPager控件 初始化ViewPager控件的適配器 viewPager1 = (ViewPager) findViewById(R.id.viewPager1); viewPager1.setAdapter(new ImgPagerAdapter(this,lists)); 配置適配器的頁面變化事件 viewPager1 .setOnPageChangeListener(new OnPageChangeListener() { //頁面選擇 @Override / /當一個頁面即將被加載時,調用此方法 public void onPageSelected(int position) { topText.setText(String.valueOf(position+1)+"/"+String.valueOf(lists.length)); } @Override // 狀態有三個0空閒,1是增在滑行中,2目標加載完畢 public void onPageScrollStateChanged(int state) { } @Override / /當在一個頁面滾動時,調用此方法 public void onPageScrolled(int position, float positionOffset, int positionOffsetPixels) { } }); 實例1 viewpager_layout.xml文件 <?xml version="1.0" encoding="utf-8"?> <LinearLayout xmlns:android="http://schemas.android.com/apk/res/android" android:layout_width="fill_parent" android:layout_height="fill_parent" android:orientation="vertical"> <!-- 此處需要給出全路徑 --> <android.support.v4.view.ViewPager android:id="@+id/viewpagerLayout" android:layout_height="fill_parent" android:layout_width="fill_parent"/> </LinearLayout> layout1.xml文件 <?xml version="1.0" encoding="utf-8"?> <LinearLayout xmlns:android="http://schemas.android.com/apk/res/android" android:layout_width="fill_parent" android:layout_height="fill_parent" android:orientation="vertical"> <TextView android:textAppearance="?android:attr/textAppearanceLarge" android:layout_height="wrap_content" android:id="@+id/textView1" android:layout_width="fill_parent" android:text="第一頁"></TextView> <EditText android:layout_width="match_parent" android:layout_height="wrap_content" android:id="@+id/editText1"> <requestFocus></requestFocus> </EditText> </LinearLayout> layout2.xml文件 <?xml version="1.0" encoding="utf-8"?> <LinearLayout xmlns:android="http://schemas.android.com/apk/res/android" android:layout_width="fill_parent" android:layout_height="fill_parent" android:orientation="vertical"> <TextView android:textAppearance="?android:attr/textAppearanceLarge" android:layout_height="wrap_content" android:id="@+id/textView1" android:layout_width="fill_parent" android:text="第二頁"></TextView> <EditText android:layout_width="match_parent" android:layout_height="wrap_content" android:id="@+id/editText1"> <requestFocus></requestFocus> </EditText> </LinearLayout> layout3.xml文件 <?xml version="1.0" encoding="utf-8"?> <LinearLayout xmlns:android="http://schemas.android.com/apk/res/android" android:layout_width="fill_parent" android:layout_height="fill_parent" android:orientation="vertical"> <TextView android:textAppearance="?android:attr/textAppearanceLarge" android:layout_height="wrap_content" android:id="@+id/textView1" android:layout_width="fill_parent" android:text="第三頁"></TextView> <EditText android:layout_width="match_parent" android:layout_height="wrap_content" android:id="@+id/editText1"> <requestFocus></requestFocus> </EditText> </LinearLayout> TestViewPager.java文件 package com.teleca.robin; import java.util.ArrayList; import java.util.List; import android.app.Activity; import android.os.Bundle; import android.os.Parcelable; import android.support.v4.view.PagerAdapter; import android.support.v4.view.ViewPager; import android.support.v4.view.ViewPager.OnPageChangeListener; import android.util.Log; import android.view.LayoutInflater; import android.view.View; import android.widget.EditText; import com.teleca.robin.R; 通過OpenGL ES混合模式縮放視頻緩沖區來適應顯示尺寸
當開發基於軟件模式的游戲時,通過縮放視頻緩沖區來適應顯示尺寸是最棘手的問題之一。當面對眾多不同的分辨率時(比如開放環境下的Android),該問題會變得更加麻煩,
 Android 利用方向傳感器實現指南針具體步驟
step1:新建一個項目Compass,並將一張指南針圖片導入到res/drawable-hdpi目錄中 step2:設計應用的UI界面,main.x
 Android本地化
Android應用程序可以在許多不同地區的許多設備上運行。為了使應用程序更具交互性,應用程序應該處理以適合應用程序將要使用的語言環境方面的文字,數字,文件等。在本章中,我
 Android控件系列之相冊Gallery&Adapter適配器入門&控件縮放動畫入門
學習目的: 1、掌握在Android中如何建立Gallery 2、初步理解Android適配器的原理 3、實現簡單的控件縮放動畫 簡介: 1、Gallery是An