編輯:Android開發實例
Android提供了特殊類型的觸摸屏事件,如掐,雙擊,滾動,長按和退縮。這些都被稱為手勢。
Android提供GestureDetector類接收移動事件,並告訴我們,這些事件是否有對應手勢。要使用它,需要創建GestureDetector對象,然後擴展另一個類GestureDetector.SimpleOnGestureListener充當監聽器,並覆蓋一些方法。它的語法如下:
GestureDetector myG; myG = new GestureDetector(this,new Gesture()); class Gesture extends GestureDetector.SimpleOnGestureListener{ public boolean onSingleTapUp(MotionEvent ev) { } public void onLongPress(MotionEvent ev) { } public boolean onScroll(MotionEvent e1, MotionEvent e2, float distanceX, float distanceY) { } public boolean onFling(MotionEvent e1, MotionEvent e2, float velocityX, float velocityY) { } } }
Android提供ScaleGestureDetector類來處理如:捏等手勢。為了使用它,需要實例化這個類的一個對象。它的語法如下:
ScaleGestureDetector SGD; SGD = new ScaleGestureDetector(this,new ScaleListener());
第一個參數是上下文,第二個參數是事件偵聽器。必須定義事件偵聽器並覆蓋 onTouchEvent 函數,使其工作。它的語法如下:
public boolean onTouchEvent(MotionEvent ev) { SGD.onTouchEvent(ev); return true; } private class ScaleListener extends ScaleGestureDetector.SimpleOnScaleGestureListener { @Override public boolean onScale(ScaleGestureDetector detector) { float scale = detector.getScaleFactor(); return true; } }
除了捏手勢,還有其它方法 avaialible 通知的詳細信息的觸摸事件。它們如下:
這裡有一個例子演示如何使用ScaleGestureDetector類。它創建了一個基本的應用程序,放大和捏縮小。
為了試驗這個例子,可以在實際設備或仿真器,觸摸屏啟用運行此程序。
以下是修改後的主活動文件的內容 src/com.yiibai.gestures/MainActivity.java.
package com.example.gestures; import android.app.Activity; import android.graphics.Matrix; import android.os.Bundle; import android.view.Menu; import android.view.MotionEvent; import android.view.ScaleGestureDetector; import android.widget.ImageView; public class MainActivity extends Activity { private ImageView img; private Matrix matrix = new Matrix(); private float scale = 1f; private ScaleGestureDetector SGD; @Override protected void onCreate(Bundle savedInstanceState) { super.onCreate(savedInstanceState); setContentView(R.layout.activity_main); img = (ImageView)findViewById(R.id.imageView1); SGD = new ScaleGestureDetector(this,new ScaleListener()); } @Override public boolean onTouchEvent(MotionEvent ev) { SGD.onTouchEvent(ev); return true; } private class ScaleListener extends ScaleGestureDetector. SimpleOnScaleGestureListener { @Override public boolean onScale(ScaleGestureDetector detector) { scale *= detector.getScaleFactor(); scale = Math.max(0.1f, Math.min(scale, 5.0f)); matrix.setScale(scale, scale); img.setImageMatrix(matrix); return true; } } @Override public boolean onCreateOptionsMenu(Menu menu) { // Inflate the menu; this adds items to the action bar if it is present. getMenuInflater().inflate(R.menu.main, menu); return true; } }
以下是XML的經修改 res/layout/activity_main.xml. 的內容
<RelativeLayout xmlns:android="http://schemas.android.com/apk/res/android" xmlns:tools="http://schemas.android.com/tools" android:layout_width="match_parent" android:layout_height="match_parent" android:paddingBottom="@dimen/activity_vertical_margin" android:paddingLeft="@dimen/activity_horizontal_margin" android:paddingRight="@dimen/activity_horizontal_margin" android:paddingTop="@dimen/activity_vertical_margin" tools:context=".MainActivity" > <TextView android:id="@+id/textView1" android:layout_width="wrap_content" android:layout_height="wrap_content" android:text="@string/hello_world" /> <ImageView android:id="@+id/imageView1" android:layout_width="match_parent" android:layout_height="match_parent" android:layout_below="@+id/textView1" android:scaleType="matrix" android:src="@android:drawable/sym_def_app_icon" /> </RelativeLayout>
以下是 res/values/string.xml. 的內容
<?xml version="1.0" encoding="utf-8"?> <resources> <string name="app_name">Gestures</string> <string name="action_settings">Settings</string> <string name="hello_world">Pinch to zoom in or out!</string> </resources>
以下是 AndroidManifest.xml 文件的內容
<?xml version="1.0" encoding="utf-8"?> <manifest xmlns:android="http://schemas.android.com/apk/res/android" package="com.yiibai.gestures" android:versionCode="1" android:versionName="1.0" > <uses-sdk android:minSdkVersion="8" android:targetSdkVersion="17" /> <application android:allowBackup="true" android:icon="@drawable/ic_launcher" android:label="@string/app_name" android:theme="@style/AppTheme" > <activity android:name="com.yiibai.gestures.MainActivity" android:label="@string/app_name" > <intent-filter> <action android:name="android.intent.action.MAIN" /> <category android:name="android.intent.category.LAUNCHER" /> </intent-filter> </activity> </application> </manifest>
讓我們試著運行Gestures應用程序。我假設已經連接實際Android的移動設備到計算機。啟動應用程序之前,會顯示如下窗口,選擇要運行Android的應用程序的選項。
選擇移動設備作為一個選項,然後檢查移動設備將顯示默認屏幕:
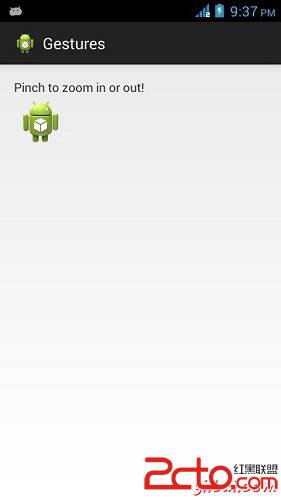
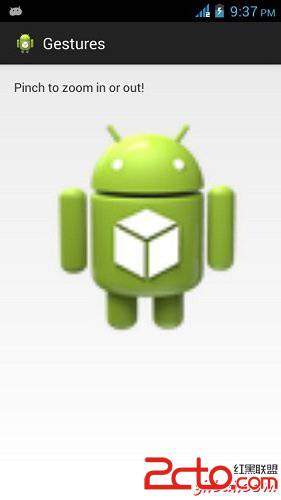
現在只是把兩個手指放在android屏幕,並且將它們分開的一部分,會看到Android的圖像縮大。這顯示在下面的圖片:
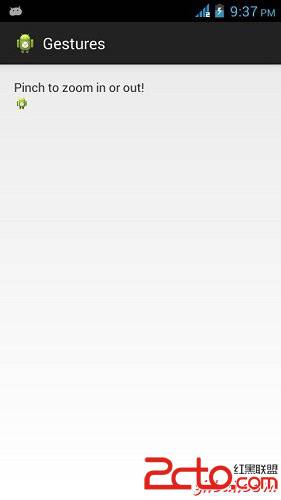
現在,再次將兩個手指在屏幕的Android,並嘗試關閉它們,會看到Android的圖像現在縮小。這顯示在下面的圖片:
 android 設置全屏的兩種方法
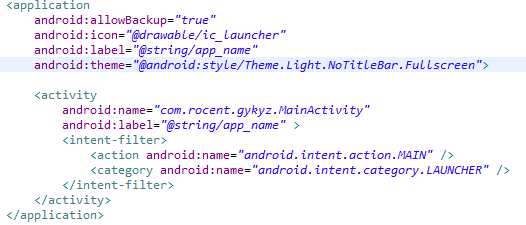
現在android的每一個項目都會需要設置為全屏,現在介紹兩種設置為全屏的方式。 一、在配置文件中設置android:theme=”@android:style/
 android監聽安裝和卸載示例
BroadcastReceiver 是系統全局廣播監聽類, 其主要方法是onReceive(),自定義的廣播類繼承於它並實現自己的onReceive()處理邏輯B
 Android Canvas繪圖之MaskFilter圖文詳解(附源碼下載)
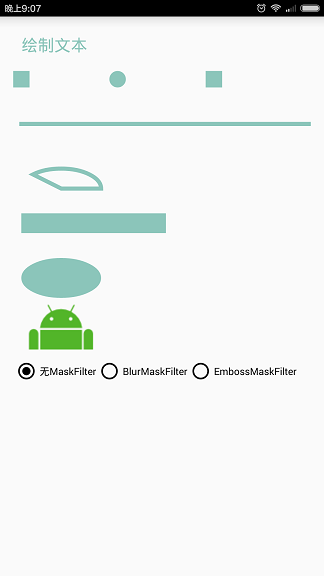
本文著重講解如何使用MaskFilter創建模糊陰影以及浮雕效果。 我們知道Canvas中的各種
 Android本地化
Android應用程序可以在許多不同地區的許多設備上運行。為了使應用程序更具交互性,應用程序應該處理以適合應用程序將要使用的語言環境方面的文字,數字,文件等。在本章中,我