編輯:Android開發實例
過去在Android上網絡通信都是使用的Xutils 因為用它可以順道處理了圖片和網絡這兩個方面,後來發覺Xutils裡面使用的是HttpClient 而Google在6.0的版本上已經把HttpClient廢除了,所以開始尋找新的網絡框架,okhttp也用過,但是它是在作用在UI線程,使用起來還需要用handler 所以就先用著Volley框架了。 這裡我先分析下Volley框架的簡單網絡請求的源碼。
使用Volley請求網絡數據的簡單過程:
RequestQueue queue = Volley.newRequestQueue(this); //實例化一個請求隊列 Google推薦寫一個單例類 獲取唯一一個隊列
 StringRequest request = new StringRequest(Request.Method.POST, url1, new Response.Listener<String>() {
      @Override
      public void onResponse(String response) {
        Toast.makeText(MainActivity.this, "success"+response, Toast.LENGTH_SHORT).show();
      }
    }, new Response.ErrorListener() {
      @Override
      public void onErrorResponse(VolleyError error) {
        Toast.makeText(MainActivity.this, "失敗了"+error.getMessage(), Toast.LENGTH_SHORT).show();
      }
    }){
      @Override
      protected Map<String, String> getParams() throws AuthFailureError { //重寫這個函數提交參數 也可以重寫一個Request實現這個方法
        Map<String,String> params = new HashMap<>();
        params.put(aaa+"name","1233555"); //參數
        return params;
      }
    };
    queue.add(request);
請求的處理在newRequestQueue的時候就開始執行了 只不過那時候請求隊列中還沒有請求 所以阻塞了 當 add的方法執行時 才開始真正請求網絡
所以我們先來看 queue.add(request) 方法
public <T> Request<T> add(Request<T> request) {
  // Tag the request as belonging to this queue and add it to the set of current requests.
  request.setRequestQueue(this);
  synchronized (mCurrentRequests) {
    mCurrentRequests.add(request);  //在當前隊列中加入
  }

  // Process requests in the order they are added.
  request.setSequence(getSequenceNumber());
  request.addMarker("add-to-queue"); //設置標志

  // If the request is uncacheable, skip the cache queue and go straight to the network.
  if (!request.shouldCache()) { //根據是否需要緩存 如果不需要緩存 就直接加入網絡任務隊列中 然後返回 如果需要緩存 那麼在下面代碼中加入緩存隊列 默認是需要緩存的
    mNetworkQueue.add(request);
    return request;
  }

  // Insert request into stage if there's already a request with the same cache key in flight.
  synchronized (mWaitingRequests) {
    String cacheKey = request.getCacheKey();
    if (mWaitingRequests.containsKey(cacheKey)) { //判斷當前正在被處理並可以緩存的請求中是否包含該請求的key 如果包含說明已經有一個相同的請求 那麼就加入到其中
      // There is already a request in flight. Queue up.
      Queue<Request<?>> stagedRequests = mWaitingRequests.get(cacheKey);
      if (stagedRequests == null) {
        stagedRequests = new LinkedList<Request<?>>();
      }
      stagedRequests.add(request);
      mWaitingRequests.put(cacheKey, stagedRequests);
      if (VolleyLog.DEBUG) {
        VolleyLog.v("Request for cacheKey=%s is in flight, putting on hold.", cacheKey);
      }
    } else { //如果不包含 加入一個空的請求到 暫存隊列中 然後加入到緩存隊列中
      // Insert 'null' queue for this cacheKey, indicating there is now a request in
      // flight.
      mWaitingRequests.put(cacheKey, null);
      mCacheQueue.add(request);
    }
    return request;
  }
}
分析add方法 首先加入到mCurrentRequests集合中 這個集合存放所有這個隊列所處理的請求 然後判斷這個請求是否需要緩存,如果不需要緩存,那麼直接加入mNetworkQueue隊列中等待處理即可,如果需要那麼最終加入到mCacheQueue隊列中,因為RequestQueue在處理請求時總會先處理緩存的任務,在處理緩存時如果第一次處理沒有緩存還是會加入mNetworkQueue隊列中處理,如果有緩存那麼就直接獲取緩存了,之後判斷當前的請求中是否有相同的請求,如果有的話那麼就把這個請求加入到暫存集合中,如果沒有那麼就加入一個空的到請求到暫存隊列中,用來以後判斷是否有和這個請求相同的請求,然後加入緩存隊列中即可。
然後我們來看RequstQueue的創建過程
public static RequestQueue newRequestQueue(Context context, HttpStack stack) {
    File cacheDir = new File(context.getCacheDir(), DEFAULT_CACHE_DIR); //創建一個文件用於緩存

    String userAgent = "volley/0";  //用戶代理初始化
    try {
      String packageName = context.getPackageName();
      PackageInfo info = context.getPackageManager().getPackageInfo(packageName, 0);
      userAgent = packageName + "/" + info.versionCode; //用戶代理為app包名+版本號
    } catch (NameNotFoundException e) {
    }

    if (stack == null) { //如果沒傳入HttpStack 那麼采用下述默認的  這裡可以自行重寫擴展HttpStack 體現了該框架的高擴展性
      if (Build.VERSION.SDK_INT >= 9) { //如果sdk版本高於2.3 采用HurlStack 內部是httpUrlConnection實現
        stack = new HurlStack();
      } else { //如果版本低於2.3 采用httpClientStack
        // Prior to Gingerbread, HttpUrlConnection was unreliable.
        // See: http://android-developers.blogspot.com/2011/09/androids-http-clients.html
        stack = new HttpClientStack(AndroidHttpClient.newInstance(userAgent));
      }
    }

    Network network = new BasicNetwork(stack); //創建一個網絡工作 僅僅作用於請求網絡

    RequestQueue queue = new RequestQueue(new DiskBasedCache(cacheDir), network); //實例化一個請求隊列 傳入參數
    queue.start();

    return queue;
  }
</pre><pre code_snippet_id="1680121" snippet_file_name="blog_20160512_5_2241745" name="code" class="java">public RequestQueue(Cache cache, Network network, int threadPoolSize) { //構造函數 會創建默認的ExecutorDelivery 用於回調
    this(cache, network, threadPoolSize,
        new ExecutorDelivery(new Handler(Looper.getMainLooper())));
  }
RequestQueue的創建過程也比較簡單 根據sdk版本號判斷使用HttpURLConnection還是HttpClient 因為在2.3之前 httpUrlConnection有一個重大的bug 所以使用HttpClient代替,而httpUrlConnection體積小 支持gzip壓縮和緩存,並且速度相對httpClient快 並逐漸優化 所以選擇httpUrlConnection 之後根據創建的NetWork 創建RequestQueue隊列 然後開啟即可
之後我們查看 queue的start方法
public void start() {
    stop(); // Make sure any currently running dispatchers are stopped.
    // Create the cache dispatcher and start it.
    mCacheDispatcher = new CacheDispatcher(mCacheQueue, mNetworkQueue, mCache, mDelivery); //創建一個緩存調度器 是一個線程 start後執行run方法
    mCacheDispatcher.start();

    // Create network dispatchers (and corresponding threads) up to the pool size.
    for (int i = 0; i < mDispatchers.length; i++) { //默認會有4個NetworkDispatcher 為了提高效率 執行netWorkQueue裡的request
      NetworkDispatcher networkDispatcher = new NetworkDispatcher(mNetworkQueue, mNetwork,
          mCache, mDelivery);
      mDispatchers[i] = networkDispatcher;
      networkDispatcher.start();
    }
  }
這個方法 先執行緩存調度器線程然後執行4個網絡工作調度器線程,因為在緩存調度器中 會判斷是否緩存過,如果緩存過並且沒過期,就直接復用緩存的,不把任務加入netWordQueue中 所以下面的NetWork調度器線程就會取不到請求而阻塞,不會執行,而如果沒有緩存,緩存調度器線程中就會把請求加入NetWork隊列中,下面的netWork調度器就會取到該請求並執行了
我們仔細看一下CacheDispatcher線程的源碼:
run方法的代碼比較長 我們分開來看 先看第一部分:
@Override
 public void run() {
   if (DEBUG) VolleyLog.v("start new dispatcher");
   Process.setThreadPriority(Process.THREAD_PRIORITY_BACKGROUND); //設置線程的優先級  值為10

   // Make a blocking call to initialize the cache.
   mCache.initialize(); //初始化一下緩存

   while (true) {
     try {
       // Get a request from the cache triage queue, blocking until
       // at least one is available.
       final Request<?> request = mCacheQueue.take();  //從緩存隊列取出一個請求 如果沒有則會阻塞
       request.addMarker("cache-queue-take");  //添加一個標記

       // If the request has been canceled, don't bother dispatching it.
       if (request.isCanceled()) {
         request.finish("cache-discard-canceled");
         continue;
       }

       // Attempt to retrieve this item from cache.
       Cache.Entry entry = mCache.get(request.getCacheKey()); //從緩存中讀取緩存
       if (entry == null) { //如果沒讀取到緩存
         request.addMarker("cache-miss"); //添加緩存miss標記
         // Cache miss; send off to the network dispatcher.
         mNetworkQueue.put(request); //換區緩存失敗 添加到netWork中等待請求
         continue;
       }

       // If it is completely expired, just send it to the network.
       if (entry.isExpired()) { //判斷緩存是否過期了 如果過期了 那麼就添加到netWork中等待請求
         request.addMarker("cache-hit-expired");
         request.setCacheEntry(entry);
         mNetworkQueue.put(request);
         continue;
       }
第二部分 :
// We have a cache hit; parse its data for delivery back to the request.
        request.addMarker("cache-hit"); //執行到了這裡說明緩存沒有過期 並且可以使用
        Response<?> response = request.parseNetworkResponse( //把讀取到的緩存內容解析成Response對象
            new NetworkResponse(entry.data, entry.responseHeaders));
        request.addMarker("cache-hit-parsed"); //添加標記

        if (!entry.refreshNeeded()) { //如果緩存不需要刷新 直接調用 mDelivery.postResponse方法  在其中會回調request的listener接口
          // Completely unexpired cache hit. Just deliver the response.
          mDelivery.postResponse(request, response);
        } else { //如果需要刷新  把請求加入mNetworkQueue中 等待請求
          // Soft-expired cache hit. We can deliver the cached response,
          // but we need to also send the request to the network for
          // refreshing.
          request.addMarker("cache-hit-refresh-needed");
          request.setCacheEntry(entry);

          // Mark the response as intermediate.
          response.intermediate = true;

          // Post the intermediate response back to the user and have
          // the delivery then forward the request along to the network.
          mDelivery.postResponse(request, response, new Runnable() {
            @Override
            public void run() {
              try {
                mNetworkQueue.put(request);
              } catch (InterruptedException e) {
                // Not much we can do about this.
              }
            }
          });
        }

      } catch (InterruptedException e) {
        // We may have been interrupted because it was time to quit.
        if (mQuit) {
          return;
        }
        continue;
      }
    }
  }
上面代碼的具體過程也很簡單 首先從緩存請求隊列取出一個請求,在緩存中看看有沒有該請求的緩存,如果沒有 那麼 請求放入NetWork調度器中 等待調用 如果有 也分幾種情況 如果獲取到的是空,放入NetWOrk 如果過期 放入 NetWork 如果不需要刷新 就直接從緩存獲取響應信息並解析 然後用mDelivery回調接口即可 如果需要刷新 放入NetWOrd隊列等待調用。。。
我們再來看看NetworkDispatcher 線程的代碼就可以了 類似於CacheDispatcher的代碼:
@Override
  public void run() {
    Process.setThreadPriority(Process.THREAD_PRIORITY_BACKGROUND); //設置優先級 10
    while (true) {
      long startTimeMs = SystemClock.elapsedRealtime(); //獲取請求執行開始時間
      Request<?> request;
      try {
        // Take a request from the queue.
        request = mQueue.take(); //從隊列獲取一個請求 沒有則阻塞
      } catch (InterruptedException e) {
        // We may have been interrupted because it was time to quit.
        if (mQuit) {
          return;
        }
        continue;
      }

      try {
        request.addMarker("network-queue-take");

        // If the request was cancelled already, do not perform the
        // network request.
        if (request.isCanceled()) {
          request.finish("network-discard-cancelled");
          continue;
        }

        addTrafficStatsTag(request);

        // Perform the network request.
        NetworkResponse networkResponse = mNetwork.performRequest(request); //真正執行請求的函數  並返回響應
        request.addMarker("network-http-complete");

        // If the server returned 304 AND we delivered a response already,
        // we're done -- don't deliver a second identical response.
        if (networkResponse.notModified && request.hasHadResponseDelivered()) {
          request.finish("not-modified");
          continue;
        }

        // Parse the response here on the worker thread.
        Response<?> response = request.parseNetworkResponse(networkResponse); //解析響應
        request.addMarker("network-parse-complete");

        // Write to cache if applicable.
        // TODO: Only update cache metadata instead of entire record for 304s.
        if (request.shouldCache() && response.cacheEntry != null) { //如果需要緩存 那麼把響應的信息存入緩存中
          mCache.put(request.getCacheKey(), response.cacheEntry);
          request.addMarker("network-cache-written");
        }

        // Post the response back.
        request.markDelivered();
        mDelivery.postResponse(request, response); //之後回調一些方法
      } catch (VolleyError volleyError) {
        volleyError.setNetworkTimeMs(SystemClock.elapsedRealtime() - startTimeMs);
        parseAndDeliverNetworkError(request, volleyError); //回調錯誤接口
      } catch (Exception e) {
        VolleyLog.e(e, "Unhandled exception %s", e.toString());
        VolleyError volleyError = new VolleyError(e);
        volleyError.setNetworkTimeMs(SystemClock.elapsedRealtime() - startTimeMs);
        mDelivery.postError(request, volleyError);  //回調錯誤接口
      }
    }
  }
NetworkDispatcher 線程的執行過程 先從 networkDispatch中獲取一個請求 然後判斷 是否取消了 如果沒有 那麼就執行NetWOrk的performRequest方法 執行http請求,這個函數內部才是真正的請求數據 ,請求後 根據設置的shouldCache標志 判斷是否放入緩存中 之後回調一些接口方法 即可 這樣就完成了一個請求
最後我們看一看NetWork類mNetwork.performRequest(request)方法是如何提交請求的吧 代碼比較長 但是不難:
@Override
  public NetworkResponse performRequest(Request<?> request) throws VolleyError {
    long requestStart = SystemClock.elapsedRealtime(); //記錄開始時間
    while (true) {
      HttpResponse httpResponse = null;
      byte[] responseContents = null;
      Map<String, String> responseHeaders = Collections.emptyMap(); //初始化響應頭為空
      try {
        // Gather headers.
        Map<String, String> headers = new HashMap<String, String>(); //請求頭
        addCacheHeaders(headers, request.getCacheEntry()); //根據緩存添加請求頭
        httpResponse = mHttpStack.performRequest(request, headers); //調用HttpStack的方法請求網絡
        StatusLine statusLine = httpResponse.getStatusLine();
        int statusCode = statusLine.getStatusCode();

        responseHeaders = convertHeaders(httpResponse.getAllHeaders()); //獲取響應頭
        // Handle cache validation.
        if (statusCode == HttpStatus.SC_NOT_MODIFIED) {  //如果為304 讀取的緩存

          Entry entry = request.getCacheEntry(); //查看以前是否緩存過
          if (entry == null) { //如果以前緩存的為空 那麼 說明上次緩存的請求也為空 直接返回response
            return new NetworkResponse(HttpStatus.SC_NOT_MODIFIED, null,
                responseHeaders, true,
                SystemClock.elapsedRealtime() - requestStart);
          }

          // A HTTP 304 response does not have all header fields. We
          // have to use the header fields from the cache entry plus
          // the new ones from the response.
          // http://www.w3.org/Protocols/rfc2616/rfc2616-sec10.html#sec10.3.5
          entry.responseHeaders.putAll(responseHeaders); //如果不空 那麼就添加頭 然後返回 數據了
          return new NetworkResponse(HttpStatus.SC_NOT_MODIFIED, entry.data,
              entry.responseHeaders, true,
              SystemClock.elapsedRealtime() - requestStart);
        }

        // Some responses such as 204s do not have content. We must check.
        if (httpResponse.getEntity() != null) { //不是304的情況
     responseContents = entityToBytes(httpResponse.getEntity()); //獲取響應的內容 下面返回響應即可
    } else {
     // Add 0 byte response as a way of honestly representing a
     // no-content request.
     responseContents = new byte[0];
    }

    // if the request is slow, log it.
    long requestLifetime = SystemClock.elapsedRealtime() - requestStart;
    logSlowRequests(requestLifetime, request, responseContents, statusLine);

    if (statusCode < 200 || statusCode > 299) {
      throw new IOException();
    }
    return new NetworkResponse(statusCode, responseContents, responseHeaders, false,
        SystemClock.elapsedRealtime() - requestStart);
  } catch (SocketTimeoutException e) {
    attemptRetryOnException("socket", request, new TimeoutError());
  } catch (ConnectTimeoutException e) {
    attemptRetryOnException("connection", request, new TimeoutError());
  } catch (MalformedURLException e) {
    throw new RuntimeException("Bad URL " + request.getUrl(), e);
  } catch (IOException e) {
    int statusCode = 0;
    NetworkResponse networkResponse = null;
    if (httpResponse != null) {
      statusCode = httpResponse.getStatusLine().getStatusCode();
    } else {
      throw new NoConnectionError(e);
    }
    VolleyLog.e("Unexpected response code %d for %s", statusCode, request.getUrl());
    if (responseContents != null) {
      networkResponse = new NetworkResponse(statusCode, responseContents,
          responseHeaders, false, SystemClock.elapsedRealtime() - requestStart);
      if (statusCode == HttpStatus.SC_UNAUTHORIZED ||
          statusCode == HttpStatus.SC_FORBIDDEN) {
        attemptRetryOnException("auth",
            request, new AuthFailureError(networkResponse));
      } else {
        // TODO: Only throw ServerError for 5xx status codes.
        throw new ServerError(networkResponse);
      }
    } else {
      throw new NetworkError(networkResponse);
    }
  }
}
然後看 HttpStack的 請求代碼:
@Override
  public HttpResponse performRequest(Request<?> request, Map<String, String> additionalHeaders)
      throws IOException, AuthFailureError {
    String url = request.getUrl();
    HashMap<String, String> map = new HashMap<String, String>();
    map.putAll(request.getHeaders()); //添加請求頭
    map.putAll(additionalHeaders);
    if (mUrlRewriter != null) {
      String rewritten = mUrlRewriter.rewriteUrl(url);
      if (rewritten == null) {
        throw new IOException("URL blocked by rewriter: " + url);
      }
      url = rewritten;
    }
    URL parsedUrl = new URL(url);
    HttpURLConnection connection = openConnection(parsedUrl, request); //打開連接
    for (String headerName : map.keySet()) { //設置頭
      connection.addRequestProperty(headerName, map.get(headerName));
    }
    setConnectionParametersForRequest(connection, request); //在這個函數裡添加請求的參數 和一些基本的信息配置
    // Initialize HttpResponse with data from the HttpURLConnection.
    ProtocolVersion protocolVersion = new ProtocolVersion("HTTP", 1, 1);
    int responseCode = connection.getResponseCode(); //下面就是些獲取響應信息後的處理了
    if (responseCode == -1) {
      // -1 is returned by getResponseCode() if the response code could not be retrieved.
      // Signal to the caller that something was wrong with the connection.
      throw new IOException("Could not retrieve response code from HttpUrlConnection.");
    }
    StatusLine responseStatus = new BasicStatusLine(protocolVersion,
        connection.getResponseCode(), connection.getResponseMessage());
    BasicHttpResponse response = new BasicHttpResponse(responseStatus);
    response.setEntity(entityFromConnection(connection));
    for (Entry<String, List<String>> header : connection.getHeaderFields().entrySet()) {
      if (header.getKey() != null) {
        Header h = new BasicHeader(header.getKey(), header.getValue().get(0));
        response.addHeader(h);
      }
    }
    return response;
  }
這個函數中主要是HttpUrlConnection的使用 添加頭在 connection.addRequestProperty方法中 添加參數需要獲取流 然後寫入參數 下面這個函數中有介紹 假設是post方式:
case Method.POST:
        connection.setRequestMethod("POST");
        addBodyIfExists(connection, request);
        break;
private static void addBodyIfExists(HttpURLConnection connection, Request<?> request)
      throws IOException, AuthFailureError {
    byte[] body = request.getBody();
    if (body != null) {
      connection.setDoOutput(true);
      connection.addRequestProperty(HEADER_CONTENT_TYPE, request.getBodyContentType());
      DataOutputStream out = new DataOutputStream(connection.getOutputStream());
      out.write(body);
      out.close();
    }
  }
將body寫入到流中 就可以 參數的封裝在 body中
public byte[] getBody() throws AuthFailureError {
    Map<String, String> params = getParams();
    if (params != null && params.size() > 0) {
      return encodeParameters(params, getParamsEncoding());
    }
    return null;
  }
getParams方法 是Request需要重寫的一個方法 返回值就是參數的Map集合
[java] view plain copy 在CODE上查看代碼片派生到我的代碼片
private byte[] encodeParameters(Map<String, String> params, String paramsEncoding) {
    StringBuilder encodedParams = new StringBuilder();
    try {
      for (Map.Entry<String, String> entry : params.entrySet()) {
        encodedParams.append(URLEncoder.encode(entry.getKey(), paramsEncoding));
        encodedParams.append('=');
        encodedParams.append(URLEncoder.encode(entry.getValue(), paramsEncoding));
        encodedParams.append('&');
      }
      return encodedParams.toString().getBytes(paramsEncoding);
    } catch (UnsupportedEncodingException uee) {
      throw new RuntimeException("Encoding not supported: " + paramsEncoding, uee);
    }
  }
這個函數就是按照一定規則拼接字符串參數即可 然後 就可以提交參數了
最後介紹下這個框架主要的幾個類、成員及他們作用:
RequestQueue 用來處理請求的隊列,請求都放在這個類中 調用start方法 開始處理請求
mCache 請求的緩存,當提交了一個請求 並且此請求需要緩存時,會放入這個緩存中
mNetwork 單純用於提交網絡請求的接口 只有一個提交請求的方法 需要傳入一個HttpStack來完成請求的提交
mDelivery 用於請求響應後的 接口回調等功能
mDispatchers NetWork調度器線程數組 包含4個對象處理請求 目的是為了提高效率 當沒有緩存可以獲取或者已經過期 需要刷新時 會調用這個線程的run方法 如果沒有 則阻塞
mCacheDispatcher 緩存調度器線程 處理已經緩存了的請求 如果沒有緩存 則將請求放入 NetWorkQueue 等待調用
以上就是本文的全部內容,希望對大家學習Android Volley框架有所幫助。
 Android本地化
Android應用程序可以在許多不同地區的許多設備上運行。為了使應用程序更具交互性,應用程序應該處理以適合應用程序將要使用的語言環境方面的文字,數字,文件等。在本章中,我
 使用PHP開發Android應用程序技術介紹
Google的開源Android移動操作系統正在席卷全球智能手機市場,和蘋果不一樣,它對那些想將應用程序提交到iPhone App Store的開發人員有著嚴格的
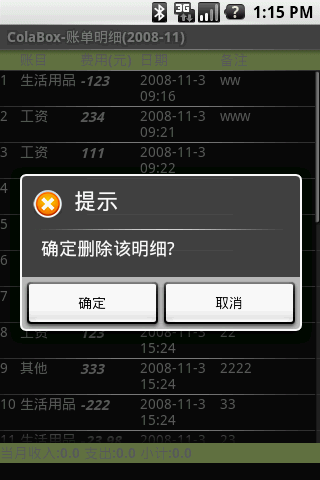 Android個人理財工具實例之六:顯示賬單明細 下
上一節的顯示賬單明細 上中,賬單明細的顯示已經基本實現,本文主要整理下代碼,實
 Android登錄實例
登錄應用程序的屏幕,詢問憑據登錄到一些特定的應用。可能需要登錄到Facebook,微博等本章介紹了,如何創建一個登錄界面,以及如何管理安全問題和錯誤嘗試。首先,必須定義兩