編輯:Android開發實例
一、概述
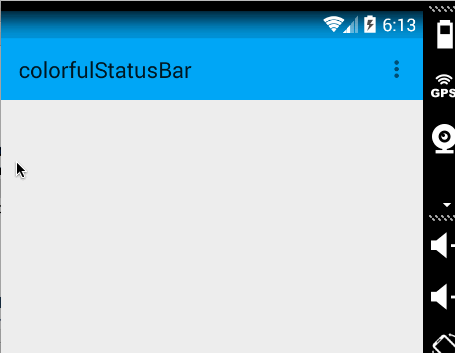
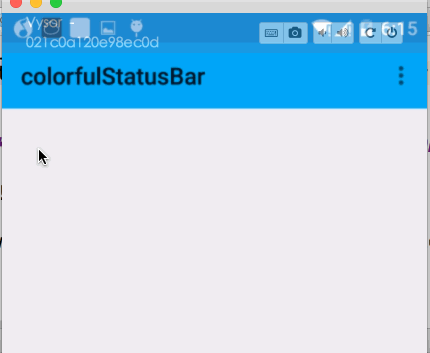
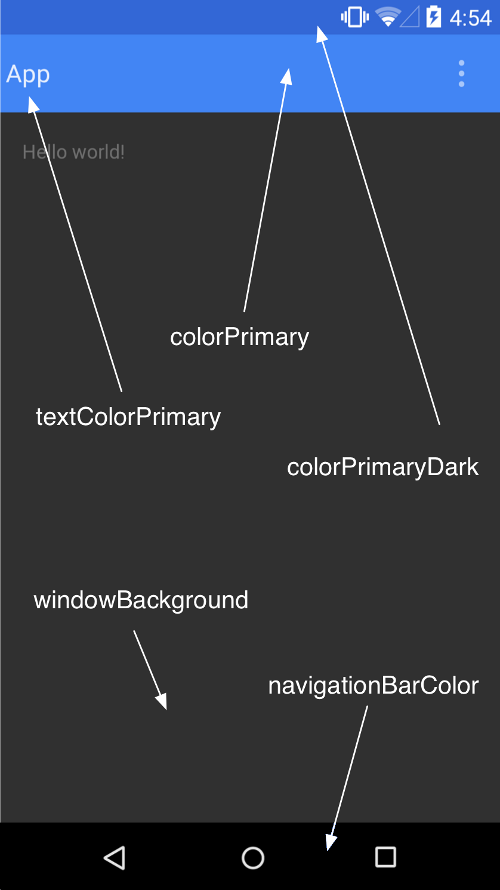
近期注意到QQ新版使用了沉浸式狀態欄,ok,先聲明一下:本篇博客效果下圖:

關於這個狀態欄變色到底叫「Immersive Mode」/「Translucent Bars」有興趣可以去了解下。
恩,接下來正題。
首先只有大於等於4.4版本支持這個半透明狀態欄的效果,但是4.4和5.0的顯示效果有一定的差異,所有本篇博文內容為:
如何實現半透明狀態欄效果在大於4.4版本之上。
如何讓4.4的效果與5.0的效果盡可能一致。
看了不少參考文章,都介紹到這個庫,大家可以了解:SystemBarTint。
不過本篇博文並未基於此庫,自己想了個hack,對於此庫源碼有空再看了。
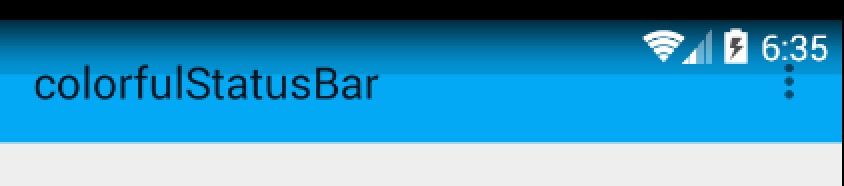
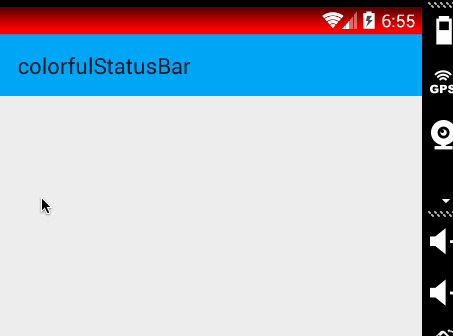
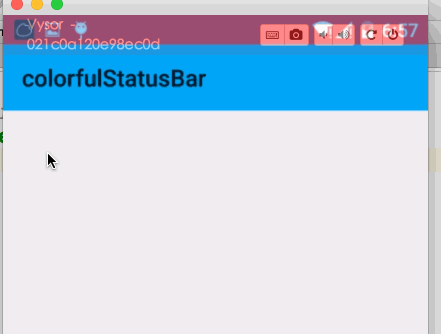
二、效果圖
先貼下效果圖,以便和實現過程中做下對比
4.4 模擬器
5.x 真機
ok,有了效果圖之後就開始看實現了。
三、實現半透明狀態欄
因為本例使用了NavigationView,所以布局代碼稍多,當然如果你不需要,可以自己進行篩減。
注意引入相關依賴:
Java代碼(一)colors.xml 和 styles.xml
首先我們定義幾個顏色:
res/values/color.xml
XML/HTML代碼下面定義幾個styles.xml
注意文件夾的路徑:
values/styles.xml
XML/HTML代碼values-v19
XML/HTML代碼ok,這個沒撒說的。注意我們的主題是基於NoActionBar的,android:windowTranslucentStatus這個屬性是v19開始引入的。
(二)布局文件
activity_main.xml
XML/HTML代碼DrawerLayout內部一個LinearLayout作為內容區域,一個NavigationView作為菜單。
注意下Toolbar的高度設置為wrap_content。
然後我們的NavigationView中又依賴一個布局文件和一個menu的文件。
header_just_username.xml
XML/HTML代碼menu的文件就不貼了,更加詳細的可以去參考Android 自己實現 NavigationView [Design Support Library(1)]。
大體看完布局文件以後,有幾個點要特別注意:
• ToolBar高度設置為wrap_content
• ToolBar添加屬性android:fitsSystemWindows="true"
• header_just_username.xml的跟布局RelativeLayout,添加屬性android:fitsSystemWindows="true"
android:fitsSystemWindows這個屬性,主要是通過調整當前設置這個屬性的view的padding去為我們的status_bar留下空間。
根據上面的解釋,如果你不寫,那麼狀態欄和Toolbar就會有擠一塊的感覺了,類似會這樣:
ok,最後看下代碼。
(三)Activity的代碼
Java代碼沒撒說的,就是setSupportActionBar。
那麼現在4.4的效果圖是:
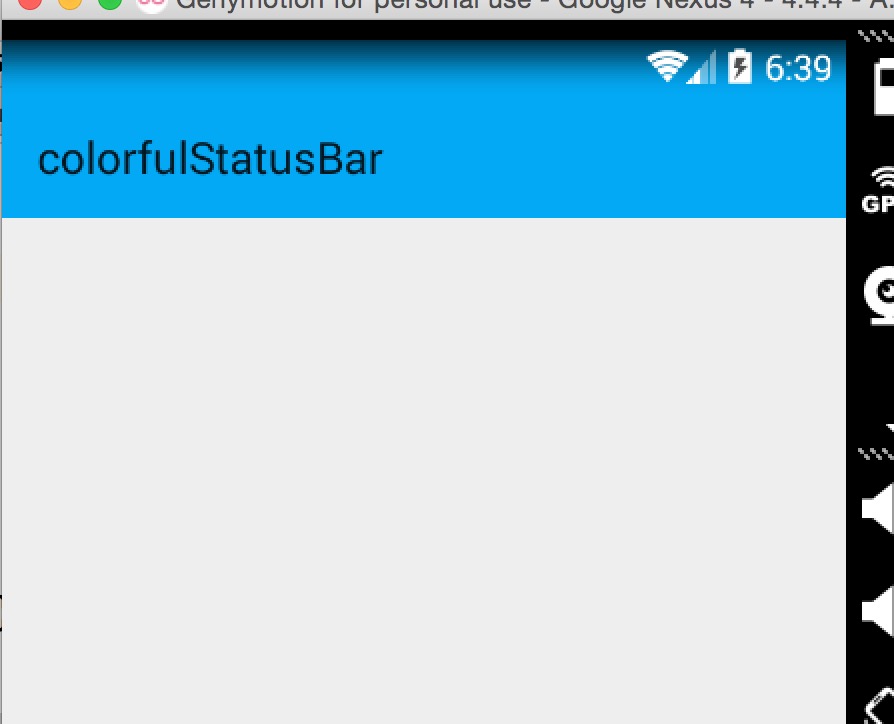
其實還不錯,有個漸變的效果。
現在5.x的效果:
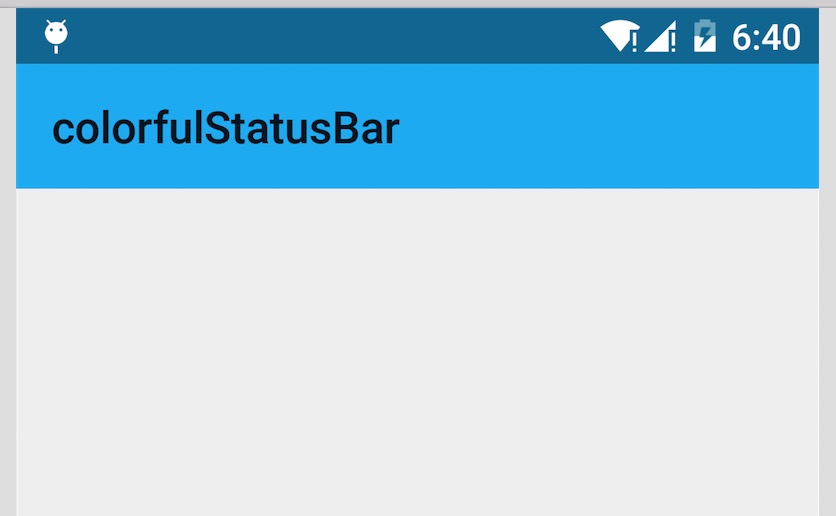
可以看到5.x默認並非是一個漸變的效果,類似是一個深一點的顏色。
再看看我們md的規范
狀態欄應該是一個比Toolbar背景色,稍微深一點的顏色。
這麼看來,我們還是有必要去為4.4做點適配工作,讓其竟可能和5.x顯示效果一致,或者說盡可能符合md的規范。
四、調整4.4的顯示方案
那麼問題來了?如何做呢?
咱們這麼看,4.4之後加入windowTranslucentStatus的屬性之後,也就是我們可以用到狀態欄的區域了。
既然我們可以用到這塊區域,那麼我們只要在根布局去設置一個與狀態欄等高的View,設置背景色為我們期望的顏色就可以了。
於是有了以下的代碼:
Java代碼代碼的思路很簡單,根據Activity找到android.R.content,在其中添加一個View(高度為statusbarHeight,背景色為我們設置的顏色,默認為半透明的黑色)。
那麼只需要在Activity裡面去寫上:
Java代碼就可以了。
如果你希望自己設置狀態看顏色,那麼就用這個方法:
Java代碼這樣的話我們就解決了4.4到5.x的適配問題,一行代碼解決,感覺還是不錯的。
最後提一下,對於5.0由於提供了setStatusBarColor去設置狀態欄顏色,但是這個方法不能在主題中設置windowTranslucentStatus屬性。所以,可以編寫一個value-v21文件夾,裡面styles.xml寫入:
XML/HTML代碼其實就是不要有windowTranslucentStatus屬性。
接下來,對於默認的效果就不測試了,參考上面的效果圖。
我們測試個設置狀態欄顏色的,我們這裡設置個紅色。
4.4 模擬器
5.x 真機
ok,這樣就結束啦~~
源碼地址:https://github.com/hongyangAndroid/ColorfulStatusBar
 Android中用ViewPager實現多頁面滑動切換及動畫效果的實例
一、首先,我們來看一下效果圖,這是新浪微博的Tab滑動效果。&nbs
 Android MediaPlayer(多媒體播放)
Android提供了許多方法來控制播放的音頻/視頻文件和流。其中該方法是通過一類稱為MediaPlayer。Android是提供MediaPlayer類訪問內置的媒體播放
 Android中GPS定位的用法實例
GPS定位是目前很多手機都有的功能,且非常實用。本文以實例形式講述了Android中GPS定位的用法。分享給大家供大家參考之用。具體方法如下: 一般在Androi
 Android JSON解析器
JSON代表JavaScript對象符號。它是一個獨立的數據交換格式,是XML的最佳替代品。本章介紹了如何解析JSON文件,並從中提取所需的信息。Android提供了四個