編輯:Android開發實例
Toast: http://developer.android.com/reference/android/widget/Toast.html
在部分手機中如果當把編輯完的消息發送完成之後,通常在手機下方會出現:”消息發送成功“的提示消息或相類似的提示消息,並且通常會短暫的停留之後會自動消失;那麼這個就是一個典型的Toast應用;
消息提示框的種類有多種比如說:Dialog(在以後章節中會介紹)。而Toast與Dialog不同:Dialog是以獨占的方式顯示的,換句話說就是:如果不關閉它Dialog會一直顯示於當前界面,而Toast則會短暫的停留之後自動關閉;
實現Toast其實很簡單,在這裡介紹三種方式:
- Toast toast = Toast.makeText(UsingIntent.this, "Some thing you want to show", Toast.LENGTH_LONG);toast.show();
調用makeText方法,會以文本的方式來進行顯示,因為它默認載入一個TextView,而第三參數可以通過:Toast的二個靜態域LENGTH_LONG/LENGTH_SHORT來進行設置; 之所以返回一個Toast是為了方便擴展,比如調用setDuration方法;
2. 添加一些自己想要的效果,個人覺得有點像重寫makeText方法的味道
- // LayoutInflater inflater = (LayoutInflater) YouAcvity.this.getSystemService(Context.LAYOUT_INFLATER_SERVICE); A
- View view = getLayoutInflater().inflate(your_layout_file,null); //B :A,B二者中選其一即可,在這裡只是提供二種途徑
- Toast toast = new Toast(YouActivity.this);
- toast.setDuration(Toast.LENGTH_LONG);
- toast.setView(view);
- toast.show(); //別忘記invoke show方法
3. Toast消息提示框會在一定時間後自動消失,如果想永遠停留該怎麼辦呢?能不能做得到呢?
首先告訴你永遠停留是可以做得到的,可怎麼去實現呢?
查看源碼後獲知,Toast.show方法是采用隊列來進行顯示,系統會依次取出一個Toast並顯示,等到一定的時間後它會自動消失,系統再會取出下一Toast,直接在整個隊列中沒有Toast為止;在Toast類有個私有的靜態內部類叫作:TN;因為TN是私有,那麼該如何訪問呢? 答案是反射。
- try {
- Field field =toast.getClass().getDeclaredField("mTN");
- field.setAccessible(true); Object object = field.get(toast);
- Method method=object.getClass().getDeclaredMethod("show",null);
- //object 最後定義在類裡面,這樣方面多次使用,比如關閉Toast
- method.invoke(object,new Object[0]);
- //new Object[0]可以用null代替,但是因為是可變參數,所以最好使用new Object[0]
- } catch (Exception e)
- {
- e.printStackTrace();
- }
如果有關閉Toast,可以使用(//method =object.getClass().getDeclaredMethod("hide",null););同時Toast提供一個其它的方法比如:setGravity方法;
Notification: http://developer.android.com/reference/android/app/Notification.html
總體分這五步!!!
Notification設計哲學是:管理通知對象,通知實體對象,Build對象(內部類),以及PendingIntent!
管理通知對象:NotificationManager: 擁有發布,更新,取消等通知功能。
通知實體對象:擁有多個實體屬性
Build對象:用於創建通知實體對象以及設置相關屬性
PendingIntent: 如果要啟動新的Activity通常是調用startActivity,startActivityForResult;而PendingIntent是對Intent的進一步封裝,以便當我們查看Notification執行相應動作時轉入對應的Activity.
在Andorid 3.0以下創建通知對象通常是直接利用:Notification的構建函數進行,而伴隨的Android os的更新升級,更多時候是使用另外二個支持類(內部類):NotificationCompat.Builder,Notification.Builder 這二者功能類似,主要區別在於:NotificationCompat.Builder可以兼容API level 4,並且它是由:SupportLibrary提供。
實碼演練:這時提供一個小Demo。
Layout file:
- <?xml version="1.0" encoding="utf-8"?>
- <LinearLayout xmlns:android="http://schemas.android.com/apk/res/android"
- android:orientation="vertical" android:layout_width="fill_parent"
- android:layout_height="fill_parent">
- <Button
- android:id="@+id/notification_demo1"
- android:layout_width="match_parent"
- android:layout_height="wrap_content"
- android:text="@string/notification_btn_string1"
- />
- <Button
- android:id="@+id/notification_demo2"
- android:layout_width="match_parent"
- android:layout_height="wrap_content"
- android:text="@string/notification_btn_string2"
- />
- <Button
- android:id="@+id/notification_demo2_1"
- android:layout_width="match_parent"
- android:layout_height="wrap_content"
- android:text="@string/notification_btn_string2_1"
- />
- <Button
- android:id="@+id/notification_demo3"
- android:layout_width="match_parent"
- android:layout_height="wrap_content"
- android:text="@string/notification_btn_string3"
- />
- <Button
- android:id="@+id/notification_demo4"
- android:layout_width="match_parent"
- android:layout_height="wrap_content"
- android:text="@string/notification_btn_string4"
- />
- <Button
- android:id="@+id/notification_demo5"
- android:layout_width="match_parent"
- android:layout_height="wrap_content"
- android:text="@string/notification_btn_string5"
- />
- </LinearLayout>
Code
- package com.ringcentral.wolf.ch04;
- import com.ringcentral.wolf.R;
- import com.ringcentral.wolf.ch03.UsingIntent;
- import android.app.Activity;
- import android.app.Notification;
- import android.app.NotificationManager;
- import android.app.PendingIntent;
- import android.content.Intent;
- import android.os.Bundle;
- import android.support.v4.app.NotificationCompat;
- import android.support.v4.app.TaskStackBuilder;
- import android.view.View;
- import android.view.View.OnClickListener;
- import android.widget.Button;
- public class NotificationTest extends Activity implements OnClickListener {
- private NotificationManager nManager;
- private Button demo1;
- private Button demo2;
- private Button demo2_1;
- private Button demo3;
- private Button demo4;
- private Button demo5;
- NotificationCompat.Builder builder;
- @Override
- public void onCreate(Bundle savedInstanceState ){
- super.onCreate(savedInstanceState);
- setContentView(com.ringcentral.wolf.R.layout.notification);
- nManager = (NotificationManager) getSystemService(NOTIFICATION_SERVICE);
- demo1 = (Button) findViewById(R.id.notification_demo1);
- demo2 = (Button) findViewById(R.id.notification_demo2);
- demo2_1= (Button) findViewById(R.id.notification_demo2_1);
- demo3 = (Button) findViewById(R.id.notification_demo3);
- demo4 = (Button) findViewById(R.id.notification_demo4);
- demo5 = (Button) findViewById(R.id.notification_demo5);
- builder = new NotificationCompat.Builder(this);
- demo1.setOnClickListener(this);
- demo2.setOnClickListener(this);
- demo3.setOnClickListener(this);
- demo4.setOnClickListener(this);
- demo5.setOnClickListener(this);
- demo2_1.setOnClickListener(this);
- }
- @SuppressWarnings("deprecation")
- private void demo1(int id){
- /**
- * 也可以調用構造方法,設置屬性
- */
- Notification notification = new Notification();
- notification.icon = R.drawable.smile;
- notification.number = 2<<2;
- notification.when = System.currentTimeMillis();
- notification.tickerText="You have a new message!! Come from Demo1";
- notification.defaults=Notification.DEFAULT_SOUND;
- //notification.flags =Notification.FLAG_NO_CLEAR;
- notification.flags=Notification.FLAG_ONGOING_EVENT;
- PendingIntent pendingIntent = PendingIntent.getActivity(this, 0, getIntent(), 0);
- notification.setLatestEventInfo(this, "Demo1", "First notification Message with Demo1!", pendingIntent);
- nManager.notify(id,notification);
- }
- private void demo2(int id){
- builder.setSmallIcon(R.drawable.smile)
- .setContentTitle("Demo2")
- .setContentText("Using 'NotificationCompat.Builder '");
- builder.setDefaults(Notification.DEFAULT_VIBRATE).setTicker("You have a new message!! Come from Demo2");
- Intent intent = new Intent(this,UsingIntent.class);
- TaskStackBuilder stackBuilder = TaskStackBuilder.create(this);
- stackBuilder.addParentStack(UsingIntent.class);
- stackBuilder.addNextIntent(intent);
- PendingIntent pendingIntent = stackBuilder.getPendingIntent(0,PendingIntent.FLAG_UPDATE_CURRENT);
- builder.setContentIntent(pendingIntent);
- nManager.notify(id, builder.build());
- }
- private void demo2_1(int id){
- builder.setSmallIcon(R.drawable.smile)
- .setContentTitle("Demo2_1")
- .setContentText("Using 'getActivity '");
- builder.setDefaults(Notification.DEFAULT_VIBRATE).setTicker("You have a new message!! Come from Demo2_1");
- Intent intent = new Intent(this,UsingIntent.class);
- intent.setFlags(Intent.FLAG_ACTIVITY_NEW_TASK|Intent.FLAG_ACTIVITY_CLEAR_TASK );
- PendingIntent pendingIntent = PendingIntent.getActivity(this, 0, intent, PendingIntent.FLAG_UPDATE_CURRENT);
- builder.setContentIntent(pendingIntent);
- nManager.notify(id, builder.build());
- }
- private void clear1(int id){
- nManager.cancel(id);
- }
- private void clearAll(){
- nManager.cancelAll();
- }
- /**
- * 如果要更新通知,簡單:保持 id 不變,進行重新繪制;新產生的通知會自動覆蓋舊通知!!!
- */
- private void update(int id){
- builder.setContentTitle("Update Demo2");
- builder.setContentText("Update Demo");
- builder.setDefaults(Notification.DEFAULT_VIBRATE).setTicker("Updte a new message!! Come from Demo2");
- Intent intent = new Intent(this,UsingIntent.class);
- TaskStackBuilder stackBuilder = TaskStackBuilder.create(this);
- stackBuilder.addParentStack(UsingIntent.class);
- stackBuilder.addNextIntent(intent);
- PendingIntent pendingIntent = stackBuilder.getPendingIntent(0,PendingIntent.FLAG_UPDATE_CURRENT);
- builder.setContentIntent(pendingIntent);
- nManager.notify(id, builder.build());
- }
- @Override
- public void onClick(View v) {
- switch (v.getId()) {
- case R.id.notification_demo1:
- demo1(R.id.notification_demo1);
- break;
- case R.id.notification_demo2:
- demo2(R.id.notification_demo2);
- break;
- case R.id.notification_demo2_1:
- demo2_1(R.id.notification_demo2);
- break;
- case R.id.notification_demo3:
- clear1(R.id.notification_demo1);
- break;
- case R.id.notification_demo4:
- clearAll();
- break;
- case R.id.notification_demo5:
- update(R.id.notification_demo2);
- break;
- default:
- break;
- }
- }
- }
如果要有震動效果,請在manifest file中設置:
- <uses-permission android:name="android.permission.VIBRATE"/>
備注:這只是提供Demo代碼,並不能直接復制,如果要練習,要本地化;另外UsingIntent類很簡單就是一Activity,因為在這裡就沒有提供。
如果是android 4.1及以後本版,還可以使用BigView,考慮到普及率不高,這裡不於解釋,感興趣的同學可以直接上官網。
利用PendingIntent設置Activity比較重要,它有二種方式:
- intent.setFlags(Intent.FLAG_ACTIVITY_NEW_TASK|Intent.FLAG_ACTIVITY_CLEAR_TASK );
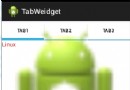
Demo程序主界面:
 Android MediaPlayer(多媒體播放)
Android提供了許多方法來控制播放的音頻/視頻文件和流。其中該方法是通過一類稱為MediaPlayer。Android是提供MediaPlayer類訪問內置的媒體播放
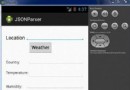 Android JSON解析器
JSON代表JavaScript對象符號。它是一個獨立的數據交換格式,是XML的最佳替代品。本章介紹了如何解析JSON文件,並從中提取所需的信息。Android提供了四個
 Android MediaPlayer(多媒體播放)
Android提供了許多方法來控制播放的音頻/視頻文件和流。其中該方法是通過一類稱為MediaPlayer。Android是提供MediaPlayer類訪問內置的媒體播放
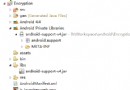 Android實用圖文教程之代碼混淆、第三方平台加固加密、渠道分發
第一步:代碼混淆(注意引入的第三方jar) 在新版本的ADT創建項目時,混碼的文件不再是proguard.cfg,而是project.properties和pro