編輯:Android編程入門
NDK的發布,使“Java+C”的開發方式終於轉正,成為官方支持的開發方式。NDK將是Android平台支持C開發的開端,今天我們開始ndk的學習。
ndk是什麼:
The Native Development Kit (NDK) is a set of tools that allow you to leverage C and C++ code in your Android apps. You can use it either to build from your own source code, or to take advantage of existing prebuilt libraries.
The NDK is not appropriate for most novice Android programmers, and has little value for many types of Android apps. It is often not worth the additional complexity it inevitably brings to the development process. However, it can be useful in cases in which you need to:
什麼場景可以應用ndk:
一、 先下載NDK的jar包,地址:http://192.168.10.75/android-ndk-r10e-windows-x86_64.exe。
點擊直接解壓,得到android-ndk-r10e文件夾,配置path系統變量:D:\android\ndk\android-ndk-r10e;
在cmd中測試:如下表示環境變量配置成功
二、 我們建立一個Android的項目,和普通的android項目一樣。這裡我們用的IDE是eclipse。
我們創建jni文件夾:
MainActivity中增加native方法,此時MainActivity內容如下:
package com.example.firstndk;

import android.os.Bundle;
import android.support.v7.app.AppCompatActivity;

public class MainActivity extends AppCompatActivity {
    // 定義一個native方法
    public static native String getStringFromNDK();

    @Override
    protected void onCreate(Bundle savedInstanceState) {
        super.onCreate(savedInstanceState);
        setContentView(R.layout.activity_main);
    }
}
二、 根據MainActivity生成頭文件:
在命令行中做以下的操作:
C:\Users\Linux>cd J:\android\andridtest\eclipseTools\2016-4-13\FirstNDK // 項目的本地目錄

C:\Users\Linux>J:

J:\android\andridtest\eclipseTools\2016-4-13\FirstNDK>javah -classpath bin/classes;D:\android\ndk\jar\android.jar;D:\and
roid\ndk\jar\android-support-v7-appcompat.jar;D:\android\ndk\jar\android-support-v4.jar -d jni com.example.firstndk.Main
Activity
上述的效果如下,在jni文件夾中生成com_example_firstndk_MainActivity.h文件,內容如下:
命令行的格式說明:javah -classpath 編譯項目所需的jar包路徑 -d 編譯文件的存放位置(相對路徑jni) 編譯的對象類
/* DO NOT EDIT THIS FILE - it is machine generated */
#include <jni.h>
/* Header for class com_example_firstndk_MainActivity */

#ifndef _Included_com_example_firstndk_MainActivity
#define _Included_com_example_firstndk_MainActivity
#ifdef __cplusplus
extern "C" {
#endif
#undef com_example_firstndk_MainActivity_BIND_ABOVE_CLIENT
#define com_example_firstndk_MainActivity_BIND_ABOVE_CLIENT 8L
#undef com_example_firstndk_MainActivity_BIND_ADJUST_WITH_ACTIVITY
#define com_example_firstndk_MainActivity_BIND_ADJUST_WITH_ACTIVITY 128L
#undef com_example_firstndk_MainActivity_BIND_ALLOW_OOM_MANAGEMENT
#define com_example_firstndk_MainActivity_BIND_ALLOW_OOM_MANAGEMENT 16L
#undef com_example_firstndk_MainActivity_BIND_AUTO_CREATE
#define com_example_firstndk_MainActivity_BIND_AUTO_CREATE 1L
#undef com_example_firstndk_MainActivity_BIND_DEBUG_UNBIND
#define com_example_firstndk_MainActivity_BIND_DEBUG_UNBIND 2L
#undef com_example_firstndk_MainActivity_BIND_IMPORTANT
#define com_example_firstndk_MainActivity_BIND_IMPORTANT 64L
#undef com_example_firstndk_MainActivity_BIND_NOT_FOREGROUND
#define com_example_firstndk_MainActivity_BIND_NOT_FOREGROUND 4L
#undef com_example_firstndk_MainActivity_BIND_WAIVE_PRIORITY
#define com_example_firstndk_MainActivity_BIND_WAIVE_PRIORITY 32L
#undef com_example_firstndk_MainActivity_CONTEXT_IGNORE_SECURITY
#define com_example_firstndk_MainActivity_CONTEXT_IGNORE_SECURITY 2L
#undef com_example_firstndk_MainActivity_CONTEXT_INCLUDE_CODE
#define com_example_firstndk_MainActivity_CONTEXT_INCLUDE_CODE 1L
#undef com_example_firstndk_MainActivity_CONTEXT_RESTRICTED
#define com_example_firstndk_MainActivity_CONTEXT_RESTRICTED 4L
#undef com_example_firstndk_MainActivity_MODE_APPEND
#define com_example_firstndk_MainActivity_MODE_APPEND 32768L
#undef com_example_firstndk_MainActivity_MODE_ENABLE_WRITE_AHEAD_LOGGING
#define com_example_firstndk_MainActivity_MODE_ENABLE_WRITE_AHEAD_LOGGING 8L
#undef com_example_firstndk_MainActivity_MODE_MULTI_PROCESS
#define com_example_firstndk_MainActivity_MODE_MULTI_PROCESS 4L
#undef com_example_firstndk_MainActivity_MODE_PRIVATE
#define com_example_firstndk_MainActivity_MODE_PRIVATE 0L
#undef com_example_firstndk_MainActivity_MODE_WORLD_READABLE
#define com_example_firstndk_MainActivity_MODE_WORLD_READABLE 1L
#undef com_example_firstndk_MainActivity_MODE_WORLD_WRITEABLE
#define com_example_firstndk_MainActivity_MODE_WORLD_WRITEABLE 2L
#undef com_example_firstndk_MainActivity_DEFAULT_KEYS_DIALER
#define com_example_firstndk_MainActivity_DEFAULT_KEYS_DIALER 1L
#undef com_example_firstndk_MainActivity_DEFAULT_KEYS_DISABLE
#define com_example_firstndk_MainActivity_DEFAULT_KEYS_DISABLE 0L
#undef com_example_firstndk_MainActivity_DEFAULT_KEYS_SEARCH_GLOBAL
#define com_example_firstndk_MainActivity_DEFAULT_KEYS_SEARCH_GLOBAL 4L
#undef com_example_firstndk_MainActivity_DEFAULT_KEYS_SEARCH_LOCAL
#define com_example_firstndk_MainActivity_DEFAULT_KEYS_SEARCH_LOCAL 3L
#undef com_example_firstndk_MainActivity_DEFAULT_KEYS_SHORTCUT
#define com_example_firstndk_MainActivity_DEFAULT_KEYS_SHORTCUT 2L
#undef com_example_firstndk_MainActivity_RESULT_CANCELED
#define com_example_firstndk_MainActivity_RESULT_CANCELED 0L
#undef com_example_firstndk_MainActivity_RESULT_FIRST_USER
#define com_example_firstndk_MainActivity_RESULT_FIRST_USER 1L
#undef com_example_firstndk_MainActivity_RESULT_OK
#define com_example_firstndk_MainActivity_RESULT_OK -1L
#undef com_example_firstndk_MainActivity_HONEYCOMB
#define com_example_firstndk_MainActivity_HONEYCOMB 11L
#undef com_example_firstndk_MainActivity_MSG_REALLY_STOPPED
#define com_example_firstndk_MainActivity_MSG_REALLY_STOPPED 1L
#undef com_example_firstndk_MainActivity_MSG_RESUME_PENDING
#define com_example_firstndk_MainActivity_MSG_RESUME_PENDING 2L
/*
 * Class:     com_example_firstndk_MainActivity
 * Method:    getStringFromNDK
 * Signature: ()Ljava/lang/String;
 */
JNIEXPORT jstring JNICALL Java_com_example_firstndk_MainActivity_getStringFromNDK
  (JNIEnv *, jclass);

#ifdef __cplusplus
}
#endif
#endif
com_example_firstndk_MainActivity.h
主要有用的內容是聲明了一個Java_com_example_firstndk_MainActivity_getStringFromNDK的方法:
JNIEXPORT jstring JNICALL Java_com_example_firstndk_MainActivity_getStringFromNDK
  (JNIEnv *, jclass);
三、 在jni文件夾下,創建一個C文件,我們命令為:hellondk.c
#include<stdio.h>
#include "com_example_firstndk_MainActivity.h"

JNIEXPORT jstring JNICALL Java_com_example_firstndk_MainActivity_getStringFromNDK
  (JNIEnv * env, jclass jclass) {

    return (*env)->NewStringUTF(env, "Hello, NDK.");
}
在jni中創建一個Android.mk文件(可以從官方文檔的項目復制過來,做修改就可)。
LOCAL_PATH := $(call my-dir)

include $(CLEAR_VARS)

LOCAL_MODULE    := hellondk
LOCAL_SRC_FILES := hellondk.c

include $(BUILD_SHARED_LIBRARY)
LOCAL_SRC_FILES就是我們創建的C代碼的源文件hellondk.c,而LOCAL_MODULE就是hellondk。其它的不需要做改動。
四、 在MainActivity中增加對JNI的調用,此時的MainActivity.java內容如下:
package com.example.firstndk;

import android.os.Bundle;
import android.support.v7.app.AppCompatActivity;
import android.widget.TextView;

public class MainActivity extends AppCompatActivity {

    private TextView textView;
    // 定義一個native方法
    public static native String getStringFromNDK();

    static {
        System.loadLibrary("hellondk");
    }

    @Override
    protected void onCreate(Bundle savedInstanceState) {
        super.onCreate(savedInstanceState);
        setContentView(R.layout.activity_main);

        textView = (TextView) findViewById(R.id.textView);
        textView.setText(getStringFromNDK());
    }
}
命令行中編譯項目:ndk-build,生成obj文件夾
J:\android\andridtest\eclipseTools\2016-4-13\FirstNDK>ndk-build
Android NDK: WARNING: APP_PLATFORM android-21 is larger than android:minSdkVersion 11 in ./AndroidManifest.xml
[armeabi] Compile thumb  : hellondk <= hellondk.c
[armeabi] SharedLibrary  : libhellondk.so
[armeabi] Install        : libhellondk.so => libs/armeabi/libhellondk.so
生成的obj內容大致如下:
五、 在模擬器中運行項目,得到結果:
最終的項目圖:
具體的視頻地址: http://pan.baidu.com/s/1dEEO5Mh
 Android學習筆記:ActionBar使用介紹
一、基本概念最權威和官方的介紹請看google的api文檔http://developer.android.com/training/basics/actionbar/s
 .Net程序猿玩轉Android開發---(8)表格布局TableLayout
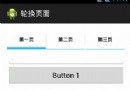
 Android Fragment 解析和使用
Android Fragment的生命周期和Activity類似,實際可能會涉及到數據傳遞,onSaveInstanceState
 強烈推薦android studio用的幾個插件
android studio經常使用插件,可極大簡化開發,增強開發效率。不懂安裝studio插件,看參考博文:android stuido插件安裝:http://blog