編輯:關於android開發
本文實現android系統照相機的調用來拍照
項目的布局相當簡單,只有一個Button:
<RelativeLayout xmlns:android="http://schemas.android.com/apk/res/android"
    xmlns:tools="http://schemas.android.com/tools"
    android:layout_width="match_parent"
    android:layout_height="match_parent"
    tools:context=".MainActivity" >

    <Button
        android:onClick="click"
        android:layout_width="wrap_content"
        android:layout_height="wrap_content"
        android:layout_centerHorizontal="true"
        android:layout_centerVertical="true"
        android:text="調用系統相機拍照" />

</RelativeLayout>
首先打開packages\apps\Camera文件夾下面的清單文件,找到下面的代碼:
       <activity android:name="com.android.camera.Camera"
                android:configChanges="orientation|keyboardHidden"
                android:theme="@android:style/Theme.Black.NoTitleBar.Fullscreen"
                android:screenOrientation="landscape"
                android:clearTaskOnLaunch="true"
                android:taskAffinity="android.task.camera">
            <intent-filter>
                <action android:name="android.intent.action.MAIN" />
                <category android:name="android.intent.category.DEFAULT" />
                <category android:name="android.intent.category.LAUNCHER" />
            </intent-filter>
            <intent-filter>
                <action android:name="android.media.action.IMAGE_CAPTURE" />
                <category android:name="android.intent.category.DEFAULT" />
            </intent-filter>
            <intent-filter>
                <action android:name="android.media.action.STILL_IMAGE_CAMERA" />
                <category android:name="android.intent.category.DEFAULT" />
            </intent-filter>
        </activity>
相關代碼如下:
public class MainActivity extends Activity {

    @Override
    protected void onCreate(Bundle savedInstanceState) {
        super.onCreate(savedInstanceState);
        setContentView(R.layout.activity_main);
    }

    public void click(View view) {
        /*
         * <intent-filter> <action
         * android:name="android.media.action.IMAGE_CAPTURE" /> <category
         * android:name="android.intent.category.DEFAULT" /> </intent-filter>
         */
        // 激活系統的照相機進行拍照
        Intent intent = new Intent();
        intent.setAction("android.media.action.IMAGE_CAPTURE");
        intent.addCategory("android.intent.category.DEFAULT");

        //保存照片到指定的路徑
        File file = new File("/sdcard/image.jpg");
        Uri uri = Uri.fromFile(file);
        intent.putExtra(MediaStore.EXTRA_OUTPUT, uri);

        startActivity(intent);

    }

}
實現激活錄像功能的相關代碼也很簡單:
public class MainActivity extends Activity {

    @Override
    protected void onCreate(Bundle savedInstanceState) {
        super.onCreate(savedInstanceState);
        setContentView(R.layout.activity_main);
    }

    public void click(View view) {
        /*
         * <intent-filter> <action
         * android:name="android.media.action.VIDEO_CAPTURE" /> <category
         * android:name="android.intent.category.DEFAULT" /> </intent-filter>
         */
        // 激活系統的照相機進行錄像
        Intent intent = new Intent();
        intent.setAction("android.media.action.VIDEO_CAPTURE");
        intent.addCategory("android.intent.category.DEFAULT");

        // 保存錄像到指定的路徑
        File file = new File("/sdcard/video.3pg");
        Uri uri = Uri.fromFile(file);
        intent.putExtra(MediaStore.EXTRA_OUTPUT, uri);

        startActivityForResult(intent, 0);
    }

    @Override
    protected void onActivityResult(int requestCode, int resultCode, Intent data) {
        Toast.makeText(this, "調用照相機完畢", 0).show();
        super.onActivityResult(requestCode, resultCode, data);

    }

}
 Android 圖片的合成,
Android 圖片的合成,本文實現在Android下圖片的合成 布局設計比較簡單: <RelativeLayout xmlns:android=http://s
 Android Bitmap占用內存計算公式,androidbitmap
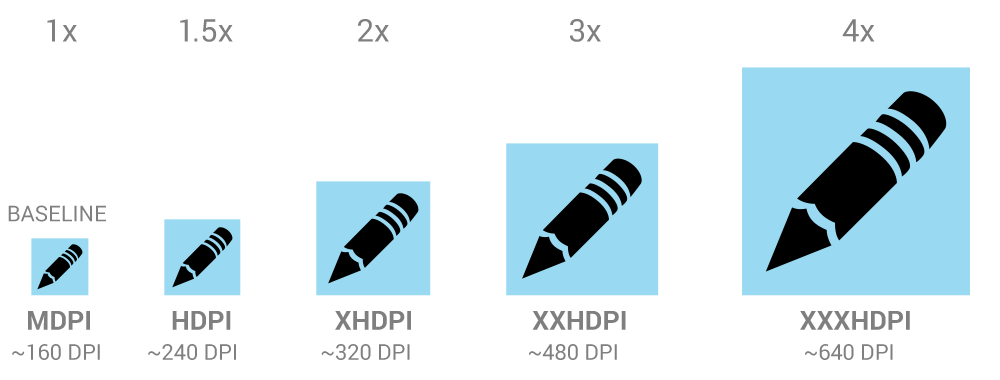
Android Bitmap占用內存計算公式,androidbitmap Android對各分辨率的定義 當圖片以格式ARGB_8888存儲時的計算方式 占用內存=圖片長
 android組合控件Titlebar的定制過程
android組合控件Titlebar的定制過程 前言:我相信”天生我才必有用”這句話,每個人都有他的作用,也許他的作用相對其他人來不是很明顯
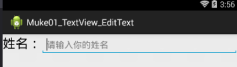 一.TextView 顯示文本框控件, EditText 輸入文本框,.textviewedittext
一.TextView 顯示文本框控件, EditText 輸入文本框,.textviewedittext1.一般共有屬性: android:id ----------