編輯:關於android開發
一般手機都是需要上網的,一般我們的浏覽器就是個webview。這裡簡單實現下下功能,先編寫Android的layout布局:
<!--{cke_protected}{C}%3C!%2D%2D%3Fxml%20version%3D%221.0%22%20encoding%3D%22utf-8%22%3F%2D%2D%3E-->
<linearlayout xmlns:android="http://schemas.android.com/apk/res/android" xmlns:tools="http://schemas.android.com/tools" android:layout_width="match_parent" android:layout_height="match_parent" android:orientation="vertical" android:layout_margin="10dp" android:padding="10dp" tools:context="com.example.jared.webviewstudy.MainActivity">

    <linearlayout android:layout_width="match_parent" android:layout_height="wrap_content">
        <edittext android:id="@+id/netAddress" android:layout_weight="1" android:layout_width="wrap_content" android:layout_height="wrap_content"><button android:id="@+id/openNetAddress" android:layout_height="wrap_content" android:layout_width="wrap_content" android:layout_weight="0" android:text="Open" android:textallcaps="false">


    <webview android:id="@+id/webView" android:layout_width="match_parent" android:layout_height="match_parent">


</webview></button></edittext></linearlayout></linearlayout>
package com.example.jared.webviewstudy;

import android.os.Bundle;
import android.support.v7.app.AppCompatActivity;
import android.view.View;
import android.webkit.WebView;
import android.webkit.WebViewClient;
import android.widget.Button;
import android.widget.EditText;

public class MainActivity extends AppCompatActivity {

    private WebView myWebView;
    private EditText networkAddr;
    private Button openNetwork;

    @Override
    protected void onCreate(Bundle savedInstanceState) {
        super.onCreate(savedInstanceState);
        setContentView(R.layout.activity_main);

        networkAddr = (EditText)findViewById(R.id.netAddress);
        myWebView = (WebView)findViewById(R.id.webView);

        openNetwork = (Button)findViewById(R.id.openNetAddress);
        openNetwork.setOnClickListener(new myOnClickListener());
    }

    class myOnClickListener implements View.OnClickListener {
        @Override
        public void onClick(View view) {
            myWebView.getSettings().setJavaScriptEnabled(true);
            myWebView.setWebViewClient(new WebViewClient() {
                @Override
                public boolean shouldOverrideUrlLoading(WebView view, String url) {
                    view.loadUrl(url);
                    return true;
                }
            });
            String networkAddress = networkAddr.getText().toString();
            myWebView.loadUrl("http://"+networkAddress);
        }
    }
}
還有就是權限問題了:
    <uses-permission android:name="android.permission.INTERNET">
</uses-permission>
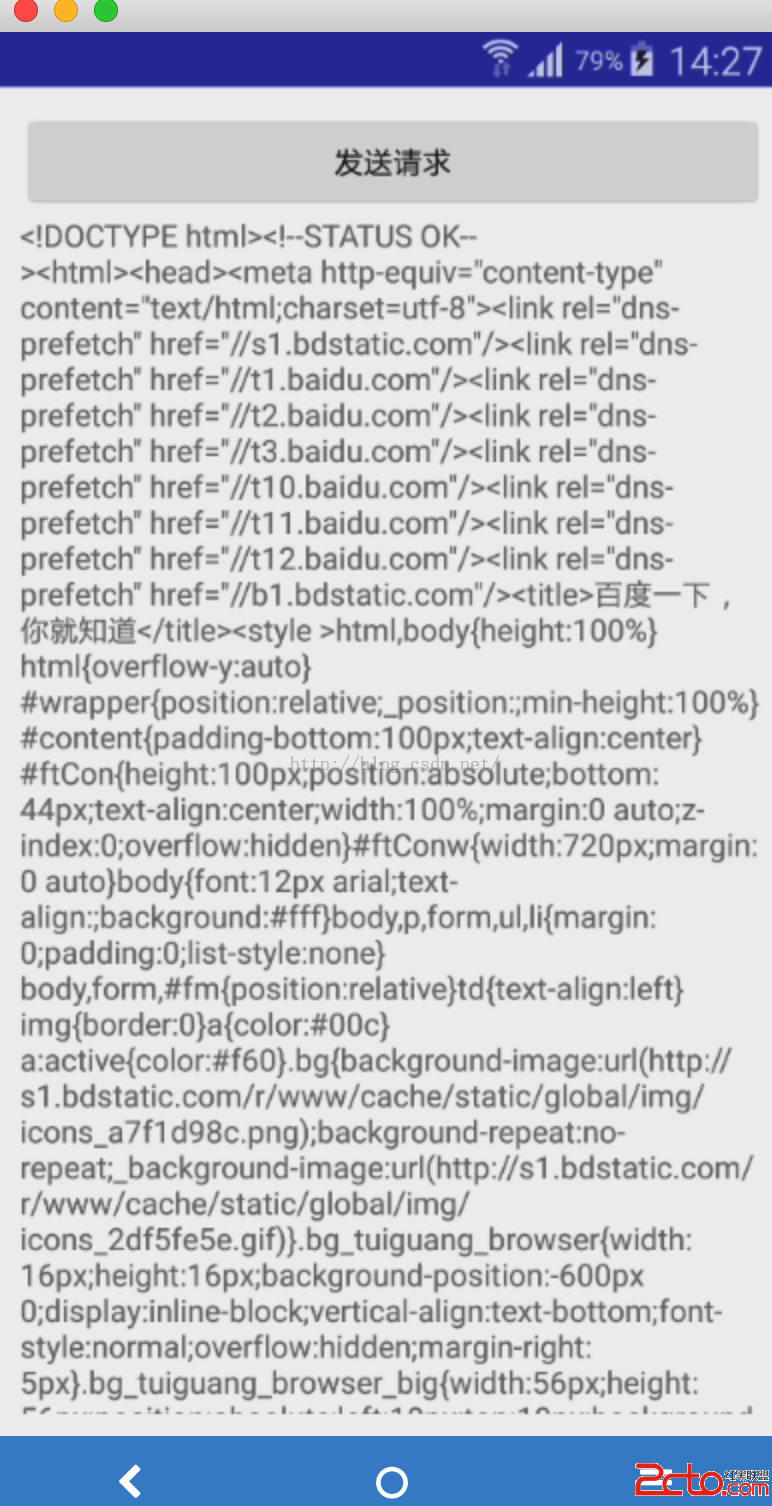
這裡通過setWebViewClient方法,實例化一個WebViewClient,loadurl實現網頁的加載。運行看下效果:
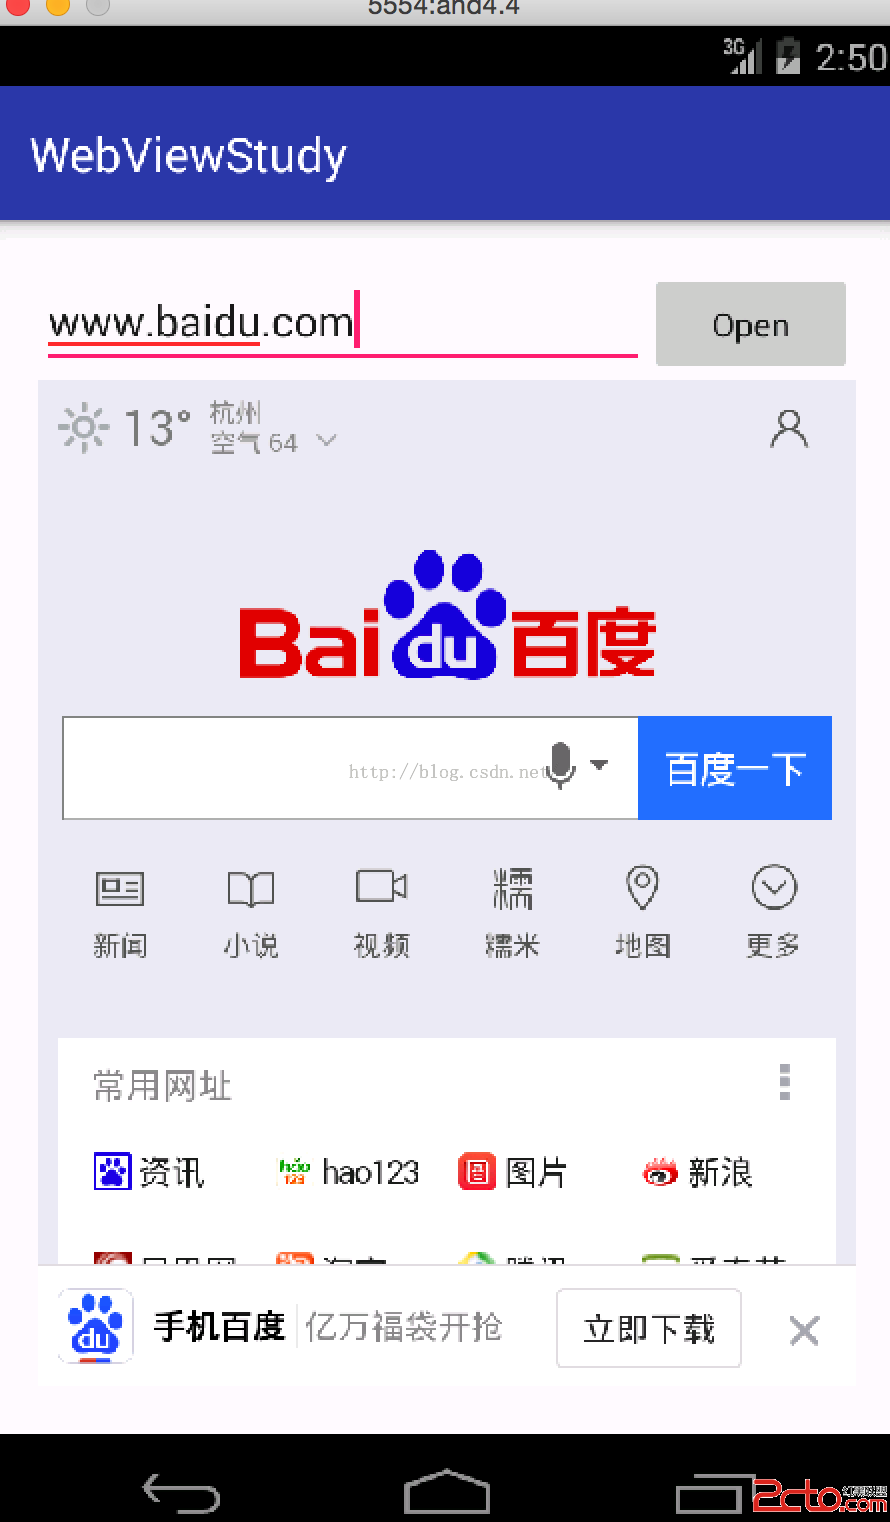
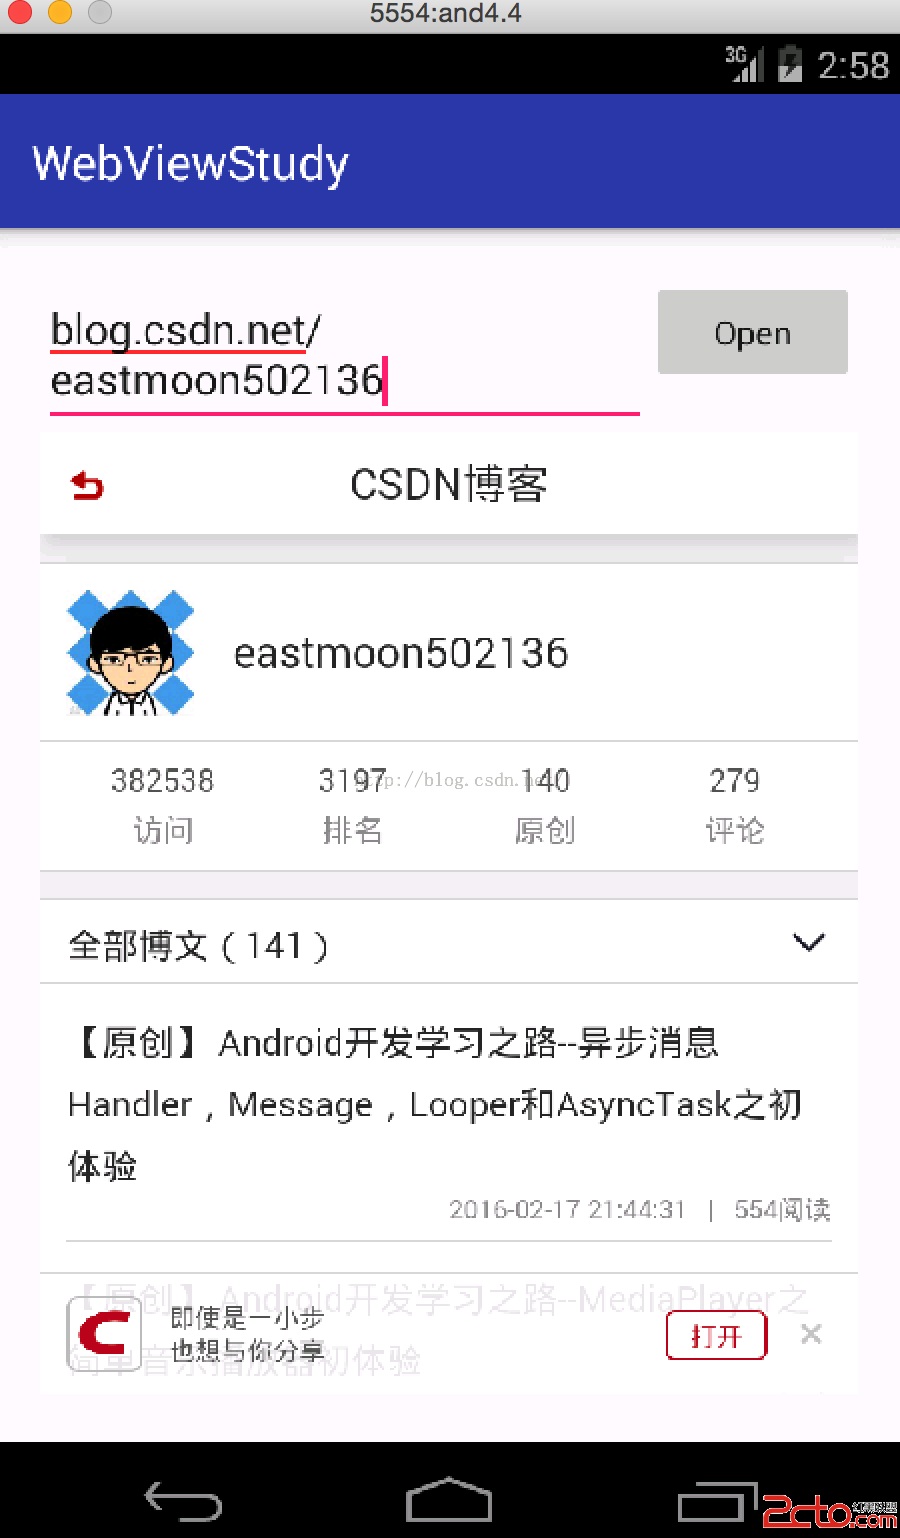
這裡打開了百度和我的博客的地址,界面略難看,勉強看看了。
一般網絡編程都是通過http的,下面就來實現下,首先是HttpURLConnection,這個一般是google官方提供的,還有一個HttpClient,本來有的,現在api23也沒有了,需要自己加載進來。
先使用HttpURLConnection和HttpClient吧,新建工程,編寫layout代碼如下:
<!--{cke_protected}{C}%3C!%2D%2D%3Fxml%20version%3D%221.0%22%20encoding%3D%22utf-8%22%3F%2D%2D%3E-->
<linearlayout xmlns:android="http://schemas.android.com/apk/res/android" xmlns:tools="http://schemas.android.com/tools" android:layout_width="match_parent" android:layout_height="match_parent" android:orientation="vertical" android:layout_margin="10dp" tools:context="com.example.jared.httpurlconnectionstudy.MainActivity"><button android:id="@+id/sendRequest" android:text="發送請求" android:layout_width="match_parent" android:layout_height="wrap_content">

    <scrollview android:layout_width="match_parent" android:layout_height="match_parent">
        <textview android:id="@+id/response" android:layout_width="match_parent" android:layout_height="wrap_content">
    </textview></scrollview></button></linearlayout>
編寫MainActivity,裡面有實現了HttpURLConnection和HttpClient:
package com.example.jared.httpurlconnectionstudy;

import android.os.Bundle;
import android.os.Handler;
import android.os.Message;
import android.support.v7.app.ActionBar;
import android.support.v7.app.AppCompatActivity;
import android.view.View;
import android.widget.Button;
import android.widget.TextView;

import org.apache.http.HttpEntity;
import org.apache.http.HttpResponse;
import org.apache.http.client.HttpClient;
import org.apache.http.client.methods.HttpGet;
import org.apache.http.impl.client.DefaultHttpClient;
import org.apache.http.util.EntityUtils;

import java.io.BufferedReader;
import java.io.InputStream;
import java.io.InputStreamReader;
import java.net.HttpURLConnection;
import java.net.URL;

public class MainActivity extends AppCompatActivity {

    private static final int SHOW_RESPONSE = 1;

    private Button sendRequestBtn;
    private TextView responseView;

    private Handler mHandler = new Handler(){
        @Override
        public void handleMessage(Message msg) {
            switch (msg.what) {
                case SHOW_RESPONSE:
                    String responseContent = (String)msg.obj;
                    responseView.setText(responseContent);
                    break;
            }
        }
    };

    @Override
    protected void onCreate(Bundle savedInstanceState) {
        super.onCreate(savedInstanceState);
        ActionBar actionBar = getSupportActionBar();
        actionBar.hide();

        setContentView(R.layout.activity_main);

        responseView = (TextView)findViewById(R.id.response);
        sendRequestBtn = (Button)findViewById(R.id.sendRequest);
        sendRequestBtn.setOnClickListener(new myOnClickListener());

    }

    private class myOnClickListener implements View.OnClickListener {
        @Override
        public void onClick(View view) {
            switch (view.getId()) {
                case R.id.sendRequest:
                    String url = "http://www.baidu.com";
                    //sendRequestWithHttpURLConnection(url);
                    sendRequestWithHttpClient(url);
                    break;
                default:
                    break;
            }
        }
    }

    private void sendRequestWithHttpClient(final String url) {
        new Thread(new Runnable() {
            @Override
            public void run() {
                try {
                    HttpClient httpClient = new DefaultHttpClient();
                    HttpGet httpGet = new HttpGet(url);
                    HttpResponse httpResponse = httpClient.execute(httpGet);
                    if(httpResponse.getStatusLine().getStatusCode() == 200) {
                        HttpEntity entity = httpResponse.getEntity();
                        String response = EntityUtils.toString(entity, "utf-8");

                        Message message = new Message();
                        message.what = SHOW_RESPONSE;
                        message.obj = response.toString();
                        mHandler.sendMessage(message);
                    }
                } catch (Exception e) {
                    e.printStackTrace();
                }
            }
        }).start();
    }

    private void sendRequestWithHttpURLConnection(final String url) {
        new Thread(new Runnable() {
            @Override
            public void run() {
                HttpURLConnection connection = null;
                try {
                    URL mUrl = new URL(url);
                    connection = (HttpURLConnection)mUrl.openConnection();
                    connection.setRequestMethod("GET");
                    connection.setConnectTimeout(8000);
                    connection.setReadTimeout(8000);
                    InputStream in = connection.getInputStream();
                    BufferedReader reader = new BufferedReader(new InputStreamReader(in));
                    StringBuilder response = new StringBuilder();
                    String line;
                    while((line = reader.readLine()) != null) {
                        response.append(line);
                    }
                    Message message = new Message();
                    message.what = SHOW_RESPONSE;
                    message.obj = response.toString();
                    mHandler.sendMessage(message);
                } catch (Exception e) {
                    e.printStackTrace();
                } finally {
                    if (connection != null) {
                        connection.disconnect();
                    }
                }
            }
        }).start();
    }
}
在build.gradle下面添加
// Apache Http
android {
    useLibrary 'org.apache.http.legacy'
}
// Header
dependencies {
    compile "org.apache.httpcomponents:httpcore:4.3.2"
}
這樣HttpClient就可以使用了,關於加載別的庫,也基本上類似了。
運行效果如下:
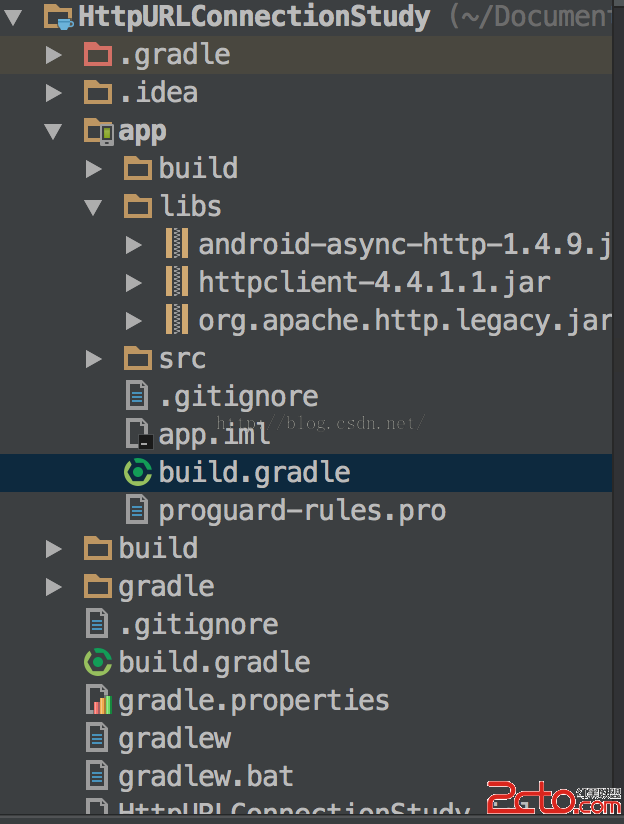
關於Http常用的框架有android-async-http,下面就使用下。jar包可以從官網下載:http://loopj.com/android-async-http/。此外還得下載一個httpclient的jar包:http://mvnrepository.com/artifact/cz.msebera.android/httpclient/4.4.1.1。
修改build.gradle如下:
dependencies {
    compile fileTree(dir: 'libs', include: ['*.jar'])
    testCompile 'junit:junit:4.12'
    compile 'com.android.support:appcompat-v7:23.1.1'
    compile files('libs/android-async-http-1.4.9.jar')
    compile files('libs/httpclient-4.4.1.1.jar')
}
這裡把兩個包都放在了libs的目錄下。切換到project目錄,如下圖:
修改MainActivity代碼,添加sendRequestWithAsyncHttpClinet方法如下:
private void sendRequestWithAsyncHttpClient(String url) {
        AsyncHttpClient client = new AsyncHttpClient();
        client.get(url, new AsyncHttpResponseHandler() {
            @Override
            public void onSuccess(int i, Header[] headers, byte[] bytes) {
                try {
                    String response = new String(bytes, 0, bytes.length, "UTF-8");
                    responseView.setText(response);
                }catch (Exception e) {
                    e.printStackTrace();
                }
            }

            @Override
            public void onFailure(int i, Header[] headers, byte[] bytes, Throwable throwable) {

            }
        });
    }
運行可以得到我們一樣的效果。AsyncHttpClient很方便地可以使用起來了,比起上面一大堆代碼簡單了不少。這裡通過一個get方法,然後再onSuccess方法中把獲取到的數據轉為String顯示在text就ok了。
關於網絡編程的webview和http就基本學到這裡了。在此還要謝謝朋友的提醒,光學基礎,實際項目會用到很多框架的,需要去熟悉,這裡繼續慢慢學。
 Android中Canvas繪圖之PorterDuffXfermode使用及工作原理詳解
Android中Canvas繪圖之PorterDuffXfermode使用及工作原理詳解 概述 類android.graphics.PorterDuffXfermode
 Android MediaPlayer的生命周期,androidmediaplayer
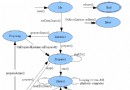
Android MediaPlayer的生命周期,androidmediaplayerMediaPlayer的狀態轉換圖也表征了它的生命周期,如下: 這張
 Android 5.0 Settings源碼簡要分析
Android 5.0 Settings源碼簡要分析 概述: 先聲明:本人工作快兩年了,仍是菜鳥級別的,慚愧啊!以前遇到好多知識點都沒有記錄下來,感覺挺可惜的,現在有機會
 android studio下百度地圖sdk的初體驗
android studio下百度地圖sdk的初體驗 獲取到sha1後,下面開始進入百度地圖sdk的資源獲取; 一、獲取密鑰和SDK; 1、搜索百度地圖sdk; 2、點