編輯:關於android開發
Android Studio包含一個頂級的構建文件和每個模塊的構建文件。構建文件被稱為 build.gradle,它是一個純文本文件,它使用Groovy語法來配置由Android Gradle插件提供的元素。在大多數情況下,你只需要編輯模塊級別的構建文件。例如,BuildSystemExample項目的app模塊的構建文件是像這樣的:
apply plugin:'com.android.application'
android {
compileSdkVersion 19
buildToolsVersion "19.0.0"
defaultConfig {
minSdkVersion 8
targetSdkVersion 19
versionCode 1
versionName "1.0"
}
buildTypes {
release {
minifyEnabled true
proguardFiles getDefaultProguardFile('proguard-android.txt'),'proguard-rules.pro'
}
}
}
dependencies {
compile project(":lib")
compile 'com.android.support:appcompat-v7:19.0.1'
compile fileTree(dir:'libs', include:['*.jar'])
}
apply plugin:'com.android.application' 是應用Android Gradle插件來構建。這樣添加Android特定的構建任務到頂級構建任務中,並且使用 android{…}中的元素來指定Android特定的構建項。
android{….} 配置所有的Android特定構建項:
compileSdkVersion 項指定編譯的目標。
buildToolsVersion 項指定使用什麼版本的構建工具。使用SDK管理器來安裝多個版本的構建工具。
注意:請始終使用其主要版本號高於或等於您的編譯目標SDK的版本。
defaultConfig 元素動態的配置在AndroidManifest.xml中的設置。在defaultConfig的值將覆蓋manifest文件中的值。配置在defaultConfig的值將應用於所有的構建變種(build variants),除非構建變種的配置覆蓋了這些值。
buildType元素控制如何構建和打包你的應用。默認的構建系統定義了兩個構建類型:debug和release。debug構建類型包含debugging符號,並且使用了debug key簽名。release構建類型默認沒有被簽名。在這個例子中構建文件配置了release版本,使用了ProGuard。
dependencies元素是在android元素外面的,並且在android元素後面。這個元素聲明了這個模塊的依賴。在一下的章節中都有依賴的內容。
注:當你在你的項目中改變了構建文件,Android Studio為了導入改變了構建配置而要求項目同步。點擊黃色通知欄中的”Sync Now”按鈕來同步改變的內容。
<!--[if gte vml 1]><v:shapetype id="_x0000_t75" coordsize="21600,21600" o:spt="75" o:preferrelative="t" path="m@4@5l@4@11@9@11@9@5xe" filled="f" stroked="f"> <v:stroke join/> <v:formulas> <v:f eqn="if lineDrawn pixelLineWidth 0"/> <v:f eqn="sum @0 1 0"/> <v:f eqn="sum 0 0 @1"/> <v:f eqn="prod @2 1 2"/> <v:f eqn="prod @3 21600 pixelWidth"/> <v:f eqn="prod @3 21600 pixelHeight"/> <v:f eqn="sum @0 0 1"/> <v:f eqn="prod @6 1 2"/> <v:f eqn="prod @7 21600 pixelWidth"/> <v:f eqn="sum @8 21600 0"/> <v:f eqn="prod @7 21600 pixelHeight"/> <v:f eqn="sum @10 21600 0"/> </v:formulas> <v:path o:extrusionok="f" gradientshapeok="t" o:connecttype="rect"/> <o:lock v:ext="edit" aspectratio="t"/> </v:shapetype><v:shape id="圖片_x0020_1" o:spid="_x0000_i1027" type="#_x0000_t75" alt="http://developer.android.com/images/tools/as-gradlesync.png" style='width:415.2pt; height:70.2pt;visibility:visible;mso-wrap-style:square'> <v:imagedata src="file:///C:\Users\SUNNYA~1\AppData\Local\Temp\msohtmlclip1\01\clip_image001.png" o:title="as-gradlesync"/> </v:shape><![endif]--><!--[if !vml]--><!--[endif]-->
圖一. 同步 Android Studio中的項目。
這個例子的應用模塊聲明了3個依賴:
...
  dependencies {
      // Module dependency
      compile project(":lib")

      // Remote binary dependency
      compile 'com.android.support:appcompat-v7:19.0.1'

      // Local binary dependency
      compile fileTree(dir:'libs', include:['*.jar'])
  }
每個依賴在下面給出描述。構建系統添加所有類型為”compile”的依賴到編譯路徑中,並且最終將他們打到最終的包中。
Module dependencies
app模塊依賴於lib模塊。因為像在”Open an Activity from a Library Module”中描述的,MainActivity登錄LibActivity1.
compile project(":lib") 聲明了依賴lib模塊。當你構建app模塊的時候,構建系統將會集合lib模塊。
運程二進制依賴
app和lib模塊都使用了來自Android支持庫的ActionBarActivity類,所有這些模塊都依賴它。
compile 'com.android.support:appcompat-v7:19.0.1' 通過指定Maven坐標來聲明了對Android支持庫19.0.1版本的依賴。在Android SDK的倉庫包中Android的支持庫是可用的。如果你安裝的SDK沒有這個包,通過使用SDK管理工具下載安裝它。
Android Studio默認使用了Maven的中央倉庫來配置項目。(這個配置在項目的頂級構建文件中)。
本地二進制依賴
一些模塊不使用任何的本地系統二進制依賴。如果你有依賴本地二進制依賴的模塊,拷貝JAR文件到<moduleName>/libs目錄下。
compile fileTree(dir: 'libs', include: ['*.jar']) 告訴構建系統將 app/libs目錄下面的JAR文件依賴包含到編譯路徑,並且最終在最終的包中。
有關在Gradle更多的依賴信息,請查看Gradle的用戶指南(Dependency Management Basics )。
構建系統運行ProGuard,以達到在構建過程中混淆你的代碼的目的。在BuildSystemExample中,為了release構建運行ProGuard修改app模塊的構建文件:
...
  android {
      ...
      buildTypes {
          release {
              minifyEnabled true
              proguardFiles getDefaultProguardFile('proguard-android.txt'),'proguard-rules.pro'
          }
      }
  }
  ...
getDefaultProguardFile('proguard-android.txt') 從安裝的Android SDK中獲取默認的ProGuard設置。你可自定義ProGuard規則,Android Studio 將會加模塊根部的proguard-rules.pro文件添加到模塊特定的規則中。
在Android構建系統中,applicationId屬性是唯一標示發行應用包。Application ID在build.gradle文件的android節點中設置。
apply plugin:'com.android.application'

      android {
          compileSdkVersion 19
          buildToolsVersion "19.1"

      defaultConfig {
          applicationId "com.example.my.app"
          minSdkVersion 15
          targetSdkVersion 19
          versionCode 1
          versionName "1.0"
      }
注: applicationID只能在build.gradle文件中被指定,不能再AndroidManifest.xml文件中。
當使用build variants,構建系統可以讓你為每個product flavors和build types指定包的唯一標示。在build type中的Application ID被添加到product flavors作為後綴。
 productFlavors {
          pro {
              applicationId ="com.example.my.pkg.pro"
          }
          free {
              applicationId ="com.example.my.pkg.free"
          }
      }

      buildTypes {
          debug {
              applicationIdSuffix ".debug"
          }
      }
      ....
包名依然需要在manifest文件中指定。它在你的源碼中用來涉及你的R class和解決相關activity/service注冊問題。
package="com.example.app">
注:如果你有多個manifests(比如,一個product flavor指定的manifest和一個build type的manifest),包名在這些manifests中是可選的。如果它再這些manifests中被指定,那報名必須和src/main目錄下的manifest的包名一致。
有關更多的關於構建文件和構建過程信息,請看 Build System Overview。
debug和release版本的app在是否能在安全設備調試和如何進行簽名是有區別的。構建系統使用一個默認的key來簽名debug版本,並且為了在構建過程中不出現密碼提示,使用了已知的證書。構建系統不會簽名release版本,除非你明確定義了簽名配置。如果你沒有一個release的key,你可以安裝”Signing your Applications”中描述的進行生成。
這個章節描述構建系統如何幫助你在一個項目中的同一個應用創建不同的版本。當時有一個demo和paid版本的時候,這是有用的,或者是你想在Google Play上為不同配置的設備發布多個APK。
構建系統使用 product flavors為你的應用創建不同的版本。每個版本有可能有不同的特性和設備要求。構建系統也應用 build types到不同的構建中,並且打包配置到每個版本中。 每個product flavor和build type的組合形成了一個build variant。構建系統為每個build variant生成了不同的APK。
這個項目例子包含了兩個默認的build types(debug 和release),還有兩個product flavors(demo和full)。更多關於使用build variants的高級信息,查看”Build System Overview”。
Product flavors
為你的應用創建不同的版本:
<!--[if !supportLists]-->1、<!--[endif]-->在構建文件中定義product flavors
<!--[if !supportLists]-->2、<!--[endif]-->為每個flavor創建附加的源碼路徑
<!--[if !supportLists]-->3、<!--[endif]-->添加flavor特定的源碼到你的項目中
接下來的章節帶你了解 BuildSystemExample項目中的每個細節。在BuildSystemExample應用中創建兩個Flavor。一個demo flavor和一個full flavor。兩個flavors共享 MainActivity,MainActivity中有一個按鈕跳轉到一個新的activity—SecondActivity.對於兩個flavor來說SecondActivity是不同的,因此你應該模擬這樣的情況:full flavor中的Activity的特性要比demo flavor中的Activity多。在練習的最後,你將得到不同flavor的不同APK。
在構建文件中定義product flavors
為app模塊中的構建文件定義兩個product flavors:
...
  android {
      ...
      defaultConfig {...}
      signingConfigs {...}
      buildTypes {...}
      productFlavors {
          demo {
              applicationId "com.buildsystemexample.app.demo"
              versionName "1.0-demo"
          }
          full {
              applicationId "com.buildsystemexample.app.full"
              versionName "1.0-full"
          }
      }
  }
  ...
這個項目的flavor定義支持使用defualtConfig相同的配置。所有flavors相同都配置都定義在defaultConfig中,每個flavor可以覆蓋任何默認的值。上面的構建文件使用了 applicationId屬性來分配給每個flavor:自從每個flavor創建了不同的app,他們應該需要不同的包名。
注:在Google Play中,為使你的應用可以擁有多APK支持。給你的所用variants分配相同的包名,並且給每個viant不同的versionCode. 為了再Google Play中區分不同的variants,你應該分配不同的包名給每個variant。
為每個flavor添加額外的源碼目錄
現在你應該創建源碼目錄,並且將SecondActivity添加到不同的flavor中。為demo flavor創建源碼目錄結構:
<!--[if !supportLists]-->1、<!--[endif]-->在Project模板中,展開BuildSystemExample,並且展開app目錄
<!--[if !supportLists]-->2、<!--[endif]-->右鍵src目錄,選擇New>Directory
<!--[if !supportLists]-->3、<!--[endif]-->使用”demo”作為目錄的名字
<!--[if !supportLists]-->4、<!--[endif]-->同樣的創建如下目錄:
app/src/demo/java
app/src/demo/res
app/src/demo/res/layout
app/src/demo/res/values
目錄的結構看起來像圖1:
<!--[if gte vml 1]><v:shape id="圖片_x0020_2" o:spid="_x0000_i1026" type="#_x0000_t75" alt="http://developer.android.com/images/tools/as-demoflavordirs.png" style='width:150pt;height:162.6pt;visibility:visible;mso-wrap-style:square'> <v:imagedata src="file:///C:\Users\SUNNYA~1\AppData\Local\Temp\msohtmlclip1\01\clip_image003.png" o:title="as-demoflavordirs"/> </v:shape><![endif]--><!--[if !vml]--><!--[endif]-->
圖一:demo flavor的目錄
添加不同的activity到不同的flavor中:
添加SecondActivity到demo flavor中:
<!--[if !supportLists]-->1、<!--[endif]-->在Project模板中,右鍵app模塊,選擇New>Activity。
<!--[if !supportLists]-->2、<!--[endif]-->選擇 Blank Activity,點擊Next
<!--[if !supportLists]-->3、<!--[endif]-->輸入activity名字: SecondActivity
<!--[if !supportLists]-->4、<!--[endif]-->輸入包名”com.buildsystemexample.app”
<!--[if !supportLists]-->5、<!--[endif]-->在app/src/demo目錄中右鍵java目錄選擇New>Package。
<!--[if !supportLists]-->6、<!--[endif]-->輸入com.buildsystemexample.xapp
<!--[if !supportLists]-->7、<!--[endif]-->將SecondActivity拖拽到app/src/demo/java中
<!--[if !supportLists]-->8、<!--[endif]-->接受默認的Refactor
為demo flavor添加SecondActivity的布局文件和資源文件
<!--[if !supportLists]-->1、<!--[endif]-->從ap/src/main/res/layout中將activity_second.xml文件拖拽到app/src/demo/res/layout中
<!--[if !supportLists]-->2、<!--[endif]-->接受默認的提示
<!--[if !supportLists]-->3、<!--[endif]-->將strings.xml從app/src/main/res中拷貝到app/src/demo/res中
<!--[if !supportLists]-->4、<!--[endif]-->替換string.xml文件中的內容,如下:
<!--[if !supportLists]-->5、<!--[endif]--><?xml version="1.0" encoding="utf-8"?>
  <resources>
      <stringname="hello_world">This is the full version!</string>
  </resources>
注:從現在開始,你可以為每個flavor單獨開發SecondActivity. 比如,你可以為full flavor的activity添加更多的屬性。
為了讓指定的flavor文件工作,點擊IDE窗口郵編的Build Variants,並且選擇你想使用的flavor,就像圖2. Android Studio可能會展示其他flavor的錯誤,但是這並不影響輸出內容的構建。
<!--[if gte vml 1]><v:shape id="圖片_x0020_3" o:spid="_x0000_i1025" type="#_x0000_t75" alt="http://developer.android.com/images/tools/as-buildvariants.png" style='width:210pt;height:113.4pt;visibility:visible;mso-wrap-style:square'> <v:imagedata src="file:///C:\Users\SUNNYA~1\AppData\Local\Temp\msohtmlclip1\01\clip_image005.png" o:title="as-buildvariants"/> </v:shape><![endif]--><!--[if !vml]--><!--[endif]-->
圖2
SecondActivity在所有的flavors中都有相同的包名,你可以同main activity中登入。編輯mainActivity:
<!--[if !supportLists]-->1、<!--[endif]-->編輯 activity_main.xml,添加一個按鈕:
<LinearLayout ...>
      ...
      <Button
          android:id="@+id/button2"
          android:layout_width="wrap_content"
          android:layout_height="wrap_content"
          android:text="@string/button2"
          android:onClick="onButton2Clicked"/>
  </LinearLayout>
<!--[if !supportLists]-->2、<!--[endif]-->為按鈕添加text標題,和按鈕事件onButton2Clicked
<!--[if !supportLists]-->3、<!--[endif]-->在MainActivity中添加如下代碼:
publicvoid onButton2Clicked(View view){
      Intent intent =newIntent(this,SecondActivity.class);
      startActivity(intent);
  }
<!--[if !supportLists]-->4、<!--[endif]-->編輯manifest文件
<manifest ...>
      <application ...>
          ...
          <activity
              android:name="com.buildsystemexample.app.SecondActivity"
              android:label="@string/title_activity_second">
          </activity>
      </application>
  </manifest>
Build types
Build types表現為為每個app包構建包版本。默認的debug和release被提供:
...
  android {
      ...
      defaultConfig {...}
      signingConfigs {...}
      buildTypes {...}
      productFlavors {...}
      buildTypes {
          release {
              minifyEnabled false
              proguardFiles getDefaultProguardFile('proguard-android.txt'),'proguard-rules.pro'
          }
           debug {
              debuggable true
          }
      }
  }
  ...
注:盡管在build.gradle文件中默認只有release構建類型,當時release和debug構建類型都被應用的每個構建中。
在這個例子中,product flavors和build types創建了一下的build variants:
demoDebug
demoRelease
fullDebug
fullRelease
為這個例子構建,可以點擊Android Studio的Build菜單,或者在命令行中執行 assemble命令。
注:Build>Make Project會編譯項目中所有的源碼。Build>Rebuild Project選項重新編譯所有的源碼。
會為不同的build variant創建不同的輸出目錄。
QQ技術交流群290551701 http://cxy.liuzhihengseo.com/558.html
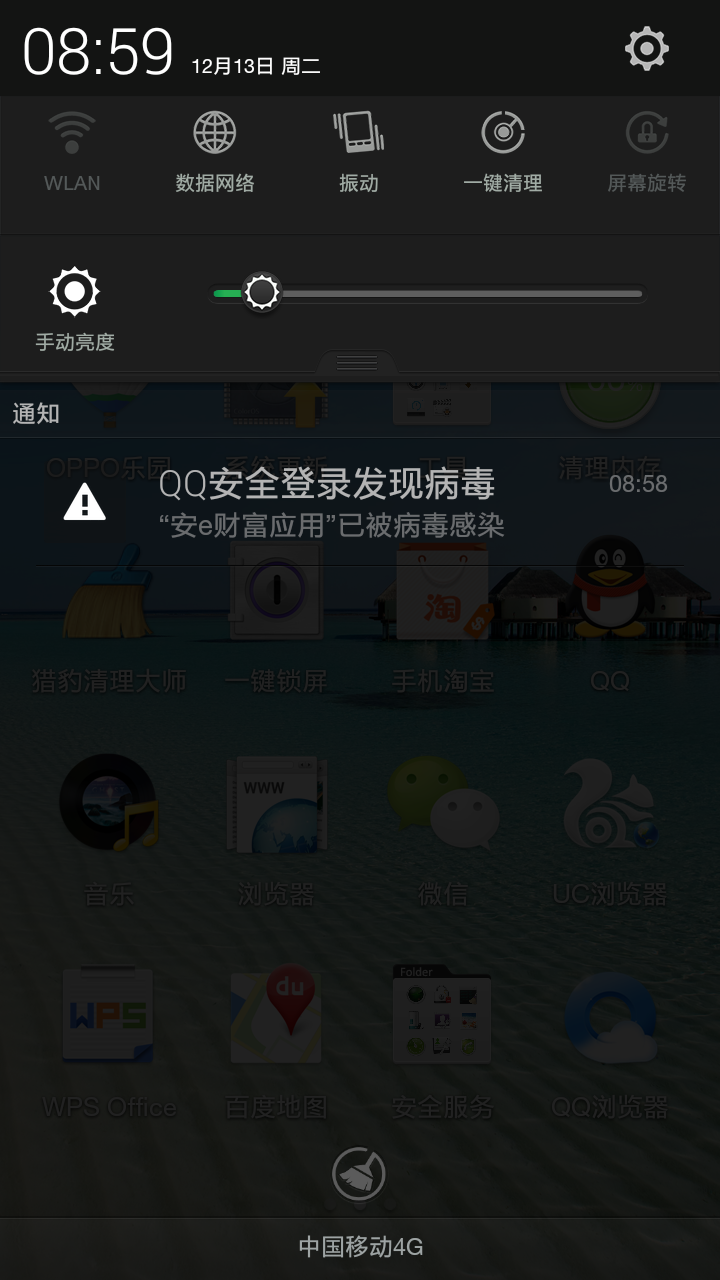 android手機登錄時遇到“QQ安全登錄發現病毒”解決,android手機
android手機登錄時遇到“QQ安全登錄發現病毒”解決,android手機android手機作為開源系統非常容易感染病毒,有時候我們會經常遇到手機QQ登錄時檢測到app
 機頂盒上gridview+ScrollView的使用。,gridviewscrollview
機頂盒上gridview+ScrollView的使用。,gridviewscrollview最近在機頂盒上做一個gridview, 其焦點需要在item的子控件上,但g
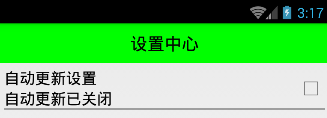 Android 手機衛士--選中SettingItemView條目狀態切換,點擊item條目跳轉頁面
Android 手機衛士--選中SettingItemView條目狀態切換,點擊item條目跳轉頁面本文實現上篇文章中自定義組合控件中相關方法。 checkBox是否選
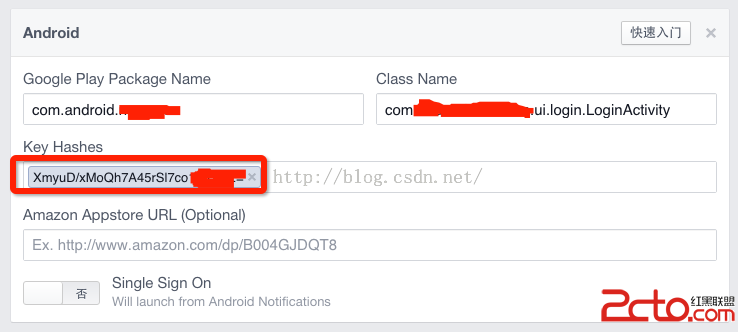 Android集成Facebook sdk,Key Hashes生成步驟
Android集成Facebook sdk,Key Hashes生成步驟 如上圖所示,使用facebook sdk進行login和share的時候,需要新建andr