編輯:關於android開發
用類對象作為ArrayAdapter綁定的基本數據類型(和SimpleAdater效果類似)
一般ArrayAdapter綁定的基本數據類型是String,接下來介紹一下類對象作為基本數據類型;
首先,新建一個類News,這個類作為基本的數據類型
package com.example.news;

import android.R.integer;
import android.widget.ImageView;

public class News {
       private String title;
       private String content;
       private int imageId;

       News(String title,String content,int imageId){
           this.title=title;
           this.content=content;
           this.imageId=imageId;
       }

       public String  getTitle() {
        return title;
    }
       public String  getContent() {
           return content;
       }
       public int  getimageId() {
              return imageId;
          }
      public void setTitle(String title){
          this.title=title;
      }
      public void setContent(String content){
          this.content=content;
      }
}
接下來先把listView的item的布局確定下來,有一個Textview和ImageView;
<LinearLayout xmlns:android="http://schemas.android.com/apk/res/android"
    android:layout_width="match_parent"
    android:layout_height="match_parent"
    android:orientation="vertical" >
    <TextView
        android:id="@+id/news_title"
        android:layout_width="wrap_content"
        android:layout_height="wrap_content"/>
    <ImageView
        android:id="@+id/news_image"
        android:layout_width="wrap_content"
        android:layout_height="wrap_content"/>

</LinearLayout>
然後自定義一個適配器NewsAdapter,繼承ArrayAdapter,並且實現其中的兩個方法,resourceId也就是上面的listView的item的布局的id;
package com.example.news;

import java.util.List;

import android.content.Context;
import android.view.LayoutInflater;
import android.view.View;
import android.view.ViewGroup;
import android.widget.ArrayAdapter;
import android.widget.ImageView;
import android.widget.TextView;

public class NewsAdapter extends ArrayAdapter<News>{

    private int resourceId;

    public NewsAdapter(Context context, int resource, List<News> objects) {
        super(context, resource, objects);
        // TODO Auto-generated constructor stub
        resourceId=resource;
    }

    @Override
    public View getView(int position, View convertView, ViewGroup parent) {
        // TODO Auto-generated method stub

        News news=getItem(position);
        View view ;
        if(convertView==null){
            view=LayoutInflater.from(getContext()).inflate(resourceId, null);
        }else {
            view=convertView;
        }
        TextView news_title=(TextView) view.findViewById(R.id.news_title);
        ImageView news_image=(ImageView) view.findViewById(R.id.news_image);

        news_title.setText(news.getTitle());
        news_image.setImageResource(news.getimageId());
        return view;
    }
}
然後在主布局中添加一個listview控件,這個簡單,大家肯定都會
<RelativeLayout xmlns:android="http://schemas.android.com/apk/res/android"
    xmlns:tools="http://schemas.android.com/tools"
    android:layout_width="match_parent"
    android:layout_height="match_parent"
    tools:context="${relativePackage}.${activityClass}" >

    <ListView
        android:id="@+id/list_title"
        android:layout_width="wrap_content"
        android:layout_height="match_parent"></ListView>
</RelativeLayout>
然後重寫主activity
import java.util.ArrayList;
import java.util.List;

import android.app.Activity;
import android.os.Bundle;
import android.view.Menu;
import android.view.MenuItem;
import android.widget.ListView;

public class MainActivity extends Activity {

    private ListView list_title;
    private List<News> list= new ArrayList<News>();

    private NewsAdapter adapter;
    @Override
    protected void onCreate(Bundle savedInstanceState) {
        super.onCreate(savedInstanceState);
        setContentView(R.layout.activity_main);
        list_title=(ListView) findViewById(R.id.list_title);
        initList();
        adapter=new NewsAdapter(this, R.layout.news_item,list);
        list_title.setAdapter(adapter);
    }
    private void initList() {

        News news1=new News("標題1", "1", R.drawable.ic_launcher);
        list.add(news1);
        News news2=new News("標題2", "2", R.drawable.ic_launcher);
        list.add(news2);
        News news3=new News("標題3", "3", R.drawable.ic_launcher);
        list.add(news3);
        News news4=new News("標題4", "4", R.drawable.ic_launcher);
        list.add(news4);
    }

}
界面效果
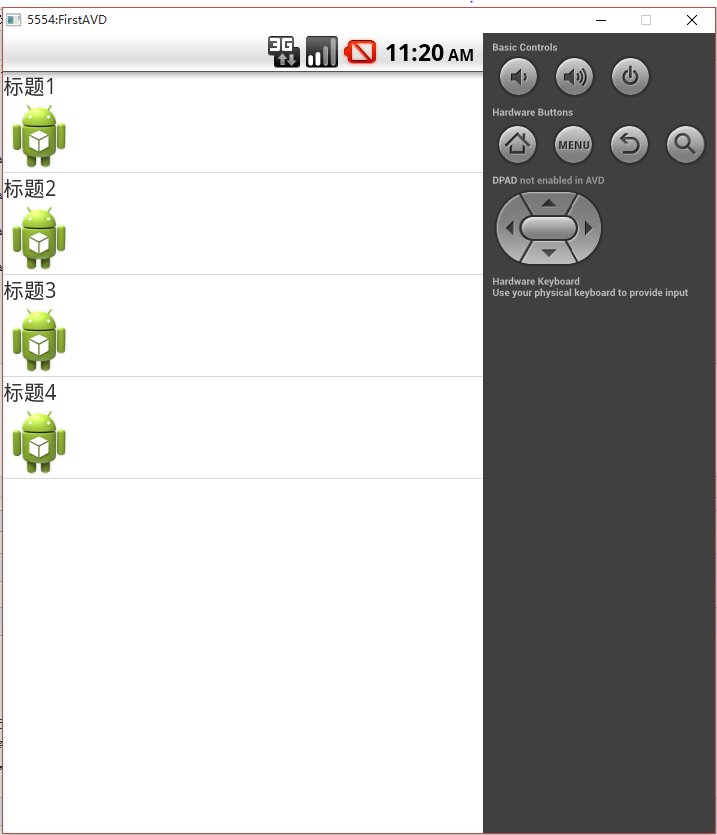
不懂得可以留言
 一步一步實現listview加載的性能優化,listview性能優化
一步一步實現listview加載的性能優化,listview性能優化listview加載的核心是其adapter,本文針對listview加載的性能優化就是對adpter
 寫程序的歡迎界面(運用畫圖方法畫圓球)。,畫圖圓球
寫程序的歡迎界面(運用畫圖方法畫圓球)。,畫圖圓球 1 package com.lixu.drawable; 2 3 import android.app.Acti
 cordova 消息推送,告別,消息推送服務器,和 蘋果推送證書,cordova證書
cordova 消息推送,告別,消息推送服務器,和 蘋果推送證書,cordova證書cordova plugin add org.apache.cordova.vibra
 Android 添加ActionBar Buttons,androidactionbar
Android 添加ActionBar Buttons,androidactionbar 一、在res/menu文件夾下創建Xml文件 跟標簽為menu,設置item