今天我用自己寫的一個Demo 和大家詳細介紹一個Android開發中遇到的一些常用系統控件的使用技巧。

1. 文本框TextView
TextView的作用是用來顯示一個文本框,下面我用兩種方式為大家呈現TextView, 第一種是通過xml布局文件呈現 ,第二種是通過代碼來呈現,由此可見Android 的界面開發真的是非常靈活。

Java代碼
- public class TextViewActivity extends Activity {
- @Override
- protected void onCreate(Bundle savedInstanceState) {
- setContentView(R.layout.textview);
-
- LinearLayout ll = (LinearLayout) findViewById(R.id.textviewll);
- TextView textView = new TextView(this);
- //設置顯示文字
- textView.setText("從代碼中添加一個TextView");
- //設置顯示顏色
- textView.setTextColor(Color.WHITE);
- //設置顯示字體大小
- textView.setTextSize(18);
- //設置顯示背景顏色
- textView.setBackgroundColor(Color.BLUE);
- //設置錨點位置
- textView.setGravity(Gravity.CENTER_VERTICAL|Gravity.CENTER_HORIZONTAL);
- //把這個view加入到布局當中
- ll.addView(textView);
-
- super.onCreate(savedInstanceState);
- }
- }
XML/HTML代碼
- <?xml version="1.0" encoding="utf-8"?>
- <LinearLayout xmlns:android="http://schemas.android.com/apk/res/android"
- android:id="@+id/textviewll"
- android:orientation="vertical" android:layout_width="fill_parent"
- android:layout_height="fill_parent">
- <TextView android:id="@+id/textView0"
- android:layout_width="fill_parent"
- android:layout_height="wrap_content"
- android:textColor="#000000"
- android:textSize="18dip"
- android:background="#00FF00"
- android:text="@string/textView"
- android:gravity="center_vertical|center_horizontal"
- />
- </LinearLayout>
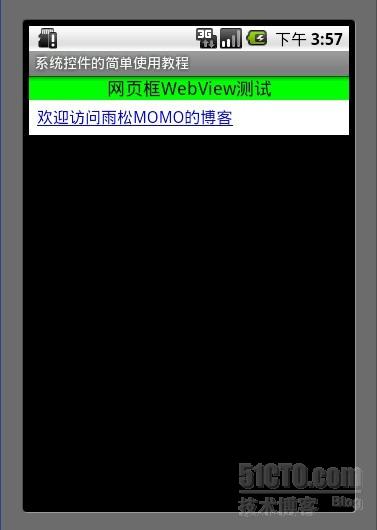
2. 網頁框WebView
WebView可以實現 類似web的網頁 的系統控件 最主要的是可以使用html代碼,如訪問網頁等。

XML/HTML代碼
- public class WebViewActivity extends Activity {
- WebView webView = null;
- static final String MIME_TYPE = "text/html";
- static final String ENCODING = "utf-8";
-
-
- @Override
- protected void onCreate(Bundle savedInstanceState) {
- setContentView(R.layout.webview);
-
- webView = (WebView) findViewById(R.id.webview);
- webView.loadDataWithBaseURL(null,"<a href='http://blog.csdn.net/xys289187120'>歡迎訪問雨松MOMO的博客</a>", MIME_TYPE, ENCODING, null);
- super.onCreate(savedInstanceState);
- }
- }
XML/HTML代碼
- <?xml version="1.0" encoding="utf-8"?>
- <LinearLayout xmlns:android="http://schemas.android.com/apk/res/android"
- android:id="@+id/textviewll"
- android:orientation="vertical" android:layout_width="fill_parent"
- android:layout_height="fill_parent">
- <TextView android:layout_width="fill_parent"
- android:layout_height="wrap_content"
- android:textColor="#000000"
- android:textSize="18dip"
- android:background="#00FF00"
- android:text="網頁框WebView測試"
- android:gravity="center_vertical|center_horizontal"
- />
- <WebView android:id="@+id/webview"
- android:layout_height="wrap_content"
- android:layout_width="fill_parent"/>
- </LinearLayout>
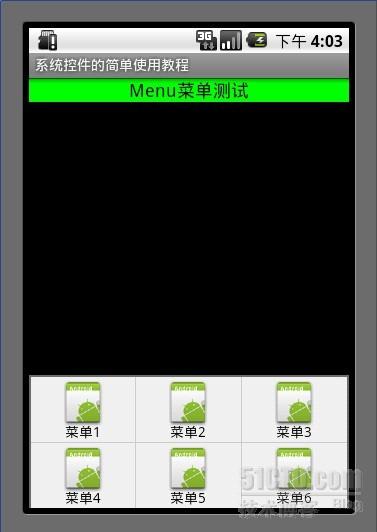
3. Menu菜單
Menu菜單在android系統控件中真的很具有特色 點擊以後會懸浮出一個菜單在次點擊菜單則會消失,今天我只是簡單的介紹一下系統的Menu菜單, 其實Menu菜單可以做出非常好看的效果,比如半透明 自定義按鈕圖片等等,後面我會詳細的介紹menu菜單。
Java代碼
- public class MenuActivity extends Activity {
-
- @Override
- protected void onCreate(Bundle savedInstanceState) {
- setContentView(R.layout.menuview);
- super.onCreate(savedInstanceState);
- }
-
- @Override
- public boolean onCreateOptionsMenu(Menu menu) {
- menu.add(0, 0, Menu.NONE, "菜單1").setIcon(R.drawable.icon);
- menu.add(0, 1, Menu.NONE, "菜單2").setIcon(R.drawable.icon);
- menu.add(0, 2, Menu.NONE, "菜單3").setIcon(R.drawable.icon);
- menu.add(0, 3, Menu.NONE, "菜單4").setIcon(R.drawable.icon);
- menu.add(0, 4, Menu.NONE, "菜單5").setIcon(R.drawable.icon);
- menu.add(0, 5, Menu.NONE, "菜單6").setIcon(R.drawable.icon);
- return super.onCreateOptionsMenu(menu);
- }
-
- @Override
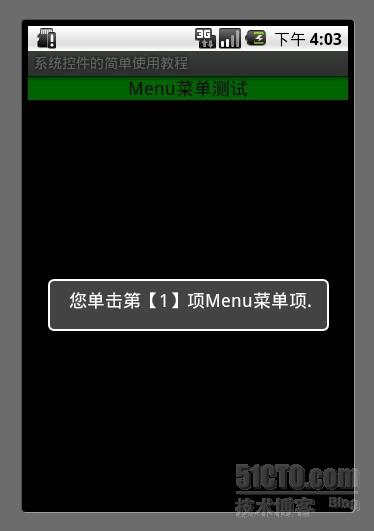
- public boolean onOptionsItemSelected(MenuItem item) {
- Dialog(item.getItemId());
- return super.onOptionsItemSelected(item);
- }
-
- private void Dialog(int message) {
- new AlertDialog.Builder(this).setMessage(
- "您單擊第【" + message + "】項Menu菜單項.").show();
- }
- }
XML/HTML代碼
- <?xml version="1.0" encoding="utf-8"?>
- <LinearLayout xmlns:android="http://schemas.android.com/apk/res/android"
- android:orientation="vertical" android:layout_width="fill_parent"
- android:layout_height="fill_parent">
- <TextView android:layout_width="fill_parent"
- android:layout_height="wrap_content"
- android:textColor="#000000"
- android:textSize="18dip"
- android:background="#00FF00"
- android:text="Menu菜單測試"
- android:gravity="center_vertical|center_horizontal"
- />
- </LinearLayout>
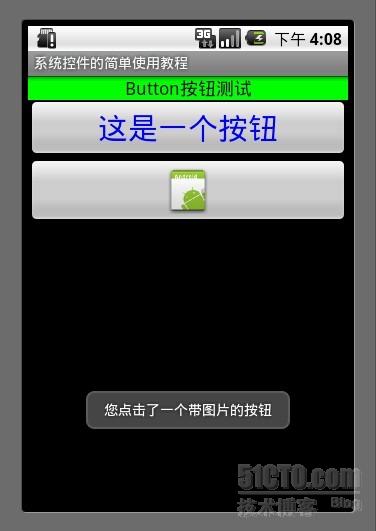
4. 按鈕Button
第一個是繪制系統字的button, 第二個是帶圖片的button 。
Java代碼
- public class ButtonActivity extends Activity {
-
- Context mContext = null;
- @Override
- protected void onCreate(Bundle savedInstanceState) {
- setContentView(R.layout.buttonview);
- mContext = this;
-
- //普通按鈕
- Button button0 = (Button)findViewById(R.id.buttonview0);
-
- //設置按鈕文字顏色
- button0.setTextColor(Color.BLUE);
- //設置按鈕文字大小
- button0.setTextSize(30);
-
- //設置按鈕監聽 點擊事件
- button0.setOnClickListener(new OnClickListener() {
-
- @Override
- public void onClick(View arg0) {
- Toast.makeText(ButtonActivity.this, "您點擊了‘這是一個按鈕’", Toast.LENGTH_LONG).show();
-
- }
- });
-
- //帶圖片的按鈕
- ImageButton button1 = (ImageButton)findViewById(R.id.buttonview1);
- //設置按鈕監聽 點擊事件
- button1.setOnClickListener(new OnClickListener() {
-
- @Override
- public void onClick(View arg0) {
- Toast.makeText(ButtonActivity.this, "您點擊了一個帶圖片的按鈕", Toast.LENGTH_LONG).show();
-
- }
- });
- super.onCreate(savedInstanceState);
- }
- }
XML/HTML代碼
- <?xml version="1.0" encoding="utf-8"?>
- <LinearLayout xmlns:android="http://schemas.android.com/apk/res/android"
- android:orientation="vertical" android:layout_width="fill_parent"
- android:layout_height="fill_parent">
- <TextView android:layout_width="fill_parent"
- android:layout_height="wrap_content"
- android:textColor="#000000"
- android:textSize="18dip"
- android:background="#00FF00"
- android:text="Button按鈕測試"
- android:gravity="center_vertical|center_horizontal"
- />
- <Button
- android:id="@+id/buttonview0"
- android:layout_width="fill_parent"
- android:layout_height="wrap_content"
- android:text="這是一個按鈕"
- />
- <ImageButton
- android:id="@+id/buttonview1"
- android:layout_width="fill_parent"
- android:layout_height="wrap_content"
- android:src="@drawable/icon"
- />
- </LinearLayout>
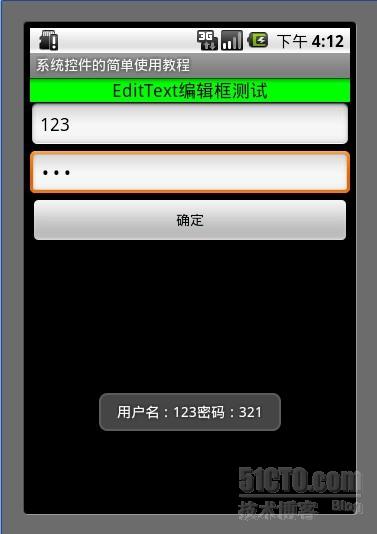
5. 編輯框EditView
編輯框在實際開發中用到的非常普遍 比如登錄 輸入賬號 密碼 等等。
Java代碼
- public class EditTextActivity extends Activity {
-
- Context mContext = null;
- @Override
- protected void onCreate(Bundle savedInstanceState) {
- setContentView(R.layout.editview);
- mContext = this;
- //帳號
- final EditText editText0 = (EditText)findViewById(R.id.editview0);
- //密碼
- final EditText editText1 = (EditText)findViewById(R.id.editview1);
-
- //確認按鈕
- Button button = (Button)findViewById(R.id.editbutton0);
-
- button.setOnClickListener(new OnClickListener() {
-
- @Override
- public void onClick(View arg0) {
- String username = editText0.getText().toString();
- String password = editText1.getText().toString();
- Toast.makeText(EditTextActivity.this, "用戶名:"+username +"密碼:"+ password, Toast.LENGTH_LONG).show();
- }
- });
- super.onCreate(savedInstanceState);
- }
- }
XML/HTML代碼
- <?xml version="1.0" encoding="utf-8"?>
- <LinearLayout xmlns:android="http://schemas.android.com/apk/res/android"
- android:orientation="vertical" android:layout_width="fill_parent"
- android:layout_height="fill_parent">
- <TextView android:layout_width="fill_parent"
- android:layout_height="wrap_content"
- android:textColor="#000000"
- android:textSize="18dip"
- android:background="#00FF00"
- android:text="EditText編輯框測試"
- android:gravity="center_vertical|center_horizontal"
- />
- <EditText
- android:id="@+id/editview0"
- android:layout_width="fill_parent"
- android:layout_height="wrap_content"
- android:hint="請輸入帳號"
- android:phoneNumber="true"
- />
-
- <EditText
- android:id="@+id/editview1"
- android:layout_width="fill_parent"
- android:layout_height="wrap_content"
- android:hint="請輸入密碼"
- android:password="true"
- />
- <Button
- android:id="@+id/editbutton0"
- android:layout_width="fill_parent"
- android:layout_height="wrap_content"
- android:text="確定"
- />
- </LinearLayout>
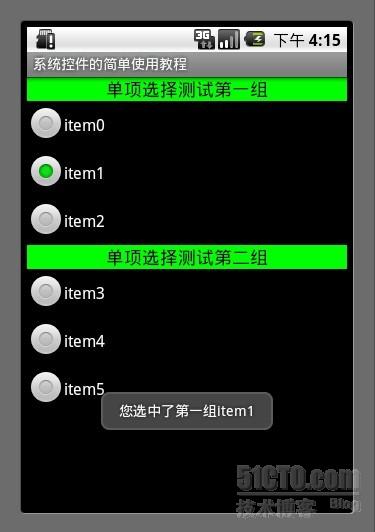
6. 單項選擇
使用RadioGroup 包住若干個RadioButton 來實現單項選擇。監聽每一個RadioGroup 就可以知道那個單選組中的第一個ID被按下。
Java代碼
- public class RadioActivity extends Activity {
-
- Context mContext = null;
- @Override
- protected void onCreate(Bundle savedInstanceState) {
- setContentView(R.layout.radioview);
- mContext = this;
- //單選組(只有在一個組中的按鈕可以單選)
- RadioGroup radioGroup = (RadioGroup)findViewById(R.id.radion0);
-
- //單選按鈕(第一組)
- final RadioButton radioButton0 = (RadioButton)findViewById(R.id.radionButton0);
- final RadioButton radioButton1 = (RadioButton)findViewById(R.id.radionButton1);
- final RadioButton radioButton2 = (RadioButton)findViewById(R.id.radionButton2);
-
- radioGroup.setOnCheckedChangeListener(new OnCheckedChangeListener() {
-
- @Override
- public void onCheckedChanged(RadioGroup arg0, int checkID) {
- if(radioButton0.getId() == checkID) {
- Toast.makeText(RadioActivity.this, "您選中了第一組" + radioButton0.getText(), Toast.LENGTH_LONG).show();
- }else if(radioButton1.getId() == checkID) {
- Toast.makeText(RadioActivity.this, "您選中了第一組" + radioButton1.getText(), Toast.LENGTH_LONG).show();
- }else if(radioButton2.getId() == checkID) {
- Toast.makeText(RadioActivity.this, "您選中了第一組" + radioButton2.getText(), Toast.LENGTH_LONG).show();
- }
- }
- });
-
- RadioGroup radioGroup0 = (RadioGroup)findViewById(R.id.radion1);
-
- //單選按鈕(第二組)
- final RadioButton radioButton3 = (RadioButton)findViewById(R.id.radionButton3);
- final RadioButton radioButton4 = (RadioButton)findViewById(R.id.radionButton4);
- final RadioButton radioButton5 = (RadioButton)findViewById(R.id.radionButton5);
-
- radioGroup0.setOnCheckedChangeListener(new OnCheckedChangeListener() {
-
- @Override
- public void onCheckedChanged(RadioGroup arg0, int checkID) {
- if(radioButton3.getId() == checkID) {
- Toast.makeText(RadioActivity.this, "您選中了第二組" + radioButton3.getText(), Toast.LENGTH_LONG).show();
- }else if(radioButton4.getId() == checkID) {
- Toast.makeText(RadioActivity.this, "您選中了第二組" + radioButton4.getText(), Toast.LENGTH_LONG).show();
- }else if(radioButton5.getId() == checkID) {
- Toast.makeText(RadioActivity.this, "您選中了第二組" + radioButton5.getText(), Toast.LENGTH_LONG).show();
- }
- }
- });
- super.onCreate(savedInstanceState);
- }
- }
XML/HTML代碼
- <?xml version="1.0" encoding="utf-8"?>
- <LinearLayout xmlns:android="http://schemas.android.com/apk/res/android"
- android:orientation="vertical" android:layout_width="fill_parent"
- android:layout_height="fill_parent">
- <TextView android:layout_width="fill_parent"
- android:layout_height="wrap_content"
- android:textColor="#000000"
- android:textSize="18dip"
- android:background="#00FF00"
- android:text="單項選擇測試第一組"
- android:gravity="center_vertical|center_horizontal"
- />
- <RadioGroup
- android:id="@+id/radion0"
- android:layout_width="fill_parent"
- android:layout_height="wrap_content" >
- <RadioButton
- android:id="@+id/radionButton0"
- android:layout_width="fill_parent"
- android:layout_height="wrap_content"
- android:text="item0"
- />
- <RadioButton
- android:id="@+id/radionButton1"
- android:layout_width="fill_parent"
- android:layout_height="wrap_content"
- android:text="item1"
- />
- <RadioButton
- android:id="@+id/radionButton2"
- android:layout_width="fill_parent"
- android:layout_height="wrap_content"
- android:text="item2"
- />
- </RadioGroup>
-
- <TextView android:layout_width="fill_parent"
- android:layout_height="wrap_content"
- android:textColor="#000000"
- android:textSize="18dip"
- android:background="#00FF00"
- android:text="單項選擇測試第二組"
- android:gravity="center_vertical|center_horizontal"
- />
- <RadioGroup
- android:id="@+id/radion1"
- android:layout_width="fill_parent"
- android:layout_height="wrap_content" >
- <RadioButton
- android:id="@+id/radionButton3"
- android:layout_width="fill_parent"
- android:layout_height="wrap_content"
- android:text="item3"
- />
- <RadioButton
- android:id="@+id/radionButton4"
- android:layout_width="fill_parent"
- android:layout_height="wrap_content"
- android:text="item4"
- />
- <RadioButton
- android:id="@+id/radionButton5"
- android:layout_width="fill_parent"
- android:layout_height="wrap_content"
- android:text="item5"
- />
- </RadioGroup>
- </LinearLayout>
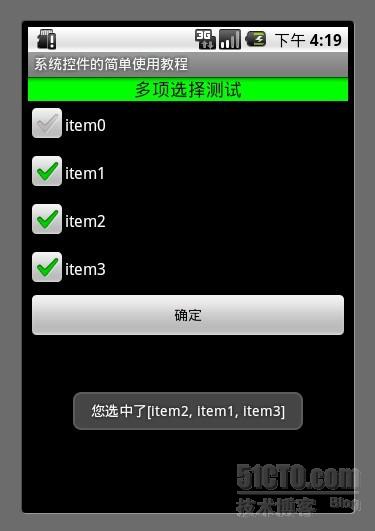
7. 多項選擇
使用系統控件Checkbox 監聽每一個checkbox 的點擊事件就可以確定那幾個選項被選擇了。
Java代碼
- public class CheckboxActivity extends Activity {
-
- //用來儲存選中的內容
- ArrayList <String>item = new ArrayList<String>();
-
- @Override
- protected void onCreate(Bundle savedInstanceState) {
- setContentView(R.layout.checkboxview);
-
- CheckBox checkbox0 = (CheckBox)findViewById(R.id.checkboxview0);
- CheckBox checkbox1 = (CheckBox)findViewById(R.id.checkboxview1);
- CheckBox checkbox2 = (CheckBox)findViewById(R.id.checkboxview2);
- CheckBox checkbox3 = (CheckBox)findViewById(R.id.checkboxview3);
- Button button = (Button)findViewById(R.id.checkboxbutton);
- //對checkbox進行監聽
- checkbox0.setOnCheckedChangeListener(new OnCheckedChangeListener() {
-
- @Override
- public void onCheckedChanged(CompoundButton button, boolean arg1) {
- String str = button.getText().toString();
- if (button.isChecked()) {
- item.add(str);
- } else {
- item.remove(str);
- }
-
- }
- });
-
- checkbox1.setOnCheckedChangeListener(new OnCheckedChangeListener() {
-
- @Override
- public void onCheckedChanged(CompoundButton button, boolean arg1) {
- String str = button.getText().toString();
- if (button.isChecked()) {
- item.add(str);
- } else {
- item.remove(str);
- }
-
- }
- });
- checkbox2.setOnCheckedChangeListener(new OnCheckedChangeListener() {
-
- @Override
- public void onCheckedChanged(CompoundButton button, boolean arg1) {
- String str = button.getText().toString();
- if (button.isChecked()) {
- item.add(str);
- } else {
- item.remove(str);
- }
-
- }
- });
- checkbox3.setOnCheckedChangeListener(new OnCheckedChangeListener() {
-
- @Override
- public void onCheckedChanged(CompoundButton button, boolean arg1) {
- String str = button.getText().toString();
- if (button.isChecked()) {
- item.add(str);
- } else {
- item.remove(str);
- }
-
- }
- });
-
- button.setOnClickListener(new OnClickListener() {
-
- @Override
- public void onClick(View arg0) {
- String str = item.toString();
- Toast.makeText(CheckboxActivity.this, "您選中了" + str, Toast.LENGTH_LONG).show();
-
- }
- });
- super.onCreate(savedInstanceState);
- }
- }
XML/HTML代碼
- <?xml version="1.0" encoding="utf-8"?>
- <LinearLayout xmlns:android="http://schemas.android.com/apk/res/android"
- android:orientation="vertical" android:layout_width="fill_parent"
- android:layout_height="fill_parent">
- <TextView android:layout_width="fill_parent"
- android:layout_height="wrap_content"
- android:textColor="#000000"
- android:textSize="18dip"
- android:background="#00FF00"
- android:text="多項選擇測試"
- android:gravity="center_vertical|center_horizontal"
- />
- <CheckBox
- android:id="@+id/checkboxview0"
- android:layout_width="fill_parent"
- android:layout_height="wrap_content"
- android:text="item0"
- />
- <CheckBox
- android:id="@+id/checkboxview1"
- android:layout_width="fill_parent"
- android:layout_height="wrap_content"
- android:text="item1"
- />
- <CheckBox
- android:id="@+id/checkboxview2"
- android:layout_width="fill_parent"
- android:layout_height="wrap_content"
- android:text="item2"
- />
- <CheckBox
- android:id="@+id/checkboxview3"
- android:layout_width="fill_parent"
- android:layout_height="wrap_content"
- android:text="item3"
- />
- <Button
- android:id="@+id/checkboxbutton"
- android:layout_width="fill_parent"
- android:layout_height="wrap_content"
- android:text="確定"
- />
- </LinearLayout>
最後如果你還是覺得我寫的不夠詳細 看的不夠爽,不要緊我把源代碼的下載地址貼出來 歡迎大家一起討論學習。
下載地址:http://download.csdn.net/source/3449861
 Android中使用GridView和ImageViewSwitcher實現電子相冊簡單功能,gridviewimageview
 Android應用開發教程之十一:應用程序PreferenceActivity
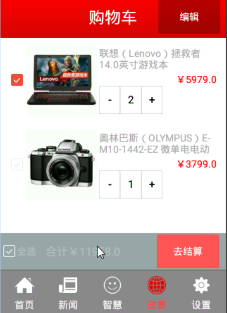
 硅谷商城5--購物車商品選中和商品總價計算,5--購物車
 新版mysql搭建多線程主從復制