編輯:關於android開發
,用於顯示文本的控件
1) 代碼
<TextView
android:layout_width="fill_parent"
android:layout_height="wrap_content"
android:text="Hello World, MyActivity"
/>
2)TextView的常用屬性:
-id: 為TextView設置一個組件id,根據id,我們可以在Java代碼中獲取到該對象,然後進行相關屬性的設置
-layout_width: 組件寬度,一般有3種屬性 wrap_content ,match_parent 和自己輸入寬度
wrap_content表示根據組件大小確定寬度即組件包含文字所占寬度越多,組件越寬;
match_parent表示填滿該組件的父容器即包含了該組件的組件如代碼中的LinearLayout ;
-layout_hight: 組件高度,一般也有3種屬性,同上;
-gravity: 設置控件中內容的對齊方向,即文字內容的對齊方向;
-text: 設置顯示的文本內容(建議把字符串寫到values/string.xml文件中,然後使用@String/xxx的方式獲取 , 也可以直接寫在""中);
-textColor: 設置文本的顏色(後面會附上常用顏色碼);
-textStyle: 設置文本顯示風格,三個可選屬性 normal(無效果) ,bold(加粗) ,italic(斜體);
-background: 控件背景顏色,即填充整個控件的顏色;
3)在textview控件中引入string.xml中寫好的文本的方法:
第一步:現在string.xml文件中加入你要顯示的文本,並命名:
<?xml version="1.0" encoding="utf-8"?>
<resources>
<string name="app_name">MyActivity</string>
<string name="hello">hello ,你好</string>
</resources>
第二步:然後在控件中引入:
<TextView
android:layout_width="fill_parent"
android:layout_height="wrap_content"
android:text="@string/hello"
/>
,與TextView控件類似,最大的區別就是EdiText允許用戶輸入
1) 代碼
<EditText
android:id="@+id/eidt"
android:layout_width="200dp"
android:layout_height="wrap_content"
/>
2)EditText常用屬性:
-id: 為EditText設置一個組件id;
-layout_weith: 設置控件的寬度;
-layout_hight: 設置控件的高度;
-inputType(textPassword): 設置輸入內容為密碼;
-inputType(Phone): 設置輸入的內容為號碼;
-maxLength: 設置輸入的最大文本數, 參數為數字例如 android:maxLength=“5”;
-maxLines: 設置最大行數,參數為數字;
-minLines: 設置最小行數,參數為數字;
-hint: 設置默認提示文本;
-textColorHint: 設置默認提示文本顏色;
-capitalize: 設置英文字母大小寫屬性,參數包含:
sentences: 僅第一個字母大寫
words: 單詞首字母大寫
characyers: 全部字母大寫;
3) EditText控件的綁定:
綁定控件的方法也都一樣,在onCreate方法中使用findViewById()方法:
public class MyActivity extends Activity {
@Override
protected void onCreate(Bundle savedInstanceState) {
super.onCreate(savedInstanceState);
setContentView(R.layout.main);
//綁定main.xml文件中的EdiText控件
EditText editText = (EditText) findViewById(R.id.edit);
}
}
4) EditText獲取用戶輸入:
綁定後獲取用戶的輸入很容易,使用getText()方法即可:
editText.getText();//獲取用戶輸入的方法
值得一提的是這個方法直接寫在綁定好的EditText語句後面是不行的!准確的說是獲取不到輸入的內容,我們需要一個 觸發事件在輸入完成後再觸發獲取輸入的方法,就能正常拿到數據啦!下面看代碼:
EditText editText;
TextView text;
@Override
protected void onCreate(Bundle savedInstanceState) {
super.onCreate(savedInstanceState);
setContentView(R.layout.activity_main);
editText = (EditText) findViewById(R.id.edit);
text = (TextView) findViewById(R.id.text);
text.setOnClickListener(new View.OnClickListener() {
@Override
public void onClick(View v) {
text.setText(editText.getText());;
}
});
}
text.setOnClickListener()方法是text監聽方法.用來監聽TextView的點擊事件。
整個流程就是在輸入文本後點擊text然後text的文本就會被替換成你輸入的文本.
本節學習Android基本控件按鈕控件,Button和ImageButton用法基本類似,所以本節重點講解Button控件。
1)代碼:
<Button
android:id="@+id/btn"
android:text="普通按鈕"
android:layout_width="wrap_content"
android:layout_height="wrap_content" />
2)Button的其他常用屬性:
-background 背景 可以是顏色或者圖片或這xml資源
-text 按鈕顯示的文字
-textColor 按鈕文字顏色
-textSize 按鈕文字大小
3)Button控件的綁定和監聽:
綁定
btn = (Button) findViewById(R.id.btn);
監聽的方法很常用
btn.setOnClickListener(new View.OnClickListener() {
@Override
public void onClick(View view) {
Toast.makeText(MainActivity.this , "button 被按下" , Toast.LENGTH_LONG).show();
}
});
4)Toast方法是常見的黑色提示框,自動消失。
完整代碼:
public class MainActivity extends Activity {
private Button btn;//聲明全局變量
@Override
protected void onCreate(Bundle savedInstanceState) {
super.onCreate(savedInstanceState);
setContentView(R.layout.activity_main);
//綁定控件
btn = (Button) findViewById(R.id.btn);
//監聽控件
btn.setOnClickListener(new View.OnClickListener() {
@Override
public void onClick(View view) {
Toast.makeText(MainActivity.this , "button 被按下" , Toast.LENGTH_SHORT).show();
}
});
}
}
,ImageView 圖像視圖,顧名思義,是一個用來顯示圖片的控件。
1)代碼:
<ImageView
android:id="@+id/imageview"
android:layout_width="wrap_content"
android:layout_height="wrap_content"
android:background="@drawable/ic_launcher"/>
2)ImageView的常用屬性:
-background 設置控件背景 當固定寬度時會拉伸圖片
-src 設置控件填充內容 固定寬度時不會拉伸圖片
3)綁定
img = (ImageView) findViewById(R.id.imageview);
ImageView沒有啥監聽方法,一般ImageView用來實現app的圖片輪播功能。這會用到修改圖片顯示的方法
常用的修改方法:
-setImageResource(int id); 使用內部資源圖片替換默認圖片,id為R.drawable.圖片名稱
-setImageBitmap(Bitmap bitmap); 使用bitmap 替換默認圖片,bitmap一般通過網絡獲取
使用方法:
img.setImageResource(R.mipmap.ic_launcher);
,RadioButton單選按鈕,就是幾個選項只能選中一個。 因此我們要把RadioButton放到RadioGroup按鈕組中,從而實現 單選功能!
1)代碼:
<RadioGroup
android:id="@+id/radioGroup"
android:layout_width="wrap_content"
android:layout_height="wrap_content"
android:orientation="horizontal">
<RadioButton
android:id="@+id/btnMan"
android:layout_width="wrap_content"
android:layout_height="wrap_content"
android:text="男"
android:checked="true"/>
<RadioButton
android:id="@+id/btnWoman"
android:layout_width="wrap_content"
android:layout_height="wrap_content"
android:text="女"/>
</RadioGroup>
2)控件的監聽方法:
ReadioGroup監聽方法:setOnCheckedChangeListener()
3)獲取選擇的值的方法:getText()
RadioGroup radgroup = (RadioGroup) findViewById(R.id.radioGroup);
//第一種獲得單選按鈕值的方法
//為radioGroup設置一個監聽器:setOnCheckedChanged()
radgroup.setOnCheckedChangeListener(new OnCheckedChangeListener() {
@Override
public void onCheckedChanged(RadioGroup group, int checkedId) {
RadioButton radbtn = (RadioButton) findViewById(checkedId);
Toast.makeText(getApplicationContext(), "按鈕組值發生改變,你選了" + radbtn.getText(), Toast.LENGTH_LONG).show();
}
});
獲得RadioButton相關信息的方法:
-getClidCont() 獲得按鈕組中的單選按鈕的數目
-getClindAt() 根據索引值獲得單選按鈕 (參數為索引值 0,1,2,3..)
-isChecked() 判斷按鈕是否被選中(參數為true/false)
1)代碼:
<CheckBox
android:id="@+id/checkbox"
android:text="蘋果"
android:layout_width="wrap_content"
android:layout_height="wrap_content" />
<CheckBox
android:id="@+id/checkbox1"
android:text="香蕉"
android:layout_width="wrap_content"
android:layout_height="wrap_content" />
<CheckBox
android:id="@+id/checkbox2"
android:text="大鴨梨"
android:layout_width="wrap_content"
android:layout_height="wrap_content" />
2)監聽方法:
可以同時選中多個選項,至於獲得選中的值,一般是為每個CheckBox添加事件:setOnCheckedChangeListener
public class MyActivity extends Activity implements View.OnClickListener,CompoundButton.OnCheckedChangeListener{
private CheckBox cb_one;
private CheckBox cb_two;
private CheckBox cb_three;
private Button btn_send;
@Override
protected void onCreate(Bundle savedInstanceState) {
super.onCreate(savedInstanceState);
setContentView(R.layout.activity_main);
cb_one = (CheckBox) findViewById(R.id.cb_one);
cb_two = (CheckBox) findViewById(R.id.cb_two);
cb_three = (CheckBox) findViewById(R.id.cb_three);
btn_send = (Button) findViewById(R.id.btn_send);
cb_one.setOnCheckedChangeListener(this);
cb_two.setOnCheckedChangeListener(this);
cb_three.setOnCheckedChangeListener(this);
btn_send.setOnClickListener(this);
}
@Override
public void onCheckedChanged(CompoundButton compoundButton, boolean b) {
if(compoundButton.isChecked()) Toast.makeText(this,compoundButton.getText().toString(),Toast.LENGTH_SHORT).show();
}
//統一監聽
@Override
public void onClick(View view) {
String choose = "";
if(cb_one.isChecked())choose += cb_one.getText().toString() + "";
if(cb_two.isChecked())choose += cb_two.getText().toString() + "";
if(cb_three.isChecked())choose += cb_three.getText().toString() + "";
Toast.makeText(this,choose,Toast.LENGTH_SHORT).show();
}
}
 Android網絡編程(三)Volley用法全解析
Android網絡編程(三)Volley用法全解析 相關文章 Android網絡編程(一)HTTP協議原理 Android網絡編程(二)HttpClient與HttpUR
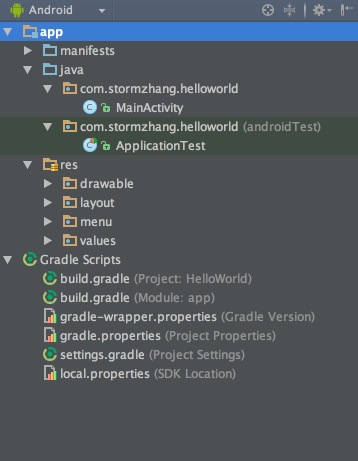 Android Studio系列教程二基本設置與運行 項目結構偏好設置運行常用功能創建模擬器,androidstudio
Android Studio系列教程二基本設置與運行 項目結構偏好設置運行常用功能創建模擬器,androidstudio Android Studio系列教程一--下載與
 Android,androidsdk
Android,androidsdk續上一篇博客《Android -- 桌面懸浮,仿360》,傳送門:http://www.cnblogs.com/yydcdut/p/3
 將語音搜索集成到Google Now中,googlenow
將語音搜索集成到Google Now中,googlenow原文標題:Use Voice Search to integrate with Google Now 原文鏈接: