編輯:關於android開發
線性布局是Android開發中最常見的一種布局方式,它是按照垂直或者水平方向來布局,通過“android:orientation”屬性可以設置線性布局的方向。屬性值有垂直(vertical)和水平(horizontal)兩種。
常用的屬性:
android:orientation:可以設置布局的方向
android:gravity:用來控制組件的對齊方式
layout_weight:控制各個組件在布局中的相對大小
第一個實例
①效果圖:
②核心代碼如下:
main.xml
第二個實例
①效果圖:
②核心代碼:
mian.xml
本文出自 “IT的點點滴滴” 博客,請務必保留此出處http://liangruijun.blog.51cto.com/3061169/632532
 安卓DJ113舞曲網應用客戶端 項目源碼(服務器+客戶端),安卓dj113
安卓DJ113舞曲網應用客戶端 項目源碼(服務器+客戶端),安卓dj113Android DJ113舞曲網app客戶端 播放器源碼 項目源碼(服務器
 ActionBar效果圖,功能一覽,actionbar效果圖
ActionBar效果圖,功能一覽,actionbar效果圖一.概述 1.App icon 應用的圖標,左側帶應用相當於back返回鍵 2.ViewContr
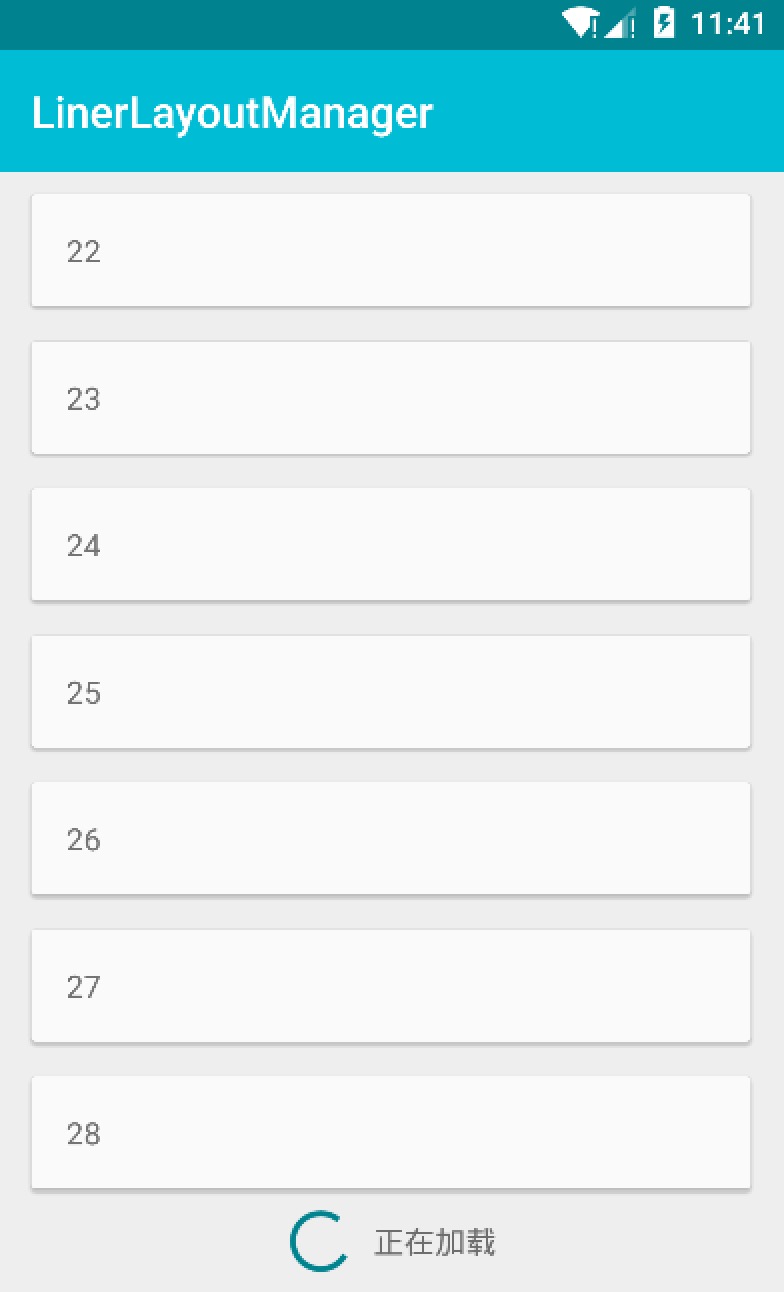 RecycleView 滑動到底部,加載更多,recycleview滑動
RecycleView 滑動到底部,加載更多,recycleview滑動 android.support.v7 包提供了一個新的組件:RecycleView,用以提供一
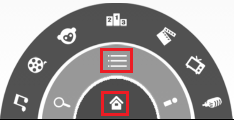 Android自定義控件4--優酷菜單的菜單鍵及細節補充,android4--
Android自定義控件4--優酷菜單的菜單鍵及細節補充,android4--在上篇文章中實現了優酷菜單執行動畫,本文接著完善已經實現的動畫功能 本文地址:http://