編輯:關於android開發
效果:
圓形頭像在我們的日常使用的app中很常見,因為圓形的頭像比較美觀.
使用圓形圖片的方法可能有我們直接將圖片裁剪成圓形再在app中使用,
還有就是使用自定義View對我們設置的任何圖片自動裁剪成圓形。
這裡使用github上CircleImageView
github:https://github.com/hdodenhof/CircleImageView
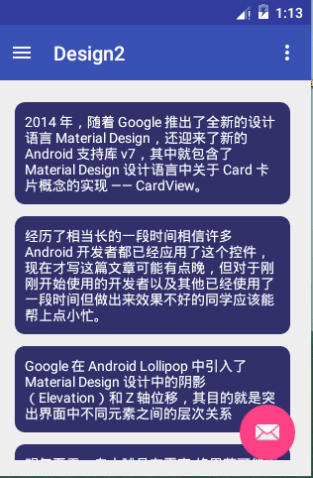
CardView顧名思義卡片式的View,
CardView繼承的是FrameLayout,所以擺放內部控件的時候需要注意一下
可以設置陰影,圓角,等等
這裡的CircleImageView還可以為頭像設置描邊。
我們新建一個項目,選擇Navigation Drawer Activity自動生成初始布局。
修改nav_header_main,添加圓角頭像
<?xml version="1.0" encoding="utf-8"?>
<LinearLayout xmlns:android="http://schemas.android.com/apk/res/android"
              android:layout_width="match_parent"
              android:layout_height="@dimen/nav_header_height"
              android:background="@drawable/side_nav_bar"
              android:gravity="bottom"
              android:orientation="vertical"
              android:paddingBottom="@dimen/activity_vertical_margin"
              android:paddingLeft="@dimen/activity_horizontal_margin"
              android:paddingRight="@dimen/activity_horizontal_margin"
              android:paddingTop="@dimen/activity_vertical_margin"
              android:theme="@style/ThemeOverlay.AppCompat.Dark">

    <de.hdodenhof.circleimageview.CircleImageView
        xmlns:app="http://schemas.android.com/apk/res-auto"
        android:id="@+id/profile_image"
        android:layout_width="96dp"
        android:layout_height="96dp"
        android:src="@drawable/darth_vader"
        app:civ_border_width="2dp"
        />


</LinearLayout>
再修改content_main,添加RecyclerView,記得導包
<?xml version="1.0" encoding="utf-8"?>
<RelativeLayout
    xmlns:android="http://schemas.android.com/apk/res/android"
    xmlns:app="http://schemas.android.com/apk/res-auto"
    xmlns:tools="http://schemas.android.com/tools"
    android:layout_width="match_parent"
    android:layout_height="match_parent"
    android:paddingBottom="@dimen/activity_vertical_margin"
    android:paddingLeft="@dimen/activity_horizontal_margin"
    android:paddingRight="@dimen/activity_horizontal_margin"
    android:paddingTop="@dimen/activity_vertical_margin"
    app:layout_behavior="@string/appbar_scrolling_view_behavior"
    tools:context="com.example.xw.design2.MainActivity"
    tools:showIn="@layout/app_bar_main">

  <android.support.v7.widget.RecyclerView
      android:id="@+id/rv"
      android:layout_width="match_parent"
      android:layout_height="match_parent"></android.support.v7.widget.RecyclerView>
</RelativeLayout>
添加item布局,CardView,記得導包
<?xml version="1.0" encoding="utf-8"?>
<android.support.v7.widget.CardView
    android:layout_height="wrap_content"
    android:layout_width="match_parent"
    xmlns:card_view="http://schemas.android.com/apk/res-auto"
    card_view:contentPadding="10dp"
    card_view:cardBackgroundColor="#303069"
    card_view:cardCornerRadius="10dp"
    card_view:cardPreventCornerOverlap="true"
    card_view:cardUseCompatPadding="true"
    xmlns:android="http://schemas.android.com/apk/res/android">

<TextView
    android:id="@+id/tv"
    android:textColor="#fff"
    android:layout_width="wrap_content"
    android:layout_height="wrap_content"/>

</android.support.v7.widget.CardView>
接下來在MainActivity添加代碼,使用我們的CardView
1. 添加成員變量和數據源
 private RecyclerView mRecyclerView;

    private String[] data={"2014 年,隨著 Google 推出了全新的設計語言 Material Design,還迎來了新的 Android 支持庫 v7,其中就包含了 Material Design 設計語言中關於 Card 卡片概念的實現 —— CardView。"
    ,"經歷了相當長的一段時間相信許多 Android 開發者都已經應用了這個控件,現在才寫這篇文章可能有點晚,但對於剛剛開始使用的開發者以及其他已經使用了一段時間但做出來效果不好的同學應該能幫上點小忙。"
    ,"Google 在 Android Lollipop 中引入了 Material Design 設計中的陰影(Elevation)和 Z 軸位移,其目的就是突出界面中不同元素之間的層次關系"
    ,"明年夏天,自由球員布雷克-格裡芬可能重返俄克拉何馬城與拉塞爾-威斯布魯克聯手。如果實現,雷霆隊能真正意義上地威脅勇士隊嗎?"};
2.創建ViewHolder
 class MyHolder extends RecyclerView.ViewHolder{
        private TextView mTextView;
        public MyHolder(View itemView) {
            super(itemView);
            mTextView= (TextView) itemView.findViewById(R.id.tv);
        }
    }
3.創建Adapter
 class MyAdapter extends  RecyclerView.Adapter<MyHolder>{


        @Override
        public MyHolder onCreateViewHolder(ViewGroup parent, int viewType) {
            LayoutInflater layoutInflater=LayoutInflater.from(getApplicationContext());
            View v=layoutInflater.inflate(R.layout.item,parent,false);
            MyHolder holder=new MyHolder(v);
            return holder;
        }

        @Override
        public void onBindViewHolder(MyHolder holder, int position) {
                holder.mTextView.setText(data[position]);
        }

        @Override
        public int getItemCount() {
            return data.length;
        }
    }
4.oncreate()方法裡設置Adapter
 mRecyclerView= (RecyclerView) findViewById(R.id.rv);
        mRecyclerView.setLayoutManager(new LinearLayoutManager(this));
        mRecyclerView.setAdapter(new MyAdapter());
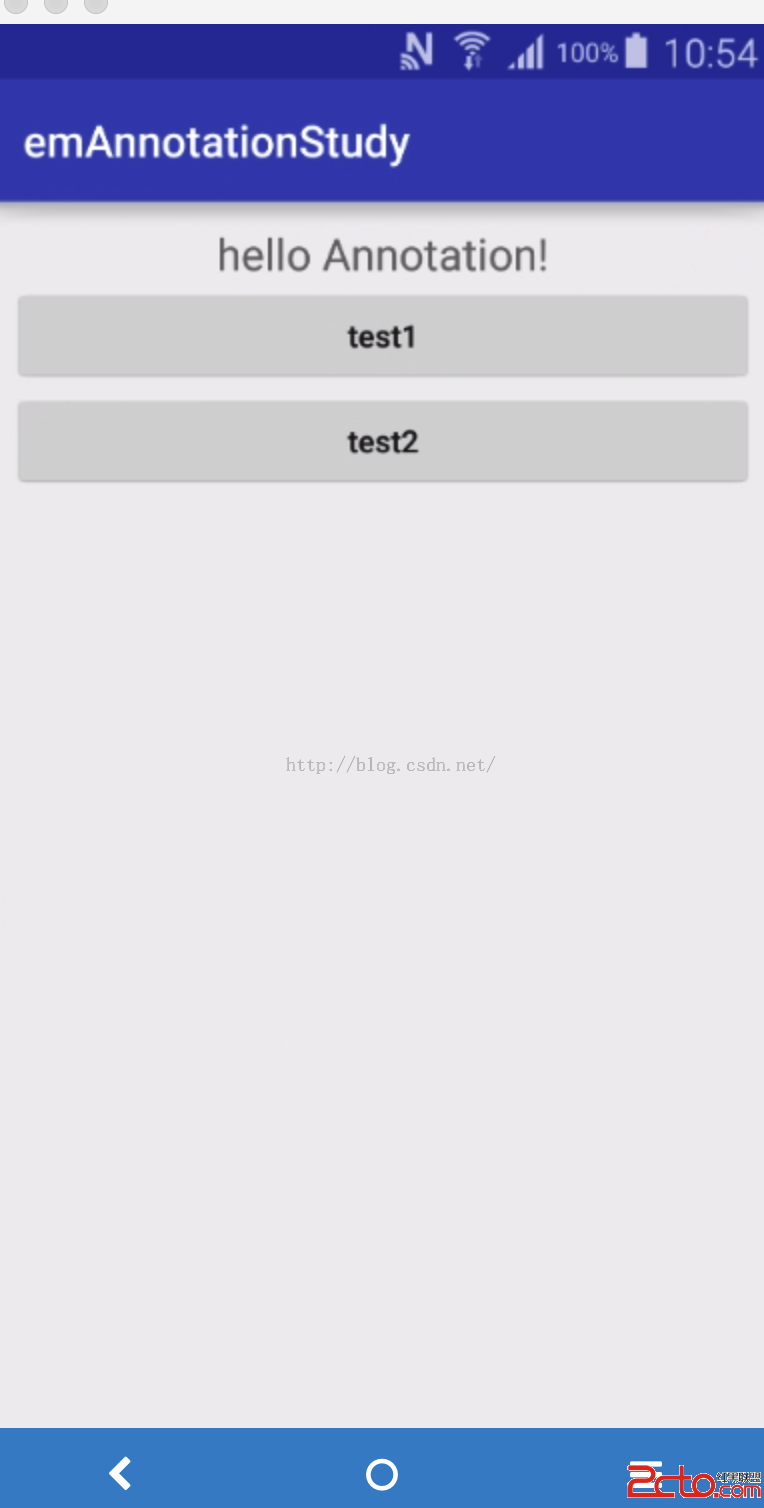 Android開發學習之路--Annotation注解簡化view控件之初體驗
Android開發學習之路--Annotation注解簡化view控件之初體驗 一般我們在寫android Activity的時候總是會在onCreate方法中加上s
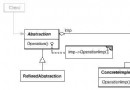 《Android源碼設計模式解析與實戰》讀書筆記(二十四)
《Android源碼設計模式解析與實戰》讀書筆記(二十四) 第二十四章、橋接模式 橋接模式也稱為橋梁模式,是結構型設計模式之一。橋接模式中體現了“單一職責原
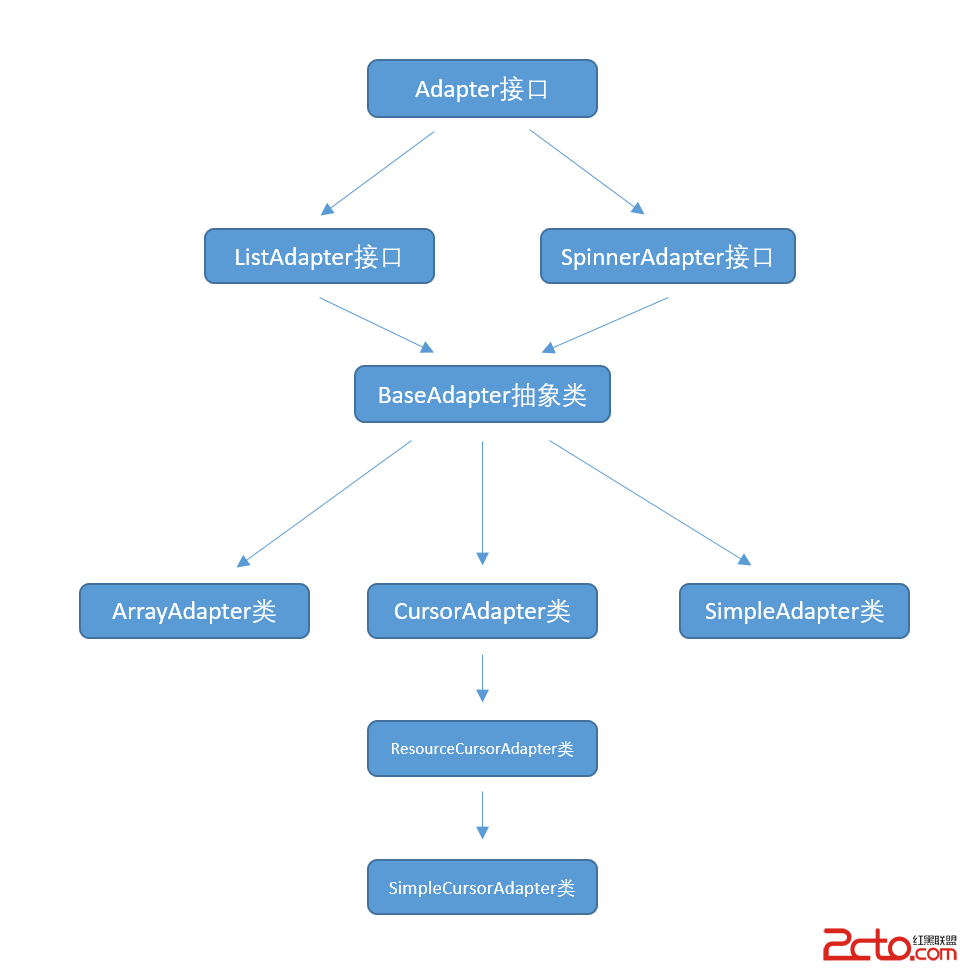 使用數據源碼解析Android中的Adapter、BaseAdapter、ArrayAdapter、SimpleAdapter和SimpleCursorAdapter
使用數據源碼解析Android中的Adapter、BaseAdapter、ArrayAdapter、SimpleAdapter和SimpleCursorAdapter
 《Android源碼設計模式解析與實戰》讀書筆記(二十六)
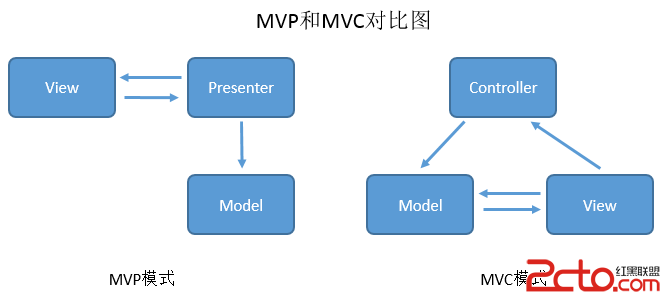
《Android源碼設計模式解析與實戰》讀書筆記(二十六) 第二十六章、MVP應用構架模式 1.MVP介紹 MVP模式是MVC模式的一個演化版本,MVP全稱Model-