編輯:高級開發
public class ProtipWidget extends AppWidgetProvider {
public static final String ACTION_NEXT_TIP = "com.android.misterwidget.NEXT_TIP"; //定義action切換到下一條提示
public static final String ACTION_POKE = "com.android.misterwidget.HEE_HEE"; //喚醒小機器人
public static final String EXTRA_TIMES = "times";
public static final String PREFS_NAME = "Protips";
public static final String PREFS_TIP_NUMBER = "widget_tip";
private static Random sRNG = new Random(); //輪換圖片用到的,生成一個靜態的隨機數生成器
private static final Pattern sNewlineRegex = Pattern.compile(" *\\n *");
private static final Pattern sDrawableRegex = Pattern.compile(" *@(drawable/[a-z0-9_]+) *");
// 初始化時Droid是眼睛沒有睜開,同時沒有信息提示
private int mIconRes = R.drawable.droidman_open;
private int mMessage = 0;
private AppWidgetManager mWidgetManager = null;
private int[] mWidgetIds;
private Context mContext;
private CharSequence[] mTips;
private void setup(Context context) {
mContext = context;
mWidgetManager = AppWidgetManager.getInstance(context);
mWidgetIds = mWidgetManager.getAppWidgetIds(new ComponentName(context, ProtipWidget.class));
SharedPreferences pref = context.getSharedPreferences(PREFS_NAME, 0);
mMessage = pref.getInt(PREFS_TIP_NUMBER, 0);
mTips = context.getResources().getTextArray(R.array.tips);
if (mTips != null) {
if (mMessage >= mTips.length) mMessage = 0;
} else {
mMessage = -1;
}
}
public void goodmorning() { //android開發網提示線程中輪換圖片,使用了500,200,100等這樣的0.5秒休眠,0.2秒休眠實現了動畫的間隔效果
mMessage = -1;
try {
setIcon(R.drawable.droidman_down_closed);
Thread.sleep(500);
setIcon(R.drawable.droidman_down_open);
Thread.sleep(200);
setIcon(R.drawable.droidman_down_closed);
Thread.sleep(100);
setIcon(R.drawable.droidman_down_open);
Thread.sleep(600);
} catch (InterruptedException ex) {
}
mMessage = 0;
mIconRes = R.drawable.droidman_open;
refresh();
}
@Override
public void onReceive(Context context, Intent intent) { //上面android123已經講到了,appWidget是基於broadcastreceiver類的,所以說需要響應onReceive通過action來驅動事件。
setup(context);
if (intent.getAction().equals(ACTION_NEXT_TIP)) {
mMessage = getNextMessageIndex();
SharedPreferences.Editor pref = context.getSharedPreferences(PREFS_NAME, 0).edit();
pref.putInt(PREFS_TIP_NUMBER, mMessage);
pref.commit();
refresh();
} else if (intent.getAction().equals(ACTION_POKE)) {
blink(intent.getIntExtra(EXTRA_TIMES, 1));
} else if (intent.getAction().equals(AppWidgetManager.ACTION_APPWIDGET_ENABLED)) {
goodmorning();
} else {
mIconRes = R.drawable.droidman_open;
refresh();
}
}
private void refresh() { //管理如果有多個本widget執行需要逐個更新
RemoteVIEws rv = buildUpdate(mContext);
for (int i : mWidgetIds) {
mWidgetManager.updateAppWidget(i, rv);
}
}
private void setIcon(int resId) {
mIconRes = resId;
refresh();
}
private int getNextMessageIndex() {
return (mMessage + 1) % mTips.length;
}
private void blink(int blinks) {
if (mMessage < 0) return;
//android123提示大家比較有意思的就是小綠人眼睛的一開一閉,這裡使用的是圖片輪換方式來實現動畫效果,在appWidget中我們可以用的控件十分少
setIcon(R.drawable.droidman_closed);
try {
Thread.sleep(100);
while (0<--blinks) {
setIcon(R.drawable.droidman_open);
Thread.sleep(200);
setIcon(R.drawable.droidman_closed);
Thread.sleep(100);
}
} catch (InterruptedException ex) { }
setIcon(R.drawable.droidman_open);
}
public RemoteVIEws buildUpdate(Context context) {
RemoteViews updateViews = new RemoteVIEws(
context.getPackageName(), R.layout.widget); //映射布局,widget.XML文件的源碼在下面可以找到
// 按下bubble的事件,對應action_next_tip動作
Intent bcast = new Intent(context, ProtipWidget.class);
bcast.setAction(ACTION_NEXT_TIP);
PendingIntent pending = PendingIntent.getBroadcast(
context, 0, bcast, PendingIntent.FLAG_UPDATE_CURRENT);
updateVIEws.setOnClickPendingIntent(R.id.tip_bubble, pending);
//這裡為action_poke
bcast = new Intent(context, ProtipWidget.class);
bcast.setAction(ACTION_POKE);
bcast.putExtra(EXTRA_TIMES, 1);
pending = PendingIntent.getBroadcast(
context, 0, bcast, PendingIntent.FLAG_UPDATE_CURRENT);
updateVIEws.setOnClickPendingIntent(R.id.bugdroid, pending);
// Tip bubble text
if (mMessage >= 0) {
String[] parts = sNewlineRegex.split(mTips[mMessage], 2);
String title = parts[0];
String text = parts.length > 1 ? parts[1] : "";
// Look for a callout graphic referenced in the text
Matcher m = sDrawableRegex.matcher(text);
if (m.find()) {
String imageName = m.group(1);
int resId = context.getResources().getIdentifIEr(
imageName, null, context.getPackageName());
updateViews.setImageVIEwResource(R.id.tip_callout, resId);
updateViews.setViewVisibility(R.id.tip_callout, VIEw.VISIBLE);
text = m.replaceFirst("");
} else {
updateViews.setImageVIEwResource(R.id.tip_callout, 0);
updateViews.setViewVisibility(R.id.tip_callout, VIEw.GONE);
}
updateViews.setTextVIEwText(R.id.tip_message,
text);
updateViews.setTextVIEwText(R.id.tip_header,
title);
updateViews.setTextVIEwText(R.id.tip_footer,
context.getResources().getString(
R.string.pager_footer,
(1+mMessage), mTips.length));
updateViews.setViewVisibility(R.id.tip_bubble, VIEw.VISIBLE);
} else {
updateViews.setViewVisibility(R.id.tip_bubble, VIEw.INVISIBLE);
}
updateViews.setImageVIEwResource(R.id.bugdroid, mIconRes);
return updateVIEws;
}
}
有關androidManifest.XML中詳細的recevIEr代碼如下
<receiver android:name=".ProtipWidget" android:label="@string/widget_name">
<intent-filter>
<action android:name="android.appwidget.action.APPWIDGET_UPDATE" />
<action android:name="com.android.protips.NEXT_TIP" />
<action android:name="com.android.protips.HEE_HEE" />
</intent-filter>
<meta-data android:name="android.appwidget.provider" android:resource="@XML/widget_build" />
</receiver>
有關res/xml/widget_build.XML的代碼如下
<appwidget-provider XMLns:android="http://schemas.android.com/apk/res/android"
android:minWidth="294dip"
android:minHeight="72dip"
android:updatePeriodMillis="0"
android:initialLayout="@layout/widget" />
有關res/layout/widget.XML的代碼如下,注意下面使用了布局文件套嵌的include方式
<RelativeLayout XMLns:android="http://schemas.android.com/apk/res/android"
android:id="@+id/widget"
android:layout_width="fill_parent"
android:layout_height="wrap_content"
android:orIEntation="vertical"
android:padding="5dip"
>
<include layout="@layout/droid" />
<include layout="@layout/bubble" />
</RelativeLayout>
有關res/layout/droid.XML的代碼如下
<ImageVIEw XMLns:android="http://schemas.android.com/apk/res/android"
android:id="@+id/bugdroid"
android:src="@drawable/droidman_down_closed"
android:scaleType="center"
android:layout_width="wrap_content"
android:layout_height="wrap_content"
android:layout_alignParentRight="true"
android:layout_centerVertical="true"
/>
有關res/layout/bubble.XML的代碼如下
<RelativeLayout XMLns:android="http://schemas.android.com/apk/res/android"
android:id="@+id/tip_bubble"
android:layout_width="fill_parent"
android:layout_height="wrap_content"
android:layout_toLeftOf="@+id/bugdroid"
android:layout_centerVertical="true"
android:gravity="center_vertical|left"
android:layout_marginRight="2dip"
android:visibility="invisible"
android:background="@drawable/droid_widget"
android:focusable="true"
>
<TextVIEw
android:layout_width="0dip"
android:layout_height="0dip"
android:layout_alignParentTop="true"
android:layout_marginTop="-100dip"
android:text="@string/widget_name"
/>
<TextVIEw
android:layout_width="0dip"
android:layout_height="0dip"
android:layout_alignParentTop="true"
android:layout_marginTop="-90dip"
android:text="@string/tts_pause"
/>
<TextVIEw
android:id="@+id/tip_footer"
style="@style/TipText.Footer"
android:layout_width="wrap_content"
android:layout_height="wrap_content"
android:layout_alignParentBottom="true"
android:layout_alignParentRight="true"
android:layout_marginRight="1dip"
/>
<ImageVIEw
android:id="@+id/tip_callout"
android:layout_width="wrap_content"
android:layout_height="fill_parent"
android:gravity="center"
android:layout_alignParentTop="true"
android:layout_alignParentRight="true"
android:layout_above="@id/tip_footer"
android:visibility="gone"
android:padding="4dip"
/>
<TextVIEw
android:id="@+id/tip_header"
style="@style/TipText.Header"
android:layout_width="fill_parent"
android:layout_height="wrap_content"
android:layout_alignParentTop="true"
android:layout_toLeftOf="@id/tip_callout"
android:layout_alignWithParentIfMissing="true"
android:layout_marginTop="0dip"
android:layout_marginLeft="3dip"
/>
<TextVIEw
android:id="@+id/tip_message"
style="@style/TipText.Message"
android:layout_width="fill_parent"
android:layout_height="wrap_content"
android:layout_below="@id/tip_header"
android:layout_alignLeft="@id/tip_header"
android:layout_alignRight="@id/tip_header"
android:layout_marginTop="1dip"
/>
</RelativeLayout>
有關上面bubble.XML中的drawable對象droid_widget的代碼如下
<selector XMLns:android="http://schemas.android.com/apk/res/android">
<item android:state_pressed="true" android:drawable="@drawable/droid_widget_pressed" />
<item android:state_focused="true" android:state_window_focused="true" android:drawable="@drawable/droid_widget_focused" />
<item android:state_focused="true" android:state_window_focused="false" android:drawable="@drawable/droid_widget_normal" />
<item android:drawable="@drawable/droid_widget_normal" />
</selector>
 全面解讀Google Android手機操作系統
2010年Google android手機操作系統的最大臂助非HTC莫屬,我們來首先來回顧下android的發展歷程。 2008 年 10 月HTC推出了全球首款and
 Android UI設計模板Dashboard及Action Bar的應用
Action bar及Dashboard能在大多數android程序項目中為用戶提供界面設計圖案。Dashboard項目組已經開始著手於一個項目,以幫助開發者們更快地使
 詳解如何使用幾個常用的Android控件
我們曾在《android 2.2開發初學者快速入門十一大秘技》一文中介紹過一些android的控件,本文從一個示例:“當點擊模擬器右側的Menu按鈕,在輸入界面中顯示一
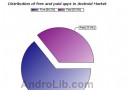 Google Android軟件數量破萬 半數為免費軟件
Google手機操作系統android今天傳出好消息,該平台的軟件數量已達到10072款,突破1萬關口。9月8日據AndroLib網站的統計數字顯示,截至今天,andr