編輯:Android開發教程
創建一個AsyncHttpClient;
(可選的)通過RequestParams對象設置請求參數;
調用AsyncHttpClient的某個get方法,傳遞你需要的(成功和失敗時)callback接口實現,一般都是匿名內部類,實現了AsyncHttpResponseHandler,類庫自己也提供許多現成的response handler,你一般不需要自己創建
AsyncHttpClient類通常用在android應用程序中創建異步GET, POST, PUT和DELETE HTTP請求,請求參數通過RequestParams實例創建,響應通過重寫匿名內部類ResponseHandlerInterface方法處理。
如下代碼展示了使用AsyncHttpClient與AsyncHttpResponseHandler的基礎操作:
 AsyncHttpClient client = new AsyncHttpClient();
        String path = "";
        RequestParams params = new RequestParams();
        params.put("username", username);
        params.put("password", password);
        client.get(path, params, new AsyncHttpResponseHandler() {
            @Override
            public void onSuccess(int i, Header[] headers, byte[] bytes) {

            }

            @Override
            public void onFailure(int i, Header[] headers, byte[] bytes, Throwable throwable) {

            }
        });
try {
    JSONObject jsonObject = new JSONObject();
    jsonObject.put("username", "ryantang");
    StringEntity stringEntity = new StringEntity(jsonObject.toString());
    client.post(mContext, "http://api.com/login", stringEntity, "application/json", new JsonHttpResponseHandler(){
        @Override
        public void onSuccess(JSONObject jsonObject) {
            super.onSuccess(jsonObject);
        }
    });
} catch (JSONException e) {
    e.printStackTrace();
} catch (UnsupportedEncodingException e) {
    e.printStackTrace();
}
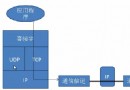
HttpUrlConnection是Java.NET包中提供的API,我們知道Android SDK是基於Java的,所以當然優先考慮HttpUrlConnection這種最原始最基本的API,其實大多數開源的聯網框架基本上也是基於JDK的HttpUrlConnection進行的封裝罷了,掌握HttpUrlConnection需要以下幾個步驟:
1、將訪問的路徑轉換成URL。
URL url = new URL(path);
2、通過URL獲取連接。
HttpURLConnection conn = (HttpURLConnection) url.openConnection();
3、設置請求方式。
conn.setRequestMethod(GET);
4、設置連接超時時間。
conn.setConnectTimeout(5000);
5、設置請求頭的信息。
conn.setRequestProperty(User-Agent, Mozilla/5.0 (compatible; MSIE 9.0; Windows NT 6.1; Trident/5.0));
7、針對不同的響應碼,做不同的操作(請求碼200,表明請求成功,獲取返回內容的輸入流)
工具類:
public class StreamTools {
    /**
     * 將輸入流轉換成字符串
     *
     * @param is
     *            從網絡獲取的輸入流
     * @return
     */
    public static String streamToString(InputStream is) {
        try {
            ByteArrayOutputStream baos = new ByteArrayOutputStream();
            byte[] buffer = new byte[1024];
            int len = 0;
            while ((len = is.read(buffer)) != -1) {
                baos.write(buffer, 0, len);
            }
            baos.close();
            is.close();
            byte[] byteArray = baos.toByteArray();
            return new String(byteArray);
        } catch (Exception e) {
            Log.e(tag, e.toString());
            return null;
        }
    }
}
public static String loginByGet(String username, String password) {
        String path = http://192.168.0.107:8080/WebTest/LoginServerlet?username= + username + &password= + password;
        try {
            URL url = new URL(path);
            HttpURLConnection conn = (HttpURLConnection) url.openConnection();
            conn.setConnectTimeout(5000);
            conn.setRequestMethod(GET);
            int code = conn.getResponseCode();
            if (code == 200) {
                InputStream is = conn.getInputStream(); // 字節流轉換成字符串
                return StreamTools.streamToString(is);
            } else {
                return 網絡訪問失敗;
            }
        } catch (Exception e) {
            e.printStackTrace();
            return 網絡訪問失敗;
        }
    }
public static String loginByPost(String username, String password) {
        String path = http://192.168.0.107:8080/WebTest/LoginServerlet;
        try {
            URL url = new URL(path);
            HttpURLConnection conn = (HttpURLConnection) url.openConnection();
            conn.setConnectTimeout(5000);
            conn.setRequestMethod(POST);
            conn.setRequestProperty(Content-Type, application/x-www-form-urlencoded);
            String data = username= + username + &password= + password;
            conn.setRequestProperty(Content-Length, data.length() + );
            // POST方式,其實就是浏覽器把數據寫給服務器
            conn.setDoOutput(true); // 設置可輸出流
            OutputStream os = conn.getOutputStream(); // 獲取輸出流
            os.write(data.getBytes()); // 將數據寫給服務器
            int code = conn.getResponseCode();
            if (code == 200) {
                InputStream is = conn.getInputStream();
                return StreamTools.streamToString(is);
            } else {
                return 網絡訪問失敗;
            }
        } catch (Exception e) {
            e.printStackTrace();
            return 網絡訪問失敗;
        }
    }
HttpClient是開源組織Apache提供的Java請求網絡框架,其最早是為了方便Java服務器開發而誕生的,是對JDK中的HttpUrlConnection各API進行了封裝和簡化,提高了性能並且降低了調用API的繁瑣,Android因此也引進了這個聯網框架,我們再不需要導入任何jar或者類庫就可以直接使用,值得注意的是Android官方已經宣布不建議使用HttpClient了。
1、 創建HttpClient對象
2、創建HttpGet對象,指定請求地址(帶參數)
3、使用HttpClient的execute(),方法執行HttpGet請求,得到HttpResponse對象
4、調用HttpResponse的getStatusLine().getStatusCode()方法得到響應碼
5、調用的HttpResponse的getEntity().getContent()得到輸入流,獲取服務端寫回的數據
public static String loginByHttpClientGet(String username, String password) {
        String path = http://192.168.0.107:8080/WebTest/LoginServerlet?username=
                + username + &password= + password;
        HttpClient client = new DefaultHttpClient(); // 開啟網絡訪問客戶端
        HttpGet httpGet = new HttpGet(path); // 包裝一個GET請求
        try {
            HttpResponse response = client.execute(httpGet); // 客戶端執行請求
            int code = response.getStatusLine().getStatusCode(); // 獲取響應碼
            if (code == 200) {
                InputStream is = response.getEntity().getContent(); // 獲取實體內容
                String result = StreamTools.streamToString(is); // 字節流轉字符串
                return result;
            } else {
                return 網絡訪問失敗;
            }
        } catch (Exception e) {
            e.printStackTrace();
            return 網絡訪問失敗;
        }
    }
1,創建HttpClient對象
2,創建HttpPost對象,指定請求地址
3,創建List,用來裝載參數
4,調用HttpPost對象的setEntity()方法,裝入一個UrlEncodedFormEntity對象,攜帶之前封裝好的參數
5,使用HttpClient的execute()方法執行HttpPost請求,得到HttpResponse對象
6, 調用HttpResponse的getStatusLine().getStatusCode()方法得到響應碼
7, 調用的HttpResponse的getEntity().getContent()得到輸入流,獲取服務端寫回的數據
public static String loginByHttpClientPOST(String username, String password) {
        String path = http://192.168.0.107:8080/WebTest/LoginServerlet;
        try {
            HttpClient client = new DefaultHttpClient(); // 建立一個客戶端
            HttpPost httpPost = new HttpPost(path); // 包裝POST請求
            // 設置發送的實體參數
            List parameters = new ArrayList();
            parameters.add(new BasicNameValuePair(username, username));
            parameters.add(new BasicNameValuePair(password, password));
            httpPost.setEntity(new UrlEncodedFormEntity(parameters, UTF-8));
            HttpResponse response = client.execute(httpPost); // 執行POST請求
            int code = response.getStatusLine().getStatusCode();
            if (code == 200) {
                InputStream is = response.getEntity().getContent();
                String result = StreamTools.streamToString(is);
                return result;
            } else {
                return 網絡訪問失敗;
            }
        } catch (Exception e) {
            e.printStackTrace();
            return 訪問網絡失敗;
        }
    }
 Android的Activity和Task
Task的概念A task is a stack of activities. Task 就是一個棧,這個棧裡面存放了 很多 Activity ,它遵循著後進先出的原則。
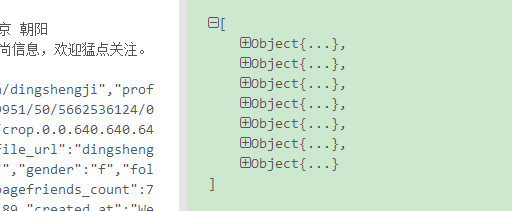 android中如何解析沒有Key的Json數據
新浪微博有一部分json數據如下,你會發現這是個數組,但是數組沒有key,數組中的對象也沒有key。怎麼解析呢?fastjson遇到這種無名數組套無名對象也會報異常。所以
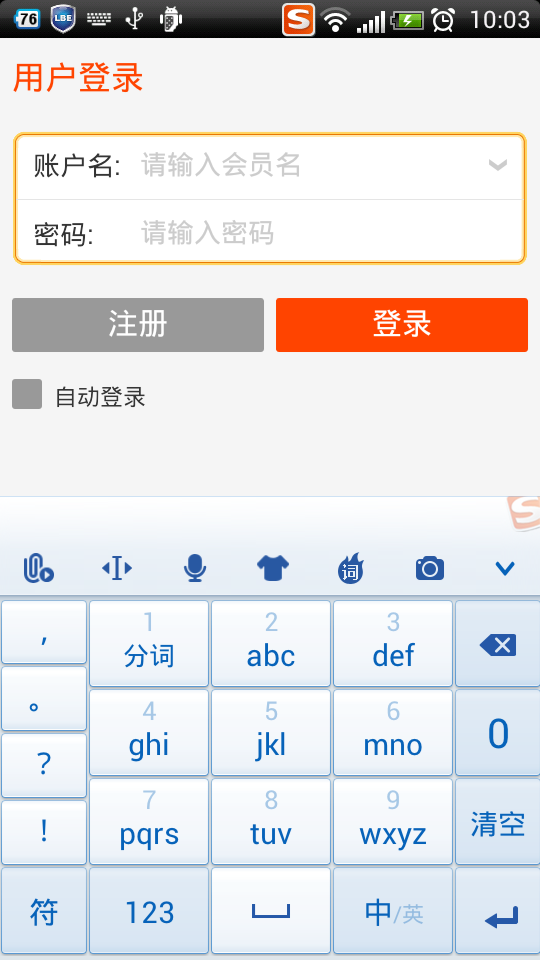
 Android基於Openfire開發即時通訊工具(2)登錄openfire
上節openfire服務器已經搭建完成,這節看看,怎麼使用smack基於xmpp協議登錄openfire服務器,在服務器中創建好測試的賬號下面看android客戶端的代碼
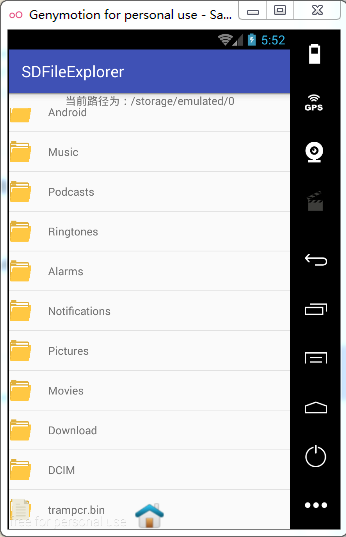 Android數據存儲之File文件儲存數據
Android數據儲存之File文件儲存數據 一.存儲在內部還是外部? AndroidManifest.xml中manifest標簽下有一個屬性andro