首先先看一個小例子,接著講解原理
TabTest.java
view plaincopy to clipboardprint?
package org.hualang.tab;
import android.app.Activity;
import android.app.TabActivity;
import android.graphics.Color;
import android.os.Bundle;
import android.widget.TabHost;
import android.widget.Toast;
import android.widget.TabHost.OnTabChangeListener;
public class TabTest extends TabActivity {
/** Called when the activity is first created. */
TabHost tabhost;
@Override
public void onCreate(Bundle savedInstanceState) {
super.onCreate(savedInstanceState);
setContentView(R.layout.main);
//取得TabHost對象
tabhost = getTabHost();
//為TabHost添加標簽
//新建一個newTabSpec(newTabSpec)
//設置其標簽和圖標(setIndicator)
//設置內容(setContent)
tabhost.addTab(tabhost.newTabSpec("tab1")
.setIndicator("TAB 1",getResources().getDrawable(R.drawable.img1))
.setContent(R.id.text1));
tabhost.addTab(tabhost.newTabSpec("tab2")
.setIndicator("TAB 2",getResources().getDrawable(R.drawable.img2))
.setContent(R.id.text2));
tabhost.addTab(tabhost.newTabSpec("tab3")
.setIndicator("TAB 3",getResources().getDrawable(R.drawable.img3))
.setContent(R.id.text3));
//設置TabHost的背景顏色
//tabhost.setBackgroundColor(Color.argb(150,22,70,150));
//設置TabHost的背景圖片資源
tabhost.setBackgroundResource(R.drawable.bg0);
//設置當前顯示哪個標簽
tabhost.setCurrentTab(0);
//標簽切換事件處理,setOnTabChangedListener
tabhost.setOnTabChangedListener(new OnTabChangeListener()
{
public void onTabChanged(String tabId)
{
Toast toast=Toast.makeText(getApplicationContext(), "現在是"+tabId+"標簽", Toast.LENGTH_SHORT);
toast.show();
}
});
}
}
main.xml
<?xml version="1.0" encoding="utf-8"?>
<TabHost xmlns:android="http://schemas.android.com/apk/res/android"
android:id="@android:id/tabhost"
android:layout_width="fill_parent"
android:layout_height="fill_parent">
<LinearLayout
android:orientation="vertical"
android:layout_width="fill_parent"
android:layout_height="fill_parent">
<TabWidget
android:id="@android:id/tabs"
android:layout_width="fill_parent"
android:layout_height="wrap_content" />
<FrameLayout
android:id="@android:id/tabcontent"
android:layout_width="fill_parent"
android:layout_height="fill_parent">
<TextView
android:id="@+id/text1"
android:layout_width="fill_parent"
android:layout_height="fill_parent"
android:text="選項卡1" />
<TextView
android:id="@+id/text2"
android:layout_width="fill_parent"
android:layout_height="fill_parent"
android:text="選項卡2" />
<TextView
android:id="@+id/text3"
android:layout_width="fill_parent"
android:layout_height="fill_parent"
android:text="選項卡3" />
</FrameLayout>
</LinearLayout>
</TabHost>
Android TabWidget的實現可以分為二種,一種是使用標准TabActivity實現,另外一種可以自定義方式實現,這種方法實現起來相對比較復雜,但對於要實現比較多元化的view是很好的,這裡我們簡單看下源碼
一、通用做法
繼承TabActivity,實現自己的TabActivity
[java]
import android.app.Activity;
import android.app.TabActivity;
import android.content.Intent;
import android.os.Bundle;
import android.widget.TabHost;
import android.widget.TabHost.OnTabChangeListener;
public class TabWidgetDemo2 extends TabActivity implements OnTabChangeListener {
private TabHost mTabHost;
@Override
protected void onCreate(Bundle savedInstanceState) {
// TODO Auto-generated method stub
super.onCreate(savedInstanceState);
setContentView(R.layout.tabwidgetdemo2);
mTabHost = getTabHost();
mTabHost.setOnTabChangedListener(this);
setupTab1();
setupTab2();
mTabHost.setCurrentTab(1);
}
private void setupTab2() {
// TODO Auto-generated method stub
Intent intent = new Intent();
intent.setAction(Intent.ACTION_MAIN);
intent.setClass(this, TabWidget2.class);
mTabHost.addTab(mTabHost.newTabSpec("TabWidget2")
.setIndicator("TabWidget2",getResources().getDrawable(R.drawable.icon))
.setContent(intent));
}
private void setupTab1() {
// TODO Auto-generated method stub
Intent intent = new Intent();
intent.setAction(Intent.ACTION_MAIN);
intent.setClass(this, TabWidget1.class);
mTabHost.addTab(mTabHost.newTabSpec("TabWidget1")
.setIndicator("TabWidget1",getResources().getDrawable(R.drawable.icon))
.setContent(intent));
}
public void onTabChanged(String tabId) {
// TODO Auto-generated method stub
Activity activity = getLocalActivityManager().getActivity(tabId);
if (activity != null) {
activity.onWindowFocusChanged(true);
}
}
}
二個tab對應的Activity,先看TabWidget1,這個類在第二種實現中還會用到,因此我們可以看到對Action的判斷。
[java]
import android.app.Activity;
import android.content.Intent;
import android.os.Bundle;
import com.android.exampledemo.R;
import com.android.exampledemo.util.DemoUtils;
public class TabWidget1 extends Activity {
@Override
protected void onCreate(Bundle savedInstanceState) {
// TODO Auto-generated method stub
super.onCreate(savedInstanceState);
Intent intent = this.getIntent();
if (intent.getAction().equals(Intent.ACTION_MAIN)){
setContentView(R.layout.tabwidgetdemo2_1);
}
else {
setContentView(R.layout.tabwidget_1);
DemoUtils.updateButtonBar((Activity)this,R.id.contactstab);
}
}
}
再看一下TabWidget2,這個Activity我們在第二種實現方式中也會用到。
[java]
import com.android.exampledemo.R;
import com.android.exampledemo.util.DemoUtils;
import android.app.Activity;
import android.content.Intent;
import android.os.Bundle;
public class TabWidget2 extends Activity {
@Override
protected void onCreate(Bundle savedInstanceState) {
// TODO Auto-generated method stub
super.onCreate(savedInstanceState);
Intent intent = this.getIntent();
if (intent.getAction().equals(Intent.ACTION_MAIN)){
setContentView(R.layout.tabwidgetdemo2_1);
}
else {
setContentView(R.layout.tabwidget_2);
DemoUtils.updateButtonBar((Activity)this,R.id.groupstab);
}
}
}
最後就是各個Activity對應的layout
1.tabwidgetdemo2.xml
[xhtml]
<?xml version="1.0" encoding="utf-8"?>
<TabHost
xmlns:android="http://schemas.android.com/apk/res/android"
android:id="@android:id/tabhost"
android:layout_width="fill_parent"
android:layout_height="fill_parent">
<LinearLayout
android:orientation="vertical"
android:layout_width="fill_parent"
android:layout_height="fill_parent">
<TabWidget android:id="@android:id/tabs"
android:layout_width="fill_parent"
android:layout_height="68dip"
android:paddingLeft="1dip"
android:paddingRight="1dip"
android:paddingTop="4dip"
/>
<FrameLayout android:id="@android:id/tabcontent"
android:layout_width="fill_parent"
android:layout_height="0dip"
android:layout_weight="1"
/>
</LinearLayout>
</TabHost>
2.二個sub tab對應的layout
[xhtml]
Layout1
<?xml version="1.0" encoding="utf-8"?>
<LinearLayout
xmlns:android="http://schemas.android.com/apk/res/android"
android:layout_width="fill_parent"
android:layout_height="fill_parent"
android:background="#FFF">
<TextView android:id="@+id/textview"
android:layout_width="wrap_content"
android:layout_height="wrap_content"
android:text="Tab Widget first">
</TextView>
</LinearLayout>
Layout2
<?xml version="1.0" encoding="utf-8"?>
<LinearLayout
xmlns:android="http://schemas.android.com/apk/res/android"
android:layout_width="fill_parent"
android:layout_height="fill_parent"
android:background="#FFF">
<TextView android:id="@+id/textview"
android:layout_width="wrap_content"
android:layout_height="wrap_content"
android:text="Tab Widget second">
</TextView>
</LinearLayout>
方法2:
先創建一個Activity (TabWidgetDemo)
[c-sharp]
1.TabWidgetDemo.java
import com.android.exampledemo.R;
import com.android.exampledemo.util.DemoUtils;
import android.app.Activity;
import android.content.Context;
import android.content.SharedPreferences;
import android.os.Bundle;
//not use tabhost to organized
public class TabWidgetDemo extends Activity {
@Override
protected void onCreate(Bundle savedInstanceState) {
// TODO Auto-generated method stub
super.onCreate(savedInstanceState);
//int activeTab = DemoUtils.getIntPref(this, "activetab", R.id.artisttab);
SharedPreferences prefs =
getSharedPreferences(getPackageName(), Context.MODE_PRIVATE);
int activeTab = prefs.getInt("activetab", R.id.contactstab);
if (activeTab != R.id.contactstab
&& activeTab != R.id.groupstab) {
activeTab = R.id.contactstab;
}
DemoUtils.activateTab(this, activeTab);
}
}
2.DemoUtils
import android.app.Activity;
import android.content.Intent;
import android.net.Uri;
import android.view.View;
import android.widget.TabWidget;
import com.android.exampledemo.R;
public class DemoUtils {
static int sActiveTabIndex = -1;
public static void activateTab(Activity a,int active_id){
Intent intent = new Intent(Intent.ACTION_PICK);
switch (active_id) {
case R.id.contactstab:
intent.setDataAndType(Uri.EMPTY, "vnd.android.cursor.dir/tb_contacts");
break;
case R.id.groupstab:
intent.setDataAndType(Uri.EMPTY, "vnd.android.cursor.dir/tb_groups");
break;
default:
return;
}
intent.addFlags(Intent.FLAG_ACTIVITY_CLEAR_TOP);
a.startActivity(intent);
a.finish();
a.overridePendingTransition(0,0);
}
public static void updateButtonBar(Activity a, int highlight) {
final TabWidget ll = (TabWidget) a.findViewById(R.id.buttonbar);
for (int i = ll.getChildCount() - 1; i >= 0; i--) {
View v = ll.getChildAt(i);
boolean isActive = (v.getId() == highlight);
if (isActive) {
ll.setCurrentTab(i);
sActiveTabIndex = i;
}
v.setTag(i);
v.setOnClickListener(new View.OnClickListener() {
public void onClick(View v) {
int id = v.getId();
if (id == ll.getChildAt(sActiveTabIndex).getId()) {
return;
}
activateTab((Activity)ll.getContext(),id );
ll.setCurrentTab((Integer) v.getTag());
}});
}
}
}
二個Tab sub activity前一方法中已經給出,這裡我們只需要看一下layout的實現就可以了
1>buttonbar.xml
[xhtml]
<?xml version="1.0" encoding="utf-8"?>
<TabWidget xmlns:android="http://schemas.android.com/apk/res/android"
android:id="@+id/buttonbar"
android:layout_width="match_parent"
android:layout_height="wrap_content" >
<TextView
android:id="@+id/contactstab"
android:focusable="true"
android:drawableTop="@drawable/icon"
android:background="@drawable/buttonbarbackground"
android:text="Contacts"
android:textColor="@color/tab_indicator_text"
android:textAppearance="?android:attr/textAppearanceSmall"
android:paddingTop="7dip"
android:paddingBottom="2dip"
android:gravity="center"
android:layout_weight="1"
android:layout_marginLeft="-3dip"
android:layout_marginRight="-3dip"
android:layout_width="match_parent"
android:layout_height="84dip"
android:singleLine="true"
android:ellipsize="marquee" />
<TextView
android:id="@+id/groupstab"
android:focusable="true"
android:drawableTop="@drawable/icon"
android:background="@drawable/buttonbarbackground"
android:text="Group"
android:textColor="@color/tab_indicator_text"
android:textAppearance="?android:attr/textAppearanceSmall"
android:paddingTop="7dip"
android:paddingBottom="2dip"
android:gravity="center"
android:layout_weight="1"
android:layout_marginLeft="-3dip"
android:layout_marginRight="-3dip"
android:layout_width="match_parent"
android:layout_height="84dip"
android:singleLine="true"
android:ellipsize="marquee" />
</TabWidget>
2>tabwidget_1.xml
[xhtml]
<?xml version="1.0" encoding="utf-8"?>
<LinearLayout
xmlns:android="http://schemas.android.com/apk/res/android"
android:layout_width="fill_parent"
android:layout_height="fill_parent">
<include layout="@layout/battonbar" />
<ExpandableListView android:id="@+id/android:list"
android:layout_width="fill_parent"
android:layout_height="wrap_content"
android:footerDividersEnabled="true"
android:fadeScrollbars="true"
android:drawSelectorOnTop="true">
</ExpandableListView>
</LinearLayout>
3> tabwidget_2.xml
[xhtml]
<?xml version="1.0" encoding="utf-8"?>
<LinearLayout
xmlns:android="http://schemas.android.com/apk/res/android"
android:layout_width="fill_parent"
android:layout_height="fill_parent">
<include layout="@layout/battonbar" />
</LinearLayout>
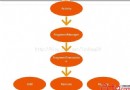 Android 筆記-Fragment 與 Activity之間傳遞數據
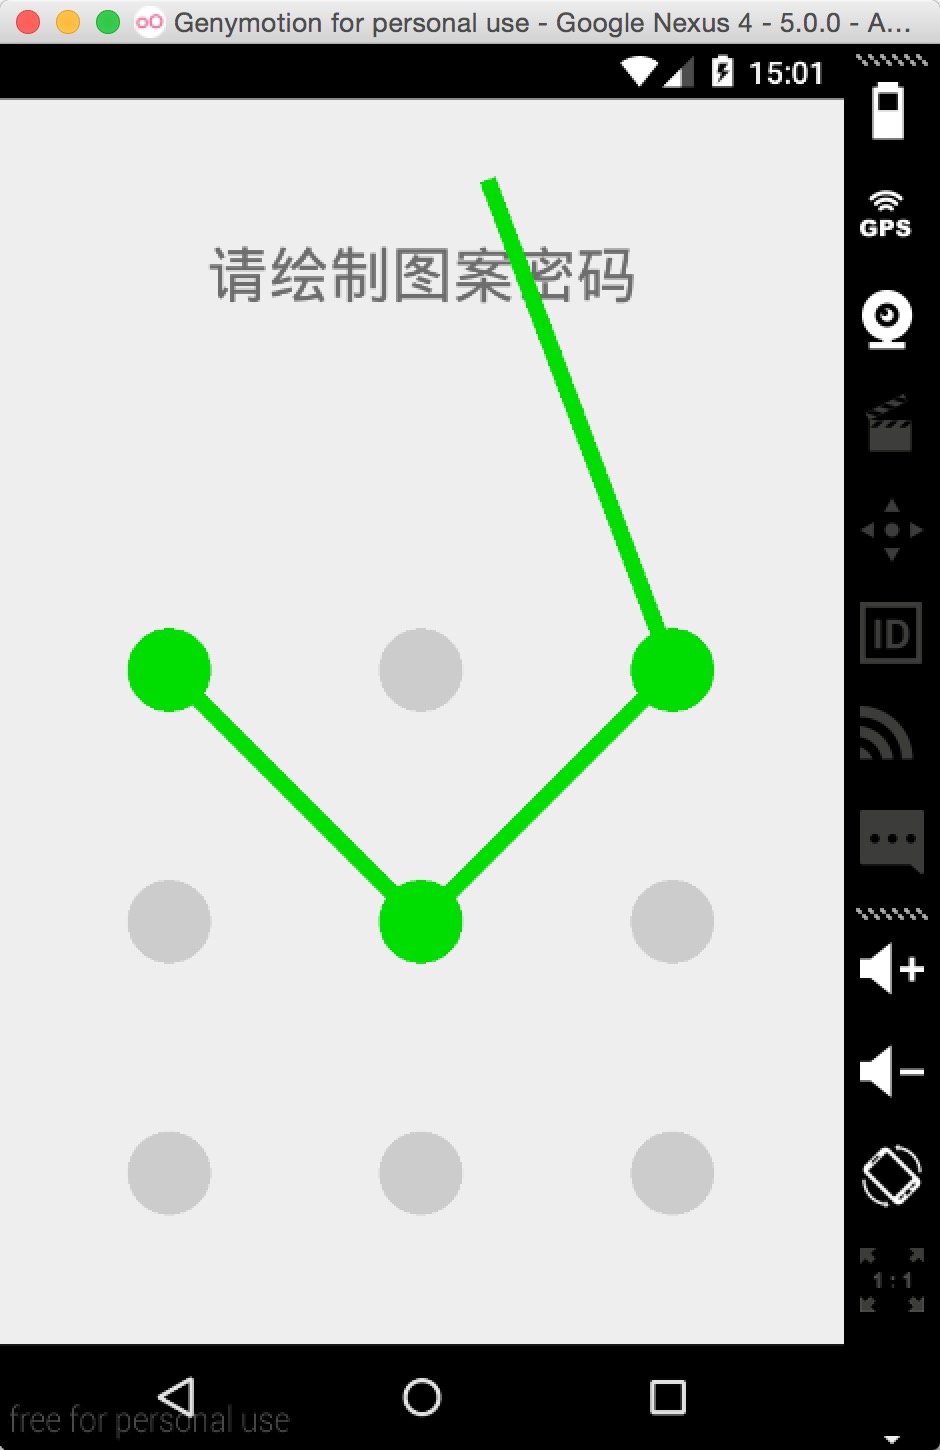 Android中圖案鎖的實現
 關於Android端配置極光推送
 布局與控件(七)-ListView知多少(上)