編輯:關於Android編程
讓開發的app自動去跑 測試 流程 ,是不是很酷
那麼通過操作屏幕自動生成 測試流程代碼 是不是更酷
接下來 我們借助Android Studio 2.2 來實現 簡單的自動測試吧
先上動態圖

可以直接去github去copy代碼 歡迎star fork
https://github.com/shf981862482/AutoTextApplication
配置我們的app下的 build.gradle
android {
    defaultConfig {
        testInstrumentationRunner 'android.support.test.runner.AndroidJUnitRunner'
    }
}
添加packagingOptions 代碼解決沖突。不然會報以下錯誤
Duplicate files copied in APK META-INF/maven/com.google.guava/guava/pom.properties
android {
    packagingOptions {
        pickFirst('META-INF/maven/com.google.guava/guava/pom.xml')
        pickFirst('META-INF/maven/com.google.guava/guava/pom.properties')
    }
}
dependencies {
    compile fileTree(dir: 'libs', include: ['*.jar'])
    testCompile 'junit:junit:4.12'
    androidTestCompile 'com.android.support.test:runner:0.5'
    androidTestCompile 'com.android.support.test:rules:0.5'
    androidTestCompile 'com.android.support.test.espresso:espresso-core:2.2.2'

}
添加configurations.all代碼解決沖突。不然會報以下錯誤
Conflict with dependency ‘com.android.support:support-annotations’. Resolved versions for app (23.1.0) and test app (23.0.1) differ
configurations.all {
    resolutionStrategy.force 'com.android.support:support-annotations:23.1.0'
}
或者嘗試
    androidTestCompile('com.android.support.test.espresso:espresso-core:2.2.2', {
        exclude group: 'com.android.support', module: 'support-annotations'
    })
環境搭建好了
必備的工具找到自己的sdk目錄
C:\AndroidSDK\tools
打開uiautomatorviewer.bat
uiautomatorviewer

	工具提供了一個便利的方式來查看UI布局結構,並且可以查看各個控件的相關屬性。利用這些信息可以用來創建UI測試代碼。
使用方法usb連接手機,點擊圖標


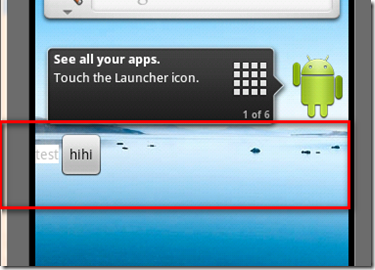
選中某一個控件,比如button
我們看note detail 出 可以找到resorce_id cotnent-dec text hint 等信息
這對我們自動測試找到控件很重要、
當然後面的RecZ喎?/kf/ware/vc/" target="_blank" class="keylink">vcmQgRXNwcmVzc28gu+HX1LavsO/O0sPH1dK1vcTctqjOu7W9xLO49r/VvOS1xNDFz6I8L2NvZGU+PC9jb2RlPjwvY29kZT48L2NvZGU+PC9jb2RlPjwvY29kZT48L3A+DQo8cD48Y29kZSBjbGFzcz0="hljs matlab">當然,為了在自動化測試的時候方便找到控件,那麼注意以下幾點
1、使用android:contentDescription屬性給 ImageButton, ImageView,

	CheckBox和其他控件設置標簽。 2、使用android:hint 屬性來標記EditText

	控件,而不是使用裡面的文本(文本內容用戶是可以修改的)。

	3、對於用來提供操作視覺反饋的UI(文本或者圖標),都添加一個android:hint 屬性來識別。

	4、確保所有用戶可操作的界面元素都可以通過方向控制鍵選中(例如軌跡球)。 5、通過uiautomatorviewer

	5、工具來確保所有的UI元素都可以被測試工具訪問到。還可以通過“輔助功能”(在設置界面)中的“TalkBack”等服務來測試UI的可訪問性。
AS2.2 Record Espresso通過 Record Espresso自動生成測試流程文件

以上兩步操作 會到如下界面

這個時候不要點擊任何按鈕,讓我們拿出手機,進行測試記錄

先說一下 我的程序流程
LauchActivity 進行耗時操作模擬初始化

LoginActivity 輸入用戶名和密碼 點擊button進行耗時操作後進入MainActivity
注意,這相當於debug操作,所以運行會比較慢

可以看到上圖,我輸入了用戶名和密碼,左邊就自動生成了測試代碼

點擊button 到了MainActivity

我們點擊Complete Recording 完成錄制,真正生成測試代碼


打開LauchActivityTest可能會有亂碼,我們按情況更成漢字就行了

規范並保證我們的測試代碼正確生成之後,我們可以先編譯試試,當然我們也可以設斷點 debug
import android.app.Instrumentation;
import android.support.test.espresso.ViewInteraction;
import android.support.test.rule.ActivityTestRule;
import android.support.test.runner.AndroidJUnit4;
import android.test.suitebuilder.annotation.LargeTest;

import org.junit.Rule;
import org.junit.Test;
import org.junit.runner.RunWith;

import static android.support.test.InstrumentationRegistry.getInstrumentation;
import static android.support.test.espresso.Espresso.onView;
import static android.support.test.espresso.action.ViewActions.click;
import static android.support.test.espresso.action.ViewActions.replaceText;
import static android.support.test.espresso.matcher.ViewMatchers.isDisplayed;
import static android.support.test.espresso.matcher.ViewMatchers.withId;
import static android.support.test.espresso.matcher.ViewMatchers.withParent;
import static android.support.test.espresso.matcher.ViewMatchers.withText;
import static org.hamcrest.Matchers.allOf;

@LargeTest
@RunWith(AndroidJUnit4.class)
public class LauchActivityTest {

    @Rule
    public ActivityTestRule mActivityTestRule = new ActivityTestRule<>(LauchActivity.class);

    @Test
    public void lauchActivityTest() {


        ViewInteraction appCompatEditText = onView(
                allOf(withId(R.id.etxt_name),
                        withParent(allOf(withId(R.id.activity_login),
                                withParent(withId(android.R.id.content)))),
                        isDisplayed()));
        appCompatEditText.perform(click());

        ViewInteraction appCompatEditText2 = onView(
                allOf(withId(R.id.etxt_name),
                        withParent(allOf(withId(R.id.activity_login),
                                withParent(withId(android.R.id.content)))),
                        isDisplayed()));
        appCompatEditText2.perform(replaceText("hong"));


        ViewInteraction appCompatEditText5 = onView(
                allOf(withId(R.id.etxt_pass),
                        withParent(allOf(withId(R.id.activity_login),
                                withParent(withId(android.R.id.content)))),
                        isDisplayed()));
        appCompatEditText5.perform(replaceText("123"));

        ViewInteraction appCompatButton = onView(
                allOf(withId(R.id.btn_login), withText("登陸"),
                        withParent(allOf(withId(R.id.activity_login),
                                withParent(withId(android.R.id.content)))),
                        isDisplayed()));
        appCompatButton.perform(click());


}

這個時候運行會有以下類似錯誤
//at dalvik.system.VMStack.getThreadStackTrace(Native Method) ....
意思就是找不到 這個控件
那麼這是為什麼呢,

前面我們說過程序流程 在LauchActivity有耗時操作,

但我們的EditText是在LoginActivity find的,所以app還沒有到LoginActivity,

測試線程在LauchActivity時間段找 控件,是找不到的,所以測試失敗

那麼解決辦法就是等待LoginActivity啟動再去找這個控件
        Instrumentation.ActivityMonitor am = new Instrumentation.ActivityMonitor("sun.com.autotextapplication.LoginActivity", null, false);
        getInstrumentation().addMonitor(am);
        getInstrumentation().waitForMonitor(am);
當然,有時候我們會有一些動畫,動畫完了才會出來布局,

那麼這個時候怎麼去找控件呢
解決辦法就是 直接將測試線程 sleep(…),之後再去找控件
        try {
            Thread.sleep(2000);
        } catch (InterruptedException e) {
            e.printStackTrace();
        }
下面是我更改後的代碼
    @Test
    public void lauchActivityTest() {
        //at dalvik.system.VMStack.getThreadStackTrace(Native Method)

        Instrumentation.ActivityMonitor am = new Instrumentation.ActivityMonitor("sun.com.autotextapplication.LoginActivity", null, false);
        getInstrumentation().addMonitor(am);
        getInstrumentation().waitForMonitor(am);

        ViewInteraction appCompatEditText = onView(
                allOf(withId(R.id.etxt_name),
                        withParent(allOf(withId(R.id.activity_login),
                                withParent(withId(android.R.id.content)))),
                        isDisplayed()));
        appCompatEditText.perform(click());

        ViewInteraction appCompatEditText2 = onView(
                allOf(withId(R.id.etxt_name),
                        withParent(allOf(withId(R.id.activity_login),
                                withParent(withId(android.R.id.content)))),
                        isDisplayed()));
        appCompatEditText2.perform(replaceText("hong"));


        ViewInteraction appCompatEditText5 = onView(
                allOf(withId(R.id.etxt_pass),
                        withParent(allOf(withId(R.id.activity_login),
                                withParent(withId(android.R.id.content)))),
                        isDisplayed()));
        appCompatEditText5.perform(replaceText("123"));

        ViewInteraction appCompatButton = onView(
                allOf(withId(R.id.btn_login), withText("登陸"),
                        withParent(allOf(withId(R.id.activity_login),
                                withParent(withId(android.R.id.content)))),
                        isDisplayed()));
        appCompatButton.perform(click());
        Instrumentation.ActivityMonitor amMain = new Instrumentation.ActivityMonitor("sun.com.autotextapplication.MainActivity", null, false);
        getInstrumentation().addMonitor(amMain);
        getInstrumentation().waitForMonitor(amMain);

        try {
            Thread.sleep(20000);
        } catch (InterruptedException e) {
            e.printStackTrace();
        }
    }
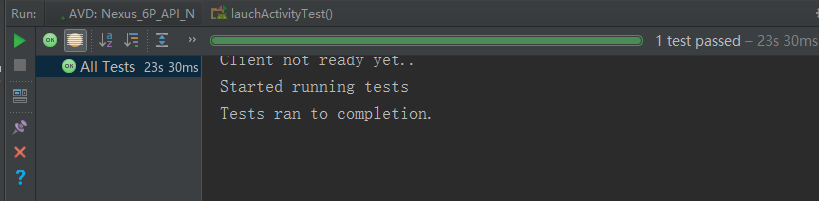
好了大功告成,然後執行測試代碼
 基於android的朋友圈
最近幾天寫了一個簡單的朋友圈程序,包含了朋友圈的列表實現,視頻的錄制、預覽與上傳,圖片可選擇拍照或者從相冊選取,從相冊選取可以一次選擇多張照片,並且限制照片的張數。大致也
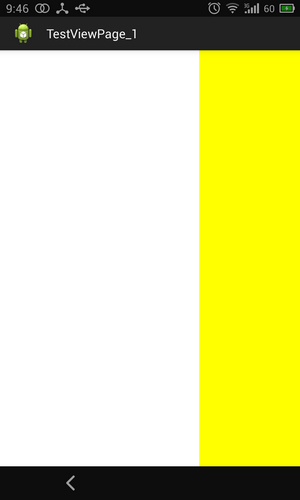
 全新android Tab控件PagerSlidingTabStrip最簡使用方法
眾所周知Android的Tab控件不是很好用,因此Github上的PagerSlidingTabStrip項目被廣為使用,該項目地址為: 其示例圖如下:由於其d
 【Android圖像處理】黑白濾鏡(效果)
說到黑白,我就想起小時候家裡的黑白電視機,顯示效果比起現在的液晶顯示器不知道差到哪裡去了,但是一放假就看電視依然成為周末必做的是。那麼,在Android中要怎麼實現黑白濾
 Android熱補丁動態修復技術(完結篇):自動生成打包帶簽名的補丁,重構項目
一、關於前面四篇博文Android熱補丁動態修復技術(一):從Dex分包原理到熱補丁Android熱補丁動態修復技術(二):實戰!CLASS_ISPREVERIFIED問