編輯:關於Android編程
使用滾動的標簽指示器和滑動的內容頁面,是手機應用經常出現的一種設計風格,常見的比較出名的應用有:微信(首頁)、網易新聞、今日頭條和知乎等。有過幾年安卓開發經驗的朋友肯定知道,在GitHub上,實現這種功能有兩個比較出名的開源項目:PagerSlidingTabStrip 和 JakeWharton大神的ViewPagerIndicator,特別是後者,估計大家或多或少都曾今在自己的項目中使用到過。當然,現在也能使用這兩個開源庫,只是我們有了更多的選擇,比如本文給大家介紹的TabLayout。
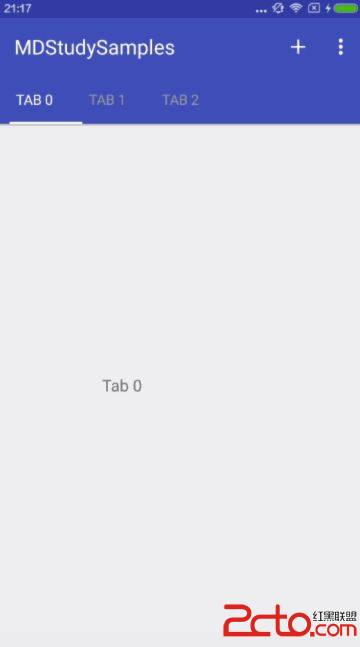
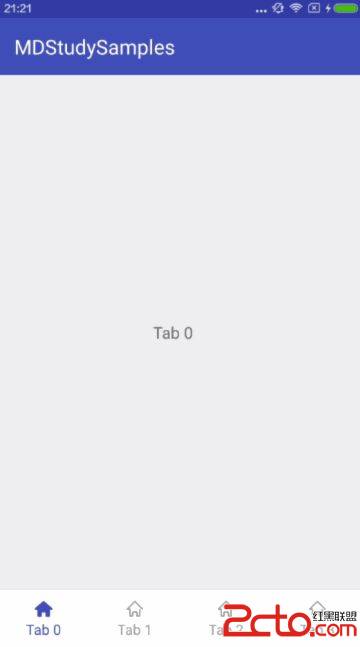
自2014年I/O結束後,Google在Support Design包中發布了一些列新的控件,其中就包括TabLayout。配合著ViewPager和Fragment的使用,TabLayout可以幫助開發者們分分鐘打造一個滑動標簽頁,非常方便。本文作為Material Design系列學習的第一篇,將介紹TabLayout的兩種常見使用場景:頂部標簽頁(如知乎),底部菜單欄(如微信)。先看一下最終能夠實現的效果:
我們可以在代碼中定義TabLayout的每一個Tab項,也可以通過TabLayout對象調用newTab()方法創建,比如:
 TabLayout tabLayout = ...;
tabLayout.addTab(tabLayout.newTab().setText("Tab 1"));
tabLayout.addTab(tabLayout.newTab().setText("Tab 2"));
tabLayout.addTab(tabLayout.newTab().setText("Tab 3"));
TabLayout的寬度分配模式、Indicator下劃線的高度、字體顏色、選擇監聽事件等這些方法都可以在官網看到,本文主要講TabLayout的常見應用場景,所以各屬性的設置就不碎碎念了,大家可以自行查閱。
頂部標簽頁TabLayout的使用需要借助Android Design包,所以我們需要在 build.gradle中引入design包:
compile 'com.android.support:design:23.3.0'
在布局文件 activity_tab_layout.xml 中加入TabLayout和ViewPager控件:
然後我們看一下 TabLayoutActivity 中的代碼:
package com.yifeng.mdstudysamples;

import android.os.Bundle;
import android.support.annotation.Nullable;
import android.support.design.widget.TabLayout;
import android.support.v4.app.Fragment;
import android.support.v4.app.FragmentManager;
import android.support.v4.app.FragmentPagerAdapter;
import android.support.v4.content.ContextCompat;
import android.support.v4.view.ViewCompat;
import android.support.v4.view.ViewPager;
import android.view.Menu;
import android.view.MenuItem;

import java.util.ArrayList;
import java.util.List;

/**
 * Created by yifeng on 16/8/3.
 *
 */
public class TabLayoutActivity extends BaseActivity {

    private TabLayout mTabTl;
    private ViewPager mContentVp;

    private List tabIndicators;
    private List tabFragments;
    private ContentPagerAdapter contentAdapter;

    @Override
    protected void onCreate(@Nullable Bundle savedInstanceState) {
        super.onCreate(savedInstanceState);
        setContentView(R.layout.activity_tab_layout);

        mTabTl = (TabLayout) findViewById(R.id.tl_tab);
        mContentVp = (ViewPager) findViewById(R.id.vp_content);

        initContent();
        initTab();
    }

    private void initTab(){
        mTabTl.setTabMode(TabLayout.MODE_SCROLLABLE);
        mTabTl.setTabTextColors(ContextCompat.getColor(this, R.color.gray), ContextCompat.getColor(this, R.color.white));
        mTabTl.setSelectedTabIndicatorColor(ContextCompat.getColor(this, R.color.white));
        ViewCompat.setElevation(mTabTl, 10);
        mTabTl.setupWithViewPager(mContentVp);
    }

    private void initContent(){
        tabIndicators = new ArrayList<>();
        for (int i = 0; i < 3; i++) {
            tabIndicators.add("Tab " + i);
        }
        tabFragments = new ArrayList<>();
        for (String s : tabIndicators) {
            tabFragments.add(TabContentFragment.newInstance(s));
        }
        contentAdapter = new ContentPagerAdapter(getSupportFragmentManager());
        mContentVp.setAdapter(contentAdapter);
    }

    @Override
    public boolean onCreateOptionsMenu(Menu menu) {
        getMenuInflater().inflate(R.menu.menu_tab_layout, menu);
        return true;
    }

    @Override
    public boolean onOptionsItemSelected(MenuItem item) {
        switch (item.getItemId()) {
            case R.id.tab_add:
                tabIndicators.add("Tab " + tabIndicators.size());
                tabFragments.add(TabContentFragment.newInstance(tabIndicators.get(tabIndicators.size()-1)));
                contentAdapter.notifyDataSetChanged();
                return true;

            case R.id.tab_mode_fixed:
                mTabTl.setTabMode(TabLayout.MODE_FIXED);
                return true;

            case R.id.tab_mode_scrollable:
                mTabTl.setTabMode(TabLayout.MODE_SCROLLABLE);
                break;
        }
        return super.onOptionsItemSelected(item);
    }

    class ContentPagerAdapter extends FragmentPagerAdapter{

        public ContentPagerAdapter(FragmentManager fm) {
            super(fm);
        }

        @Override
        public Fragment getItem(int position) {
            return tabFragments.get(position);
        }

        @Override
        public int getCount() {
            return tabIndicators.size();
        }

        @Override
        public CharSequence getPageTitle(int position) {
            return tabIndicators.get(position);
        }
    }

}
核心代碼有兩個地方,第一個是 setupWithViewPager 方法將TabLayout和ViewPager綁定在一起,使雙方各自的改變都能直接影響另一方,解放了開發人員對雙方變動事件的監聽;第二個是在ViewPager的Adapter適配器中重寫 getPageTitle 方法,在這個方法中設置標簽指示器的標題。
底部菜單欄上面我們使用了系統定義好的View做了一個純文字加下劃線組合的標簽指示器。其實,我們也能自定義一個布局,然後賦值給TabLayout的Tab視圖,比如做一個微信首頁界面。
相比頂部標簽指示器,底部菜單欄只是將TabLayout布局在了下面:
在Activity代碼中,設置TabLayout的指示器高度為0,即達到了隱藏Indicator的目的,然後通過getTabAt(position)的方法獲取TabLayout的每一個Tab,並賦值為自定義布局視圖,代碼也很簡單:
package com.yifeng.mdstudysamples;

import android.os.Bundle;
import android.support.annotation.Nullable;
import android.support.design.widget.TabLayout;
import android.support.v4.app.Fragment;
import android.support.v4.app.FragmentManager;
import android.support.v4.app.FragmentPagerAdapter;
import android.support.v4.view.ViewCompat;
import android.support.v4.view.ViewPager;
import android.widget.TextView;

import java.util.ArrayList;
import java.util.List;

/**
 * Created by yifeng on 16/8/3.
 *
 */
public class TabLayoutBottomActivity extends BaseActivity {

    private TabLayout mTabTl;
    private ViewPager mContentVp;

    private List tabIndicators;
    private List tabFragments;
    private ContentPagerAdapter contentAdapter;

    @Override
    protected void onCreate(@Nullable Bundle savedInstanceState) {
        super.onCreate(savedInstanceState);
        setContentView(R.layout.activity_tab_layout_bottom);

        mTabTl = (TabLayout) findViewById(R.id.tl_tab);
        mContentVp = (ViewPager) findViewById(R.id.vp_content);

        initContent();
        initTab();
    }

    private void initTab(){
        mTabTl.setTabMode(TabLayout.MODE_FIXED);
        mTabTl.setSelectedTabIndicatorHeight(0);
        ViewCompat.setElevation(mTabTl, 10);
        mTabTl.setupWithViewPager(mContentVp);
        for (int i = 0; i < tabIndicators.size(); i++) {
            TabLayout.Tab itemTab = mTabTl.getTabAt(i);
            if (itemTab!=null){
                itemTab.setCustomView(R.layout.item_tab_layout_custom);
                TextView itemTv = (TextView) itemTab.getCustomView().findViewById(R.id.tv_menu_item);
                itemTv.setText(tabIndicators.get(i));
            }
        }
        mTabTl.getTabAt(0).getCustomView().setSelected(true);
    }

    private void initContent(){
        tabIndicators = new ArrayList<>();
        for (int i = 0; i < 4; i++) {
            tabIndicators.add("Tab " + i);
        }
        tabFragments = new ArrayList<>();
        for (String s : tabIndicators) {
            tabFragments.add(TabContentFragment.newInstance(s));
        }
        contentAdapter = new ContentPagerAdapter(getSupportFragmentManager());
        mContentVp.setAdapter(contentAdapter);
    }

    class ContentPagerAdapter extends FragmentPagerAdapter{

        public ContentPagerAdapter(FragmentManager fm) {
            super(fm);
        }

        @Override
        public Fragment getItem(int position) {
            return tabFragments.get(position);
        }

        @Override
        public int getCount() {
            return tabIndicators.size();
        }

        @Override
        public CharSequence getPageTitle(int position) {
            return tabIndicators.get(position);
        }
    }

}
從這兩種使用場景可以看出,利用TabLayout做一個滑動標簽頁或者底部菜單欄,實現起來非常方便,代碼量也不多,極大地減少了我們的開發量。但是,TabLayout也不是萬能的,如果想做出更多地特效還是需要我們自己去開發。所以,如果你想自己做一個滑動標簽指示器,強烈推薦大家去看看TabLayout的源碼,相信對你一定有所啟發。
示例源碼我在GitHub上建立了一個Repository,用來存放整個Android Material Design系列控件的學習案例,會伴隨著文章逐漸更新完善,歡迎大家補充交流,Star地址:
https://github.com/Mike-bel/MDStudySamples
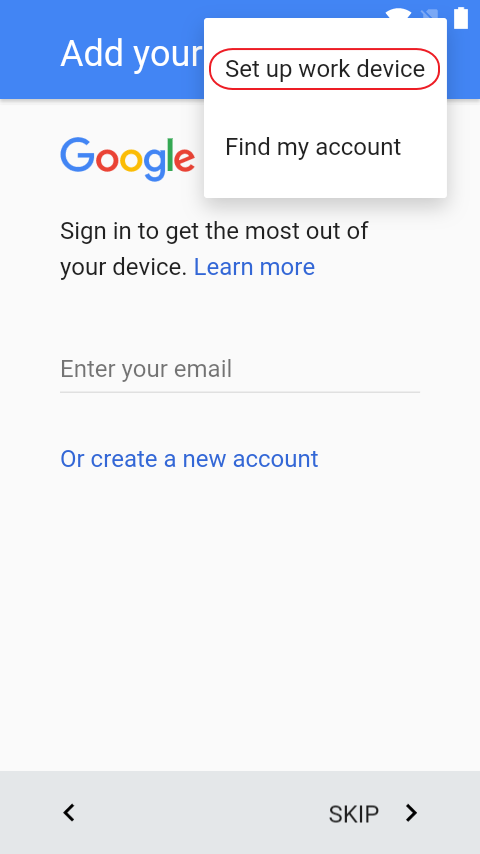 Android for work總結(下)
Afw流程演示Device OwnerL平台恢復出廠設置連接翻牆Wifi直到出現如下界面點擊”Set up work device”,輸入賬號和激
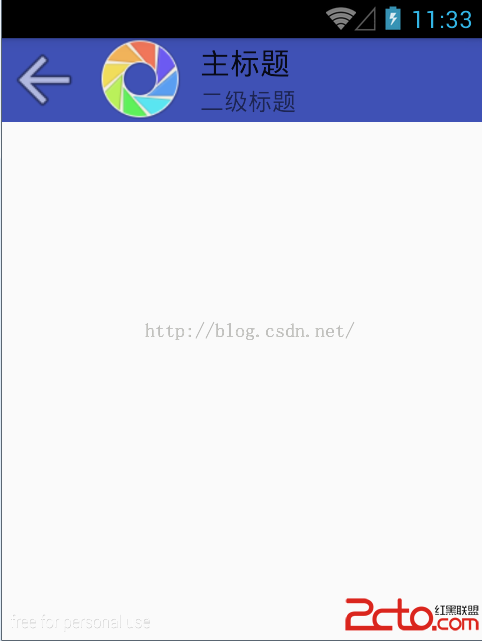 Android5.0之Toobar的使用
總體上來說,Toolbar的使用可以分為兩個方面,一方面是將ToolBar當作ActionBar來用,另一方面就是將Toolbar當成一個單獨的控件來用,不過到目前為止我
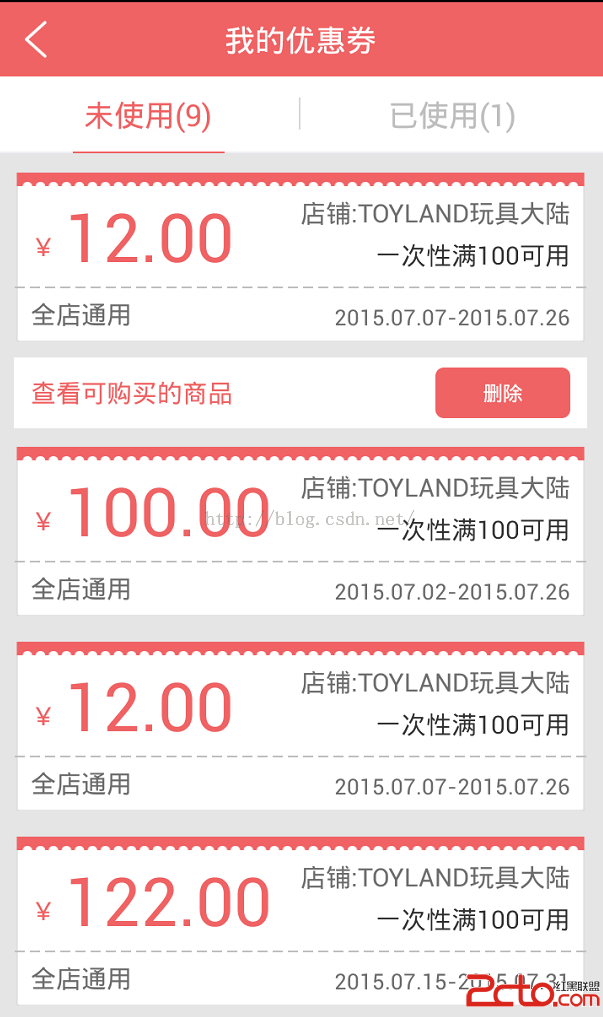 android 點擊listview 展開和閉合 效果
現在公司做的是電商項目,在我的優惠券界面中有個未使用和已使用, 在列表中要求 點擊item 把下面的刪除按鈕顯示出來,點擊其他item的時候把 之前顯示的 隱藏把正被點擊
 Android實現通過浏覽器點擊鏈接打開本地應用(APP)並拿到浏覽器傳遞的數據
點擊浏覽器中的URL鏈接,啟動特定的App。 首先做成HTML的頁面,頁面內容格式如下: 啟動應用程序 這一句就可以了。 各個項目含義如下