The most important part of a custom view is its appearance. Custom drawing can be easy or complex according to your application's needs. This lesson covers some of the most common operations. http://blog.csdn.net/sergeycao
Override onDraw()
The most important step in drawing a custom view is to override the onDraw() method. The parameter to onDraw() is a Canvas object that the view can use to draw itself. The Canvas class defines methods for drawing text, lines, bitmaps, and many other graphics primitives. You can use these methods in onDraw() to create your custom user interface (UI).
Before you can call any drawing methods, though, it's necessary to create a Paint object. The next section discusses Paint in more detail.
Create Drawing Objects
The android.graphics framework divides drawing into two areas:
What to draw, handled by Canvas
How to draw, handled by Paint.
For instance, Canvas provides a method to draw a line, while Paint provides methods to define that line's color. Canvas has a method to draw a rectangle, while Paint defines whether to fill that rectangle with a color or leave it empty. Simply put, Canvas defines shapes that you can draw on the screen, while Paint defines the color, style, font, and so forth of each shape you draw.
So, before you draw anything, you need to create one or more Paint objects. The PieChart example does this in a method called init, which is called from the constructor:
private void init() {
mTextPaint = new Paint(Paint.ANTI_ALIAS_FLAG);
mTextPaint.setColor(mTextColor);
if (mTextHeight == 0) {
mTextHeight = mTextPaint.getTextSize();
} else {
mTextPaint.setTextSize(mTextHeight);
}
mPiePaint = new Paint(Paint.ANTI_ALIAS_FLAG);
mPiePaint.setStyle(Paint.Style.FILL);
mPiePaint.setTextSize(mTextHeight);
mShadowPaint = new Paint(0);
mShadowPaint.setColor(0xff101010);
mShadowPaint.setMaskFilter(new BlurMaskFilter(8, BlurMaskFilter.Blur.NORMAL));
...
Creating objects ahead of time is an important optimization. Views are redrawn very frequently, and many drawing objects require expensive initialization. Creating drawing objects within your onDraw() method significantly reduces performance and can make your UI appear sluggish.
Handle Layout Events
In order to properly draw your custom view, you need to know what size it is. Complex custom views often need to perform multiple layout calculations depending on the size and shape of their area on screen. You should never make assumptions about the size of your view on the screen. Even if only one app uses your view, that app needs to handle different screen sizes, multiple screen densities, and various aspect ratios in both portrait and landscape mode.
Although View has many methods for handling measurement, most of them do not need to be overridden. If your view doesn't need special control over its size, you only need to override one method: onSizeChanged().
onSizeChanged() is called when your view is first assigned a size, and again if the size of your view changes for any reason. Calculate positions, dimensions, and any other values related to your view's size in onSizeChanged(), instead of recalculating them every time you draw. In the PieChart example, onSizeChanged() is where the PieChart view calculates the bounding rectangle of the pie chart and the relative position of the text label and other visual elements.
When your view is assigned a size, the layout manager assumes that the size includes all of the view's padding. You must handle the padding values when you calculate your view's size. Here's a snippet from PieChart.onSizeChanged() that shows how to do this:
// Account for padding
float xpad = (float)(getPaddingLeft() + getPaddingRight());
float ypad = (float)(getPaddingTop() + getPaddingBottom());
// Account for the label
if (mShowText) xpad += mTextWidth;
float ww = (float)w - xpad;
float hh = (float)h - ypad;
// Figure out how big we can make the pie.
float diameter = Math.min(ww, hh);
If you need finer control over your view's layout parameters, implement onMeasure(). This method's parameters are View.MeasureSpec values that tell you how big your view's parent wants your view to be, and whether that size is a hard maximum or just a suggestion. As an optimization, these values are stored as packed integers, and you use the static methods of View.MeasureSpec to unpack the information stored in each integer.
Here's an example implementation of onMeasure(). In this implementation, PieChart attempts to make its area big enough to make the pie as big as its label:
@Override
protected void onMeasure(int widthMeasureSpec, int heightMeasureSpec) {
// Try for a width based on our minimum
int minw = getPaddingLeft() + getPaddingRight() + getSuggestedMinimumWidth();
int w = resolveSizeAndState(minw, widthMeasureSpec, 1);
// Whatever the width ends up being, ask for a height that would let the pie
// get as big as it can
int minh = MeasureSpec.getSize(w) - (int)mTextWidth + getPaddingBottom() + getPaddingTop();
int h = resolveSizeAndState(MeasureSpec.getSize(w) - (int)mTextWidth, heightMeasureSpec, 0);
setMeasuredDimension(w, h);
}
There are three important things to note in this code:
The calculations take into account the view's padding. As mentioned earlier, this is the view's responsibility.
The helper method resolveSizeAndState() is used to create the final width and height values. This helper returns an appropriate View.MeasureSpec value by comparing the view's desired size to the spec passed into onMeasure().
onMeasure() has no return value. Instead, the method communicates its results by calling setMeasuredDimension(). Calling this method is mandatory. If you omit this call, the View class throws a runtime exception.
Draw!
Once you have your object creation and measuring code defined, you can implement onDraw(). Every view implements onDraw() differently, but there are some common operations that most views share:
Draw text using drawText(). Specify the typeface by calling setTypeface(), and the text color by calling setColor().
Draw primitive shapes using drawRect(), drawOval(), and drawArc(). Change whether the shapes are filled, outlined, or both by calling setStyle().
Draw more complex shapes using the Path class. Define a shape by adding lines and curves to a Path object, then draw the shape using drawPath(). Just as with primitive shapes, paths can be outlined, filled, or both, depending on the setStyle().
Define gradient fills by creating LinearGradient objects. Call setShader() to use your LinearGradient on filled shapes.
Draw bitmaps using drawBitmap().
For example, here's the code that draws PieChart. It uses a mix of text, lines, and shapes.
protected void onDraw(Canvas canvas) {
super.onDraw(canvas);
// Draw the shadow
canvas.drawOval(
mShadowBounds,
mShadowPaint
);
// Draw the label text
canvas.drawText(mData.get(mCurrentItem).mLabel, mTextX, mTextY, mTextPaint);
// Draw the pie slices
for (int i = 0; i < mData.size(); ++i) {
Item it = mData.get(i);
mPiePaint.setShader(it.mShader);
canvas.drawArc(mBounds,
360 - it.mEndAngle,
it.mEndAngle - it.mStartAngle,
true, mPiePaint);
}
// Draw the pointer
canvas.drawLine(mTextX, mPointerY, mPointerX, mPointerY, mTextPaint);
canvas.drawCircle(mPointerX, mPointerY, mPointerSize, mTextPaint);
}
 Android啟動屏實現左右滑動切換查看功能
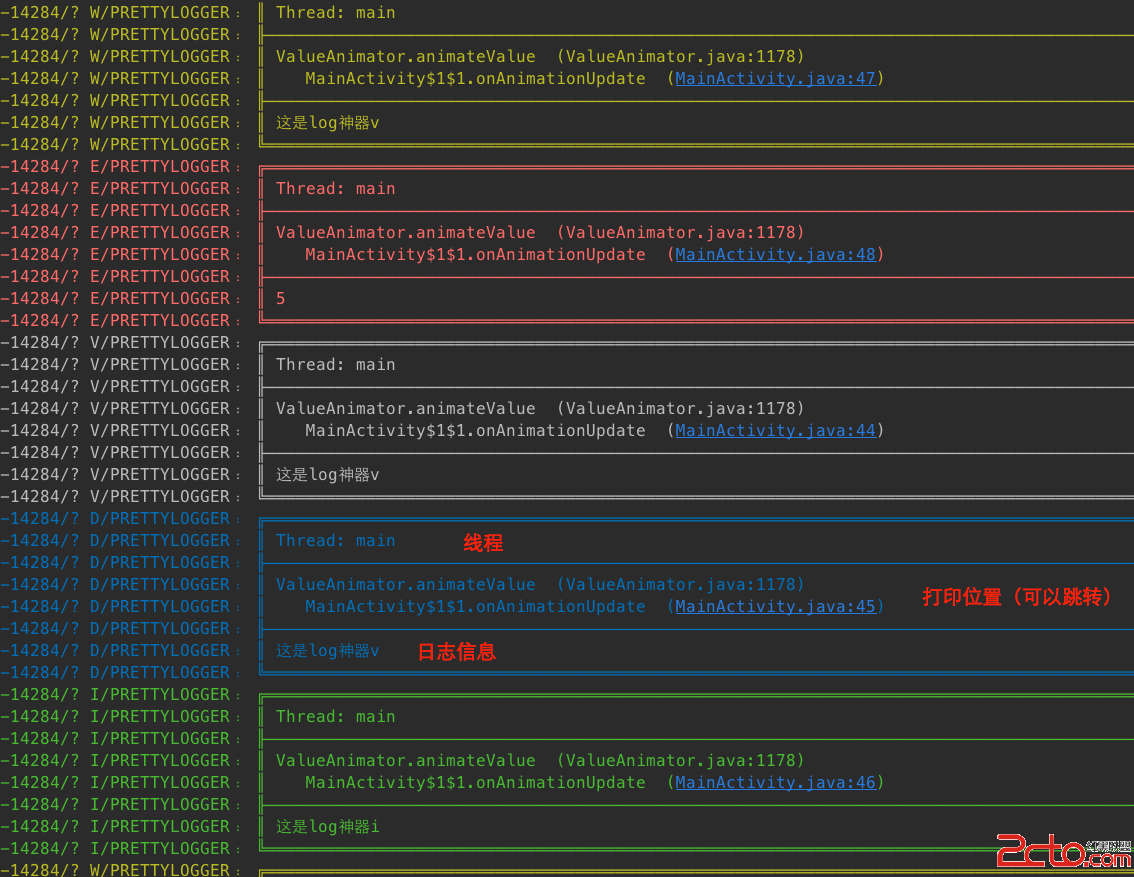 Android Studio -添加你見過的最牛Log*神器*
 Android 系統廣播機制
 Android官方文檔之Calendar Provider