編輯:關於Android編程
Android開發的過程中,每次調用startService(Intent)的時候,都會調用該Service對象的onStartCommand(Intent,int,int)方法,然後在onStartCommand方法中做一些處理。
從Android官方文檔中,我們知道onStartCommand有4種int返回值,首先簡單地講講int返回值的作用。
一、onStartCommand有4種返回值:
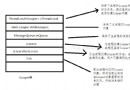
START_STICKY:如果service進程被kill掉,保留service的狀態為開始狀態,但不保留遞送的intent對象。隨後系統會嘗試重新創建service,由於服務狀態為開始狀態,所以創建服務後一定會調用onStartCommand(Intent,int,int)方法。如果在此期間沒有任何啟動命令被傳遞到service,那麼參數Intent將為null。
START_NOT_STICKY:“非粘性的”。使用這個返回值時,如果在執行完onStartCommand後,服務被異常kill掉,系統不會自動重啟該服務。
START_REDELIVER_INTENT:重傳Intent。使用這個返回值時,如果在執行完onStartCommand後,服務被異常kill掉,系統會自動重啟該服務,並將Intent的值傳入。
START_STICKY_COMPATIBILITY:START_STICKY的兼容版本,但不保證服務被kill後一定能重啟。
二、創建不被殺死的service
1.在service中重寫下面的方法,這個方法有三個返回值, START_STICKY(或START_STICKY_COMPATIBILITY)是service被kill掉後自動重寫創建
@Override
public int onStartCommand(Intent intent, int flags, int startId)
{
return START_STICKY_COMPATIBILITY;
//return super.onStartCommand(intent, flags, startId);
}
或
@Override
public int onStartCommand(Intent intent, int flags, int startId)
{
flags = START_STICKY;
return super.onStartCommand(intent, flags, startId);
// return START_REDELIVER_INTENT;
}
@Override
public void onStart(Intent intent, int startId)
{
// 再次動態注冊廣播
IntentFilter localIntentFilter = new IntentFilter("android.intent.action.USER_PRESENT");
localIntentFilter.setPriority(Integer.MAX_VALUE);// 整形最大值
myReceiver searchReceiver = new myReceiver();
registerReceiver(searchReceiver, localIntentFilter);
super.onStart(intent, startId);
}
2.在Service的onDestroy()中重啟Service.
public void onDestroy()
{
Intent localIntent = new Intent();
localIntent.setClass(this, MyService.class); // 銷毀時重新啟動Service
this.startService(localIntent);
}
3.創建一個廣播
public class myReceiver extends BroadcastReceiver
{
@Override
public void onReceive(Context context, Intent intent)
{
context.startService(new Intent(context, Google.class));
}
}
4.AndroidManifest.xml中注冊廣播myReceiver及MyService服務
<receiver android:name=".myReceiver" >
<intent-filter android:priority="2147483647" ><!--優先級加最高-->
<!-- 系統啟動完成後會調用 -->
<action android:name="android.intent.action.BOOT_COMPLETED" />
<!-- 解鎖完成後會調用 -->
<action android:name="android.intent.action.USER_PRESENT" />
<!-- 監聽情景切換 -->
<action android:name="android.media.RINGER_MODE_CHANGED" />
</intent-filter>
</receiver>
<service android:name=".MyService" >
注:解鎖,啟動,切換場景激活廣播需加權限,如啟動完成,及手機機狀態等。
<uses-permission android:name="android.permission.RECEIVE_BOOT_COMPLETED" />
<uses-permission android:name="android.permission.READ_PHONE_STATE" />
親測ZTE U795手機Android 4.0.4版本adb push到system\app下android:persistent="true"
變成核心程序,在360殺掉進程的時候,myReceiver照樣有效,保證service重生。呃
KILL問題:
1. settings 中stop service
onDestroy方法中,調用startService進行Service的重啟。
2.settings中force stop 應用
捕捉系統進行廣播(action為android.intent.action.PACKAGE_RESTARTED)
3. 借助第三方應用kill掉running task
提升service的優先級,程序簽名,或adb push到system\app下等
相較於/data/app下的應用,放在/system/app下的應用享受更多的特權,比如若在其Manifest.xml文件中設置persistent屬性為true,則可使其免受out-of-memory killer的影響。如應用程序'Phone'的AndroidManifest.xml文件:
<application android:name="PhoneApp"
android:persistent="true"
android:label="@string/dialerIconLabel"
android:icon="@drawable/ic_launcher_phone">
...
</application>
設置後app提升為系統核心級別
 android-async-http開源項目GET方式 POST方式實現登陸
我們通過最常見的登陸案例進行介紹android-async-http開源項目中有關類的使用.希望對你學習android-async-http開源項目有所幫助. 1.在應用
 Android實現字母雨的效果
首先來看效果: 一、實現原理在實現過程中,主要考慮整個界面由若干個字母組成的子母線條組成,這樣的話把固定數量的字母封裝成一個字母線條,而每個字母又封裝成一個對象,這樣的話
 Android MVP開發模式詳解(十九)
(一).前言:今天我們的項目繼續更新,今天我們主要講解MVP開發模式以及具體實例。 (二).簡介:MVP(Model ViewPrese
 android一個彈出菜單的動畫(一)
先上效果圖: 先寫Layout文件: