編輯:關於Android編程
<activity android:name=".LunchList"
android:label="@string/app_name">
<intent-filter>
<action android:name="android.intent.action.MAIN" />
<category android:name="android.intent.category.LAUNCHER" />
</intent-filter>
<intent-filter>
<action android:name="android.intent.action.SEARCH" />
<category android:name="android.intent.category.DEFAULT" />
</intent-filter>
<meta-data android:name="android.app.searchable"
android:resource="@xml/searchable" />
<meta-data android:name="android.app.default_searchable"
android:value=".LunchList" />
</activity>
<activity android:name=".LunchList"
android:label="@string/app_name">
<intent-filter>
<action android:name="android.intent.action.MAIN" />
<category android:name="android.intent.category.LAUNCHER" />
</intent-filter>
<intent-filter>
<action android:name="android.intent.action.SEARCH" />
<category android:name="android.intent.category.DEFAULT" />
</intent-filter>
<meta-data android:name="android.app.searchable"
android:resource="@xml/searchable" />
<meta-data android:name="android.app.default_searchable"
android:value=".LunchList" />
</activity>在上面這段代碼中,
[html]
<intent-filter>
<action android:name="android.intent.action.SEARCH" />
<category android:name="android.intent.category.DEFAULT" />
</intent-filter>
<intent-filter>
<action android:name="android.intent.action.SEARCH" />
<category android:name="android.intent.category.DEFAULT" />
</intent-filter>這個是注冊的隱式Intent的過濾器,第二行表示過濾帶有搜索action的intent,第三行是必須要添加的(自定義的Activity如果要通過隱式intent啟動,則必須添加)
[html]
<meta-data android:name="android.app.searchable"
android:resource="@xml/searchable" />
<meta-data android:name="android.app.searchable"
android:resource="@xml/searchable" />這個是在使用默認的搜索框架是,給搜索框設置的布局,第一行name是給定的,第二行resource就是你給自己的搜索框設置的外觀布局,一般放在res/xml裡
[html]
<meta-data android:name="android.app.default_searchable"
android:value=".LunchList" />
<meta-data android:name="android.app.default_searchable"
android:value=".LunchList" />
這個也是和搜索相關,上面兩個是通過intent_filter過濾接收到intent,以及接收到intent之後顯示出來的搜索框的布局,但那樣只是在你注冊了meta-data節點的activity裡面才能執行搜索,如果想要在任意一個activity裡面都能啟動搜索框架,就要加上這個,這個第一行也是給定的,第二行則用來指定是由哪一個activity響應並執行搜索和顯示搜索結果.
[html]
<receiver android:name=".AppWidget"
android:label="@string/app_name"
android:icon="@drawable/icon">
<intent-filter>
<action android:name="android.appwidget.action.APPWIDGET_UPDATE"/>
<category android:name="android.intent.category.DEFAULT" />
</intent-filter>
<meta-data
android:name="android.appwidget.provider"
android:resource="@xml/widget_provider" />
</receiver>
<receiver android:name=".AppWidget"
android:label="@string/app_name"
android:icon="@drawable/icon">
<intent-filter>
<action android:name="android.appwidget.action.APPWIDGET_UPDATE"/>
<category android:name="android.intent.category.DEFAULT" />
</intent-filter>
<meta-data
android:name="android.appwidget.provider"
android:resource="@xml/widget_provider" />
</receiver>這段代碼中:注冊的是一個Widget,其中第二行是widget的標題,第三行是它的圖標,
[html]
<intent-filter>
<action android:name="android.appwidget.action.APPWIDGET_UPDATE"/>
<category android:name="android.intent.category.DEFAULT" />
</intent-filter>
<intent-filter>
<action android:name="android.appwidget.action.APPWIDGET_UPDATE"/>
<category android:name="android.intent.category.DEFAULT" />
</intent-filter>這個跟最上面的類似,就是注冊了intent的過濾器,過濾widget的更新action,第三行在上面解釋過了,這裡的更新actiong是放在隱式intent裡面的,所以要加上第三行
[html]
<meta-data
android:name="android.appwidget.provider"
android:resource="@xml/widget_provider" />
<meta-data
android:name="android.appwidget.provider"
android:resource="@xml/widget_provider" />這個則是對widget的參數配置,第二行是指定的,第三行就是我們自定義的widget參數,放在res/xml下,這裡的配置如下:res/xml/widget_provider.xml
[html]
<appwidget-provider xmlns:android="http://schemas.android.com/apk/res/android"
android:minWidth="300dip"
android:minHeight="79dip"
android:updatePeriodMillis="1800000"
android:initialLayout="@layout/widget"
/>
<appwidget-provider xmlns:android="http://schemas.android.com/apk/res/android"
android:minWidth="300dip"
android:minHeight="79dip"
android:updatePeriodMillis="1800000"
android:initialLayout="@layout/widget"
/>二三四行分別是寬高和更新頻率,第五行則是該widget的具體布局,布局方式與layout裡的其他布局方式一樣:res/layout/widget.xml
[html]
<?xml version="1.0" encoding="utf-8"?>
<RelativeLayout xmlns:android="http://schemas.android.com/apk/res/android"
android:layout_width="fill_parent"
android:layout_height="fill_parent"
android:background="@drawable/widget_frame"
>
<TextView android:id="@+id/name"
android:layout_width="wrap_content"
android:layout_height="wrap_content"
android:layout_centerVertical="true"
android:layout_alignParentLeft="true"
android:layout_toLeftOf="@+id/next"
android:textSize="10pt"
android:textColor="#FFFFFFFF"
/>
<ImageButton android:id="@+id/next"
android:layout_width="wrap_content"
android:layout_height="wrap_content"
android:layout_centerVertical="true"
android:layout_alignParentRight="true"
android:src="@drawable/ff"
/>
</RelativeLayout>
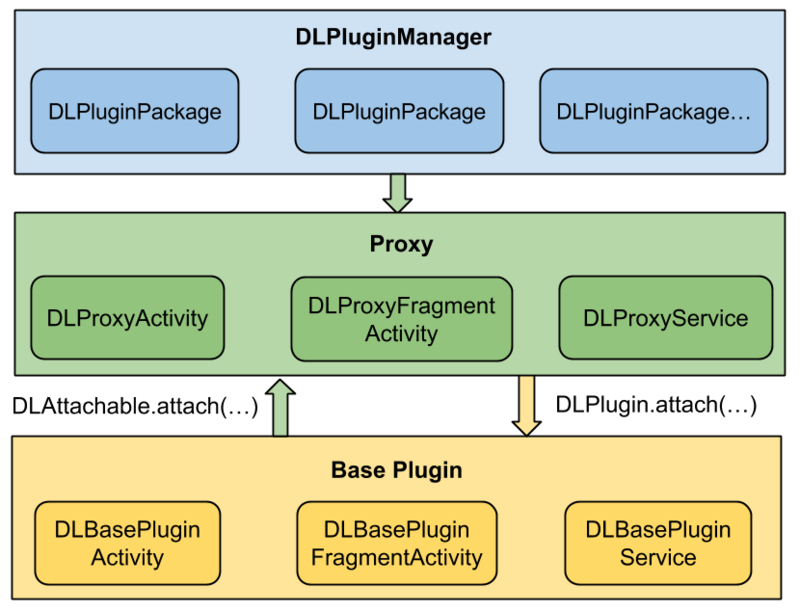 拆輪子之動態加載DynamicLoadApk
動態加載是什麼應用在運行的時候通過加載一些本地不存在的可執行文件實現一些特定的功能,Android中動態加載的核心思想是動態調用外部的Dex文件,極端的情況下,Andro
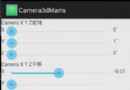 android.graphics.Camera 實現簡單的3D效果
/** * Camera與Matrix的比較: * Camera的rotate()相關方法是指定某一維度上旋轉指定的角度。 * Matrix的rotate()相
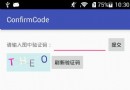 簡單實現Android驗證碼
安卓驗證碼的簡單實現我們經常在登錄或者注冊的時候要求輸入驗證碼,這裡簡單介紹一下一種方法 效果如下首先是要獲取 隨機的四個字母組合,我這裡是將26個字母存儲到一個數組中,
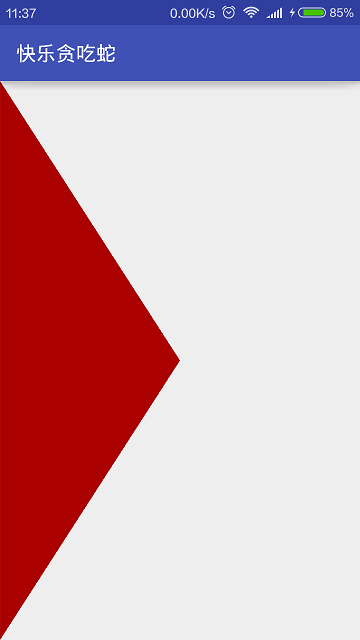
 Android View 自定義RangeSeekBar范圍選擇器
前段時間群裡兄弟項目中有類似這樣的需求 我看到兄弟受苦受難,於心不忍。又因事不關己,打算高高掛起。正在愛恨糾結之時,日神對我說:沒事多造點輪子,你的人生會有很多