一:文本的顏色選擇器:
在res目錄下面創建color文件夾,在color文件夾下面創建font_style_colors.xml文件
在布局文件中使用字體顏色選擇器
android:id="@+id/bt_ok"
android:layout_width="wrap_content"
android:layout_height="wrap_content"
android:background="@drawable/feedback_selector"
android:text="確定"
android:textColor="@color/font_style_colors" />
二、關於Calener的比較
calendar的compareto測試時出現了兩個時間相等,但比較結果不是我斷言的,經高人指點,這才明白,
原來calendar.set(year,month,day,hour,min,sec)沒有設置ccalendar.millisecond,需要設置calendar.millisecond為0:
例如
calendar now=calendar.getinstance();
now.set(2008,11,1,0,0,0);now.set(calendar.millisecond,0);
calendar start = calendar.getinstance();
start.set(2008, 11, 1, 0, 0, 0);
start.set(calendar.millisecond, 0);
if(start.compareto(now) == 0){
system.out.println("success");
}
這樣設置的時間才是精確的2008-12-1 0:00:00,兩個時間對比的時候才能得到我想要的結果!
上面那個有點不靠譜,自己寫了一個工具方法:
/**
* 就是先格式化一下時間,將後面的秒數干掉,然後又變成時間,最後比較
* @param localDate
* @return
*/
public static int compareData(Date localDate) {
DateFormat df = new SimpleDateFormat("yyyy-MM-dd HH:mm");
Date data = Calendar.getInstance().getTime();
String currentString = df.format(data);
String localDateString = df.format(localDate);
try {
Date dt1 = df.parse(localDateString);
Date dt2 = df.parse(currentString);
if (dt1.getTime() > dt2.getTime()) {
System.out.println("dt1 在dt2後");
return 1;
} else if (dt1.getTime() < dt2.getTime()) {
System.out.println("dt1在dt2前");
return -1;
} else {
return 0;
}
} catch (Exception e) {
e.printStackTrace();
}
return Integer.MAX_VALUE;
}
三、干掉項目中標題欄
1、 針對一個Activity
requestWindowFeature(Window.FEATURE_NO_TITLE);//去掉標題欄
2、 去掉整個應用的標題欄
android:icon="@drawable/icon"
android:label="@string/app_name"
android:theme="@android:style/Theme.NoTitleBar">
3、 在res/values目錄下面新建一個style.xml的文件:有經驗的開發者最喜歡的方法,因為它把功能分開的;對於後期的維護非常方便。
style.xml文件
在AndroidManifest.xml文件中引用
android:icon="@drawable/icon"
android:label="@string/app_name"
android:theme="@style/concealTitle">
四:鍵盤覆蓋掉輸入法的問題(不太好使)
不希望遮擋設置activity屬性android:windowSoftInputMode="adjustPan"
希望動態調整高度android:windowSoftInputMode="adjustResize"
五:學會使用ExpandableListView這個類
1、ExpandableListView要使用的適配器類
private class MyAdapter extends BaseExpandableListAdapter {
/**
* 返回有多少個分組 先被調用.
*/
public int getGroupCount() {
if (groupItems == null) {
groupItems = CommonNumDao.getGroupInfos();
}
return groupItems.size();
}
/**
* 返回每個分組裡面有多少個孩子
*/
public int getChildrenCount(int groupPosition) {
List childInfos;
if (childrenCaches.containsKey(groupPosition)) {
childInfos = childrenCaches.get(groupPosition);
} else {
childInfos = CommonNumDao
.getChildrenInfosByGroupPostion(groupPosition);
childrenCaches.put(groupPosition, childInfos);
}
return childInfos.size();
}
public Object getGroup(int groupPosition) {
return null;
}
public Object getChild(int groupPosition, int childPosition) {
return null;
}
public long getGroupId(int groupPosition) {
return groupPosition;
}
public long getChildId(int groupPosition, int childPosition) {
return childPosition;
}
public boolean hasStableIds() {
return false;
}
/**
* 返回某個分組顯示的view對象.
*/
public View getGroupView(int groupPosition, boolean isExpanded,
View convertView, ViewGroup parent) {
TextView tv ;
if(convertView==null){
tv = new TextView(getApplicationContext());
}else{
tv = (TextView) convertView;
}
tv.setTextSize(28);
tv.setTextColor(Color.RED);
// tv.setText(" " + CommonNumDao.getGroupName(groupPosition));
tv.setText(" " + groupItems.get(groupPosition)); // 改成了查詢內存
return tv;
}
/**
* 返回某個分組的某個孩子的view對象.
*/
public View getChildView(int groupPosition, int childPosition,
boolean isLastChild, View convertView, ViewGroup parent) {
TextView tv ;
if(convertView==null){
tv = new TextView(getApplicationContext());
}else{
tv = (TextView) convertView;
}
tv.setTextSize(20);
tv.setTextColor(Color.BLACK);
// tv.setText(CommonNumDao.getChildInfoByPosition(groupPosition,
// childPosition));
tv.setText(childrenCaches.get(groupPosition).get(childPosition));
return tv;
}
public boolean isChildSelectable(int groupPosition, int childPosition) {
return true;
}
}
2、修改ExpandableListView前面的箭頭標記:
分兩個步驟:
①:寫背景圖片選擇器
②:在代碼中添加如下代碼
ExpandableListView.setGroupIndicator(getResources().getDrawable(R.drawable.expandlist_selector));
3、干掉ExpandableListView拉動時的顏色。默認為黑色
android:cacheColorHint="@android:color/transparent"
4、干掉條目點擊時的顏色,換成自己的顏色
android:listSelector="@drawable/feedback_selector"
六、merge標簽和include標簽
1.當LayoutInflater遇到標簽時,它會跳過它,並將內的元素添加到的父元素裡。
只能作為XML布局的根標簽使用,只能替換<frameLayout/>
當Inflate以開頭的布局文件時,必須指定一個父ViewGroup,並且必須設定attachToRoot為true。參看LayoutInflater.inflate(int resource, ViewGroup root, boolean attachToRoot)。
2. include標簽內不能設置RelativeLayout屬性,如android:layout_alignParentBottom,因為不起作用
include標簽內設置id屬性後(android:id),其引用的布局layout內的id屬性就不起作用了,懷疑是其引用的layout外層包裹了一層include標簽或者是覆蓋了其內的屬性id
如果沒有include標簽,所有布局代碼都寫在一個xml文件中,界面會顯得很冗余,可讀性很差。而且界面加載的時候是按照順序加載的,前面的布局不能調用其後面的布局id。而采用include後,一個include中可以引用其後的include中的布局id屬性
七、ScrollView嵌套GridView,加載完成後默認不顯示頂部
強調:就算ScrollView裡面沒有嵌套GridView和ListView,只要文本超出了內容,一般都會顯示最下面的東西。這個時候,我們得想辦法讓用戶可以看到上面的信息。
解決方式:
在ScrollView中嵌套了GridView或者ListView,在第一次activity啟動後,會顯示頂部位置。當activity再次喚醒的時候,就默認顯示GridView了,並不是ScrollView的頂部位置。
解決這個問題的辦法就是在Activity的OnResume方法中添加一段代碼即可
protected void onResume() {
scrollView.smoothScrollTo(0, 0);
super.onResume();
}
八、關於在ScrollView中嵌套ListView或者GridView。導致ListView、GridView沒有滑動效果
按照android的標准,ScrollView中是不能嵌套具有滑動特性的View的,但是有時如果設計真的有這樣做的需要,或者為了更方便簡單的實現外觀(比如在
外在的大布局需要有滑動的特性,並且內部有類似於List的UI結構,那麼ListView + Adpater的方式來實現裡面的效果就很方便,算是違規抄近道的一種
方式吧),有時就會不得不采用這種怪異的組合方式。先說下這種方式如果不做特殊處理時會出現的沖突和問題:
1,在SrollView中嵌套ListView,ListView的顯示會有問題,只顯示一行或顯示效果與預期不同,這是因為android禁止這樣使用,放入ScrollView中的ListView的高度是無法計算的。
2,嵌套中的子ListView和GridvIew是無法滑動的,因為子控件的滑動事件會被外面的ScrollView吃掉,如果想讓子控件可以滑動,只能強行的截取滑動的相關事件了。
言歸正傳,嵌套的解決方案:1,第一種方案,也是我比較推薦的方案,就是重寫ListView與GridView,讓其失去滑動特性:
package com.perfect.xiaoao.all.ui;
import android.content.Context;
import android.util.AttributeSet;
import android.widget.GridView;
public class NoScrollGridView extends GridView{
public NoScrollGridView(Context context, AttributeSet attrs){
super(context, attrs);
}
public void onMeasure(int widthMeasureSpec, int heightMeasureSpec){
int mExpandSpec = MeasureSpec.makeMeasureSpec(Integer.MAX_VALUE >> 2, MeasureSpec.AT_MOST);
super.onMeasure(widthMeasureSpec, mExpandSpec);
}
}
package com.perfect.xiaoao.all.ui;
import android.content.Context;
import android.util.AttributeSet;
import android.widget.ListView;
/**
* Created by IntelliJ IDEA.
* User: zhUser
* Date: 13-1-24
* Time: 下午6:53
*/
public class NoScrollListView extends ListView{
public NoScrollListView(Context context, AttributeSet attrs){
super(context, attrs);
}
public void onMeasure(int widthMeasureSpec, int heightMeasureSpec){
int mExpandSpec = MeasureSpec.makeMeasureSpec(Integer.MAX_VALUE >> 2, MeasureSpec.AT_MOST);
super.onMeasure(widthMeasureSpec, mExpandSpec);
}
}
2,第二種方案,也是網上流行的一種解決辦法,人工計算子控件的尺寸,解決辦法:
在listview.setAdapter()之後調用Utility.setListViewHeightBasedOnChilren(listview)就Okay 了。
public class Utility {
public static void setListViewHeightBasedOnChildren(ListView listView) {
//獲取ListView對應的Adapter
ListAdapter listAdapter = listView.getAdapter();
if (listAdapter == null) {
// pre-condition
return;
}
int totalHeight = 0;
for (int i = 0, len = listAdapter.getCount(); i < len; i++) { //listAdapter.getCount()返回數據項的數目
View listItem = listAdapter.getView(i, null, listView);
listItem.measure(0, 0); //計算子項View 的寬高
totalHeight += listItem.getMeasuredHeight(); //統計所有子項的總高度
}
ViewGroup.LayoutParams params = listView.getLayoutParams();
params.height = totalHeight + (listView.getDividerHeight() * (listAdapter.getCount() - 1));
//listView.getDividerHeight()獲取子項間分隔符占用的高度
//params.height最後得到整個ListView完整顯示需要的高度
listView.setLayoutParams(params);
}
}
原理就是:設置完ListView的Adapter後,根據ListView的子項目重新計算ListView的高度,然後把高度再作為LayoutParams設置給ListView,這樣它的高度就正確了,通過人工算取控件的應有高度,再設置給ListView
注意:這個方案中子ListView的每個Item必須是LinearLayout,不能是其他的,因為其他的Layout(如RelativeLayout)沒有重寫onMeasure(),所以會在onMeasure()時拋出異常。
最後,建議大家還是少用這樣的設計,畢竟這種方式是不標准與不規范的。
九、android javax.net.ssl.SSLPeerUnverifiedException: No peer certificate
博客地址:http://lanyan-lan.iteye.com/blog/1522370
最近做項目,界面有選擇使用SSL登陸或非SSL登陸,發現本來可以登陸的程序刷系統或者換機器登陸不了,痛苦了好一會兒,解決了,如下為解決方案,項目中用的挺帥的
第一步:編寫SSLSocketFactoryEx,以代替原有的SSLSocketFactory,代碼如下
import org.apache.http.conn.ssl.SSLSocketFactory;
public class SSLSocketFactoryEx extends SSLSocketFactory {
SSLContext sslContext = SSLContext.getInstance("TLS");
public SSLSocketFactoryEx(KeyStore truststore)
throws NoSuchAlgorithmException, KeyManagementException,
KeyStoreException, UnrecoverableKeyException {
super(truststore);
TrustManager tm = new X509TrustManager() {
public java.security.cert.X509Certificate[] getAcceptedIssuers() {
return null;
}
@Override
public void checkClientTrusted(
java.security.cert.X509Certificate[] chain, String authType)
throws java.security.cert.CertificateException {
}
@Override
public void checkServerTrusted(
java.security.cert.X509Certificate[] chain, String authType)
throws java.security.cert.CertificateException {
}
};
sslContext.init(null, new TrustManager[] { tm }, null);
}
@Override
public Socket createSocket(Socket socket, String host, int port,
boolean autoClose) throws IOException, UnknownHostException {
return sslContext.getSocketFactory().createSocket(socket, host, port,
autoClose);
}
@Override
public Socket createSocket() throws IOException {
return sslContext.getSocketFactory().createSocket();
}
}
第二步:編寫新的HttpClient getNewHttpClient來代替原有DefaultHttpClient,代碼如下:
public static HttpClient getNewHttpClient() {
try {
KeyStore trustStore = KeyStore.getInstance(KeyStore.getDefaultType());
trustStore.load(null, null);
SSLSocketFactory sf = new SSLSocketFactoryEx(trustStore);
sf.setHostnameVerifier(SSLSocketFactory.ALLOW_ALL_HOSTNAME_VERIFIER);
HttpParams params = new BasicHttpParams();
HttpProtocolParams.setVersion(params, HttpVersion.HTTP_1_1);
HttpProtocolParams.setContentCharset(params, HTTP.UTF_8);
SchemeRegistry registry = new SchemeRegistry();
registry.register(new Scheme("http", PlainSocketFactory.getSocketFactory(), 80));
registry.register(new Scheme("https", sf, 443));
ClientConnectionManager ccm = new ThreadSafeClientConnManager(params, registry);
return new DefaultHttpClient(ccm, params);
} catch (Exception e) {
return new DefaultHttpClient();
}
}
第三步;接著在項目裡把所有獲得HttpClient實例通過DefaultHttpClient,都改成從
getNewHttpClient獲取
//HttpClient hc = new DefaultHttpClient(httpParams);
//modified by lucky.lan@2012/05/10
HttpClient hc = ConnectionManager.getNewHttpClient() ;
10、android布局文件中scrollview中android:fillviewpoint="true"是什麼意思?
這玩意兒在ScrollView中用處比較大
表明這ScrollView是否應該伸展其內容的高度來填補視圖。 true則表示自動拉伸填補,false則不拉伸,默認為false,也就是說不拉伸內容,所以你一般看到的ScrollView在內容超過固定高度就會有滾動效果。
11、android sqlite批量插入數據速度解決方案(不一定非得將整個數據庫加載到應用下面)
最近在做android項目的時候遇到一個問題,應用程序初始化時需要批量的向sqlite中插入大量數,導致應用啟動過慢。
android使用的是sqlite數據庫,sqlite是比較輕量級的數據庫,在Google了之後發現,sqlite事務處理的問題,在sqlite插入數據的時候默認一條語句就是一個事務,
有多少條數據就有多少次磁盤操作。我的應用初始5000條記錄也就是要5000次讀寫磁盤操作。
解決方法:
添加事務處理,把5000條插入作為一個事務
SQLiteDatabase.beginTransaction(); //手動設置開始事務
//數據插入操作循環
SQLiteDatabase.setTransactionSuccessful(); //設置事務處理成功,不設置會自動回滾不提交
SQLiteDatabase.endTransaction(); //處理完成
12、android中怎樣判斷ListView滑動到最後一條?
lv_refresh.setOnScrollListener(new OnScrollListener(){
@Override
public void onScrollStateChanged(AbsListView view, int scrollState) {
if (view.getLastVisiblePosition() == view.getCount() - 1) {
//執行異步刷新的操作
new AsyncTask().execute();
}
}
@Override
public void onScroll(AbsListView view, int firstVisibleItem,int visibleItemCount, int totalItemCount) {
}
});
13、Android中兩張圖片合並
private Bitmap mergeBitmap(Bitmap firstBitmap, Bitmap secondBitmap) {
Bitmap bitmap = Bitmap.createBitmap(firstBitmap.getWidth(), firstBitmap.getHeight(),
firstBitmap.getConfig());
Canvas canvas = new Canvas(bitmap);
canvas.drawBitmap(firstBitmap, new Matrix(), null);
canvas.drawBitmap(secondBitmap, 0, 0, null);
return bitmap;
}
14、調起鍵盤,而且還希望監聽調起鍵盤的監聽事件
先添加監聽事件,然後再利用計時器調起鍵盤
et_search.setOnKeyListener(new OnKeyListener(){
@Override
public boolean onKey(View v, int keyCode, KeyEvent event) {
if(keyCode == KeyEvent.KEYCODE_ENTER&& event.getAction() == KeyEvent.ACTION_UP){
imm.hideSoftInputFromWindow(et_search.getWindowToken(), 0);
searchCategory();
return true;
}
return false;
}
});
Timer timer = new Timer();
timer.schedule(new TimerTask(){
@Override
public void run() {
imm = (InputMethodManager) et_search.getContext().getSystemService(Context.INPUT_METHOD_SERVICE);
imm.toggleSoftInput(0, InputMethodManager.HIDE_NOT_ALWAYS);
}
}, 200);
在默認情況下,被我們代碼調起來的鍵盤是不會關閉的,需要我們手工關閉,此時又要關閉鍵盤
點擊應用中的後退按鈕
if(imm!=null&&imm.isActive()){
// imm.hideSoftInputFromInputMethod(et_search.getWindowToken(), InputMethodManager.HIDE_IMPLICIT_ONLY);
//下面這個起作用
imm.hideSoftInputFromWindow(et_search.getWindowToken(), 0);
}
要注意一件事兒,InputMethodManager.hideSoftInputFromWindow和hideSoftInputFromInputMethod是不一樣的
16、在android原生系統中,默認情況下Dialog打開之後,點擊Dialog外圍,Dialog是不會消失的,但是有的手機不會這樣,比如說小米手機
這個時候,我們就應該添加一個方法,讓它不消失。
dialog.setCanceledOnTouchOutside(false);
在AlertDialog是Dialog的子類,但是AlertDialog沒有這個方法,我們只需要將其變成Dialog即可
17、怎樣調用系統的鬧鈴的鈴聲
問題出現場景:做一個android小應用(類似鬧鐘),我想在設定的事件觸發後響鈴提醒用戶,不知道能否調用系統中原有的鬧鐘鈴聲。
(思路一:)android源碼中有個便簽的應用程序,你可以去看看代碼!
(思路二:)
RingtoneManager.getDefaultUri(RingtoneManager.TYPE_ALARM),會得到默認的鬧鈴鈴聲
MediaPlayer mp = new MediaPlayer();
mp.setDataSource(this, RingtoneManager.getDefaultUri(RingtoneManager.TYPE_RINGTONE));
mp.prepare();
mp.start();
這個是播放默認鈴音的一段代碼,鬧鈴只要改下Type就行了
18、問題:怎樣讓自己的Activity中的標題欄不受擠壓
最近項目裡有類似微信聊天界面需要我去寫,要動態顯示最新的數據,效果和微信基本一樣。有個問題困擾我一晚上,每次進入Activity後,
EditText自動獲得焦點彈出軟鍵盤,鍵盤遮擋listView,使得無法顯示最後一條消息。我在edittext點擊事件中也設定了,listView.setSelection,
選中最後一條數據,可是每次需要點擊兩下才會顯示最新消息,最後在windowSoftInputMode設置了N種組合還是不行。到中午修改Bug,莫名其妙的把acitivity設置成了全屏,
這樣每次進入acitivity,整個布局都將被上移,其中自定義的Title每次都被擠出屏幕,此奧,這樣……我又一邊邊找錯誤,
終於發現原來我把屏幕設置為了全屏,所以設置inputMode為adjustResize木有反應,Tittle依然被擠出。
最後發現,ListView有一屬性,android:transcriptMode="normal" 設置過後,再配合adjustResize這樣每次進入界面後,效果和微信一模一樣了,listView被壓縮,
tittle也不會移出屏幕,並且listView顯示最新一條數據。哈哈,終於大功告成~~~~~另外android:stackFromBottom="true"時,如果是動態加載數據,
listView每次回從最下面開始加載,這樣listVIew上面一片空白,效果不好。
①:在menifest中的activity界面添加
android:windowSoftInputMode="stateHidden|adjustResize"
②:在ListView中添加transcriptMode屬性,並且設置為normal
【A】stateUnspecified:軟鍵盤的狀態並沒有指定,系統將選擇一個合適的狀態或依賴於主題的設置
【B】stateUnchanged:當這個activity出現時,軟鍵盤將一直保持在上一個activity裡的狀態,無論是隱藏還是顯示
【C】stateHidden:用戶選擇activity時,軟鍵盤總是被隱藏
【D】stateAlwaysHidden:當該Activity主窗口獲取焦點時,軟鍵盤也總是被隱藏的
【E】stateVisible:軟鍵盤通常是可見的
【F】stateAlwaysVisible:用戶選擇activity時,軟鍵盤總是顯示的狀態
【G】adjustUnspecified:默認設置,通常由系統自行決定是隱藏還是顯示
【H】adjustResize:該Activity總是調整屏幕的大小以便留出軟鍵盤的空間
【I】adjustPan:當前窗口的內容將自動移動以便當前焦點從不被鍵盤覆蓋和用戶能總是看到輸入內容的部分
同樣的問題:
http://www.eoeandroid.com/thread-227827-1-1.html
[Android UI界面] windowSoftInputMode怎樣設置才能不會把整個activity向上頂出呢?
這是我的布局,在點最下方的edittext控件,輸入法會把整個activity向上頂出,如果我不想把最上的那個title向上推那要怎麼辦呢?
manifest:
android:name=".FriendMessageContentActivity"
android:configChanges="keyboardHidden|orientation"
android:launchMode="singleTask"
android:screenOrientation="portrait"
android:theme="@android:style/Theme.Black.NoTitleBar"
android:windowSoftInputMode="adjustPan" />
android:layout_width="fill_parent"
android:layout_height="fill_parent"
android:background="@drawable/background"
android:orientation="vertical" >
android:id="@+id/top_pic"
android:layout_width="fill_parent"
android:layout_height="wrap_content"
android:layout_alignParentTop="true"
android:background="@drawable/alltitle"
android:orientation="horizontal" >
android:id="@+id/btn_back"
android:layout_width="40.0dip"
android:layout_height="wrap_content"
android:layout_centerVertical="true"
android:layout_marginLeft="6.0dip"
android:background="@drawable/all_title_button"
android:gravity="center"
android:visibility="gone" />
android:id="@+id/title_ll"
android:layout_width="wrap_content"
android:layout_height="wrap_content"
android:layout_centerHorizontal="true"
android:layout_centerVertical="true"
android:orientation="horizontal" >
android:id="@+id/title_tv"
android:layout_width="wrap_content"
android:layout_height="wrap_content"
android:text="" />
android:id="@+id/arrow_tip_iv"
android:layout_width="wrap_content"
android:layout_height="wrap_content"
android:visibility="gone"/>
android:id="@+id/btn_next"
android:layout_width="40.0dip"
android:layout_height="wrap_content"
android:layout_alignParentRight="true"
android:layout_centerVertical="true"
android:layout_marginRight="6.0dip"
android:background="@drawable/all_title_button"
android:gravity="center"
android:visibility="gone" />
android:id="@+id/iolist_lv"
android:layout_width="fill_parent"
android:layout_height="fill_parent"
android:layout_above="@+id/messageinput_rl"
android:layout_below="@+id/top_pic"
android:cacheColorHint="#00000000"
android:clickable="true"
android:fadeScrollbars="true"
android:fadingEdge="none"
android:fastScrollEnabled="true"
android:listSelector="@drawable/list_selector"
android:focusable="true" />
android:id="@+id/messageinput_rl"
android:layout_width="fill_parent"
android:layout_height="60.0dip"
android:layout_alignParentBottom="true"
android:background="@drawable/tablecell_highlight" >
android:layout_width="fill_parent"
android:layout_height="wrap_content" >
android:id="@+id/messagecontent_et"
android:layout_width="fill_parent"
android:layout_height="40.0dip"
android:layout_centerVertical="true"
android:layout_marginLeft="10.0dip"
android:layout_marginRight="10.0dip"
android:layout_toLeftOf="@+id/send_bt"
android:background="@drawable/all_base_bg"
android:paddingLeft="4.0dip"
android:paddingRight="4.0dip"/>
android:id="@+id/send_bt"
android:layout_width="wrap_content"
android:layout_height="40.0dip"
android:layout_alignParentRight="true"
android:layout_centerVertical="true"
android:layout_marginRight="6.0dip"
android:text="@string/sendmessage" />
解決辦法:
就在最下邊的RelativeLayout上邊加上
android:layout_width="fill_parent"
android:layout_height="0dip"/>
這樣就可以的了。
19、友盟社會化分享
選中產品---組件---社會化分享---設置
20、關於ActionBar的解決方式
http://blog.csdn.net/fireofstar/article/details/7378824
操作步驟:
①先定義menu(注意showAsAction)在res/menu/main.xml
②在Activity中加載,並且添加監聽
@Override
public boolean onCreateOptionsMenu(Menu menu) {
// Inflate the menu; this adds items to the action bar if it is present.
getMenuInflater().inflate(R.menu.main, menu);
return true;
}
@Override
public boolean onOptionsItemSelected(MenuItem item) {
switch (item.getItemId()) {
case R.id.action_add:
Toast.makeText(this, "action_add", 0).show();
break;
case R.id.action_save:
Toast.makeText(this, "action_save", 0).show();
break;
case R.id.action_delete:
Toast.makeText(this, "action_delete", 0).show();
break;
}
return super.onOptionsItemSelected(item);
}
③修改ActionBar的樣式(在values-v14中創建actionbar_style.xml)
④在清單中Activity或者application節點引用樣式:
android:theme="@style/CustomActivityTheme"
21、關於Java設計模式中的簡單工廠、工廠方法、抽象工廠的區別:
博客地址:http://blog.chinaunix.net/uid-25979788-id-3199524.html
簡單工廠、工廠方法,抽象工廠都屬於設計模式中的創建型模式。主要功能是:幫我們將對象的實例化部分抽取出來,優化系統架構,增強系統拓展性
簡單工廠:工廠類一般使用靜態方法,通過接收參數的不同,返回不同對象實例
缺點:不修改代碼是無法進行拓展的
工廠方法:針對每一種產品提供一個工廠類。通過不同工廠創建不同實例。
優點:在同一等級結構支持增加任意產品
抽象工廠:是應對產品族概念的。每個汽車公司可能要同時生產轎車,貨車,客車,那麼每一個工廠都要有創建轎車,貨車和客車的方法
缺點:應對產品族概念而生,增加新的產品線很容易,但是無法增加新的產品
小結
★工廠模式中,重要的是工廠類,而不是產品類。產品類可以是多種形式,多層繼承或者是單個類都是可以的。但要明確的,工廠模式的接口只會返回一種
類型的實例,這是在設計產品類的時候需要注意的,最好是有父類或者共同實現的接口。
★使用工廠模式,返回的實例一定是工廠創建的,而不是從其他對象中獲取的。
★工廠模式返回的實例可以不是新創建的,返回由工廠創建好的實例也是可以的。
區別
簡單工廠 :用來生產同一等級結構中的任意產品。(對於增加新的產品,無能為力)
工廠模式 :用來生產同一等級結構中的固定產品。(支持增加任意產品)
抽象工廠 :用來生產不同產品族的全部產品。(對於增加新的產品,無能為力;支持增加產品族)
以上三種工廠方法在等級結構和產品族這兩個方向上的支持程度不同。所以要根據情況考慮應該使用哪種方法。
22、關於監聽PopupWindow的鍵盤事件和dismiss事件
PopupWindow在設置setFocusable後監聽返回鍵盤事件
PopupWindow在設置了焦點之後,那麼這個彈出窗口就是當前操作的窗口,如果想要在此時響應按鍵事件,就需要在PopupWindow上注冊鍵盤事件來響應。
1、監聽dismiss事件:但是PopupWindow好像只有一個OnDismissListener,怎麼來注冊鍵盤事件監聽呢?
2、監聽按鍵事件:可以利用PopupWindow裡的最外層View,對該子View監聽鍵盤事件setOnKeyListener即可。
示例代碼:
popupwindow.setBackgroundDrawable(new BitmapDrawable());
popupwindow.setFocusable(true);
popupwindow.setFocusableInTouchMode(true);
childrenView.setOnKeyListener(new OnKeyListener()
{
@Override
public boolean onKey(View v, int keyCode, KeyEvent event)
{
// TODO Auto-generated method stub
if (keyCode == KeyEvent.KEYCODE_BACK)
{
Log.v("keyCode", "/" + keyCode);
if(popupwindow != null) {
popupwindow.dismiss();
popupwindow = null;
}
}
return false;
}
});
23、android檢測軟鍵盤的彈起與隱藏
方法一:
android開發者可能會遇到需要檢測軟鍵盤的彈出和隱藏問題,這裡給出一個實用而又經典的方法。
下面談談實現原理:
使用自定義布局,頁面布局中包含ScrollVIew,在軟鍵盤彈起後,布局的高度會發生改變,根據布局的高度來判斷軟鍵盤的狀態。
package com.ransj.keyboard;
import android.content.Context;
import android.util.AttributeSet;
import android.util.Log;
import android.widget.RelativeLayout;
public class KeyboardLayout extends RelativeLayout {
private static final String TAG = KeyboardLayout.class.getSimpleName();
public static final byte KEYBOARD_STATE_SHOW = -3;
public static final byte KEYBOARD_STATE_HIDE = -2;
public static final byte KEYBOARD_STATE_INIT = -1;
private boolean mHasInit;
private boolean mHasKeybord;
private int mHeight;
private onKybdsChangeListener mListener;
public KeyboardLayout(Context context, AttributeSet attrs, int defStyle) {
super(context, attrs, defStyle);
}
public KeyboardLayout(Context context, AttributeSet attrs) {
super(context, attrs);
}
public KeyboardLayout(Context context) {
super(context);
}
/**
* set keyboard state listener
*/
public void setOnkbdStateListener(onKybdsChangeListener listener){
mListener = listener;
}
@Override
protected void onLayout(boolean changed, int l, int t, int r, int b) {
super.onLayout(changed, l, t, r, b);
if (!mHasInit) {
mHasInit = true;
mHeight = b;
if (mListener != null) {
mListener.onKeyBoardStateChange(KEYBOARD_STATE_INIT);
}
} else {
mHeight = mHeight < b ? b : mHeight;
}
if (mHasInit && mHeight > b) {
mHasKeybord = true;
if (mListener != null) {
mListener.onKeyBoardStateChange(KEYBOARD_STATE_SHOW);
}
Log.w(TAG, "show keyboard.......");
//軟鍵盤彈出
}
if (mHasInit && mHasKeybord && mHeight == b) {
mHasKeybord = false;
if (mListener != null) {
mListener.onKeyBoardStateChange(KEYBOARD_STATE_HIDE);
}
Log.w(TAG, "hide keyboard.......");
//軟鍵盤隱藏
}
}
public interface onKybdsChangeListener{
public void onKeyBoardStateChange(int state);
}
}
這個是自定義的布局,自定義布局可以繼承各種常見布局。自定義布局有鍵盤狀態改變監聽器,可以通過注冊監聽器來監聽軟鍵盤狀態。
android:id="@+id/keyboardLayout1"
android:layout_width="fill_parent"
android:layout_height="fill_parent" >
android:layout_width="fill_parent"
android:layout_height="fill_parent"
android:layout_alignParentLeft="true"
android:layout_alignParentTop="true"
android:fillViewport="true" >
android:layout_width="fill_parent"
android:layout_height="wrap_content"
android:orientation="vertical" >
android:id="@+id/testone_tv"
android:layout_width="fill_parent"
android:layout_height="wrap_content"
android:background="#000000"
android:gravity="center"
android:text="軟件盤彈起,我將消失!軟鍵盤隱藏,我將回來!"
android:layout_weight="1.0"
android:textColor="#00ff00"
android:text />
android:id="@+id/testone_et"
android:layout_width="fill_parent"
android:layout_height="wrap_content">
方法二
Android soft (virtual) keyboard listener
If you use Evernote android app you might have noticed, that when, on a login screen, soft keyboard gets shown (to type password or username) the layout doesn't just scale, or scrolls. It changes (for example Evernotes logo
is hidden).
Unfortunately, android api doesn't provide you with the specific tools to listen for a moment, when soft keyboard gets shown, or hidden. But there is a way (dirty hack) to assume that the keyboards state was changed.
We can guess it by listening measure changes in layout.
To do it, first, we need to make our layout to resize and scale instaed of scroll. Add android:windowSoftInputMode="adjustResize" parameter to your activity in manifest.xml. This way, when soft keyboard is called, content
will be resized instead of scrolled.
Next step is to actually listen for this resizing. And again, there is a catch. There is no such thing as OnMeasureChangedListener, so the only way is to extend the container layout and do it inside. As an example I extended
LinearLayout, and this is what I've got:
public class MyLayout extends LinearLayout {
public MyLayout(final Context context, final AttributeSet attrs) {
super(context, attrs);
}
public MyLayout(Context context) {
super(context);
}
private OnSoftKeyboardListener onSoftKeyboardListener;
@Override
protected void onMeasure(final int widthMeasureSpec, final int heightMeasureSpec) {
if (onSoftKeyboardListener != null) {
final int newSpec = MeasureSpec.getSize(heightMeasureSpec);
final int oldSpec = getMeasuredHeight();
// If layout became smaller, that means something forced it to resize. Probably soft keyboard :)
if (oldSpec > newSpec){
onSoftKeyboardListener.onShown();
} else {
onSoftKeyboardListener.onHidden();
}
}
super.onMeasure(widthMeasureSpec, heightMeasureSpec);
}
public final void setOnSoftKeyboardListener(final OnSoftKeyboardListener listener) {
this.onSoftKeyboardListener = listener;
}
// Simplest possible listener :)
public interface OnSoftKeyboardListener {
public void onShown();
public void onHidden();
}
}
That's about it. Of course you need to use your layout (MyLayout) in your code/xml for it to work. And example from activity:
((MyLayout)findViewById(R.id.layout)).setOnSoftKeyboardListener(newOnSoftKeyboardListener() {
@Override
public void onShown() {
// Do something here
}
@Override
public void onHidden() {
// Do something here
}
});
24、如果讓View獲取焦點
Android新啟動Activity,dialog或者其他窗體中中包含EditText, 新啟動的activity的焦點默認在EditText上,這是android系統會彈出軟鍵盤,擠壓activity本來的界面,影響美觀。
因此最好在新窗體創建時,最好在onCreate()方法中將焦點放在另一個view上. view使用requestFocus()焦點,但是如果讓button或者textView之類控件直接使用requestFocus()方法,則無法獲取焦點,焦點會依然在editText上。
只能在使用View的requestFocus()方法之前調用下面2個方法,view才可獲取焦點:
view.setFocusable(true);
view.setFocusableInTouchMode(true);
然後調用 requestFocus()即可獲取焦點。
25、android:descendantFocusability用法簡析
開發中很常見的一個問題,項目中的listview不僅僅是簡單的文字,常常需要自己定義listview,自己的Adapter去繼承BaseAdapter,在adapter中按照需求進行編寫,問題就出現了,可能會發生點擊每一個item的時候沒有反應,無法獲取的焦點。原因多半是由於在你自己定義的Item中存在諸如ImageButton,Button,CheckBox等子控件(也可以說是Button或者Checkable的子類控件),此時這些子控件會將焦點獲取到,所以常常當點擊item時變化的是子控件,item本身的點擊沒有響應。
這時候就可以使用descendantFocusability來解決啦,API描述如下:
android:descendantFocusability
Defines the relationship between the ViewGroup and its descendants when looking for a View to take focus.
Must be one of the following constant values.
該屬性是當一個為view獲取焦點時,定義viewGroup和其子控件兩者之間的關系。
屬性的值有三種:
beforeDescendants:viewgroup會優先其子類控件而獲取到焦點
afterDescendants:viewgroup只有當其子類控件不需要獲取焦點時才獲取焦點
blocksDescendants:viewgroup會覆蓋子類控件而直接獲得焦點
通常我們用到的是第三種,即在Item布局的根布局加上android:descendantFocusability=”blocksDescendants”的屬性就好了,至此listview點擊的靈異事件告一段落
26、xxx is not translated in yyy, zzz 的解決方法
在Android SDK Tool r19之後, Export的時候遇到xxx is not translated in yyy, zzz的問題。
例如說"auto_exit" is not translated in zh, zh_CN.
這是因為Android SDK Tool 將 ANDROID_LINT_COMPLETE_REGIONS 改為了需要檢查。
臨時解決方法:
Eclipse > Preference > Android > Lint Error Checking的Correctness: Messages > MissingTranslate
將 Severity 從 Fetal 改為 Warming
27、關於ActionBar的解決方式
http://blog.csdn.net/fireofstar/article/details/7378824
操作步驟:
①先定義menu
②在Activity中加載,並且添加監聽
@Override
public boolean onCreateOptionsMenu(Menu menu) {
// Inflate the menu; this adds items to the action bar if it is present.
getMenuInflater().inflate(R.menu.main, menu);
return true;
}
@Override
public boolean onOptionsItemSelected(MenuItem item) {
switch (item.getItemId()) {
case R.id.action_add:
Toast.makeText(this, "action_add", 0).show();
break;
case R.id.action_save:
Toast.makeText(this, "action_save", 0).show();
break;
case R.id.action_delete:
Toast.makeText(this, "action_delete", 0).show();
break;
}
return super.onOptionsItemSelected(item);
}
③修改ActionBar的樣式(在values-v14中創建actionbar_style.xml)
④在清單中Activity或者application節點引用樣式:
版主很牛逼http://blog.csdn.net/FireOfStar/article/list/3
28、Java中正則表達式
字符串中的正則表達式特殊符號 2006-06-01 12:25:33
問題:
String s1="111+222+333";
System.out.println(s1.split("+").length);
//輸出時提示錯誤:
java.util.regex.PatternSyntaxException: Dangling meta character ''+'' near index
問題出現在加號附近,查詢相關的資料顯示,+、*、|、等符號在正則表達示中有相應的不同意義。
正則表達式的基本用法 zt
1、“.”為通配符,表示任何一個字符,例如:“a.c”可以匹配“anc”、“abc”、“acc”;
2、“[]”,在[]內可以指定要求匹配的字符,例如:“a[nbc]c”可以匹配“anc”、“abc”、“acc;
但不可以匹配“ancc”,a到z可以寫成[a-z],0到9可以寫成[0-9];
3、數量限定符號,表示匹配次數(或者叫做長度)的符號:
包括:“*”??0次或者多次
“+”??1次或者多次
“?”??0次或者1次
“{n}”??匹配n次,n為整數
“{n,m}”??匹配從n到m之間的某個數的次數;n和m都是整數;
“{n,}”??匹配n到無窮次之間任意次數;
“{,m}”??匹配0到m之間任意次數;
他們放到匹配格式的後面:
例如:
電話號碼:024-84820482,02484820482(假設前面3或者4位,後面7或者8位,並且中間的減號可有可無)
都是符合規定的,那麼可以用如下格式來匹配:[0-9]{3,4} -? [0-9]{7,8};
注意:“”為轉義字符,因為“-”在正則表達式用有代表一個范圍的意義,例如:前面所說的[0-9],
所以它需要轉義字符“”進行轉義才可使用;
4、“^”為否符號,表示不想匹配的符號,例如:[^z][a-z]+可以匹配所有除“z”開頭的以外的所有字
符串(長度大於2,因為“+”表示大於等於1的次數,從第二位開始都是小寫英文字符);
如果^放到[]的外邊則表示以[]開頭的字符串;^[az][a-z]+表示a或者z開頭的長度大於等於2的英文字符串;
5、“|”或運算符,例如:a[n|bc|cb]c可以匹配“abcc”,“anc”,“acbc”;
6、“$”以它前面的字符結尾的;例如:ab+$就可以被“abb”,“ab”匹配;
7、一些簡單表示方法:
d表示[0-9];D表示[^0-9];w表示[A-Z0-9];W表示[^A-Z0-9];s表示[
f],就是空格字符包括tab,空格等等;S表示[^
f],就是非空格字符;
明白了這些以後,我們再返回頭看看它們如何被運用呢?一般來講只需要加[]、或是\即可。
舉例來講:
String s1="111+222+333";
System.out.println(s1.split("[+]").length);
或是
String s1="111+222+333";
System.out.println(s1.split("\\+").length);
29、Android中獲取多媒體音量
通過程序獲取android系統手機的鈴聲和音量。同樣,設置鈴聲和音量的方法也很簡單!
設置音量的方法也很簡單,AudioManager提供了方法:
publicvoidsetStreamVolume(intstreamType,intindex,intflags)其中streamType有內置的常量,去文檔裡面就可以看到。
JAVA代碼:
AudioManager mAudioManager = (AudioManager) getSystemService(Context.AUDIO_SERVICE);
//通話音量
int max = mAudioManager.getStreamMaxVolume( AudioManager.STREAM_VOICE_CALL );
int current = mAudioManager.getStreamVolume( AudioManager.STREAM_VOICE_CALL );
Log.d(“VIOCE_CALL”, “max : ” + max + ” current : ” + current);
//系統音量
max = mAudioManager.getStreamMaxVolume( AudioManager.STREAM_SYSTEM );
current = mAudioManager.getStreamVolume( AudioManager.STREAM_SYSTEM );
Log.d(“SYSTEM”, “max : ” + max + ” current : ” + current);
//鈴聲音量
max = mAudioManager.getStreamMaxVolume( AudioManager.STREAM_RING );
current = mAudioManager.getStreamVolume( AudioManager.STREAM_RING );
Log.d(“RING”, “max : ” + max + ” current : ” + current);
//音樂音量
max = mAudioManager.getStreamMaxVolume( AudioManager.STREAM_MUSIC );
current = mAudioManager.getStreamVolume( AudioManager.STREAM_MUSIC );
Log.d(“MUSIC”, “max : ” + max + ” current : ” + current);
//提示聲音音量
max = mAudioManager.getStreamMaxVolume( AudioManager.STREAM_ALARM );
current = mAudioManager.getStreamVolume( AudioManager.STREAM_ALARM );
Log.d(“ALARM”, “max : ” + max + ” current : ” + current);
ps:
游戲過程中只允許調整多媒體音量,而不允許調整通話音量。
setVolumeControlStream(AudioManager.STREAM_MUSIC);
長時間不動,不允許黑屏,View.setKeepScreenOn(true);
估計manifest文件中需要注冊權限吧
30、Android中通過音量鍵調節音頻文件播放的聲音
在Android游戲開發中,有兩種音量,一種是軟音量,軟音量可以是通過設置MediaPlayer和SoundPool的音量來實現游戲的聲音增減,常見的游戲引擎,如cocos2d-x都有相應的聲音引擎來封裝軟音量方便開發。
但是游戲引擎卻沒提供硬件音量的設置,這需要我們自己來監聽手機上的上下兩個音量鍵,來實現對“媒體音量的”調節。
重寫Activity中的onKeyDown方法。
private AudioManager audio = (AudioManager) getSystemService(Service.AUDIO_SERVICE);//聲音管理類
@Override
public boolean onKeyDown(int keyCode, KeyEvent event) {
switch (keyCode) {
case KeyEvent.KEYCODE_VOLUME_UP://增大音量
audio.adjustStreamVolume(
AudioManager.STREAM_MUSIC,
AudioManager.ADJUST_RAISE,
AudioManager.FLAG_PLAY_SOUND | AudioManager.FLAG_SHOW_UI);
return true;
case KeyEvent.KEYCODE_VOLUME_DOWN://減小音量
audio.adjustStreamVolume(
AudioManager.STREAM_MUSIC,
AudioManager.ADJUST_LOWER,
AudioManager.FLAG_PLAY_SOUND | AudioManager.FLAG_SHOW_UI);
return true;
}
return super.onKeyDown(keyCode, event);
}
31、項目文件上面總是顯示有錯 gen already exists but is not a source folder
gen already exists but is not a source folder
遇到android項目導入出現後重復空包等錯誤,往往是導入的java編譯級別有關,點擊項目properties->
java Compiler ->修改Compiler compliance level 一般是1.6。
修改完成clean項目之後,往往還會遇到:
gen already exists but is not a source folder. Convert to a source folder or rename it的錯誤遇到這個問題的解決方法:
1. 右鍵點擊工程,選擇 "Properties"
2. 選擇左邊的 "Java Build Path"
3. 打開 "Source" 標簽面板
4. 點擊 "Add Folder..."
5. 勾選 "gen" 文件夾,點擊OK,點擊YES,再點擊OK
6. 最後右鍵點擊工程,選擇 "Andriod Tools" 裡面的 "Fix Project Properties"
出現這個問題的原因是classpath文件出錯,這個文件存在於項目根目錄下,是eclipse自動生成的,它定義了你這個項目在編譯時所使用的$CLASSPATH,一般不需要手動配置。如果出錯,也可手動修改:
Xml代碼 復制代碼 收藏代碼
1.
2.
3.
4.
5.
6.
7.
8.
9.
從數據上我們容易看出,上面描述了工程的依賴文件:
源文件的具體位置(kind="src")
運行的系統環境(kind="con")
工程的library的具體位置信息(kind="lib")
項目的輸出目錄(kind="output")
32、關於WebViewClient方法的解釋
1、public boolean shouldOverrideUrlLoading(WebView view, String url) {
view.loadUrl(url);
return true;
}
在點擊請求的是鏈接是才會調用,重寫此方法返回true表明點擊網頁裡面的鏈接還是在當前的webview裡跳轉,不跳到浏覽器那邊。
2、public void onReceivedSslError(WebView view, SslErrorHandler handler, android.net.http.SslError error) {
handler.proceed();
}
重寫此方法可以讓webview處理https請求。
3、public boolean shouldOverrideKeyEvent(WebView view, KeyEvent event) {
return super.shouldOverrideKeyEvent(view, event);
}
}
重寫此方法才能夠處理在浏覽器中的按鍵事件。
4、 public void onLoadResource(WebView view, String url) {
// TODO Auto-generated method stub
if (DEBUG) {
Log.d(TAG, " onLoadResource ");
}
super.onLoadResource(view, url);
}
在加載頁面資源時會調用,每一個資源(比如圖片)的加載都會調用一次。
5、 public void onPageStarted(WebView view, String url, Bitmap favicon) {
// TODO Auto-generated method stub
if (DEBUG) {
Log.d(TAG, " onPageStarted ");
}
if (url.endsWith(".apk")) {
download(url);//下載處理
}
super.onPageStarted(view, url, favicon);
}
在頁面加載開始時調用。
6、public void onPageFinished(WebView view, String url) {
// TODO Auto-generated method stub
if (DEBUG) {
Log.d(TAG, " onPageFinished ");
}
super.onPageFinished(view, url);
}
在頁面加載結束時調用。
33、WebviewClient與WebChromeClient的區別
ANDROID應用開發的時候可能會用到WEBVIEW這個組件,使用過程中可能會接觸到WEBVIEWCLIENT與WEBCHROMECLIENT,那麼這兩個類到底有什麼不同呢?
WebViewClient主要幫助WebView處理各種通知、請求事件的,比如:
onLoadResource
onPageStart
onPageFinish
onReceiveError
onReceivedHttpAuthRequest
WebChromeClient主要輔助WebView處理Javascript的對話框、網站圖標、網站title、加載進度等比如
onCloseWindow(關閉WebView)
onCreateWindow()
onJsAlert (WebView上alert無效,需要定制WebChromeClient處理彈出)
onJsPrompt
onJsConfirm
onProgressChanged
onReceivedIcon
onReceivedTitle
看上去他們有很多不同,實際使用的話,如果你的WebView只是用來處理一些html的頁面內容,只用WebViewClient就行了,如果需要更豐富的處理效果,比如JS、進度條等,就要用到WebChromeClient。
更多的時候,你可以這樣
WebView webView;
webView= (WebView) findViewById(R.id.webview);
webView.setWebChromeClient(new WebChromeClient());
webView.setWebViewClient(new WebViewClient());
webView.getSettings().setJavaScriptEnabled(true);
webView.loadUrl(url);
這樣你的WebView理論上就能有大部分需要實現的特色了
當然,有些更精彩的內容還是需要你自己添加的
34、文件上傳的功能:
Android 上傳大文件
androidexceptionstringnullcommand測試
最近工作需要實現使用 Android 手機上傳圖片的功能, 參考了網絡上的很多資料, 不過網絡上的代碼都僅僅適合上傳較小的文件, 當上傳較大文件時(我在自己的測試機器上發現是 2M 左右), 就會因為內存不足發生異常。異常一般發生在兩個地方, 1. 將需要上傳的文件讀取到內存緩存時, 2. 調用 HttpUrlConnection 的 OutputStream 發送數據時。 為了解決這兩個問題, 我使用了將上傳數據寫入臨時文件, 然後調用
HttpPost 類來發送數據的辦法, 代碼如下
private String post(String command, Map params, String format, String name, String type, Bitmap content) throws Exception
{
String BOUNDARY = "-------1A2B3C4D5E6F";
String MULTIPART_FORM_DATA = "multipart/form-data";
OutputStream outStream = null;
File tmpFile = iHompyFile.createRandomFile();
if (tmpFile == null)
{
outStream = new ByteArrayOutputStream();
}
else
{
outStream = new FileOutputStream(tmpFile);
}
/**
* 填寫數據
*/
try
{
if (params != null)
{
for(Map.Entry entry : params.entrySet())
{
outStream.write(("--" + BOUNDARY + "/r/n").getBytes());
outStream.write(("Content-Disposition: form-data; name=/"" + entry.getKey() + "/"/r/n/r/n").getBytes());
outStream.write(entry.getValue().getBytes());
outStream.write(("/r/n").getBytes());
}
}
outStream.write(("--" + BOUNDARY + "/r/n").getBytes());
outStream.write(("Content-Disposition: form-data; name=/"" + format + "/"; filename=/"" + name + "/"/r/n").getBytes());
outStream.write(("Content-Type: " + type + "/r/n/r/n").getBytes());
content.compress(Bitmap.CompressFormat.PNG, 100, outStream);
outStream.write(("/r/n--" + BOUNDARY + "--/r/n").getBytes());
}
catch(Exception e)
{
throw new Exception("向數據流寫入數據失敗, 可能是內存空間不足!" + e.getMessage());
}
HttpPost httpRequest = new HttpPost(myServer + command);
if (tmpFile != null)
{
outStream.flush();
outStream.close();
FileEntity entity = new FileEntity(tmpFile, MULTIPART_FORM_DATA + "; boundary=" + BOUNDARY);
entity.setContentEncoding("UTF-8");
httpRequest.setEntity(entity);
}
else
{
ByteArrayEntity entity = new ByteArrayEntity(((ByteArrayOutputStream)outStream).toByteArray());
entity.setContentType(MULTIPART_FORM_DATA + "; boundary=" + BOUNDARY);
entity.setContentEncoding("UTF-8");
httpRequest.setEntity(entity);
}
HttpResponse httpResponse = myClient.execute(httpRequest);
int httpCode = httpResponse.getStatusLine().getStatusCode();
if (tmpFile != null)
{
tmpFile.delete();
}
if (httpCode != 200)
{
throw new Exception("Error response: " + httpResponse.getStatusLine().toString());
}
return EntityUtils.toString(httpResponse.getEntity());
}
35、如果給應用添加評分的功能
http://mobile.51cto.com/market-332808.htm
36、猴子測試
adb shell monkey -v -p com.lianyou.lottery 50000
猴子測試詳細解釋
http://blog.chinaunix.net/uid-20546441-id-355035.html
37、關於LayoutInflate.inflate第三個參數的作用
http://www.189works.com/article-43331-1.html
獲取LayoutInflate的方法:
LayoutInflater inflater=(LayoutInflater)context.getSystemService(Context.LAYOUT_INFLATER_SERVICE);
View layout = inflater.inflate(R.layout.main, null);
LayoutInflater inflater = LayoutInflater.from(context); (該方法實質就是第一種方法,可參考源代碼)
View layout = inflater.inflate(R.layout.main, null);
LayoutInflater inflater = getLayoutInflater();(在Activity中可以使用,實際上是View子類下window的一個函數)
View layout = inflater.inflate(R.layout.main, null);
inflate(int resource, ViewGroup root, boolean attachToRoot) 中,前連個參數都好理解,我比較費解的是第3個參數。
resource:資源文件
root:根目錄
attachRoot:如果根目錄存在,並且attachToRoot設置為true,就會將加載的resource資源View添加到root下面
38、Java中的線程池與任務隊列
http://blog.csdn.net/xcysuccess3/article/details/7551720
package test.main;
import java.util.HashSet;
import java.util.LinkedList;
import java.util.Set;
import java.util.concurrent.ExecutorService;
import java.util.concurrent.Executors;
/**
* 測試多線程管理下載任務
*/
public class TestDownload {
public static void main(String[] args) {
// 1.new一個線程管理隊列
DownloadTaskManager.getInstance();
// 2.new一個線程池,並啟動
DownloadTaskManagerThread downloadTaskManagerThread = new DownloadTaskManagerThread();
new Thread(downloadTaskManagerThread).start();
// 3.請求下載
String[] items = new String[] { "張菲1", "張菲2", "張菲3", "張菲4", "張菲5",
"張菲6", "張菲7", "張菲1", "張菲2" };
for (int i = 0; i < items.length; i++) {
DownloadTaskManager downloadTaskMananger = DownloadTaskManager
.getInstance();
downloadTaskMananger.addDownloadTask(new DownloadTask(items[i]));
try {
Thread.sleep(2000);
} catch (InterruptedException e) {
e.printStackTrace();
}
}
}
}
class DownloadTask implements Runnable {
public String name;
public DownloadTask(String name) {
this.name = name;
}
@Override
public void run() {
// String name=Thread.currentThread().getName();
try {
Thread.sleep(1500);
} catch (InterruptedException e) {
e.printStackTrace();
}
System.out.println(name + " executed OK!");
}
public String getFileId() {
return name;
}
}
/**
* 其中downloadTasks表示的是線程隊列,taskIdSet是任務隊列,作用就是用來管理線程隊列,此程序用的是去重操作。已經下載過的文件,
* 不會再次下載。
*/
class DownloadTaskManager {
private static final String TAG = "DownloadTaskManager";
// UI請求隊列
private LinkedList downloadTasks;
// 任務不能重復
private Set taskIdSet;
private static DownloadTaskManager downloadTaskMananger;
private DownloadTaskManager() {
downloadTasks = new LinkedList();
taskIdSet = new HashSet();
}
public static synchronized DownloadTaskManager getInstance() {
if (downloadTaskMananger == null) {
downloadTaskMananger = new DownloadTaskManager();
}
return downloadTaskMananger;
}
// 1.先執行
public void addDownloadTask(DownloadTask downloadTask) {
synchronized (downloadTasks) {
if (!isTaskRepeat(downloadTask.getFileId())) {
// 增加下載任務
downloadTasks.addLast(downloadTask);
}
}
}
public boolean isTaskRepeat(String fileId) {
synchronized (taskIdSet) {
if (taskIdSet.contains(fileId)) {
return true;
} else {
System.out.println("下載管理器增加下載任務:" + fileId);
taskIdSet.add(fileId);
return false;
}
}
}
public DownloadTask getDownloadTask() {
synchronized (downloadTasks) {
if (downloadTasks.size() > 0) {
System.out.println("下載管理器增加下載任務:" + "取出任務");
DownloadTask downloadTask = downloadTasks.removeFirst();
return downloadTask;
}
}
return null;
}
}
class DownloadTaskManagerThread implements Runnable {
private DownloadTaskManager downloadTaskManager;
// 創建一個可重用固定線程數的線程池
private ExecutorService pool;
// 線程池大小
private final int POOL_SIZE = 5;
// 輪詢時間
private final int SLEEP_TIME = 1000;
// 是否停止
private boolean isStop = false;
public DownloadTaskManagerThread() {
downloadTaskManager = DownloadTaskManager.getInstance();
pool = Executors.newFixedThreadPool(POOL_SIZE);
}
@Override
public void run() {
while (!isStop) {
DownloadTask downloadTask = downloadTaskManager.getDownloadTask();
if (downloadTask != null) {
pool.execute(downloadTask);
} else { // 如果當前未有downloadTask在任務隊列中
try {
// 查詢任務完成失敗的,重新加載任務隊列
// 輪詢,
Thread.sleep(SLEEP_TIME);
} catch (InterruptedException e) {
// TODO Auto-generated catch block
e.printStackTrace();
}
}
}
if (isStop) {
pool.shutdown();
}
}
/**
* @param isStop
* the isStop to set
*/
public void setStop(boolean isStop) {
this.isStop = isStop;
}
}
39、android中軟件的評分功能
Android 調用已安裝市場,進行軟件評分的功能實現
http://blog.csdn.net/wangfayinn/article/details/10351655
調用手機中已經安裝好的軟件,進行評分:比如360手機助手、google play、豌豆莢
Uri uri = Uri.parse("market://details?id="+getPackageName());
Intent intent = new Intent(Intent.ACTION_VIEW,uri);
intent.addFlags(Intent.FLAG_ACTIVITY_NEW_TASK);
startActivity(intent);
40、Android Debug模式下的簽名
Android應用程序簽名
http://blog.sina.com.cn/s/blog_69a4fbd70100rrio.html
Android build tools 提供了debug簽名模式, 幫助簡化應用的開發和調試, 而仍然符合Android系統簽名.apk的需求. 當使用debug模式來構建app時, SDK 工具調用 Keytool來自動創建一個用於debug的 keystore 和 key. 然後這個debug key被用來自動簽名 .apk, 所以不必用自己的key來簽名包.
SDK 工具使用預定義的 名稱/密碼 來創建keystore/key :
Keystore name: "debug.keystore"
Keystore password: "android"
Key alias: "androiddebugkey"
Key password: "android"
CN: "CN=Android Debug,O=Android,C=US"
如有必要, 可以更改 debug keystore/key 的 location/name 或自己提供一個自定義的 debug keystore/key. 然而, 任何自定義的debug keystore/key必須使用和默認debug key(如之前所述)相同的debug keystore/key 名稱和密碼.
(Eclipse/ADT中, Windows > Preferences > Android > Build)
注意: 當用debug證書簽名時, 應用程序不能對外發布.
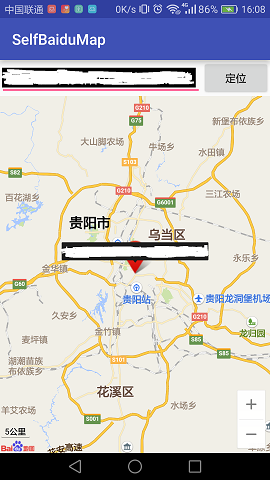
如何生成APK簽名文件的sha1信息---在百度地圖中使用
C:\Users\Orion>keytool -list -v -keystore C:\Users\Orion\Desktop\ihouse -storepass 111111
其中ihouse是簽名文件
111111是這個簽名文件的密碼
http://www.cnblogs.com/qianxudetianxia/archive/2011/04/09/2010468.html
41、 Use View.isInEditMode() in your custom views to skip code when shown in Eclipse
今天在做自定義ViewGroup中,出現了一下錯誤提示
Use View.isInEditMode() in your custom views to skip code when shown in Eclipse
具體解決方法:
在eclipse error log中查看錯誤具體出現在哪一行,然後將
if (isInEditMode()) { return; }加入即可。
這種方法同樣適用於 xml布局文件中null錯誤。
java.lang.NullPointerException
Exception details are logged in Window > Show View > Error Log
42、集成支付寶玩意兒SDK使用微博
http://www.cnblogs.com/qianxudetianxia/archive/2012/04/04/2432406.html
43、EditText:一、點擊屏幕其它地方讓EditText失去焦點;二、關於EditText默認不彈出鍵盤的問題
1. 點擊屏幕其他地方讓edittext失去焦點 的實現
方法就是:讓EditText所在的layout獲得焦點。
給layout注冊OnTouchListener監聽器
直接使用 .requestFocus() 無法獲取焦點,焦點依然在EditTtext上
先調用下面這兩個方法:
.setFocusable(true);
.setFocusableInTouchMode(true);
再調用 .requestFocus() 就可獲取焦點
//必須
relative.setOnTouchListener(new OnTouchListener() {
public boolean onTouch(View v, MotionEvent event) {
relative.setFocusable(true);
relative.setFocusableInTouchMode(true);
relative.requestFocus();
return false;
}
});
// 失去焦點觸發
eidt.setOnFocusChangeListener(new OnFocusChangeListener() {
@Override
public void onFocusChange(View arg0, boolean arg1) {
if (remove_btn.hasFocus() == false) {
//失去焦點時做某事
}
}
}
貌似在擁有ListView的界面裡面不太好使用
2.關於EditText的焦點問題(默認進入不彈出鍵盤)
父控件設置下面屬性,攔截焦點即可
android:focusable="true"
android:focusableInTouchMode="true"
 Android 的媒體路由功能應用與框架解析
 Android打造炫酷的電影票在線選座app在線選座功能
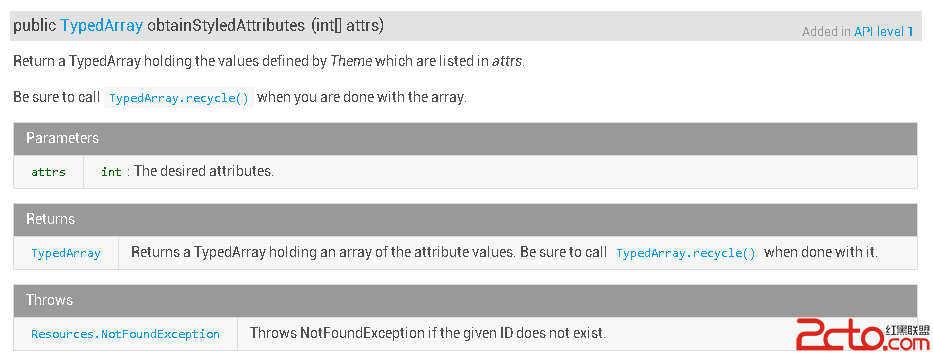 Android 自定義控件之第三講:obtainStyledAttributes 系列函數詳解
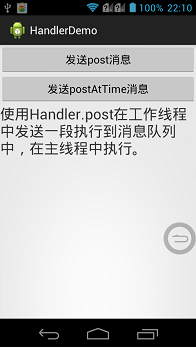
 Android消息機制Handler的實現原理解析