setContentView
只要你使用過Activity,那麼你一定使用過setContentView這個方法。一般都是這樣調用該方法:
setContentView(R.layout.main);
然後,在手機或者模擬器上就可以看見自己的布局。
如果,你留意的話,setContentView還有很多過載方法:
復制代碼
public void setContentView(int layoutResID) {
getWindow().setContentView(layoutResID);
}
public void setContentView(View view) {
getWindow().setContentView(view);
}
public void setContentView(View view, ViewGroup.LayoutParams params) {
getWindow().setContentView(view, params);
}
復制代碼
那麼,getWindow()方法是做什麼的呢?一探究竟:
public Window getWindow() {
return mWindow;
}
可以看出,該方法返回一個Window實例。但是Window是一個抽象類啊,怎麼可以有實例對象???原來,Window類有一個子類PhoneWindow,那麼如何得知getWindow返回的是PhoneWindow實例呢?來,看下面這張圖:
至此,您應該明白setContentView()方法是調用PhoneWindow類的同名方法。源碼如下:
復制代碼
@Override
public void setContentView(int layoutResID) {
if (mContentParent == null) {
installDecor();
} else {
mContentParent.removeAllViews();
}
mLayoutInflater.inflate(layoutResID, mContentParent);
final Callback cb = getCallback();
if (cb != null) {
cb.onContentChanged();
}
}
@Override
public void setContentView(View view) {
setContentView(view, new ViewGroup.LayoutParams(MATCH_PARENT, MATCH_PARENT));
}
@Override
public void setContentView(View view, ViewGroup.LayoutParams params) {
if (mContentParent == null) {
installDecor();
} else {
mContentParent.removeAllViews();
}
mContentParent.addView(view, params);
final Callback cb = getCallback();
if (cb != null) {
cb.onContentChanged();
}
}
復制代碼
每個Activity都會實例化一個Window並且只有一個,而View就像是貼在Window上的裝飾品。窗戶(Window)只有一個,但是窗花(View)可以有很多。
LayoutInflater
獲得 LayoutInflater 實例
LayoutInflater inflater = getLayoutInflater();
LayoutInflater localinflater =(LayoutInflater)context.getSystemServie
(Context.LAYOUT_INFLATER_SERVICE);
LayoutInflater inflater = LayoutInflater.from(context);
對於第一種,主要是調用 Activity 的 getLayoutInflater() 方法。
繼續跟蹤研究 android 源碼,Activity 中的該方法是調用 PhoneWindow 的 getLayoutInflater()方法!
public PhoneWindow(Context context) {
super(context);
mLayoutInflater = LayoutInflater.from(context);
}
可以看出它其實是調用 LayoutInflater.from(context), 那麼該方法其實是調用第二種方法,看看源碼,如下:
復制代碼
/**
* Obtains the LayoutInflater from the given context.
*/
public static LayoutInflater from(Context context) {
LayoutInflater LayoutInflater =
(LayoutInflater) context.getSystemService(Context.LAYOUT_INFLATER_SERVICE);
if (LayoutInflater == null) {
throw new AssertionError("LayoutInflater not found.");
}
return LayoutInflater;
}
復制代碼
inflate 方法
inflate 原意是充氣之類的,在這裡主要意思就是,擴張、使之膨脹。換句話說就是將當前視圖view補充完整、擴展該視圖。
復制代碼
public View inflate (int resource, ViewGroup root)
public View inflate (XmlPullParser parser, ViewGroup root)
public View inflate (XmlPullParser parser, ViewGroup root, boolean attachToRoot)
public View inflate (int resource, ViewGroup root, boolean attachToRoot)
復制代碼
示例代碼:
復制代碼
LayoutInflater inflater = (LayoutInflater)
getSystemService(LAYOUT_INFLATER_SERVICE);
/* R.id.test 是 custom.xml 中根(root)布局 LinearLayout 的 id */
View view = inflater.inflate(R.layout.custom,
(ViewGroup)findViewById(R.id.test));
/* 通過該 view 實例化 EditText對象, 否則報錯,因為當前視圖不是custom.xml.
即沒有 setContentView(R.layout.custom) 或者 addView() */
//EditText editText = (EditText)findViewById(R.id.content);// error
EditText editText = (EditText)view.findViewById(R.id.content);
復制代碼
對於上面代碼,指定了第二個參數 ViewGroup root,當然你也可以設置為 null 值。
注意:該方法與 findViewById 方法不同。
inflater 是用來找 layout 下 xml 布局文件,並且實例化!而 findViewById() 是找具體 xml 下的具體 widget 控件(如: Button,TextView 等)。
postInvalidate() (參考)
在子線程中控制UI:
復制代碼
@Override
protected void onRestart() {
super.onRestart();
/*onRestart中開啟新線程,更新UI*/
Thread thread = new Thread(new Runnable() {
@Override
public void run() {
System.out.println(Thread.currentThread().getName() + ": " + Thread.currentThread().getId());
tv.postInvalidate();
btn.postInvalidate();
tv.setText("update UI is success!");
btn.setText("update UI is success!");
}});
thread.start();
}
復制代碼
postInvalidate() 方法,源碼:
復制代碼
public void postInvalidate() {
postInvalidateDelayed(0);
}
public void postInvalidateDelayed(long delayMilliseconds) {
// We try only with the AttachInfo because there's no point in invalidating
// if we are not attached to our window
if (mAttachInfo != null) {
Message msg = Message.obtain();
msg.what = AttachInfo.INVALIDATE_MSG;
msg.obj = this;
mAttachInfo.mHandler.sendMessageDelayed(msg, delayMilliseconds);
}
}
復制代碼
其實,是調用了 Handler 的處理消息的機制!該方法可以在子線程中直接用來更新UI。但是在 Button 的事件中開啟線程,更新 UI就會報錯報異常。
Handler 和 invalidate 方法結合多線程更新 UI
方法 invalidate 主要用在主線程中(即UI 線程中),不可以用於子線程。如果在子線程中需要使用 postInvalidate 方法。
復制代碼
public void invalidate() {
if (ViewDebug.TRACE_HIERARCHY) {
ViewDebug.trace(this, ViewDebug.HierarchyTraceType.INVALIDATE);
}
if ((mPrivateFlags & (DRAWN | HAS_BOUNDS)) == (DRAWN | HAS_BOUNDS)) {
mPrivateFlags &= ~DRAWN & ~DRAWING_CACHE_VALID;
final ViewParent p = mParent;
final AttachInfo ai = mAttachInfo;
if (p != null && ai != null) {
final Rect r = ai.mTmpInvalRect;
r.set(0, 0, mRight - mLeft, mBottom - mTop);
// Don't call invalidate -- we don't want to internally scroll
// our own bounds
p.invalidateChild(this, r);
}
}
}
復制代碼
invalidate 方法如果你直接在主線程中調用,是看不到任何更新的。需要與Handler結合!
Android 在 onDraw 事件處理繪圖,而 invalidate() 函數可以再一次觸發 onDraw 事件,然後再一次進行繪圖動作。
復制代碼
public class MasterActivity extends Activity {
static int times = 1;
/** Called when the activity is first created. */
@Override
public void onCreate(Bundle savedInstanceState) {
super.onCreate(savedInstanceState);
setContentView( new View(null){
Paint vPaint = new Paint(); //繪制樣式物件
private int i = 0; //弧形角度
@Override
protected void onDraw (Canvas canvas) {
super.onDraw(canvas);
System.out.println("this run " + (times++) +" times!");
// 設定繪圖樣式
vPaint.setColor( 0xff00ffff ); //畫筆顏色
vPaint.setAntiAlias( true ); //反鋸齒
vPaint.setStyle( Paint.Style.STROKE );
// 繪制一個弧形
canvas.drawArc(new RectF(60, 120, 260, 320), 0, i, true, vPaint );
// 弧形角度
if( (i+=10) > 360 )
i = 0;
// 重繪, 再一次執行onDraw 程序
invalidate();
}
});
}
}
復制代碼
經過測試,發現 times 一直在++,說明 onDraw 被多次調用,並且一直在畫圖!
注釋掉的話:
// 重繪, 再一次執行onDraw 程序
//invalidate();
可以看出,圖像只畫了一條線,說明onDraw()方法被調用一次。從log上也可以看出來:
D/mark ( 221): this run onDraw() 1 times!
那麼,是什麼力量促使onDraw()方法被調用呢?
setContentView()View view方法,其實是調用PhoneWindow的setContentView(View view)方法,調用關系如下:
從而可以看出,invalidate()方法是促使onDraw()方法被調用的力量。
那麼,修改代碼,將內部類MyView的onDraw()方法中的invalidate()注釋取消,再看看運行效果:
控制台:
復制代碼
D/mark ( 248): this run onDraw() 5629 times!
D/mark ( 248): this run onDraw() 5630 times!
D/mark ( 248): this run onDraw() 5631 times!
D/mark ( 248): this run onDraw() 5632 times!
D/mark ( 248): this run onDraw() 5633 times!
D/mark ( 248): this run onDraw() 5634 times!
D/mark ( 248): this run onDraw() 5635 times!
D/mark ( 248): this run onDraw() 5636 times!
D/mark ( 248): this run onDraw() 5637 times!
D/mark ( 248): this run onDraw() 5638 times!
D/mark ( 248): this run onDraw() 5639 times!
D/mark ( 248): this run onDraw() 5640 times!
D/mark ( 248): this run onDraw() 5641 times!
D/mark ( 248): this run onDraw() 5642 times!
D/mark ( 248): this run onDraw() 5643 times!
D/mark ( 248): this run onDraw() 5644 times!
D/mark ( 248): this run onDraw() 5645 times!
D/mark ( 248): this run onDraw() 5646 times!
復制代碼
可以看出,invalidate()方法使onDraw()一直被調用,實現重繪的效果。
在invalidate()方法源碼中,有這麼一段注釋:
/**
* Invalidate the whole view. If the view is visible, {@link #onDraw} will
* be called at some point in the future. This must be called from a
* UI thread. To call from a non-UI thread, call {@link #postInvalidate()}.
*/
這段話,說明了上面的實現(調用onDraw()方法)。但是在子線程中必須使用postInvalidate()方法。
invalidate()源碼分析
復制代碼
public class ViewDrawTestActivity extends Activity {
// 用於測試
static int times = 1;
@Override
public void onCreate(Bundle savedInstanceState) {
super.onCreate(savedInstanceState);
MyView mView = new MyView(this);
mView.invalidate();
//setContentView(mView);
}
/**
* 內部類,繼承View
*
* @author mark
*/
class MyView extends View {
MyView(Context context) {
super(context);
}
Paint vPaint = new Paint(); // 繪制樣式物件
int i = 0; // 弧形角度
@Override
protected void onDraw(Canvas canvas) {
super.onDraw(canvas);
Log.d("mark", "this run onDraw() " + (times++) + " times!");
// 設定繪圖樣式
vPaint.setColor(0xff00ffff); // 畫筆顏色
vPaint.setAntiAlias(true); // 反鋸齒
vPaint.setStyle(Paint.Style.STROKE);
// 繪制一個弧形
canvas.drawArc(new RectF(60, 120, 260, 320), 0, i, true, vPaint);
// 弧形角度
if ((i += 10) > 360) {
i = 0;
}
// 重繪, 再一次執行onDraw 程序
// invalidate();
}
}
}
復制代碼
子沒有多大的變化,只是在onCreate()方法中直接調用invalidate()方法,如:
mView.invalidate();
這樣做的目的主要是想看看,自己調用View的invalidate()方法會不會觸發onDraw()方法。運行一下:
nDraw()方法並沒有執行!那麼是不是因為沒有調用setContentVIew()方法呢?修改onCreate()方法:
復制代碼
@Override
public void onCreate(Bundle savedInstanceState) {
super.onCreate(savedInstanceState);
MyView mView = new MyView(this);
mView.invalidate();
setContentView(mView);
mView.invalidate();
}
復制代碼
再次運行,效果:
D/mark ( 251): this run onDraw() 1 times!
說明,只有setContentVIew()方法中的invalidate()方法啟了作用,自己調用View的invalidate()方法,mView.invalidate()沒啟任何作用。但是,在MyView的onDraw()方法中調用invalidate()方法可以循環調用onDraw()方法,類似遞歸。
分析一下,invalidate()方法的源碼吧,在這裡也許可以找到答案。
復制代碼
/**
* Invalidate the whole view. If the view is visible, {@link #onDraw} will
* be called at some point in the future. This must be called from a
* UI thread. To call from a non-UI thread, call {@link #postInvalidate()}.
*/
public void invalidate() {
if (ViewDebug.TRACE_HIERARCHY) {
ViewDebug.trace(this, ViewDebug.HierarchyTraceType.INVALIDATE);
}
if ((mPrivateFlags & (DRAWN | HAS_BOUNDS)) == (DRAWN | HAS_BOUNDS)) {
mPrivateFlags &= ~DRAWN & ~DRAWING_CACHE_VALID;
final ViewParent p = mParent;
final AttachInfo ai = mAttachInfo;
if (p != null && ai != null) {
final Rect r = ai.mTmpInvalRect;
r.set(0, 0, mRight - mLeft, mBottom - mTop);
// Don't call invalidate -- we don't want to internally scroll
// our own bounds
p.invalidateChild(this, r);
}
}
}
復制代碼
這裡可以看到p.invalidateChild(this, r)(看源碼只看關鍵部分,不然你會很暈!),其中p是ViewParent實例對象。ViewParent是一個接口,現在我們關心誰實現了這個接口?
通過千辛萬苦的search,終於找到ViewParent的實現類ViewRoot:
復制代碼
/**
* The top of a view hierarchy, implementing the needed protocol between View
* and the WindowManager. This is for the most part an internal implementation
* detail of {@link WindowManagerImpl}.
*
* {@hide}
*/
@SuppressWarnings({"EmptyCatchBlock"})
public final class ViewRoot extends Handler implements ViewParent, View.AttachInfo.Callbacks { }
復制代碼
那麼,看看該類實現的invalidateChild()方法:
復制代碼
public void invalidateChild(View child, Rect dirty) {
checkThread();
if (DEBUG_DRAW) Log.v(TAG, "Invalidate child: " + dirty);
if (mCurScrollY != 0 || mTranslator != null) {
mTempRect.set(dirty);
dirty = mTempRect;
if (mCurScrollY != 0) {
dirty.offset(0, -mCurScrollY);
}
if (mTranslator != null) {
mTranslator.translateRectInAppWindowToScreen(dirty);
}
if (mAttachInfo.mScalingRequired) {
dirty.inset(-1, -1);
}
}
mDirty.union(dirty);
if (!mWillDrawSoon) {
scheduleTraversals();
}
}
復制代碼
關鍵代碼在這兒:
if (!mWillDrawSoon) {
scheduleTraversals();
}
這個方法是向Handler發送消息:
public void scheduleTraversals() {
if (!mTraversalScheduled) {
mTraversalScheduled = true;
sendEmptyMessage(DO_TRAVERSAL);
}
}
接下來,看看ViewRoot的Handler的handleMessage的實現:
復制代碼
public void handleMessage(Message msg) {
switch (msg.what) {
// 、、、
case DO_TRAVERSAL:
// 、、、
performTraversals();
}
}
復制代碼
performTraversals()方法,調用ViewRoot的私有方法private void draw(boolean fullRedrawNeeded),在該方法中有句代碼很關鍵:
mView.draw(canvas);
其實這句代碼,就是調用View的draw()方法 ,關鍵代碼:
if (!dirtyOpaque) onDraw(canvas);
也就是說,滿足這個方法,就會回調onDraw()方法。到此為止,您應該明白,當我們自己調用invalidate()方法時,想使onDraw()方法回調,必須滿足條件。
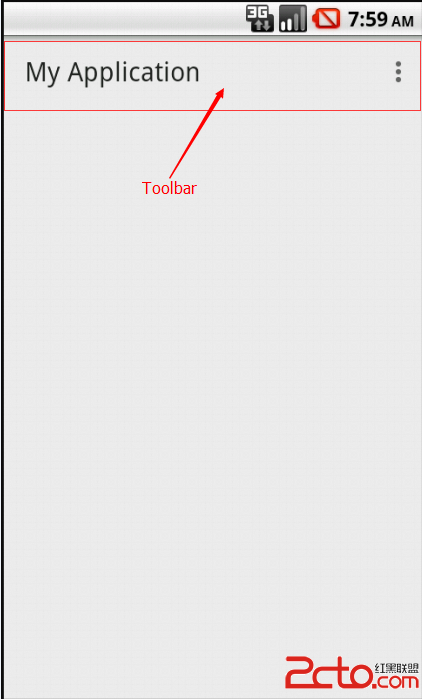 Android5.x新特性之 Toolbar和Theme的使用
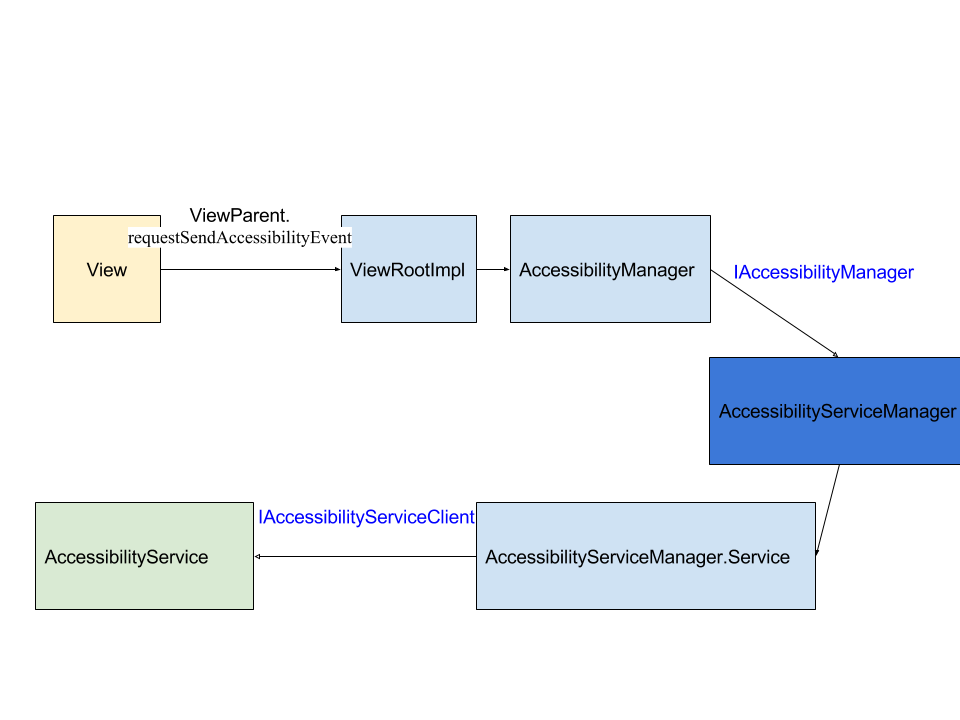 Android Accessibility使用及原理簡介
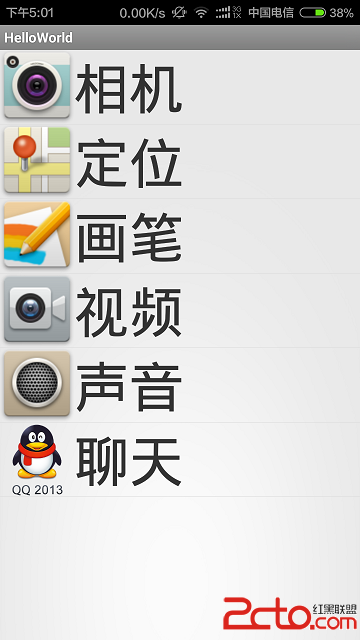 Android中如何為ListView設置靜態數據
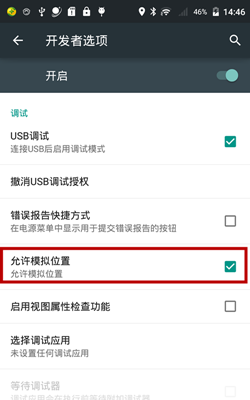 Android系統模擬位置的使用方法