編輯:關於Android編程
首先看一下GLSurfaceView是如何繪制的。正如android開發文檔中描述的那樣,我們需要new一個GLSurfaceView對象,然後設置一個實現了Renderer接口的對象,我們需要寫一個MyRender類,實現Renderer的方法等等。我們先看一下Activity的寫法。它不需要一個布局文件,我們將GLSurfaceView對象作為activity的contentview即可。如下:
package net.mobctrl.glsurfaceviewbmp;

import java.util.Random;

import android.annotation.SuppressLint;
import android.app.Activity;
import android.opengl.GLSurfaceView;
import android.os.Bundle;
import android.view.WindowManager;

/**
 *
 * @author Zheng Haibo
 * @web http://www.mobctrl.net
 *
 */
public class MainActivity extends Activity {

	private GLSurfaceView glView; // Use GLSurfaceView
	Random rnd = new Random();

	@SuppressLint("NewApi")
	@Override
	protected void onCreate(Bundle savedInstanceState) {
		super.onCreate(savedInstanceState);
		setTheme(android.R.style.Theme_Translucent_NoTitleBar);
		getWindow().addFlags(WindowManager.LayoutParams.FLAG_KEEP_SCREEN_ON);
		glView = new GLSurfaceView(this); // Allocate a GLSurfaceView
		glView.setRenderer(new MyGLRenderer(this)); // Use a custom renderer
		glView.getAlpha();
		this.setContentView(glView);

	}

	@Override
	protected void onPause() {
		super.onPause();
		glView.onPause();
	}

	@Override
	protected void onResume() {
		super.onResume();
		glView.onResume();
		android.provider.Settings.System.putInt(this.getContentResolver(),
				android.provider.Settings.System.SCREEN_BRIGHTNESS,
				rnd.nextInt(256));

	}
}
package net.mobctrl.glsurfaceviewbmp;

import java.util.Random;

import javax.microedition.khronos.opengles.GL10;

import android.content.Context;
import android.opengl.GLSurfaceView.Renderer;
import android.opengl.GLU;

/**
 * @date 2014年10月20日 下午2:49:17
 * @author Zheng Haibo
 * @Description: TODO
 */
public class MyGLRenderer implements Renderer {
	Context context; // Application's context
	Random r = new Random();
	//private Square square;
	private GLBitmap glBitmap;
	private int width = 0;
	private int height = 0;
	private long frameSeq = 0;
	private int viewportOffset = 0;
	private int maxOffset = 400;

	public MyGLRenderer(Context context) {
		this.context = context;
		//square = new Square();
		glBitmap = new GLBitmap();
	}

	@Override
	public void onSurfaceChanged(GL10 gl, int width, int height) {
		if (height == 0) { // Prevent A Divide By Zero By
			height = 1; // Making Height Equal One
		}
		this.width = width;
		this.height = height;
		gl.glViewport(0, 0, width, height); // Reset The
											// Current
		// Viewport
		gl.glMatrixMode(GL10.GL_PROJECTION); // Select The Projection Matrix
		gl.glLoadIdentity(); // Reset The Projection Matrix

		// Calculate The Aspect Ratio Of The Window
		GLU.gluPerspective(gl, 45.0f, (float) width / (float) height, 0.1f,
				100.0f);

		gl.glMatrixMode(GL10.GL_MODELVIEW); // Select The Modelview Matrix
		gl.glLoadIdentity();
	}

	/**
	 * 每隔16ms調用一次
	 */
	@Override
	public void onDrawFrame(GL10 gl) {
		gl.glClear(GL10.GL_COLOR_BUFFER_BIT | GL10.GL_DEPTH_BUFFER_BIT);
		// Reset the Modelview Matrix
		gl.glLoadIdentity();
		gl.glTranslatef(0.0f, 0.0f, -5.0f); // move 5 units INTO the screen is
											// the same as moving the camera 5
											// units away
		// square.draw(gl);
		glBitmap.draw(gl);
		changeGLViewport(gl);
	}

	/**
	 * 通過改變gl的視角獲取
	 *
	 * @param gl
	 */
	private void changeGLViewport(GL10 gl) {
		System.out.println("time=" + System.currentTimeMillis());
		frameSeq++;
		viewportOffset++;
		// The
		// Current
		if (frameSeq % 100 == 0) {// 每隔100幀,重置
			gl.glViewport(0, 0, width, height);
			viewportOffset = 0;
		} else {
			int k = 4;
			gl.glViewport(-maxOffset + viewportOffset * k, -maxOffset
					+ viewportOffset * k, this.width - viewportOffset * 2 * k
					+ maxOffset * 2, this.height - viewportOffset * 2 * k
					+ maxOffset * 2);
		}
	}

	@Override
	public void onSurfaceCreated(GL10 gl,
			javax.microedition.khronos.egl.EGLConfig arg1) {
		glBitmap.loadGLTexture(gl, this.context);

		gl.glEnable(GL10.GL_TEXTURE_2D); // Enable Texture Mapping ( NEW )
		gl.glShadeModel(GL10.GL_SMOOTH); // Enable Smooth Shading
		gl.glClearColor(0.0f, 0.0f, 0.0f, 0.5f); // Black Background
		gl.glClearDepthf(1.0f); // Depth Buffer Setup
		gl.glEnable(GL10.GL_DEPTH_TEST); // Enables Depth Testing
		gl.glDepthFunc(GL10.GL_LEQUAL); // The Type Of Depth Testing To Do

		gl.glHint(GL10.GL_PERSPECTIVE_CORRECTION_HINT, GL10.GL_NICEST);
	}
}
package net.mobctrl.glsurfaceviewbmp;

import java.nio.ByteBuffer;
import java.nio.ByteOrder;
import java.nio.FloatBuffer;

import javax.microedition.khronos.opengles.GL10;

import net.mobctrl.glsurfaceviewbmp.R;
import android.content.Context;
import android.graphics.Bitmap;
import android.graphics.BitmapFactory;
import android.opengl.GLUtils;

/**
 * @date 2014年10月20日 下午3:09:33
 * @author Zheng Haibo
 * @Description: TODO
 */
public class GLBitmap {
	private FloatBuffer textureBuffer; // buffer holding the texture coordinates
	private float texture[] = {
			// Mapping coordinates for the vertices
			0.0f, 1.0f, // top left (V2)
			0.0f, 0.0f, // bottom left (V1)
			1.0f, 1.0f, // top right (V4)
			1.0f, 0.0f // bottom right (V3)
	};

	private FloatBuffer vertexBuffer; // buffer holding the vertices

	private float vertices[] = { -1.0f, -1.0f, 0.0f, // V1 - bottom left
			-1.0f, 1.0f, 0.0f, // V2 - top left
			1.0f, -1.0f, 0.0f, // V3 - bottom right
			1.0f, 1.0f, 0.0f // V4 - top right
	};

	public GLBitmap() {
		ByteBuffer byteBuffer = ByteBuffer.allocateDirect(vertices.length * 4);
		byteBuffer.order(ByteOrder.nativeOrder());
		vertexBuffer = byteBuffer.asFloatBuffer();
		vertexBuffer.put(vertices);
		vertexBuffer.position(0);

		byteBuffer = ByteBuffer.allocateDirect(texture.length * 4);
		byteBuffer.order(ByteOrder.nativeOrder());
		textureBuffer = byteBuffer.asFloatBuffer();
		textureBuffer.put(texture);
		textureBuffer.position(0);
	}

	/** The texture pointer */
	private int[] textures = new int[1];

	public void loadGLTexture(GL10 gl, Context context) {
		// loading texture
		Bitmap bitmap = BitmapFactory.decodeResource(context.getResources(),
				R.drawable.plane_image);

		// generate one texture pointer
		gl.glGenTextures(1, textures, 0);
		// ...and bind it to our array
		gl.glBindTexture(GL10.GL_TEXTURE_2D, textures[0]);

		// create nearest filtered texture
		gl.glTexParameterf(GL10.GL_TEXTURE_2D, GL10.GL_TEXTURE_MIN_FILTER,
				GL10.GL_NEAREST);
		gl.glTexParameterf(GL10.GL_TEXTURE_2D, GL10.GL_TEXTURE_MAG_FILTER,
				GL10.GL_LINEAR);

		// Use Android GLUtils to specify a two-dimensional texture image from
		// our bitmap
		GLUtils.texImage2D(GL10.GL_TEXTURE_2D, 0, bitmap, 0);

		// Clean up
		bitmap.recycle();
	}

	public void draw(GL10 gl) {
		// bind the previously generated texture
		gl.glBindTexture(GL10.GL_TEXTURE_2D, textures[0]);

		// Point to our buffers
		gl.glEnableClientState(GL10.GL_VERTEX_ARRAY);
		gl.glEnableClientState(GL10.GL_TEXTURE_COORD_ARRAY);

		// Set the face rotation
		gl.glFrontFace(GL10.GL_CW);

		// Point to our vertex buffer
		gl.glVertexPointer(3, GL10.GL_FLOAT, 0, vertexBuffer);
		gl.glTexCoordPointer(2, GL10.GL_FLOAT, 0, textureBuffer);

		// Draw the vertices as triangle strip
		gl.glDrawArrays(GL10.GL_TRIANGLE_STRIP, 0, vertices.length / 3);

		// Disable the client state before leaving
		gl.glDisableClientState(GL10.GL_VERTEX_ARRAY);
		gl.glDisableClientState(GL10.GL_TEXTURE_COORD_ARRAY);
	}

}
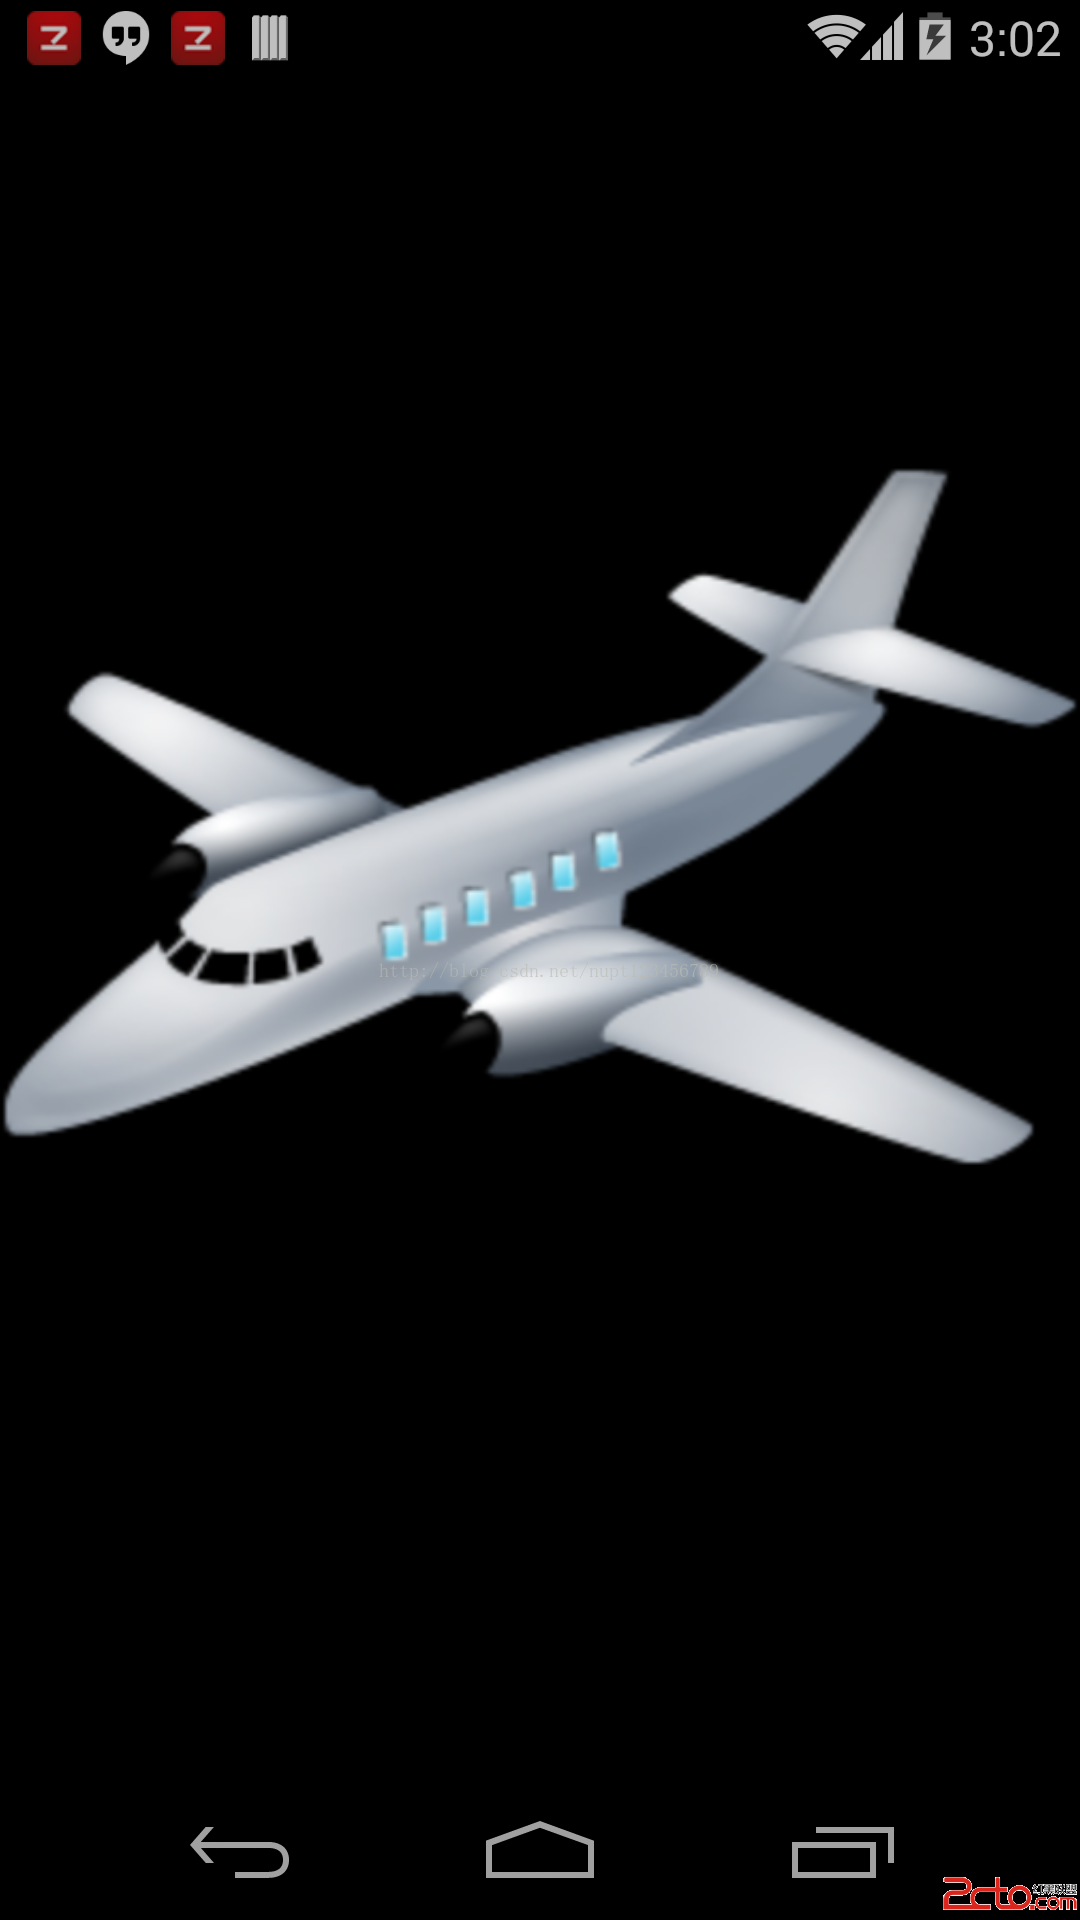
從GLBitmap可以看出,我們首先需要加載一個圖片資源,然後生成texture。在這裡,特別說明一下changeGLViewport這個方法,如果在MyRender裡面去掉這個方法,運行結果是,GLSurfaceView繪制出一張圖片。添加這個方法以後,則是周期性得繪制一個由遠到近的一個“動畫”。注意,這種動畫,並沒有改變圖像本身,而且調整不通的視角產生的,因此效率很高。它的原理,就像你拿一個相機,去拍攝牆壁上得一幅畫,相機離畫越來越近時,畫面在放大,而牆壁本身並沒有變化。
-------------------------------------------------------------------
更多交流,Android開發聯盟QQ群:272209595
 Android使用SwipeListView實現類似QQ的滑動刪除效果
QQ的滑動刪除效果很不錯,要實現這種效果,可以使用SwipeListView。1. 下載com.fortysevendeg.swipelistview這個項目(以前Git
 Android開源框架Image-Loader詳解
如果說評價一下哪個圖片開源庫最被廣泛使用的話,我想應該可以說是Universal-Image-Loader,在主流的應用中如果你隨便去反編譯幾個,基本都能看到他的身影,它
 Android掛斷電話以及Java Class Loader
Android中,要自己實現一個掛斷電話方法時,很久之前可以endCall().不過現在已經不行了,要應用反射機制,獲取到"android.os.Service
 Android中WebView無法後退和js注入漏洞的解決方案
因重定向無法正常goBack()解決方案首先說下問題,初始頁面為A,點擊某個鏈接跳轉到B(http://xxx.com.cn/),B頁面重定向到C頁面(http://xx