編輯:關於Android編程
 蝦米 來講解 Android中輸入的控件 在 Android中輸入控件是常見的 隨處可見 今天又時間 寫一篇Android中輸入控件的集合 了解他們的相同處和不同處,下面是Android系統中我們常用到的輸入控件 好 廢話不多 開始:
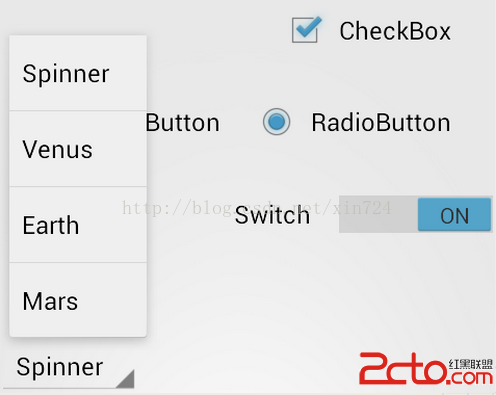
 public class MyActivity extends Activity {
     protected void onCreate(Bundle icicle) {
         super.onCreate(icicle);

         setContentView(R.layout.content_layout_id);

         final Button button = (Button) findViewById(R.id.button_id);
         button.setOnClickListener(new View.OnClickListener() {
             public void onClick(View v) {
                 // Perform action on click
             }
         });
     }
 }
Text Fields
一個文本字段允許用戶輸入文本到您的應用程序。它可以是一行或多行。觸摸一個文本字段位置,光標,並自動顯示鍵盤。除了打字,文本字段允許各種各樣的其他活動,例如文本選擇(剪切、復制、粘貼)和數據通過自動完成查找。
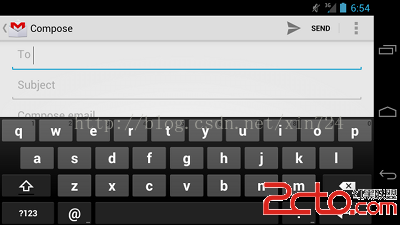
Android:inputType:輸入的類型 允許輸入Text(字符串) TextEmailAddress(email的地址) texturi(網址) number(數字) phone(號碼) textCansentences() textcapwords() textautocurrect() textpassword() textmultiLine()
在一個Activity 判斷checkbox是否選中
public void onCheckboxClicked(View view) {
    // Is the view now checked?
    boolean checked = ((CheckBox) view).isChecked();

    // Check which checkbox was clicked
    switch(view.getId()) {
        case R.id.checkbox_meat:
            if (checked)
                // Put some meat on the sandwich
            else
                // Remove the meat
            break;
        case R.id.checkbox_cheese:
            if (checked)
                // Cheese me
            else
                // I'm lactose intolerant
            break;
    }
}
public void onRadioButtonClicked(View view) {
    // Is the button now checked?
    boolean checked = ((RadioButton) view).isChecked();

    // Check which radio button was clicked
    switch(view.getId()) {
        case R.id.radio_pirates:
            if (checked)
                // Pirates are the best
            break;
        case R.id.radio_ninjas:
            if (checked)
                // Ninjas rule
            break;
    }
}

 (切換按鈕) 開關 (Android4.0+)
響應點擊事件
(切換按鈕) 開關 (Android4.0+)
響應點擊事件public void onToggleClicked(View view) { // Is the toggle on? boolean on = ((ToggleButton) view).isChecked(); if (on) { // Enable vibrate } else { // Disable vibrate } }
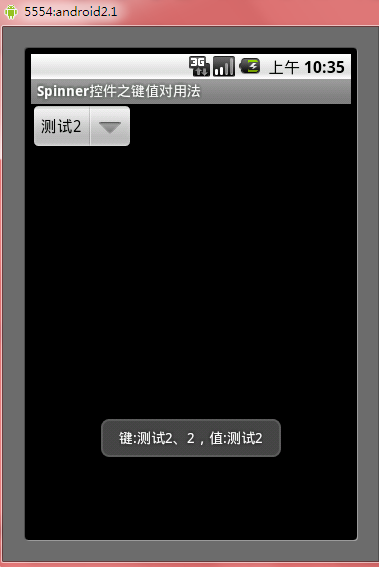
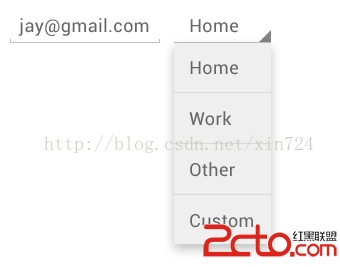 spinner布局
特別的string array 的條目在res/values/planets_arrays下
查看Spinners指南更多細節。注意,定制一個微調控制項的文本需要使用自定義數組適配器和布局文件。- Mercury
- Venus
- Earth
- Mars
public void setSpinnerToValue(Spinner spinner, String value) {
	int index = 0;
	SpinnerAdapter adapter = spinner.getAdapter();
	for (int i = 0; i < adapter.getCount(); i++) {
		if (adapter.getItem(i).equals(value)) {
			index = i;
			break; // terminate loop
		}
	}
	spinner.setSelection(index);
}
自定義ArrayAdapter 資源
Spinner spinner = (Spinner) findViewById(R.id.spinner); // Create an ArrayAdapter using the string array and a default spinner layout ArrayAdapterMultiple Select Spinneradapter = ArrayAdapter.createFromResource(this, R.array.planets_array, android.R.layout.simple_spinner_item); // Specify the layout to use when the list of choices appears adapter.setDropDownViewResource(android.R.layout.simple_spinner_dropdown_item); // Apply the adapter to the spinner spinner.setAdapter(adapter);
public class DemoPickerActivity extends Activity {
    @Override
    public void onCreate(Bundle savedInstanceState) {
        super.onCreate(savedInstanceState);
        setContentView(R.layout.activity_demo_picker);
        NumberPicker numberPicker =
            (NumberPicker) findViewById(R.id.np_total);
        numberPicker.setMinValue(0);
        numberPicker.setMaxValue(100);
        numberPicker.setWrapSelectorWheel(true);
    }
}
// within onCreate
numberPicker.setOnValueChangedListener(new NumberPicker.OnValueChangeListener() {
    @Override
    public void onValueChange(NumberPicker picker, int oldVal, int newVal) {
        Log.d("DEBUG", "Selected number in picker is " + newVal);
    }
});
 Android App開發中使用RecyclerView替代ListView的實踐
RecyclerView是Android 5.0的新特性,可以直接代替ListView與GridView,並且能夠實現瀑布流的布局,感覺RecyclerView使用的好處
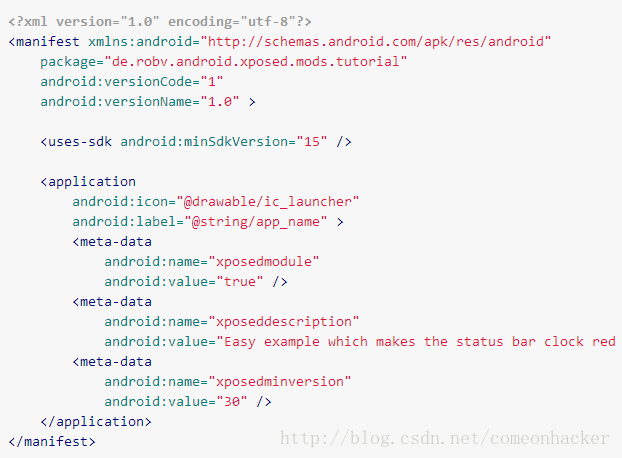 Xpoded模塊開發教程
當然,你可以去學習如何創建一個Xposed模塊。所以你可以閱讀這篇教程(官方教程)去學習怎樣解決這個問題。這不僅僅講解如何新建模塊、如何編寫模塊,我們要往更深處思考,為什
 Android開發之Jenkins+Gradle實現持續集成、apk多渠道打包
前言: 首先很高興大家來閱讀王某人這篇文章,我干肯定大部分公司的發版流程是這樣的,android程序員小李打出各渠道包,發給運維小胡,小胡將個渠道包上傳各大應用
 Android------Intent.createChooser
Intent的匹配過程中有三個步驟,包括Action , category與data 的匹配。如果匹配出了多個結果,系統會顯示一個dialog讓用戶來選