編輯:關於Android編程
public final boolean post(Runnable r)
{
  return sendMessageDelayed(getPostMessage(r), 0);
}

public final boolean postAtTime(Runnable r, long uptimeMillis)

public final boolean postAtTime(Runnable r, Object token, long uptimeMillis)
上面就是Runnable的方法,可以看到Runnable會被分裝成Message的形式發送。 private static Message getPostMessage(Runnable r) { Message m = Message.obtain(); m.callback = r; return m; } 所以本質上,都是以Message的封裝方式處理。 最終所有的消息都會放入MessageQueue裡面。 MessageQueue並不是一個真正的隊列,而是鏈表。 Looper就是循環在某件事情,類似於while(true)干的事情。 Handler就是真正做事情的。 Looper不斷的從MessageQueue從取出數據,然後交給handler來處理。 2.Handler: framework/base/core/android/os/Handler.java 其實handler的作用,它的注釋已經解釋的非常清楚。
/**
 * A Handler allows you to send and process {@link Message} and Runnable
 * objects associated with a thread's {@link MessageQueue}.  Each Handler
 * instance is associated with a single thread and that thread's message
 * queue.  When you create a new Handler, it is bound to the thread /
 * message queue of the thread that is creating it -- from that point on,
 * it will deliver messages and runnables to that message queue and execute
 * them as they come out of the message queue.
*
 * <p>There are two main uses for a Handler: (1) to schedule messages and
 * runnables to be executed as some point in the future; and (2) to enqueue
 * an action to be performed on a different thread than your own.
*
 * <p>When posting or sending to a Handler, you can either
 * allow the item to be processed as soon as the message queue is ready
 * to do so, or specify a delay before it gets processed or absolute time for
 * it to be processed.  The latter two allow you to implement timeouts,
 * ticks, and other timing-based behavior.
*/
這個一共三段內容,大意是: 1)handler使用runnable或者message的方式傳遞,存儲在一個thread的messagequeue裡面。 當你創建一個新的handler的時候,他會與這個創建它的線程綁定。 對於一個Thread 來說MessageQueue,和Looper只有一個。 2)使用handler一般有2種場景。 希望do runnable或者某種Message 在in the future. 或者把一個action(Runnable or Message)傳遞到其他線程進行操作。 常見的操作就是在工作線程中使用主線程handler來操作UI。 3)你可以讓handler直接操作message內容,或者等待一段時間,這個時間是可以配置的。 handle的2大功能 處理message: public void dispatchMessage(Message msg) 分發消息 public void handleMessage(Message msg) 處理消息,該方法通常情況下,須由子類繼承。 Looper.loop()方法會調用dispatchMessage來處理消息。
    public void dispatchMessage(Message msg) {
        if (msg.callback != null) {
            handleCallback(msg);
        } else {
            if (mCallback != null) {
                if (mCallback.handleMessage(msg)) {
                    return;
                }
            }
            handleMessage(msg);
        }
handler的子類通過重載該方法,可以修改handler的消息派發方式。 handler的第二個作用是把message & Runnable分裝到MessageQueue裡面。 handler,messagequeue,looper目的是什麼,目的就是啟動消息機制。 MessageQueue: MessageQueue從哪裡得到,從Handler源碼看到,是從Looper裡面來的。
  public Handler(Looper looper, Callback callback, boolean async) {
        mLooper = looper;
        mQueue = looper.mQueue;
        mCallback = callback;
        mAsynchronous = async;
    }
Looper:

    private Looper(boolean quitAllowed) {
        mQueue = new MessageQueue(quitAllowed);
        mThread = Thread.currentThread();
    }
Looper 構造函數就干了2件事。 創建Messagequeue,所以 每個Looper都有唯一的一個MessageQueue與之對應。 得到運行thread。 // sThreadLocal.get() will return null unless you've called prepare(). static final ThreadLocal<Looper> sThreadLocal = new ThreadLocal<Looper>(); Looper有個特殊的變量,ThreadLocal, 這個對象只對自己所在的線程全局,其他的線程無法看到它。 Looper提供了很多static的方法,所以肯定還有一些能都識別“身份“的方法。 這些方法在我們使用looper 的時候,最重要的是如下2個: private static void prepare(boolean quitAllowed) { if (sThreadLocal.get() != null) { throw new RuntimeException("Only one Looper may be created per thread"); } sThreadLocal.set(new Looper(quitAllowed)); }
**
     * Run the message queue in this thread. Be sure to call
     * {@link #quit()} to end the loop.
     */
    public static void loop() {
        final Looper me = myLooper();
        if (me == null) {
            throw new RuntimeException("No Looper; Looper.prepare() wasn't called on this thread.");
        }
        final MessageQueue queue = me.mQueue;

        // Make sure the identity of this thread is that of the local process,
        // and keep track of what that identity token actually is.
        Binder.clearCallingIdentity();
        final long ident = Binder.clearCallingIdentity();

        for (;;) {
            Message msg = queue.next(); // might block
            if (msg == null) {
                // No message indicates that the message queue is quitting.
                return;
            }

            // This must be in a local variable, in case a UI event sets the logger
            Printer logging = me.mLogging;
            if (logging != null) {
                logging.println(">>>>> Dispatching to " + msg.target + " " +
                        msg.callback + ": " + msg.what);
            }

            msg.target.dispatchMessage(msg);

            if (logging != null) {
                logging.println("<<<<< Finished to " + msg.target + " " + msg.callback);
            }

            // Make sure that during the course of dispatching the
            // identity of the thread wasn't corrupted.
            final long newIdent = Binder.clearCallingIdentity();
            if (ident != newIdent) {
                Log.wtf(TAG, "Thread identity changed from 0x"
                        + Long.toHexString(ident) + " to 0x"
                        + Long.toHexString(newIdent) + " while dispatching to "
                        + msg.target.getClass().getName() + " "
                        + msg.callback + " what=" + msg.what);
            }

            msg.recycle();
        }
    }
/ prepare才是looper創建以及和thread綁定的地方。 looper.loop()方法是整個looper機制啟動的地方。 從此thread就會接受消息和處理消息了。 這裡有個小問題: Message msg = queue.next(); // might block if (msg == null) { // No message indicates that the message queue is quitting. return; } 一開始的時候,MessageQueue handler沒有傳遞消息進隊列,按理說取到的消息是null,這樣looper就直接退出了。 這個問題等到分析源碼的時候,在解決。 這樣handler,messaqequeue,looper, 和thread都關聯起來了。 下面還有一個mainlooper的問題。
public static void main(String[] args) {
    ...

    Looper.prepareMainLooper();

    if (sMainThreadHandler == null) {
            sMainThreadHandler = thread.getHandler();
        }

    Looper.loop();
}
以上是ActivityThread的部分入口函數main的源碼: 可見prepareMainLooper()的方法,是給主線程使用的。
 360手機q5怎麼插卡/裝卡?360q5手機SIM卡安裝教程
360手機q5配備雙攝像頭,主打高端安全。360手機Q5支持全網通與Volte高清語音通話。那麼,360手機Q5怎麼插卡或者裝卡呢?360q5手機支持什麼S
 Android:仿手機QQ好友動態的ListView
1.介紹:本博客使用XListView模仿Android版QQ好友動態的ListView效果。效果截圖如下:效果圖1效果圖2這裡面主要涉及的是ListView的布局問題,
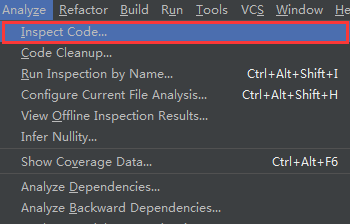 Android Studio使用Lint進行代碼檢查
Android Studio目前已經更新到1.4版本,它作為Google官方推薦的IDE,功能非常強大,其中提供了一套靜態代碼分析工具,它可以幫助我們檢查項目中存在的問題
 Android天氣預報app改進版
最近總是有人來和我說我以前寫的一個小app無法正常獲取數據~Android簡易版天氣預報app 今天就又運行了下來查找問題,發現或許是接口有限制吧,不能在多台手機使用同個