編輯:關於Android編程
不知不覺這個系列已經寫了三篇了,其實很早之前就想寫設計模式了,只不過怕自己誤人子弟沒有提筆去寫。後來在實際開發中,發現設計模式可以讓一個開發人員融會貫通所學的知識,為了進一步鞏固自己,就寫下了這一些列文章。前面介紹了三個模式。
Android開發中無處不在的設計模式——單例模式 Android開發中無處不在的設計模式——Builder模式 Android開發中無處不在的設計模式——觀察者模式本篇文章介紹的模式其實很簡單,即原型模式,按照慣例,先看定義。
用原型實例指定創建對象的種類,並通過拷貝這些原型創建新的對象。
這是什麼鬼哦,本寶寶看不懂!不必過度在意這些定義,自己心裡明白就ok了。沒代碼你說個jb。
首先我們定義一個Person類
public class Person{
    private String name;
    private int age;
    private double height;
    private double weight;

    public Person(){

    }

    public String getName() {
        return name;
    }

    public void setName(String name) {
        this.name = name;
    }

    public int getAge() {
        return age;
    }

    public void setAge(int age) {
        this.age = age;
    }

    public double getHeight() {
        return height;
    }

    public void setHeight(double height) {
        this.height = height;
    }

    public double getWeight() {
        return weight;
    }

    public void setWeight(double weight) {
        this.weight = weight;
    }

    @Override
    public String toString() {
        return Person{ +
                name=' + name + ''' +
                , age= + age +
                , height= + height +
                , weight= + weight +
                '}';
    }
}
要實現原型模式,只需要按照下面的幾個步驟去實現即可。
實現Cloneable接口
public class Person implements Cloneable{

}
重寫Object的clone方法
@Override
public Object clone(){
    return null;
}
實現clone方法中的拷貝邏輯
    @Override
    public Object clone(){
        Person person=null;
        try {
            person=(Person)super.clone();
            person.name=this.name;
            person.weight=this.weight;
            person.height=this.height;
            person.age=this.age;
        } catch (CloneNotSupportedException e) {
            e.printStackTrace();
        }
        return person;
    }
測試一下
public class Main {
    public static void main(String [] args){
        Person p=new Person();
        p.setAge(18);
        p.setName(張三);
        p.setHeight(178);
        p.setWeight(65);
        System.out.println(p);

        Person p1= (Person) p.clone();
        System.out.println(p1);

        p1.setName(李四);
        System.out.println(p);
        System.out.println(p1);
    }
}
輸出結果如下
Person{name=’張三’, age=18, height=178.0, weight=65.0}
Person{name=’張三’, age=18, height=178.0, weight=65.0}
Person{name=’張三’, age=18, height=178.0, weight=65.0}
Person{name=’李四’, age=18, height=178.0, weight=65.0}
試想一下,兩個不同的人,除了姓名不一樣,其他三個屬性都一樣,用原型模式進行拷貝就會顯得異常簡單,這也是原型模式的應用場景之一。
一個對象需要提供給其他對象訪問,而且各個調用者可能都需要修改其值時,可以考慮使用原型模式拷貝多個對象供調用者使用,即保護性拷貝。
但是假設Person類裡還有一個屬性叫興趣愛好,是一個List集合,就像這樣子
 private ArrayList hobbies=new ArrayList();

    public ArrayList getHobbies() {
        return hobbies;
    }

    public void setHobbies(ArrayList hobbies) {
        this.hobbies = hobbies;
    }
在進行拷貝的時候要格外注意,如果你直接按之前的代碼那樣拷貝
 @Override
    public Object clone(){
        Person person=null;
        try {
            person=(Person)super.clone();
            person.name=this.name;
            person.weight=this.weight;
            person.height=this.height;
            person.age=this.age;
            person.hobbies=this.hobbies;
        } catch (CloneNotSupportedException e) {
            e.printStackTrace();
        }
        return person;
    }
會帶來一個問題
使用測試代碼進行測試
public class Main {
    public static void main(String [] args){
        Person p=new Person();
        p.setAge(18);
        p.setName(張三);
        p.setHeight(178);
        p.setWeight(65);
        ArrayList  hobbies=new ArrayList();
        hobbies.add(籃球);
        hobbies.add(編程);
        hobbies.add(長跑);
        p.setHobbies(hobbies);
        System.out.println(p);

        Person p1= (Person) p.clone();
        System.out.println(p1);

        p1.setName(李四);
        p1.getHobbies().add(游泳);
        System.out.println(p);
        System.out.println(p1);
    }
}
我們拷貝了一個對象,並添加了一個興趣愛好進去,看下打印結果
Person{name=’張三’, age=18, height=178.0, weight=65.0, hobbies=[籃球, 編程, 長跑]}
Person{name=’張三’, age=18, height=178.0, weight=65.0, hobbies=[籃球, 編程, 長跑]}
Person{name=’張三’, age=18, height=178.0, weight=65.0, hobbies=[籃球, 編程, 長跑, 游泳]}
Person{name=’李四’, age=18, height=178.0, weight=65.0, hobbies=[籃球, 編程, 長跑, 游泳]}
你會發現原來的對象的hobby也發生了變換。
其實導致這個問題的本質原因是我們只進行了淺拷貝,也就是只拷貝了引用,最終兩個對象指向的引用是同一個,一個發生變化另一個也會發生變換,顯然解決方法就是使用深拷貝。
 @Override
    public Object clone(){
        Person person=null;
        try {
            person=(Person)super.clone();
            person.name=this.name;
            person.weight=this.weight;
            person.height=this.height;
            person.age=this.age;

            person.hobbies=(ArrayList)this.hobbies.clone();
        } catch (CloneNotSupportedException e) {
            e.printStackTrace();
        }
        return person;
    }
注意person.hobbies=(ArrayList)this.hobbies.clone();,不再是直接引用而是進行了一份拷貝。再運行一下,就會發現原來的對象不會再發生變化了。
Person{name=’張三’, age=18, height=178.0, weight=65.0, hobbies=[籃球, 編程, 長跑]}
Person{name=’張三’, age=18, height=178.0, weight=65.0, hobbies=[籃球, 編程, 長跑]}
Person{name=’張三’, age=18, height=178.0, weight=65.0, hobbies=[籃球, 編程, 長跑]}
Person{name=’李四’, age=18, height=178.0, weight=65.0, hobbies=[籃球, 編程, 長跑, 游泳]}
其實有時候我們會更多的看到原型模式的另一種寫法。
在clone函數裡調用構造函數,構造函數的入參是該類對象。
 @Override
    public Object clone(){
        return new Person(this);
    }
在構造函數中完成拷貝邏輯
   public Person(Person person){
        this.name=person.name;
        this.weight=person.weight;
        this.height=person.height;
        this.age=person.age;
        this.hobbies= new ArrayList(hobbies);
    }
其實都差不多,只是寫法不一樣。
現在來挖挖android中的原型模式。
先看Bundle類,該類實現了Cloneable接口
public Object clone() {
    return new Bundle(this);
}
public Bundle(Bundle b) {
    super(b);

    mHasFds = b.mHasFds;
    mFdsKnown = b.mFdsKnown;
}
然後是Intent類,該類也實現了Cloneable接口
@Override
public Object clone() {
    return new Intent(this);
}
public Intent(Intent o) {
    this.mAction = o.mAction;
    this.mData = o.mData;
    this.mType = o.mType;
    this.mPackage = o.mPackage;
    this.mComponent = o.mComponent;
    this.mFlags = o.mFlags;
    this.mContentUserHint = o.mContentUserHint;
    if (o.mCategories != null) {
        this.mCategories = new ArraySet(o.mCategories);
    }
    if (o.mExtras != null) {
        this.mExtras = new Bundle(o.mExtras);
    }
    if (o.mSourceBounds != null) {
        this.mSourceBounds = new Rect(o.mSourceBounds);
    }
    if (o.mSelector != null) {
        this.mSelector = new Intent(o.mSelector);
    }
    if (o.mClipData != null) {
        this.mClipData = new ClipData(o.mClipData);
    }
}
用法也顯得十分簡單,一旦我們要用的Intent與現有的一個Intent很多東西都是一樣的,那我們就可以直接拷貝現有的Intent,再修改不同的地方,便可以直接使用。
Uri uri = Uri.parse(smsto:10086);
Intent shareIntent = new Intent(Intent.ACTION_SENDTO, uri);
shareIntent.putExtra(sms_body, hello);

Intent intent = (Intent)shareIntent.clone() ;
startActivity(intent);
網絡請求中一個最常見的開源庫OkHttp中,也應用了原型模式。它就在OkHttpClient這個類中,它實現了Cloneable接口
/** Returns a shallow copy of this OkHttpClient. */
@Override
public OkHttpClient clone() {
    return new OkHttpClient(this);
}
private OkHttpClient(OkHttpClient okHttpClient) {
    this.routeDatabase = okHttpClient.routeDatabase;
    this.dispatcher = okHttpClient.dispatcher;
    this.proxy = okHttpClient.proxy;
    this.protocols = okHttpClient.protocols;
    this.connectionSpecs = okHttpClient.connectionSpecs;
    this.interceptors.addAll(okHttpClient.interceptors);
    this.networkInterceptors.addAll(okHttpClient.networkInterceptors);
    this.proxySelector = okHttpClient.proxySelector;
    this.cookieHandler = okHttpClient.cookieHandler;
    this.cache = okHttpClient.cache;
    this.internalCache = cache != null ? cache.internalCache : okHttpClient.internalCache;
    this.socketFactory = okHttpClient.socketFactory;
    this.sslSocketFactory = okHttpClient.sslSocketFactory;
    this.hostnameVerifier = okHttpClient.hostnameVerifier;
    this.certificatePinner = okHttpClient.certificatePinner;
    this.authenticator = okHttpClient.authenticator;
    this.connectionPool = okHttpClient.connectionPool;
    this.network = okHttpClient.network;
    this.followSslRedirects = okHttpClient.followSslRedirects;
    this.followRedirects = okHttpClient.followRedirects;
    this.retryOnConnectionFailure = okHttpClient.retryOnConnectionFailure;
    this.connectTimeout = okHttpClient.connectTimeout;
    this.readTimeout = okHttpClient.readTimeout;
    this.writeTimeout = okHttpClient.writeTimeout;
}
正如開頭的注釋Returns a shallow copy of this OkHttpClient,該clone方法返回了一個當前對象的深拷貝對象。
至於其他框架中的原型模式,請讀者自行發現。
 Android 底部彈出提示框的解決辦法(使用Activity以及PopupWindow)
本片文章主要談探討了如何實現在底部彈出提示框背景為半透明效果的實現。想要實現此種效果一般有兩種方式一個是使用Activity設置Theme另一種方式就是使用PopupWi
 Android studio出現Error:Unable to tunnel through proxy. Proxy returns HTTP/1.1 400 Bad Reques的解決辦法
最近更新了一下Android Studio,在導入新項目之後出現Error:Unable to tunnel through proxy. Proxy returns &
 Android中的腦殘設計總結
Trackball軌跡球 這有點類似於PC上面的鼠標,可以用於導航,為此便有了Focus,但是這實際操作意義並不大,因為整個屏幕都是觸控的,還用導航干什麼,先把Focus
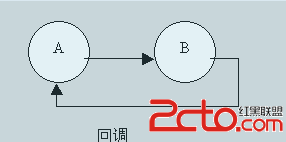 淺析android系統設計中的回調思想
為何寫作本文??在慢慢深入接觸android開發的過程中,我越來越發現android中(至少應用曾的開發)用到了很多回調的思想。比如activity的生命周期,fragm