編輯:關於Android編程
這個系列停更了好久了,差不多可以重新拿起來更一篇了,這篇文章主要介紹策略模式。在這之前,先溫習一下前面介紹的4種模式。
設計模式很重要!
設計模式很重要!
設計模式很重要!
接著看下策略模式的定義
策略模式定義了一些列的算法,並將每一個算法封裝起來,而且使它們還可以相互替換。策略模式讓算法獨立於使用它的客戶而獨立變換。
乍一看,也沒看出個所以然來。舉個栗子吧。
假設我們要出去旅游,而去旅游出行的方式有很多,有步行,有坐火車,有坐飛機等等。而如果不使用任何模式,我們的代碼可能就是這樣子的。
public class TravelStrategy {
    enum Strategy{
        WALK,PLANE,SUBWAY
    }
    private Strategy strategy;
    public TravelStrategy(Strategy strategy){
        this.strategy=strategy;
    }

    public void travel(){
        if(strategy==Strategy.WALK){
            print(walk);
        }else if(strategy==Strategy.PLANE){
            print(plane);
        }else if(strategy==Strategy.SUBWAY){
            print(subway);
        }
    }

    public void print(String str){
        System.out.println(出行旅游的方式為:+str);
    }

    public static void main(String[] args) {
        TravelStrategy walk=new TravelStrategy(Strategy.WALK);
        walk.travel();

        TravelStrategy plane=new TravelStrategy(Strategy.PLANE);
        plane.travel();

        TravelStrategy subway=new TravelStrategy(Strategy.SUBWAY);
        subway.travel();
    }
}
這樣做有一個致命的缺點,一旦出行的方式要增加,我們就不得不增加新的else if語句,而這違反了面向對象的原則之一,對修改封閉。而這時候,策略模式則可以完美的解決這一切。
首先,需要定義一個策略接口。
public interface Strategy {
    void travel();
}
然後根據不同的出行方式實行對應的接口
public class WalkStrategy implements Strategy{

    @Override
    public void travel() {
        System.out.println(walk);
    }

}
public class PlaneStrategy implements Strategy{

    @Override
    public void travel() {
        System.out.println(plane);
    }

}
public class SubwayStrategy implements Strategy{

    @Override
    public void travel() {
        System.out.println(subway);
    }

}
此外還需要一個包裝策略的類,並調用策略接口中的方法
public class TravelContext {
    Strategy strategy;

    public Strategy getStrategy() {
        return strategy;
    }

    public void setStrategy(Strategy strategy) {
        this.strategy = strategy;
    }

    public void travel() {
        if (strategy != null) {
            strategy.travel();
        }
    }
}
測試一下代碼
public class Main {
    public static void main(String[] args) {
        TravelContext travelContext=new TravelContext();
        travelContext.setStrategy(new PlaneStrategy());
        travelContext.travel();
        travelContext.setStrategy(new WalkStrategy());
        travelContext.travel();
        travelContext.setStrategy(new SubwayStrategy());
        travelContext.travel();
    }
}
輸出結果如下
plane
walk
subway
可以看到,應用了策略模式後,如果我們想增加新的出行方式,完全不必要修改現有的類,我們只需要實現策略接口即可,這就是面向對象中的對擴展開放准則。假設現在我們增加了一種自行車出行的方式。只需新增一個類即可。
public class BikeStrategy implements Strategy{

    @Override
    public void travel() {
        System.out.println(bike);
    }

}
之後設置策略即可
public class Main {
    public static void main(String[] args) {
        TravelContext travelContext=new TravelContext();
        travelContext.setStrategy(new BikeStrategy());
        travelContext.travel();
    }
}
而在Android的系統源碼中,策略模式也是應用的相當廣泛的.最典型的就是屬性動畫中的應用.
我們知道,在屬性動畫中,有一個東西叫做插值器,它的作用就是根據時間流逝的百分比來來計算出當前屬性值改變的百分比.
我們使用屬性動畫的時候,可以通過set方法對插值器進行設置.可以看到內部維持了一個時間插值器的引用,並設置了getter和setter方法,默認情況下是先加速後減速的插值器,set方法如果傳入的是null,則是線性插值器。而時間插值器TimeInterpolator是個接口,有一個接口繼承了該接口,就是Interpolator這個接口,其作用是為了保持兼容
private static final TimeInterpolator sDefaultInterpolator =
        new AccelerateDecelerateInterpolator();
private TimeInterpolator mInterpolator = sDefaultInterpolator;
@Override
public void setInterpolator(TimeInterpolator value) {
    if (value != null) {
        mInterpolator = value;
    } else {
        mInterpolator = new LinearInterpolator();
    }
}

@Override
public TimeInterpolator getInterpolator() {
    return mInterpolator;
}
public interface Interpolator extends TimeInterpolator {
    // A new interface, TimeInterpolator, was introduced for the new android.animation
    // package. This older Interpolator interface extends TimeInterpolator so that users of
    // the new Animator-based animations can use either the old Interpolator implementations or
    // new classes that implement TimeInterpolator directly.
}
此外還有一個BaseInterpolator插值器實現了Interpolator接口,並且是一個抽象類
abstract public class BaseInterpolator implements Interpolator {
    private int mChangingConfiguration;
    /**
     * @hide
     */
    public int getChangingConfiguration() {
        return mChangingConfiguration;
    }

    /**
     * @hide
     */
    void setChangingConfiguration(int changingConfiguration) {
        mChangingConfiguration = changingConfiguration;
    }
}
平時我們使用的時候,通過設置不同的插值器,實現不同的動畫速率變換效果,比如線性變換,回彈,自由落體等等。這些都是插值器接口的具體實現,也就是具體的插值器策略。我們略微來看幾個策略。
public class LinearInterpolator extends BaseInterpolator implements NativeInterpolatorFactory {

    public LinearInterpolator() {
    }

    public LinearInterpolator(Context context, AttributeSet attrs) {
    }

    public float getInterpolation(float input) {
        return input;
    }

    /** @hide */
    @Override
    public long createNativeInterpolator() {
        return NativeInterpolatorFactoryHelper.createLinearInterpolator();
    }
}
public class AccelerateDecelerateInterpolator extends BaseInterpolator
        implements NativeInterpolatorFactory {
    public AccelerateDecelerateInterpolator() {
    }

    @SuppressWarnings({UnusedDeclaration})
    public AccelerateDecelerateInterpolator(Context context, AttributeSet attrs) {
    }

    public float getInterpolation(float input) {
        return (float)(Math.cos((input + 1) * Math.PI) / 2.0f) + 0.5f;
    }

    /** @hide */
    @Override
    public long createNativeInterpolator() {
        return NativeInterpolatorFactoryHelper.createAccelerateDecelerateInterpolator();
    }
}
內部使用的時候直接調用getInterpolation方法就可以返回對應的值了,也就是屬性值改變的百分比。
屬性動畫中另外一個應用策略模式的地方就是估值器,它的作用是根據當前屬性改變的百分比來計算改變後的屬性值。該屬性和插值器是類似的,有幾個默認的實現。其中TypeEvaluator是一個接口。
public interface TypeEvaluator {

    public T evaluate(float fraction, T startValue, T endValue);

}
public class IntEvaluator implements TypeEvaluator {

    public Integer evaluate(float fraction, Integer startValue, Integer endValue) {
        int startInt = startValue;
        return (int)(startInt + fraction * (endValue - startInt));
    }
}
public class FloatEvaluator implements TypeEvaluator {

    public Float evaluate(float fraction, Number startValue, Number endValue) {
        float startFloat = startValue.floatValue();
        return startFloat + fraction * (endValue.floatValue() - startFloat);
    }
}
public class PointFEvaluator implements TypeEvaluator {

    private PointF mPoint;


    public PointFEvaluator() {
    }

    public PointFEvaluator(PointF reuse) {
        mPoint = reuse;
    }

    @Override
    public PointF evaluate(float fraction, PointF startValue, PointF endValue) {
        float x = startValue.x + (fraction * (endValue.x - startValue.x));
        float y = startValue.y + (fraction * (endValue.y - startValue.y));

        if (mPoint != null) {
            mPoint.set(x, y);
            return mPoint;
        } else {
            return new PointF(x, y);
        }
    }
}
public class ArgbEvaluator implements TypeEvaluator {
    private static final ArgbEvaluator sInstance = new ArgbEvaluator();

    public static ArgbEvaluator getInstance() {
        return sInstance;
    }

    public Object evaluate(float fraction, Object startValue, Object endValue) {
        int startInt = (Integer) startValue;
        int startA = (startInt >> 24) & 0xff;
        int startR = (startInt >> 16) & 0xff;
        int startG = (startInt >> 8) & 0xff;
        int startB = startInt & 0xff;

        int endInt = (Integer) endValue;
        int endA = (endInt >> 24) & 0xff;
        int endR = (endInt >> 16) & 0xff;
        int endG = (endInt >> 8) & 0xff;
        int endB = endInt & 0xff;

        return (int)((startA + (int)(fraction * (endA - startA))) << 24) |
                (int)((startR + (int)(fraction * (endR - startR))) << 16) |
                (int)((startG + (int)(fraction * (endG - startG))) << 8) |
                (int)((startB + (int)(fraction * (endB - startB))));
    }
}
上面的都是一些系統實現好的估值策略,在內部調用估值器的evaluate方法即可返回改變後的值了。我們也可以自定義估值策略。這裡就不展開了。
當然,在開源框架中,策略模式也是無處不在的。
首先在Volley中,策略模式就能看到。
有一個重試策略接口
public interface RetryPolicy {


    public int getCurrentTimeout();//獲取當前請求用時(用於 Log)


    public int getCurrentRetryCount();//獲取已經重試的次數(用於 Log)


    public void retry(VolleyError error) throws VolleyError;//確定是否重試,參數為這次異常的具體信息。在請求異常時此接口會被調用,可在此函數實現中拋出傳入的異常表示停止重試。
}
在Volley中,該接口有一個默認的實現DefaultRetryPolicy,Volley 默認的重試策略實現類。主要通過在 retry(…) 函數中判斷重試次數是否達到上限確定是否繼續重試。
public class DefaultRetryPolicy implements RetryPolicy {
    ...
}
而策略的設置是在Request類中
public abstract class Request implements Comparable> {
    private RetryPolicy mRetryPolicy;
    public Request setRetryPolicy(RetryPolicy retryPolicy) {
        mRetryPolicy = retryPolicy;
        return this;
    }
    public RetryPolicy getRetryPolicy() {
        return mRetryPolicy;
    }
}
此外,各大網絡請求框架,或多或少都會使用到緩存,緩存一般會定義一個Cache接口,然後實現不同的緩存策略,如內存緩存,磁盤緩存等等,這個緩存的實現,其實也可以使用策略模式。直接看Volley,裡面也有緩存。
定義了一個緩存接口
/**
 * An interface for a cache keyed by a String with a byte array as data.
 */
public interface Cache {
    /**
     * Retrieves an entry from the cache.
     * @param key Cache key
     * @return An {@link Entry} or null in the event of a cache miss
     */
    public Entry get(String key);

    /**
     * Adds or replaces an entry to the cache.
     * @param key Cache key
     * @param entry Data to store and metadata for cache coherency, TTL, etc.
     */
    public void put(String key, Entry entry);

    /**
     * Performs any potentially long-running actions needed to initialize the cache;
     * will be called from a worker thread.
     */
    public void initialize();

    /**
     * Invalidates an entry in the cache.
     * @param key Cache key
     * @param fullExpire True to fully expire the entry, false to soft expire
     */
    public void invalidate(String key, boolean fullExpire);

    /**
     * Removes an entry from the cache.
     * @param key Cache key
     */
    public void remove(String key);

    /**
     * Empties the cache.
     */
    public void clear();

    /**
     * Data and metadata for an entry returned by the cache.
     */
    public static class Entry {
        /** The data returned from cache. */
        public byte[] data;

        /** ETag for cache coherency. */
        public String etag;

        /** Date of this response as reported by the server. */
        public long serverDate;

        /** The last modified date for the requested object. */
        public long lastModified;

        /** TTL for this record. */
        public long ttl;

        /** Soft TTL for this record. */
        public long softTtl;

        /** Immutable response headers as received from server; must be non-null. */
        public Map responseHeaders = Collections.emptyMap();

        /** True if the entry is expired. */
        public boolean isExpired() {
            return this.ttl < System.currentTimeMillis();
        }

        /** True if a refresh is needed from the original data source. */
        public boolean refreshNeeded() {
            return this.softTtl < System.currentTimeMillis();
        }
    }

}
它有兩個實現類NoCache和DiskBasedCache,使用的時候設置對應的緩存策略即可。
在android開發中,ViewPager是一個使用非常常見的控件,它的使用往往需要伴隨一個Indicator指示器。如果讓你重新實現一個ViewPager,並且帶有Indicator,這時候,你會不會想到用策略模式呢?在你自己寫的ViewPager中(不是系統的,當然你也可以繼承系統的)持有一個策略接口Indicator的變量,通過set方法設置策略,然後ViewPager滑動的時候調用策略接口的對應方法改變指示器。默認提供幾個Indicator接口的實現類,比如圓形指示器CircleIndicator、線性指示器LineIndicator、Tab指示器TabIndicator、圖標指示器IconIndicator 等等等等。有興趣的話自己去實現一個吧。
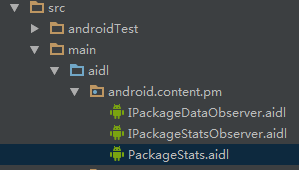 Android獲取app應用程序大小的方法
Android對這種方法進行了封裝,我們沒有權限去調用這個方法,所以我們只能通過AIDL,然後利用Java的反射機制去調用系統級的方法。下面上代碼:(注釋比較詳細)/**
 Android Studio 模板用法與自定義模板
本文gif圖比較多,可能會導致頁面加載緩慢,請大家耐心等待今天我們來學習下Android Studio這款軟件的一些秘密,這些就是Template,就是我們輸出一些特定
 Android的多媒體管理庫Glide的基本使用示例
Glide 是一個android平台上的快速和高效的開源的多媒體資源管理庫, 提供 多媒體文件的壓縮,內存和磁盤緩存, 資源池的接口。Glide 支持獲取,解壓展示視頻,
 Android-PullRefreshLayout
Android-PullRefreshLayout簡介:基於SwipeRefreshLayout,通吃所有的AbsListView、RecyclerViewAndroid