編輯:關於Android編程
This lesson explains how to capture photos using an existing camera application.
Suppose you are implementing a crowd-sourced weather service that makes a global weather map by blending together pictures of the sky taken by devices running your client app. Integrating photos is only a small part of your application. You want to take photos with minimal fuss, not reinvent the camera. Happily, most Android-powered devices already have at least one camera application installed. In this lesson, you learn how to make it take a picture for you.
...
If your application uses, but does not require a camera in order to function, instead set android:required to false. In doing so, Google Play will allow devices without a camera to download your application. It’s then your responsibility to check for the availability of the camera at runtime by calling hasSystemFeature(PackageManager.FEATURE_CAMERA). If a camera is not available, you should then disable your camera features.
The Android way of delegating actions to other applications is to invoke an Intent that describes what you want done. This process involves three pieces: The Intent itself, a call to start the external Activity, and some code to handle the image data when focus returns to your activity.
Here’s a function that invokes an intent to capture a photo.
static final int REQUEST_IMAGE_CAPTURE = 1;

private void dispatchTakePictureIntent() {
    Intent takePictureIntent = new Intent(MediaStore.ACTION_IMAGE_CAPTURE);
    if (takePictureIntent.resolveActivity(getPackageManager()) != null) {
        startActivityForResult(takePictureIntent, REQUEST_IMAGE_CAPTURE);
    }
}
Notice that the startActivityForResult() method is protected by a condition that calls resolveActivity(), which returns the first activity component that can handle the intent. Performing this check is important because if you call startActivityForResult() using an intent that no app can handle, your app will crash. So as long as the result is not null, it’s safe to use the intent.
If the simple feat of taking a photo is not the culmination of your app’s ambition, then you probably want to get the image back from the camera application and do something with it.
The Android Camera application encodes the photo in the return Intent delivered to onActivityResult() as a small Bitmap in the extras, under the key “data”. The following code retrieves this image and displays it in an ImageView.
@Override
protected void onActivityResult(int requestCode, int resultCode, Intent data) {
    if (requestCode == REQUEST_IMAGE_CAPTURE && resultCode == RESULT_OK) {
        Bundle extras = data.getExtras();
        Bitmap imageBitmap = (Bitmap) extras.get("data");
        mImageView.setImageBitmap(imageBitmap);
    }
}
Note: This thumbnail image from “data” might be good for an icon, but not a lot more. Dealing with a full-sized image takes a bit more work.
The Android Camera application saves a full-size photo if you give it a file to save into. You must provide a fully qualified file name where the camera app should save the photo.
Generally, any photos that the user captures with the device camera should be saved on the device in the public external storage so they are accessible by all apps. The proper directory for shared photos is provided bygetExternalStoragePublicDirectory(), with the DIRECTORY_PICTURES argument. Because the directory provided by this method is shared among all apps, reading and writing to it requires the READ_EXTERNAL_STORAGE and WRITE_EXTERNAL_STORAGE permissions, respectively. The write permission implicitly allows reading, so if you need to write to the external storage then you need to request only one permission:
...
Once you decide the directory for the file, you need to create a collision-resistant file name. You may wish also to save the path in a member variable for later use. Here’s an example solution in a method that returns a unique file name for a new photo using a date-time stamp:
String mCurrentPhotoPath;

private File createImageFile() throws IOException {
    // Create an image file name
    String timeStamp = new SimpleDateFormat("yyyyMMdd_HHmmss").format(new Date());
    String imageFileName = "JPEG_" + timeStamp + "_";
    File storageDir = getExternalFilesDir(Environment.DIRECTORY_PICTURES);
    File image = File.createTempFile(
        imageFileName,  /* prefix */
        ".jpg",         /* suffix */
        storageDir      /* directory */
    );

    // Save a file: path for use with ACTION_VIEW intents
    mCurrentPhotoPath = "file:" + image.getAbsolutePath();
    return image;
}
With this method available to create a file for the photo, you can now create and invoke the Intent like this:
static final int REQUEST_TAKE_PHOTO = 1;

private void dispatchTakePictureIntent() {
    Intent takePictureIntent = new Intent(MediaStore.ACTION_IMAGE_CAPTURE);
    // Ensure that there's a camera activity to handle the intent
    if (takePictureIntent.resolveActivity(getPackageManager()) != null) {
        // Create the File where the photo should go
        File photoFile = null;
        try {
            photoFile = createImageFile();
        } catch (IOException ex) {
            // Error occurred while creating the File
            ...
        }
        // Continue only if the File was successfully created
        if (photoFile != null) {
            Uri photoURI = FileProvider.getUriForFile(this,
                                                  "com.example.android.fileprovider",
                                                  photoFile);
            takePictureIntent.putExtra(MediaStore.EXTRA_OUTPUT, photoURI);
            startActivityForResult(takePictureIntent, REQUEST_TAKE_PHOTO);
        }
    }
}
Note: We are using getUriForFile(Context, String, File) which returns a content:// URI. For more recent apps targeting Android N and higher, passing a file:// URI across a package boundary causes a FileUriExposedException. Therefore, we now present a more generic way of storing images using a FileProvider.
Now, you need to configure the FileProvider. In your app’s manifest, add a provider to your application:
......
Make sure that the authorities string matches the second argument to getUriForFile(Context, String, File). In the meta-data section of the provider definition, you can see that the provider expects eligible paths to be configured in a dedicated resource file, res/xml/file_paths.xml. Here is the content required for this particular example:
The path component corresponds to the path that is returned by getExternalFilesDir() when called with Environment.DIRECTORY_PICTURES. Make sure that you replace com.example.package.name with the actual package name of your app. Also, checkout the documentation of FileProvider for an extensive description of path specifiers that you can use besides external-path.
When you create a photo through an intent, you should know where your image is located, because you said where to save it in the first place. For everyone else, perhaps the easiest way to make your photo accessible is to make it accessible from the system’s Media Provider.
Note: If you saved your photo to the directory provided by getExternalFilesDir(), the media scanner cannot access the files because they are private to your app.
The following example method demonstrates how to invoke the system’s media scanner to add your photo to the Media Provider’s database, making it available in the Android Gallery application and to other apps.
private void galleryAddPic() {
    Intent mediaScanIntent = new Intent(Intent.ACTION_MEDIA_SCANNER_SCAN_FILE);
    File f = new File(mCurrentPhotoPath);
    Uri contentUri = Uri.fromFile(f);
    mediaScanIntent.setData(contentUri);
    this.sendBroadcast(mediaScanIntent);
}
Managing multiple full-sized images can be tricky with limited memory. If you find your application running out of memory after displaying just a few images, you can dramatically reduce the amount of dynamic heap used by expanding the JPEG into a memory array that’s already scaled to match the size of the destination view. The following example method demonstrates this technique.
private void setPic() {
    // Get the dimensions of the View
    int targetW = mImageView.getWidth();
    int targetH = mImageView.getHeight();

    // Get the dimensions of the bitmap
    BitmapFactory.Options bmOptions = new BitmapFactory.Options();
    bmOptions.inJustDecodeBounds = true;
    BitmapFactory.decodeFile(mCurrentPhotoPath, bmOptions);
    int photoW = bmOptions.outWidth;
    int photoH = bmOptions.outHeight;

    // Determine how much to scale down the image
    int scaleFactor = Math.min(photoW/targetW, photoH/targetH);

    // Decode the image file into a Bitmap sized to fill the View
    bmOptions.inJustDecodeBounds = false;
    bmOptions.inSampleSize = scaleFactor;
    bmOptions.inPurgeable = true;

    Bitmap bitmap = BitmapFactory.decodeFile(mCurrentPhotoPath, bmOptions);
    mImageView.setImageBitmap(bitmap);
}
This lesson explains how to capture video using existing camera applications.
Your application has a job to do, and integrating videos is only a small part of it. You want to take videos with minimal fuss, and not reinvent the camcorder. Happily, most Android-powered devices already have a camera application that records video. In this lesson, you make it do this for you
The Android way of delegating actions to other applications is to invoke an Intent that describes what you want done. This process involves three pieces: The Intent itself, a call to start the external Activity, and some code to handle the video when focus returns to your activity.
Here’s a function that invokes an intent to capture video.
static final int REQUEST_VIDEO_CAPTURE = 1;

private void dispatchTakeVideoIntent() {
    Intent takeVideoIntent = new Intent(MediaStore.ACTION_VIDEO_CAPTURE);
    if (takeVideoIntent.resolveActivity(getPackageManager()) != null) {
        startActivityForResult(takeVideoIntent, REQUEST_VIDEO_CAPTURE);
    }
}
Notice that the startActivityForResult() method is protected by a condition that calls resolveActivity(), which returns the first activity component that can handle the intent. Performing this check is important because if you call startActivityForResult() using an intent that no app can handle, your app will crash. So as long as the result is not null, it’s safe to use the intent
The Android Camera application returns the video in the Intent delivered to onActivityResult() as a Uri pointing to the video location in storage. The following code retrieves this video and displays it in a VideoView.
@Override
protected void onActivityResult(int requestCode, int resultCode, Intent data) {
    if (requestCode == REQUEST_VIDEO_CAPTURE && resultCode == RESULT_OK) {
        Uri videoUri = intent.getData();
        mVideoView.setVideoURI(videoUri);
    }
}
In this lesson, we discuss how to control the camera hardware directly using the framework APIs.
Directly controlling a device camera requires a lot more code than requesting pictures or videos from existing camera applications. However, if you want to build a specialized camera application or something fully integrated in your app UI, this lesson shows you how.
Getting an instance of the Camera object is the first step in the process of directly controlling the camera. As Android’s own Camera application does, the recommended way to access the camera is to open Camera on a separate thread that’s launched from onCreate(). This approach is a good idea since it can take a while and might bog down the UI thread. In a more basic implementation, opening the camera can be deferred to the onResume() method to facilitate code reuse and keep the flow of control simple.
Calling Camera.open() throws an exception if the camera is already in use by another application, so we wrap it in a try block.
private boolean safeCameraOpen(int id) {
    boolean qOpened = false;

    try {
        releaseCameraAndPreview();
        mCamera = Camera.open(id);
        qOpened = (mCamera != null);
    } catch (Exception e) {
        Log.e(getString(R.string.app_name), "failed to open Camera");
        e.printStackTrace();
    }

    return qOpened;
}

private void releaseCameraAndPreview() {
    mPreview.setCamera(null);
    if (mCamera != null) {
        mCamera.release();
        mCamera = null;
    }
}
Since API level 9, the camera framework supports multiple cameras. If you use the legacy API and call open() without an argument, you get the first rear-facing camera.
Taking a picture usually requires that your users see a preview of their subject before clicking the shutter. To do so, you can use a SurfaceView to draw previews of what the camera sensor is picking up.
To get started with displaying a preview, you need preview class. The preview requires an implementation of the android.view.SurfaceHolder.Callback interface, which is used to pass image data from the camera hardware to the application.
class Preview extends ViewGroup implements SurfaceHolder.Callback {

    SurfaceView mSurfaceView;
    SurfaceHolder mHolder;

    Preview(Context context) {
        super(context);

        mSurfaceView = new SurfaceView(context);
        addView(mSurfaceView);

        // Install a SurfaceHolder.Callback so we get notified when the
        // underlying surface is created and destroyed.
        mHolder = mSurfaceView.getHolder();
        mHolder.addCallback(this);
        mHolder.setType(SurfaceHolder.SURFACE_TYPE_PUSH_BUFFERS);
    }
...
}
The preview class must be passed to the Camera object before the live image preview can be started, as shown in the next section.
A camera instance and its related preview must be created in a specific order, with the camera object being first. In the snippet below, the process of initializing the camera is encapsulated so that Camera.startPreview() is called by the setCamera() method, whenever the user does something to change the camera. The preview must also be restarted in the preview class surfaceChanged() callback method.
public void setCamera(Camera camera) {
    if (mCamera == camera) { return; }

    stopPreviewAndFreeCamera();

    mCamera = camera;

    if (mCamera != null) {
        List localSizes = mCamera.getParameters().getSupportedPreviewSizes();
        mSupportedPreviewSizes = localSizes;
        requestLayout();

        try {
            mCamera.setPreviewDisplay(mHolder);
        } catch (IOException e) {
            e.printStackTrace();
        }

        // Important: Call startPreview() to start updating the preview
        // surface. Preview must be started before you can take a picture.
        mCamera.startPreview();
    }
}
Camera settings change the way that the camera takes pictures, from the zoom level to exposure compensation. This example changes only the preview size; see the source code of the Camera application for many more.
public void surfaceChanged(SurfaceHolder holder, int format, int w, int h) {
    // Now that the size is known, set up the camera parameters and begin
    // the preview.
    Camera.Parameters parameters = mCamera.getParameters();
    parameters.setPreviewSize(mPreviewSize.width, mPreviewSize.height);
    requestLayout();
    mCamera.setParameters(parameters);

    // Important: Call startPreview() to start updating the preview surface.
    // Preview must be started before you can take a picture.
    mCamera.startPreview();
}
Most camera applications lock the display into landscape mode because that is the natural orientation of the camera sensor. This setting does not prevent you from taking portrait-mode photos, because the orientation of the device is recorded in the EXIF header. The setCameraDisplayOrientation() method lets you change how the preview is displayed without affecting how the image is recorded. However, in Android prior to API level 14, you must stop your preview before changing the orientation and then restart it.
Use the Camera.takePicture() method to take a picture once the preview is started. You can create Camera.PictureCallback and Camera.ShutterCallback objects and pass them into Camera.takePicture().
If you want to grab images continously, you can create a Camera.PreviewCallback that implements onPreviewFrame(). For something in between, you can capture only selected preview frames, or set up a delayed action to call takePicture().
After a picture is taken, you must restart the preview before the user can take another picture. In this example, the restart is done by overloading the shutter button.
@Override
public void onClick(View v) {
    switch(mPreviewState) {
    case K_STATE_FROZEN:
        mCamera.startPreview();
        mPreviewState = K_STATE_PREVIEW;
        break;

    default:
        mCamera.takePicture( null, rawCallback, null);
        mPreviewState = K_STATE_BUSY;
    } // switch
    shutterBtnConfig();
}
Once your application is done using the camera, it’s time to clean up. In particular, you must release the Camera object, or you risk crashing other applications, including new instances of your own application.
When should you stop the preview and release the camera? Well, having your preview surface destroyed is a pretty good hint that it’s time to stop the preview and release the camera, as shown in these methods from the Preview class.
public void surfaceDestroyed(SurfaceHolder holder) {
    // Surface will be destroyed when we return, so stop the preview.
    if (mCamera != null) {
        // Call stopPreview() to stop updating the preview surface.
        mCamera.stopPreview();
    }
}

/**
 * When this function returns, mCamera will be null.
 */
private void stopPreviewAndFreeCamera() {

    if (mCamera != null) {
        // Call stopPreview() to stop updating the preview surface.
        mCamera.stopPreview();

        // Important: Call release() to release the camera for use by other
        // applications. Applications should release the camera immediately
        // during onPause() and re-open() it during onResume()).
        mCamera.release();

        mCamera = null;
    }
}
Earlier in the lesson, this procedure was also part of the setCamera() method, so initializing a camera always begins with stopping the preview.
 Android實現的ListView分組布局改進示例
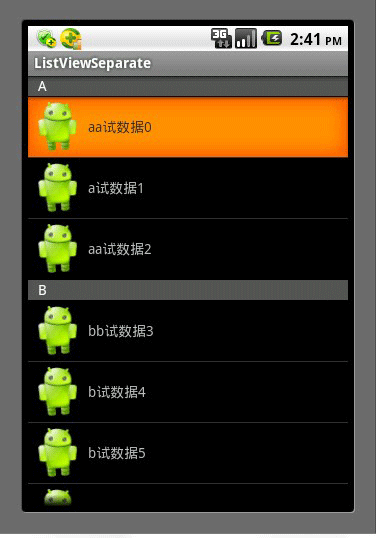
本文實例講述了Android實現的ListView分組布局改進方法。分享給大家供大家參考,具體如下:由於是在網上轉載的一篇文章,在這裡就不多說廢話了,首先看一下最終的效果
 android 添加按(power鍵)電源鍵結束通話(掛斷電話)
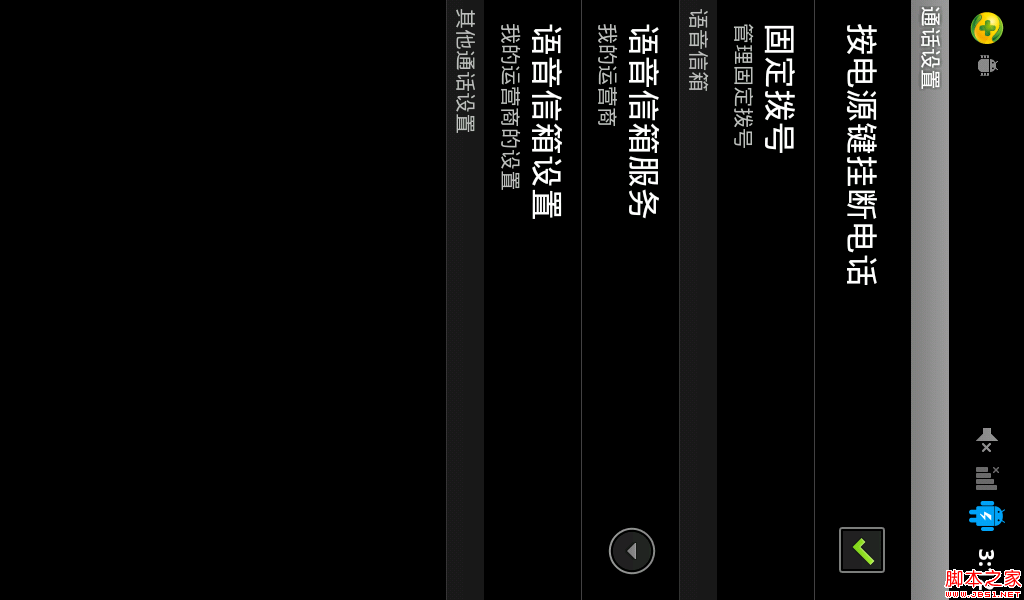
首先我們發現現在我們所用的android智能手機大部分都有當你在打電話時按power鍵來掛斷電話,一般都是在設置中。 我主要是在原生源碼中添加這一功能,主要用於學習。。。
 超實用的Android手勢鎖制作實例教程
今天偶遇以github上gesturelock關於手勢鎖的一個例子(有興趣的去搜索下看看),於是下載下來研究,無奈基本沒有注釋,代碼上存在一些問題(當設置gravity=
 微信公眾號怎麼申請 微信公眾號申請要錢嗎
隨著微信紅包席卷而來,緊接著微信中的公眾號各大服務鋪天蓋地,都是和我們的生活緊密相連的。就比如輕松籌,比如去哪兒旅行等等,都可以在微信在有所關注,了解動態。
 自定義View時,用到Paint Canvas的一些溫故,講講平時一些效果是怎麼畫的(基礎篇 二,圖像遮蓋,Canvas靜態變化)
上一篇把簡單的一些概念理一理,還畫了個圈,那這一篇講一下圖像遮蓋&ldq